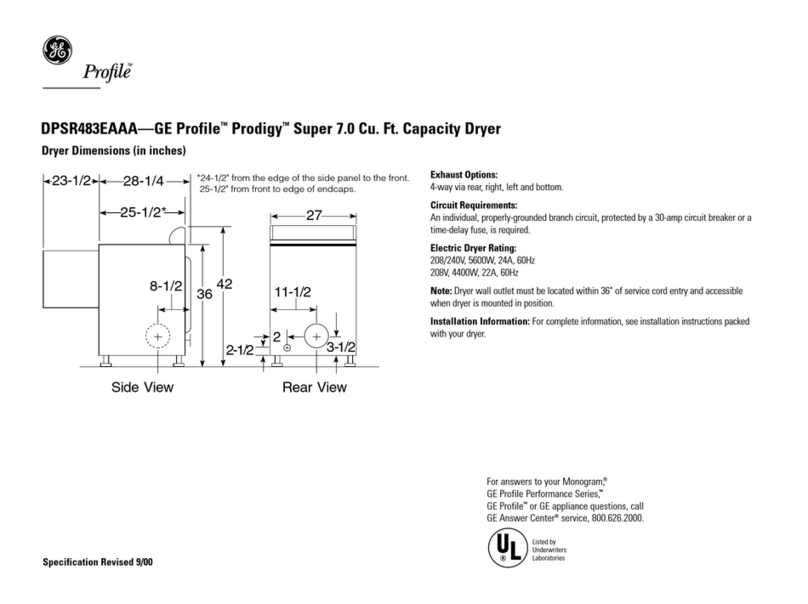
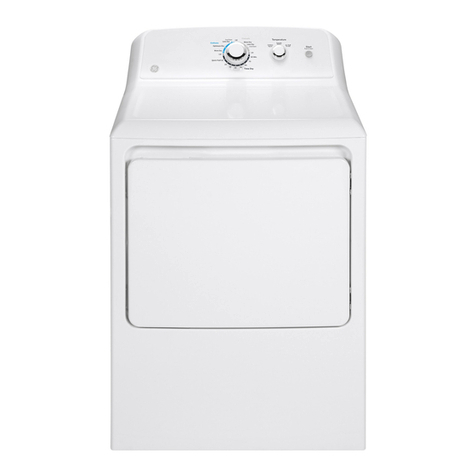
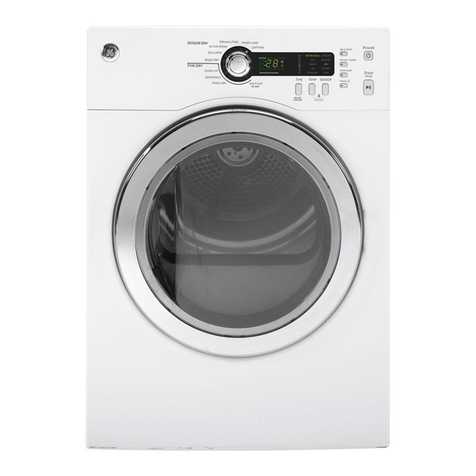
GE DCVH515 User manual

ge.com
Safetg instructions ........ 2-5
Operating Instructions
Control Panels ................ 6-8
Cycle Options ................ 9, !0
Dryer Features ................. !!
Loading and Using
the Dryer .................... 16, 17
Reversing the Door Swing .... 12-15
Venting the Dryer .............. 18
Troubleshooting Tips .... 19-21
Consumer Support
Consumer Support ..... Back Cover
Warranty ..................... 23
DCVH515
DHDVH52
DBVH512
Write the model and serial
numbers here:
Model #
Serial #
They are on the label on
the front of the druer behind
the door.
175D1807P550 49-90282 12@5 JR

IMPORTANTSAFETYINFORMATION.
READALLINSTRUCTIONSBEFOREUSING.
AWARNING!
For yoursafety,the informationin this manualmust be followed tominimize the risk of fire
or explosion,electric shock, or topreventpropertydamage,personalinjury,or death.
•Do notstoreor usegasoline or other
flammable vaporsand liquids in the
vicinityof thisor anyother appliance.
•Installationand service mustbeperformed
bya qualified installer,service agency or
the gas supplier.
WHATTODOIF YOUSMELLGAS:
[] Donottry tolighta match, or cigarette, or
turnon anygas or electrical appliance.
[] Donottouchanyelectrical switch; donot
use anyphone in yourbuilding.
[] Clear the room,buildingor area of all
occupants.
[] Immediately call yourgassupplier
froma neighbor'sphone. Follow the
gassupplier'sinstructionscarefully.
[] If youcannot reach yourgassupplier,
call the fire department.
Caflfomia Safe Drinking Water and ToxicEnforcement Act
This act requires tile goxemor of Califimfia to publish a list of substances kno_n to tile state to catLse cance_,
birth defects or other reproductive ham_ and reqtfires businesses to warn customei_ of potential exl)osure
to Stlch stlbst_lnces.
(;as al)l)liances C_lil C_ltlSe iilinoY exl)OStli'e to J[D/li" of these s/ibst;inces, nai/lelv benzene, C_li'bon illonoxi(le,
fimnaldehyde and soot, caused primarily by the incomplete combustion of natural gas or I,P fllels.
Propedy ac!jusmd (h')/e_s will minimize incomplete COlllbtlstion. EN)osure to these stlbst;Inces can be
minimized fln'ther by propedy venting the dryer to the out(loo_s.

ge.com
%PROPERINSTALLAtiON
This dryer must be properly installed and located in accordance with the Installation Instructions
before it is used. If you did not receive an Installation Instructions sheet, you can receive one by
visiting ge.com, or by calling 8##.GE.CARE$ (800.432.2737).
[] Properl} gromld dr) er to confiwm _itll all
governing codes and ordinances. Fol]o_ details
in Installation Instructions.
[] Instnll or store where it will not be exposed to
temperatures below fl'eezing or exposed to
tile _ eathe_;
[] Connect to a properly rated, protected and sized
power supply circuit to m_)id electdcal ovedoad.
[] Remove tile colored protective film fi'om both
tile control panel and ,lie doo_:
[] Remo\v all shaq) packing items and dispose
ot all shil/ping matedals propedy.
[] DO IIot reIllove tile vent protector ti'oln tile
back of tile chyel:
[] Pull tile pxotector out and down to its lowest
position and connect ,lie exhaust duct to tile
drvel; Tile loweied protector will prevent tile
duct ii'om getting crushed.
Exhaust/Ducting:
[7] Dryers MUSTbe exhausted to tile outside to
prevent l'u'oe,_ _m/ounts of moisture and lint
ti'om being blown into tile room.
[_Lse onl) ngld metal or flexable metal 4
diameter duct_ork inside tile dr\er cabinet or
ior exha usting to tile outside. USE OFPLASTIC
OROTHERCOMBUSTIBLE BUCTWORK CAN
CAUSEAFIRE.PUNCTURED BUCTWORK CAN
CAUSEAFIREIF IT COLLAPSESOR BECOMES
OTHERWISERESTRICTEDIN USE ORDURING
iNSTALLATION.
For complete details, fbllow tile Installation
h_structions.
3

iMPORTANTSAFETYiNFORMATiON.
READALLiNSTRUCTiONSBEFOREUSING.
WARNING!
YOUflIAUNOflYAflEA
• Keep the area underneath and around your
appliances fl'ee of combustible materials
(lint, paper; rags, etc.), gasoline, chemicals
and other flammable wq)o_ and liquids.
• Keep the floor around your appliances clean
and dry to reduce the possibility of slipping.
• Close supervision is necessm T if this appliance
is used bv or near children. Do not allow children
to play on, with or inside this or any other
appliance.
• Keep all lmmchw aids (such as detergents,
bleaches, etc.) out (ff the reach of chikh'en,
prefl_rably in a locked cabinet. Observe all
warnings on container labels to avoid iqjm'y.
• Never climb on or stand on the dryer top.
WHENUSINgYOUflOflYEfl
• Never reach into the dryer while the drum is
moving. Before loading, mfloading or adding
clothes, wait tmtil the drum has completely
stopped.
• Clean the lint filter befin'e each load to prevent
lint accumulation inside the dryer or in the
room. DONOTOPERATETHEDRYERWITHOUT
THELINTFILTERIN PLACE.
• Do not wash or d_y articles that have been
cleaned in, washed in, soaked in or spotted
with combustfl)le or explosive substances (such as
wax, oil, paint, gasoline, degrease_, dry-cleaning
solvents, kerosene, etc.) which may ignite or
explode. Do not add these substances to the
wash water: Do not use or place these substances
aromM veto" washer or dryer dining operation.
• Do not place items exposed to cooking oils in
wmr (hTe_: Items contaminated with cooking oils
may contribute to a chemical reaction that could
cause a clothes load to catch fire.
•Anv article on which wm have used a cleaning
solvent or that contaii_s flammable materials
(such as cleaning cloths, mops, towels used in
beaut)' salons, restaurants or barber shops, etc.)
must not be placed in or near the d_Ter until
solvents or flammable materials have been
removed. There are many highly flammable
items used in homes such as acetone, denatm'ed
alcohol, gasoline, kerosene, some household
deaileiN_ soille spot i'eil/oveiN_ ttli_)entines_
waxes_ wax I'eIllOVeIN and pI'o(hlctS containing
petroleum distillates.
• The laundry process can reduce the flame
retardanc_ of rid)tics. To axoid such a result,
careflflE fi)llow the gmment manufactm'er's
caI'e instYtlctions.
• Do not dry articles containing rubbe_; plastic,
loam or si_nilar materials such as padded bras,
temfis shoes, galoshes, bath mats, rugs, bibs, baby
pants, plastic bags, pillo_vs, etc., that may melt or
burn. Seine rubber materials, when heated, can
trader certain drcumstances produce fire by
spont;i neo/is COil/btlstion.
• Do not store plastic, paper or clothing that may
btm_ or melt on top (ff tile dryer during
opei_ltion.
•Gam/ents labeled OryAway from Heator DoNot
TumbleDry (such aslife jackets containing kapok)
lit liSt not be put in your (h_'et:
• Do not (h T fiberglass articles in veto" dryer:
Skin irritation could result from the remaining
particles that may be picked up by clothing
dulJng subsequent dryer rises.
• To minimize the possibility ot electric shock,
m_plug this appliance fl'om the power supply
or disconnect the dryer at the building's
distribution panel b)' removing the fllse or
switching off the circuit breaker befi)re
attempting any maintenance or cleaning
(except the removal and cleaning of the lint
filter). NOTE: Pressing START,STOP or POWER
does NOTdisconnect the appliance from the
power supply.
4
ge.com
WHENUSINGYOURDRYER(cont.)
• Never attempt to operate this appliance if it is
damaged, nmlflmcdoning, partially disassembled,
or has missing or broken parts, including a
damaged cord or plug.
• The interior of the machine and the exhaust
duct connection inside the (hyer should be
cleaned at least once a year by a qualified
technidan. See the Loadingand Using the Dryer
section.
• If vom_ is a gas (hTe_, it is equipped with an
automatic electric ignition and does not have
apilot light. DONOTATTEMPT TOLIGHT WITHA
MATCH. Burns may result fr(>m having your hand
in the vicinity of the burner when the atltoi/latic
• Ybu may wish to soften your laundered lid)tics
or reduce the static electridtv in them by using
a (hTe_=ai)i)lied thl)_ic softener or an anti-static
condifione_; We recommend you use either a
tid)_ic softener in the wash cycle, according to
the manufi_cturer's instructions for those
products, or t_?' a drye>added product fin.
which the manuemmrer gives written assurance
on the package that their product can be saflqv
used in your (h_'e_: Service or perfimnance
problems caused by use of these products are
the responsibili D' of the manuthcture_ of those
products and are not covered under the warranty
to this appliance.
ignition ttlrnS {)n.
WHENNOTUSINGYOURDRYER
• (;rasp the plug firefly when disconnecting this
appliance to avoid damage to the cord while
pulling. Place the cord away from traffic areas
so it will not be stepped on, tripped over or
subjecmd to damage.
• Do not attempt to repair or replace any part of
this appliance or attempt any se_Mcing unless
specifically recommended in this Owner's Manual
or in published use>repair instructions that you
understand and have the skills to car_ T out.
• Before discarding a (hTe_; or removing it fl'om
se_Mce, remove the (hTer door to prevent
children fl'om hiding inside.
• Do not tamper with controls.
READANDFOLLOWTHISSAFETYINFORMATIONCAREFULLY.
SAVETHESEINSTRUCTIONS

Aboutthe dryercontrolpanel
Youcan locate your model number at the top inside of the door opening.
Model DHDVH52
Model DCVH515
Model DBVH512
SPEEDDRY
SENNORORY DELICMES @ WARMUP TIINE DRY
•Tu_t_@
ACTIVEWE_
E_STC_RE _n_ _LE_
NIXEDLOAD @
COTTONS ®

Oge.com
Power
Press to "wake up" the displa). If the displa) is actixe, press to put the drxer in the standby mode.
/VOTE: Pressing POWER does not disconnect the appliance from the power supply
ODry Cycles
The (h'_ cwle controls the len_th,, and tumble speed of the drvino, ., process. The chart beh)w will
help )ou match the dr) setting with the loads.
Sensor Cycles
co'r]'oNs For cottons and most linens.
MIXED LOAD For loads consisting of cottons and poly-blends.
EASY CARE For wrinkle-free and permanent press items.
ACTIVE WEAR Clothing worn for active sports exercise and some casual wear. Fabrics include new technology finishes
and stretch fibers such as Spandex.
DELICATES For lingerie and special-care fabrics.
DRYELTM Designed for use with the DRYEL_ "dry clean only" fabric care system. See product package for directions.
For questions or issues related to use and performance of DRYEL_, see the Website at: www.dryel.com.
SPEED DRY For small loads that are needed in a hurry, such as sports or school uniforms. Canalso be used if the
previous cycle left some items damp, such as collars or waistbands.
Timed Dry Cycles
DEWRINKLE For removing wrinkles from items that are dry or slightly damp. This cycle is not recommended for
delicate fabrics.
WARM UP Provides 10 minutes of warming time to warm up clothes.
AIR FLUFF Use this feature to tumble items without heat.
My Cycle(on some models)
MY CYCLE Pressto use, create or modify custom dry cycles.
0
0
Timed Dry
Use to set your own dry time. TIMED DRYis also recoininended for small loads.
To use TIMED DRY."
I. Turn dry cycle dial t(> TIMED DRY..
2. Select the drying time by pressing the ÷and -buttons,
3. Select the DRY.TEMP,
4. Close the door,
5. Press START
Sensor Dry Level
The sensor contintu)usl)' monitors the amotmt of moisture in the load, When the moisture in your
clothes reaches your selected dry level, the dryer will stop.
MORE DRY Use for heavy or mixed type of fabrics.
DRY Use for normal dryness level suitable for most loads. This is the preferred cycle
for energy saving.
LESS DRY Use for lighter fabric (ideal for ironing).
DAMP For leaving items partially damp.

Aboutthe dryercontrolpanel
ODry Temp
You can chanoe_ the temperature ot your dry, cycle.,
ANTI-BACTERIAL Thisoptionmayonlybeusedwith COTTONSor MIXED LOADcycles.Thisoptionreducescertain
typesof bacteriaby 99.9%,including:Staph?/ococcusaureus,PseuflomonasaeruginosaandK/ebsie//a
pneumoniae*.Theanti-bacterialprocessoccurswhenhigh heatis usedduringa portionofthis
dryingcycle.
NOTE:Donot usethiscycleondelicatefabrics.
TheAnti-BacterialCycleis CertifiedbyNSFInternational(formerlyNationalSanitationFoundation)
to NSFProtocolP154SanitizationPerformanceofResidentialClothesDryers.
NSF Protocol P 154 ]
S midzation Perfbrmailce of
Residential (_]othes Dryers
HIGH Forregularto heavycottons.
MEDIUM Forsynthetics,blendsanditems labeledpermanentpress.
LOW Fordelicates,syntheticsanditems labeledTumb/eDryLow.
EXTRALOW Forlingerieandspecial-carefabrics.
NO HEAT Canonlybeusedwith TIMED DRY.
OSTART
Press to start a dr) cycle. 1t the dryer is running press it once and it will pause the dr_er.
Press it again to restart the (h'x cxcle,
My Cycle (on some models)
Set up your ta\'orite combination of settings and save them here for one touch recall.
These custoln settings can be set while a cycle is in progress.
Tostore a MY CYCLEcombination of settings:
I. Select your drying cycle.
2. Change DRY TEMP and SENSOR DRYLEVEL settings to fit wmr needs.
3. Select any drying OPTIONS w)u want.
4. Press and hold the _ pad for three seconds to store your selection. A beep will sound
and the pad will light up.
Torecall your stored MY CYCLEcombination:
Press the MYCYCLEbutton befl)re drying a load.
Tochange your stored MY CYCLEcombination:
Follow steps 1-4 in "To store a MY CYCLEcombination of settings'.

Aboutcycle options.
NOTE,"Not all features are available on all dryer models.
Extend Tumble
Minimizes wrinkles by adding
approximately 60 minutes (ff no-heat
tumbling after clothes are dr); The beeper
will sound eveYv 2 minutes to remind w)u
to remove the clothes. The ESTIMATED
TIME REMAINING display will show 00.
ge.com
Damp Alert
This option causes the (hyer to beep when
clothes have dried to a damp level. Remove
items that you wish to hang (hT: The DAMP
ALERTwill only beep when this option
is selected.
Removing clothes and hanging them when
they are damp can reduce the need to iron
soi//e items.
Signal
_derts you that the cycle is complete. The
beeper will continue to sotmd e\'e_' two
minutes fi)r the next 6 minutes, until the
clothes have been removed. The clothes
should be removed when the beeper goes
off so wrinkles don't set in.
Press SIGNALto select low, medimn or high
xolume, or to turn the beeper off.
Delay Start
Use to delay the start ot yore" (h've_;
I. (_hoose vom" (h T cycle and any options.
2. Press DELAYSTART You can change the
delay time in 1 horn" increments using
the +or - arrow pads.
3. Press the STARTpad to start the
COtlntdown.
The cotmtdown time will be shown in the
ESTIMATEDTIMEREMAININGdisplay:
NOTE:If thedooris openedwhile thedryeris
in DELAy thecountdowntimewill notrestart
unlessthedooris dosedandSTARThasbeen
pressedagain.

Aboutcycleoptions.NOTE."Not all features are available on all dryer models.
51
il)i
Lock
You can lock the controls to prevent any
selections fl'onE being made. Or you can
lock the controls after you have started
a cycle,
Children cannot accidentally start the dryer
by touchingpadswith this optionselected.
To lock the chye_; press and hold the lock
icon fiw 3 seconds. To tmlock the (lrye_;
press and hold the lock icon fin" 3 seconds.
The icon of the lock next to the timer will
light up when the controls are locked.
ESTIMATEOTiME REMAiNiNG
Estimated Time Remaining
Displa)s the approximate time remaining
tmti] the end of the cycle.
As the cycle begins, you will see an initial
approximate total cycle time in the display.
Then lights will "race" in the display: This
means the (hyer is continuotlsly monitoring
the amotmt of moistm'e in the load. The
lights will continue tmtil the (h_'er senses
a low level ot moisture in the load. At that
point, the dryer will calctflate and display
the approximate time remaining.
My Cycle (on some models)
To save a fi_\'orite cycle, set the desired
settings and hoM down the MY CYCLE
btEmm for 3 seconds. A beep will sotmd
to indicate the cycle has been saved.
To use }ore" custom cycle press the MY
CYCLEbtltton before drying a load.
To change the saxed cycle set the desired
settings and hold down the MY CYCLE
l)utton for 3 seconds.
See page 8 fi)r more details.
7O

Aboutdryerfeatures, ge.com
Drum Lamp
getore replacing the light bulb, be sure to unplug the dryer power cord or
disconnect the dryer at the household distribution panel by removing the
fllse or switching off the circuit breaker. Reach above drver opening fl'om
inside the drum. Remove the bulb and replace with the same size bulb.
Drying Rack (onsomemodels)
A handy drying rack ma_ be used for drying delicate items such as
washable sweaters. Place items fiat on the dQing rack and block such
items as wool sweaters and delicate tabrics. Drx with low heat.
To install the drying rack, pull up the lint filter slightly.,,Insert the drvim*,
rack into the slots, then push the filter back down.
NOTE:
• The drying rack must be used with the TIMED DRYor RACKDRY
(on some models) cycles.
• Do not use this drvim* rack when there are other clothes in the dryer.
//

REVERSING THE DOOR SWING
IMPORTANT NOTES
"Read the instructions all the way through
before starting.
"Handle parts carefully to avoid scratching
paint.
•Set screws down by their related parts to
avoid using them in the wrong places.
•Provide a non-scratching work surface for
the doors.
•Normal completion time to reverse the door
swing is 30-60 minutes.
iMPORTANT: Once you begin, do not move
the cabinet until door-swing reversal is
completed.
These instructions are for changing the
hinges from the right side to the left side--
if you ever want to switch them back to the
right side, follow these same instructions and
reverse all references to the left and right.
TOOLS YOU WILL NEED
Phillips Head
Screwdriver U
Putty Knife or Thin-
Blade Screwdriver
DOOR PARTS
Cover
Hinge
Assembly
Window
Retainer
Large Tapping Tapping Machine
Screw (#10) - 6 Screw (#8) - 2 Screw (#8) - 6
_-I BEFORE YOU START
Unplug the dryer from its electrical outlet.
_-I REMOVE DOOR ASSEMBLY
Open the door to approximately 90 degrees.
Remove the 4 screws starting from the
bottom to the top. Make sure the door is
supported while removing the screws.
Remove the
four screws.
Loosen the top screw as shown. Unhook the
door by lifting and pulling as shown by the
a rrows.
2

REMOVE DOOR ASSEMBLY
(cont.)
Lay the door down on a soft protected flat
surface so that the inner part faces upward
(door resting on the handle side).
Remove the 6 large tapping screws
(#10) located around the perimeter of the
door outlining the gasket, the 4 machine
screws (#8).
2 #8 Machine
Screws 6 #10 Large
Screws
2 #8 Machine
Screws
With the screws removed, turn the door over
and separate the silver cover part of the door
from the door frame and set aside.
[] REMOVE HINGE
IMPORTANT: Note the location of the hinge
(left or right) before removing.
With the door frame part of the door laid
down on a protected soft surface, remove
the hinge cover by removing the 2 tapping
screws (#8) that fasten it to the frame. The
hinge cover is located at the opposite side
of the hinge assembly.
Remove the window retainer and set it aside.
The window retainer is located on the side
opposite the hinge assembly and underneath
the plastic cover.
0
0
Remove the hinge
assembly by removing
the 2 machine screws
(#8) that fasten it to the
frame. Pull the hinge
assembly out of its
cavity and set it aside,
13

REVERSING THE DOOR SWING ICONT.I
[_ REINSTALL HINGE ASSEMBLY
Insert the hinge assembly in the opposite
side of the door as shown.
Push the hinge assembly into place until the
hinge holes align with the door holes.
Fasten the hinge assembly to the edge using
2 machine screws (#8).
Hold the door on its side with one hand and
fasten the remaining 2 screws as shown.
[_ REINSTALL WINDOW RETAINER
AND HINGE COVER
Insert the window retainer. Align the window
retainer holes with the holes in the door.
O
O
Place the door on its edge and secure
the window retainer using the 2 machine
screws (#8).
/
Insert the hinge cover. Align the hinge cover
holes with the holes in the door.
Secure the hinge cover with the 2 tapping
screws (#8).
14

REASSEMBLE DOOR
ASSEMBLY
IMPORTANT: Make sure there is no dirt or
any other foreign material in between the
window panes.
Place the outer door onto the inner door.
Top of Door
After reversing door, there will be a mismatch
between the outer door and the inner door.
Make sure that the handle part of the outer
door is opposite the hinge as shown.
Turn the door over and fasten the outer door
to the inner door using the 6 large tapping
screws (#10).
[] MOVE STRIKE BRACKET
Using a putty knife or any other flat tool,
remove the 5 plastic screw caps located on
the dryer where the door will be installed and
install them on the opposite side.
Switch the strike bracket and its cover on
the opposite side by removing the screws.
Reinstall both on the opposite side.
[] REINSTALL DOOR ASSEMBLY
The door is now ready to be installed on
the dryer. To ease this step, the hinge has
keyholes that allow a partially fastened screw
to be used as a hook.
Partially fasten a screw to the uppermost
screw hole. Hook the door on the partially
fastened screw.
Fasten the hinge by installing the other
4 screws and tightening the partially fastened
screw above.
Partially
Inserted
Tighten AII_
Screws
®
15

Loadingand usingthedryer.
Always follow the fabric manufacturer's care label when laundering.
FabricCareLabels
Below are fhbric care label "svng)ols" that affect the clothing you will be laundering.
WASH LABELS
wash __ __
cycle Normal p.......... t Press/ Gentle'_/ Do not wastl Do not wring
wrinkle resistant delicate Hand wash
Target Automatic
Front load Category Water Teloperatere TemperatureControl
target water TapCold Inlet Water Temperature Not used
Cold 27°C/80°F Used
temperature Warm 40°C/105°F Used
Hot 50°C/120°F Used
Sanitize 70°C/160°F Used
DRYLABELS
dry Donotdry
Dry Normal Permanent Press/ Gentle/ Do not tumble dry (used with
wrinkle resistam delicate do not wash)
.00, e ® ® •
setting High Medium Low No heat/air
f:::rSo, Pq
Line dry/ Drip dry Dry fiat In the shade
hang to dry
BLEACHLABELS
SylllUOIS Any bleactl Dn]y ....... Norine bleach Do not bleach
(when needed) (when needed)
16
SortingandLoadingHints
As a general rtfle, if' clothes are sorted i)rol)erl)
fin" the washe_; the) are sorted prtrperl) for the
dryer. Try also to sort items according to size.
For example, do not (lr_ a sheet with socks or
other small items.
Do not overload. Thiswastes energyandcauses wrinkling.
Donotdrythefollowingitems:h#erg/assitems,woolens,
rubber-coateditem&plastic&itemswith plastictrimand
foam-rifleditems.
Donotaddfabricsoftenersheetsoncetheloadhas
becomewarm.Theymaycausefabricsoftenerstains.
Bounce_FabricConditionerDryerSheetshavebeen
approvedforusein aftGEDryerswhenusedin accordance
with themanufacturer#instructions.

Always follow the fabric manufacturer's care label when laundering.
ge.com
CareandCleaningof theDryer
The Exterior:X&ipe or dust any, si)ills or washing
comi)ounds with a damp cloth. Drxer control
panel and finishes may be danm(,ed_ by, some
latmdi) i)retreatment soil and stain remoxer
i)roduets. Appl) these i)roducts away froll_ the
dlaer. The ed)ric InaV then be washed and dried
noi_nally. Danlage to }otlr dr_er caused b _,these
i)roduets is not co_ei'ed b)your warrant_.
The Lint Niter: Clean the
lint filter before each use.
Pull ()tit the lint filter,
Moisten your fingeI_ and
renlove the cal)tured lint.
Once clean, slide the filter
back into position. Have
a qualified teclmidan
vactltlill the lint ti'om the dryer once a veal:
The Exhaust Duct:]nspect and clean the exhaust
ducting at least once a year to prevent clogging.
A partially clogged exhaust can lengthen the
drying time.
Follow those steps:
[_] Turn off electrical su ) )1_ by disconnecting
the i)lug fl'om the wall socket.
_ Disconnect the duct fronl the dr_ eI:
_] VaetltlIll the duct with the hose attachn_ent
and recolmect the duct.
The Exhaust Hood: Check with a inirror that
the inside flaps (ff the hood move fl'eely when
opelating. Make sm'e that there is no wildlife
(birds, insects, etc.) nesting inside the duct
or hood.
NEVEROPERATETHEDRYERWITHOUTITSFILTER
IN PLACE.
77

Ventingthedryer.
For the best drying perfl_rnmnce, the dryer needs to be properly vented. The dryer will use
more energy and run longer if it is not vented to the below specifications. Carefully follow the
details on Exhausting in the Installation Instructions.
• Use only rigid metal or flexible metal 4" diameter du('twork inside the dryer cabinet
or for exhausting to the outside.
• Do not use plastic or other combustible ductwork.
• Use the shortest length possible.
• Do not crash, kink or collapse the duct.
• Avoid resting the duct on sharp objects.
•Venting must conform to local building codes.
• Do not remove the vent protector from the back oI the dryer.
• Flip the protector down to its lowest position and connect the exhaust duct
to the dryer. The lowered protector will prevent the duct fl'om getting crushed.
Correct
Venting
m
Vent protector in place
Incorrect
Venting
/8

Beforeyoucall forservice.., gecem
_roubleshooting -tips
Save time and money! Review the charts on the following pages,
or visit ge.eom. Youmay not need to call for service.
OPERATION Possible Causes What To Do
Controlpads not Controls accidentally put in "Press STOP.
responding service mode
Controls accidentally put in *Hold the tOCKbutton fin" 3 seconds to unlock the dryer.
lock mode
Controls performed an • Reset the in-house breaker.
incorrect operation
Dryer doesn'tstatt Control pmml is "asleep" *This is noxmal. Press POWERto acti\ate the control panel.
Dryer is tmplugged • Make sure the dryer l)lug is pushed coml)letely into
the outlet.
Fuse is blown/circuit breaker *Check the building's filse/circuit breaker box and
is tripped replace filse or reset breakei: NOTE:Electnc d_'e_
use two fllses or breakei_.
Dryer was accidentally paused *If the light on the DELAYSTARTpad is flashing, the
when starting Delay Smart (hTer is paused. Press STARTto restmX the countdown.
Dryer doesn't heat Fuse is blown/circuit breaker *Check the building's fllse/drcuit breaker box and
is tripped; the dryer may tumble replace both fl/ses or reset both breakei_. Y)>ur dryer
but not heat inav tuu_ble if only one fllse is blowi_ or one breaker
tlJpped.
Gas service is off *Make sure gas shutoff' at dlTer and main shutoff' are
fiflly open.
LP gas supply taaakis empty * Refill or replace tank. Dryer should heat when utility
or there has been a utility service is restored.
interruption of naturaJ gas
(gas models)
Dryershakesor Some shaking/noise is normal. *Move dryer to an even floor space, or a(!just leveling legs
makes noise Dryer may be sitting unevenly as necessar_ until exen.
Inconsistent dryingtimes Type of heat *O_ying time will xa_3 according to the type of heat used.
If you recently changed fl'om an electric to a gas
(natural or I,P) (lrye_; or vice ve_a, the drying time
could be different.
Type of load mad * The load size, t}pes ot tid)ric, wetness of clothes and the
drying conditions length and condition of the exhaust system will affect
drying times.
No numbers displayed Dryer is continuously • This is nomml. X41_en the dryer senses a low level of
duringcycle, only lights monitoring the mnomzt of moisture in the h)ad the dryer will display the (h'} time
moisture in the clothes remaining.
_me Remaining The estimated time may chm_ge "This is nomml.
jumped to a when asmaller load thmz usuaJ
lower number is daryh_g
Glowat the rear Heaters behind the drum *This is nolmal. Under certain drying conditions and
of the drum room ambient lighting, the glow of the heatei_ ulav be
visible at the rear of the druln.
/9

Beforeyou call forservice...
OPERATION Possible Causes What ToDo
Clothes are still wet The door was opened mid-cycle. * A (h3 ()(le must be reselected each time a ne'_ load
and dryer shut off The load was then removed from is put ill.
after a short time the dryer and a new load put in
without selecting a new cycle
Small load *When drying 3 items or less, choose SPEED DRYer
TIMEDDRK
Load was already dry except * Choose SPEEDDRYor TIMEDDRYto dry damp rollm_
for collars and waistbands and waistbands. Ill the future, when (hying a load with
collm_ and waistbands, choose MORE DRY.
Dryer is not level o Move dryer to all e\vn floor space or at!just leveling legs
aS necessary tlntil even.
The ORYdryness level Load consists of a mixture *When combining hea\ T and light fabrics ill a load,
was chosen hut load is of heavy aaad fight fabrics choose MOREDRK
still damp
Exhaust system is blocked * Inspect and clean exhaust s)_stem.
Cannot make aThe DRYNESS LEVEL, TEMP *This is normal.
selection and the or OPTION that you axe
dryer beeps twice trying to select is incompatible
with the chosen dry cycle
Dryer is runninghut The EXTENDTUMBLE *This is normal. During extended tumbling, tile time
O0 is displayed in option was chosen remaining is not displayed. The extended tumbling
Time Remaining option lasts approximately 20 minutes.
LAUNORY PRACTICES Possible Causes What ToDo
Clothes take too long Improper or obstructed dueling *Check the Installation Insmu Lions to make sm'e the
to dry dryer renting is correct.
•Make sure ducting is clean, t_'ee of ldnks and
unobstructed.
®Check to see if outside wall damper operates easily.
Improper sorting o Separate heavy items Kern lightweight items (generally,
a well-so_ted washer load is a well-sorted dryer load).
Large loads of heavy fabrics ®I_arge, hea Wfiibfics contain more moisture and take
(Nm beach towels) hmger to dry. Separate laige, hea\ T thbrics into smaller
loads to speed &ying time.
Controls improperly set *Match control settings to tile load )ou are ch)ing.
Lint filter is full *Clean lint filter betbre e\ ery load.
Blown fuses or tripped circuit * Replace fuses or reset dreuit breake_. Since most
breaker dx)'el_ use 2 fllses/breake_, make sm'e both are
operating.
Overloading/combining loads *Do not put more than one washer load in tile dr}er at
a time.
Underloading ®lf)ou are d_Ting onl)one or two items, add a few items
to ensure proper tumbling.
2O
This manual suits for next models
2
Table of contents
Other GE Dryer manuals

GE
GE GTDS560GF User manual

GE
GE VTD52 User manual

GE
GE Profile Dryers Installation instructions

GE
GE Spacemaker DDP1270G Installation instructions

GE
GE DRSR483EGWW User manual

GE
GE HTDP120ED0WW User manual

GE
GE Gas Dryer User manual

GE
GE GTD18GSSJWW User manual

GE
GE GFD55 Original instructions

GE
GE HTDP200GMWW User manual