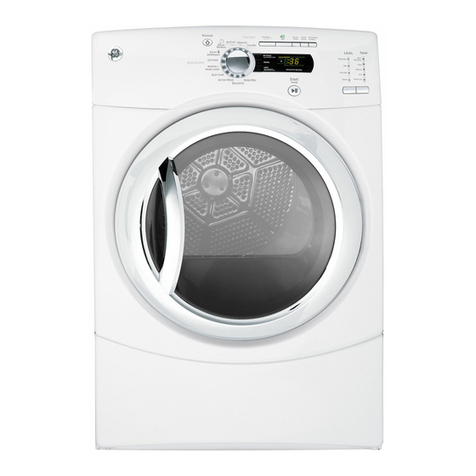
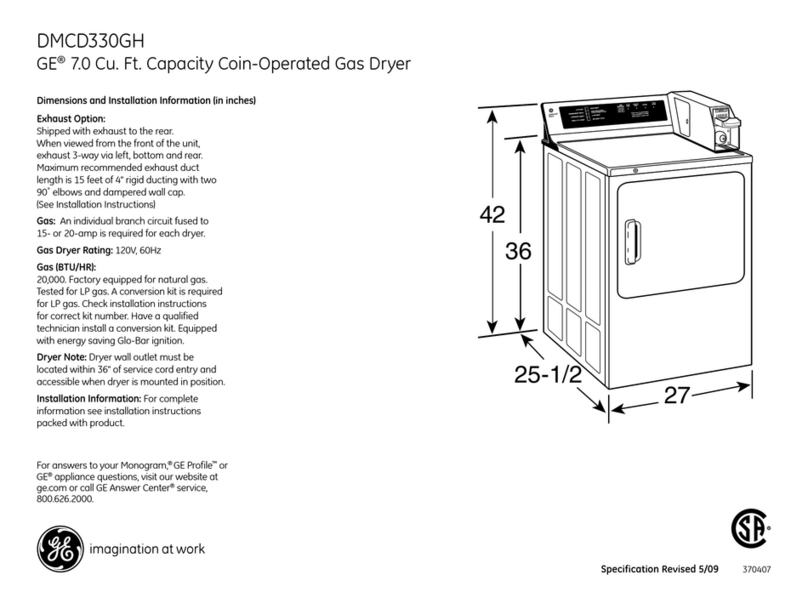
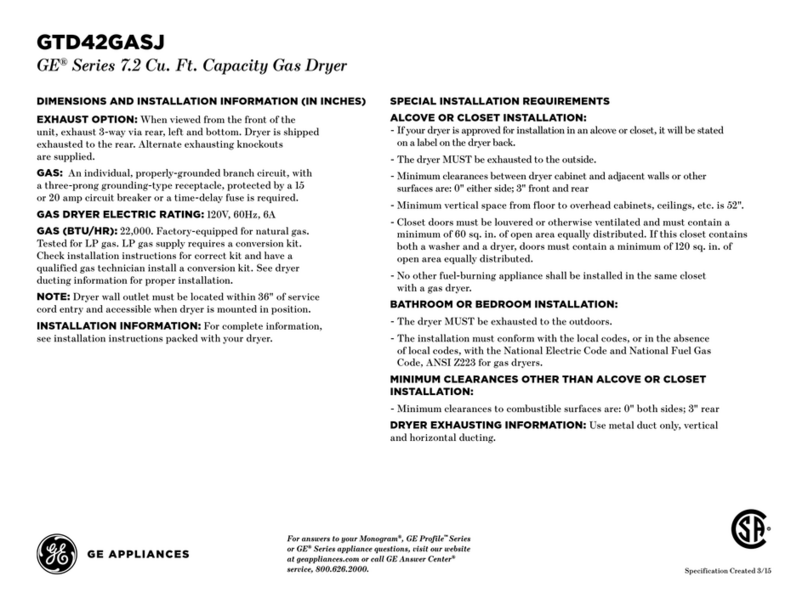
GE Profile 405 User manual

GEApp/iances
Profile
Dryers
Profile
S&cheuses
Profile
Secadoras
Modds Type:
7);0esde rood&'.:
Moddo @o:
4O5
483
513
Safety hlforrnation ........ 3-!5
Operating Instructions
Controls .................. 6-7
Features ..................... 8
Reversing The Door .......... 9
Loading and Using
the D,yer ................... 10
Venting The Duet .......... 11
Troubleshooting Tips
Before You (]all
For Smsqce .............. 12, 13
Customer Selwice
Product Registration ..... 15, 16
Warranty .................. 17
Sets'ice Telephone
Numbers ........... Back (;over
English section begins on page 2
La section franqaise commence fi la page 18
La secci6n en espafiol empieza en la pfigina 32
ww_zgeappliances, com I75DISOlP308 49-90042 2-OOJR
500A277P028

B_
m
GE& You,A ServicePartnership.
IMPORTANT!
Fill out the Consumer Product Registration (ard.
Two easy ways to register your appliance!
• Through the internet at _w.geappliames.com
• Complete and mail the enclosed Product Registration Card
FORYOURRECORDS
Write the model and serial numbers here:
#
#
They are on the label on the tiont of the (hTer behind the door.
READTHISMANUAL
Inside you will find many helpfifl hints on how to use and maintain your (hyer properly.Just a little
preventive (are on your part (an save you a great deal of time and money over the life of your duet.
PROPERVENTING
For the best duing performance the duet needs to be properly vented. The duet xdll use more energy
and nm longer ifit is not vented to the specifications outlined in the Venting the Dryer section in this
manual and the Exhausting section in the Installation Instructions.
IFYOUNEEDSERVICE
You'll find many answers to common problems in the Before YouCall For Service section. If you review
our chart of Troubleshooting 77psfirst, you may not need to call for se_x'ice at all.
If you do need service, you can relax knowing help is only a phone call away, A list of toll4iee customer
service numbers is included in the back se(tion. Or, intheU.S.,you can ahvays (all the (;E Answer
(enter <"at 800.626.2000, 24 hours a day, 7 days a week. In Canada, call 1-800-361-3400.
2

iMPORTANTSAFETYiNFORMAtiON.
READALLiNSTRUCtiONSBEFOREUSING
.4,WARNING!
For your safety, the information in this manual must be followed to minimize the risk of fire
or explosion, electric shock, or to prevent property damage, personal injury, or death.
[] Do notstoreor use gasoline or other
flammable vaporsandliquids in the
vicinityofthis or any other appliance.
[] Installation and servicemust beperformed
by a qualified installer,service agencyor
the gas supplier.
WHATTODOIF YOUSMELLGAS:
]Do nottryto light a match, or cigarette, or
turnon anygas or electrical appliance.
]Do nottouchany electrical switch; donot
use anyphone in yourbuilding.
[] Clear the room,building or area ofall
occupants.
[]Immediately call your gas supplier from a
neighbors phone. Follow the gas
supplier's instructions carefully.
[] ff youcannot reach yourgassupplier,call
the fire department.
California Safe Drinking Water and ToxicEnforcement Act
This act requires tile governor of California to publish a list of substances ka_o;_aato the state to cause cancer,
birth deie( ts or other reprodu(five harm nnd requires businesses u) warn (us( omers of poteminl exposure
11) Stlth subslall(es.
(;as applian(es (an (a!lse minor exposure 1oi()'tn of these subs(ant es, namely benzene, (aabon monoxide,
formaldehyde and soot (aused primarily by the in( omplete (ombustion of natural gas or IJ_ fimls.
Properly adjusted (hyers will minimize incomplete combustion. Exposure U)dlese substances can be
minimized fllrdler by properly vetoing tile (hyer I11llle outdoors.
PROPERINSTALLAtiON
This dryer must be properly installed and located in accordance with the Installation Instructions
before it is used. If you did not receive an Installation Instructions sheet, you can receive one by
calling us toll-free at the GEAnswer CenteF _,800.626.2000.
[] Properly ground ohyet to coniorm with all
gox erning (odes and ordinan(es. Follow derails in
Ins(alia(Jim InstI_.lctJt)ns.
[] Install or store _dlere it will not be exposed to
temperatures below freezing 1)1exposed u/die
we_l[hel.
[] Connect to a properly rated, pro(e( ted and sized
power supply (it( uit u/a_oid ele( t1i(al overload
[] Remox e all shmp packing items and (fispose ()fall
shipping materials properly.
Exhaust/Ducting:
[_ (;as (hTers MUSTbe exhausted to tile outside.
[_ Exhmlsting electric (hyers to tile outside is
strongly recommended I(i prex em large amounts
of m//istme and lin[ from being bl//wn in[11 [lie
I'()()lll.
_]Use only rigid metal or flexible metal 4"
diameter duct_vork inside [lie d_yer cabinet or
for exhausting u/tile outside. USEOFPLASTIC
OROTHERCOMBUSTIBLE DUCTWORK CAN
CAUSEAFIRE.PUNCTURED BUCTWORK CAN
CAUSEAFIREIF IT COLLAPSESOR BECOMES
OTHERWISERESTRICTEDIN USE ORDURING
iNSTALLATiON.
For (omplete details, follow the Installalion
Inst,u( titms.

iMPORTANTSAFETYiNFORMATiON.
READALLiNSTRUCTiONSBEFOREUSING.
WARNING!
YOURLAUNDRYAREA
• Keep the area underneath and m()und your
appliances fiee of combustible materials (lint,
paper, rags, etc.), gasoline, chemicals, and other
flmnmable vapors and liquids.
• Keep the floor ar()und your appliances clean and
dUto reduce the possibilib_ of slipping.
• (lose supecvision is necess_ny if this appliance is
used by or nero chiMren. Do not allow chiMren to
play on, with, or inskle this or any other appliance.
• Keep all lmm&y aids (such as detergents,
bleaches, etc.) out of the reach ofchiMren,
preterably in a locked cabinet. Obsevve all
wanfings on container labels to avoid in juU.
• Never climb on or stand on the &yet top.
WHENUSINGYOURDRYER
• Never reach in/o the &yet while the dram is
m(Mng. Beii)re loading, unloading or ad(fing
clothes, w:tit until the dram has completely
stopped.
• Clean the lint fiher befine each load to prevent
lint acommlation inside the &yet or in the room.
DONOTOPERATETHEDRYERWITHOUTTHELINT
FILTERIN PLACE.
• Do not wash or &y articles that have been
cleaned in, washed in, soaked in, or spotted
with combustible or explosive substances (such as
w_Lx,oil, paint, gasoline, deg_easers, &)_cleaning
solven/s, kerosene, etc.) which mW ignite or
explode. Do not add these subslances u) the
wash water. Do not use or place these substances
mound your washer or duet during operation.
• Do not place items exposed to cooking oils in
y{nn"(h)'er. Items contaminated with cooking oils
may contribute to a chemical reaction that could
cm_se a clothes load to catch fire.
•Any mticle on which you have used a cleaning
solvent or that contains flammable materials
(such as cleaning cloths, mops, towels used in
bemny salons, restmmm/s, or bmber shops, etc.)
nmst not be placed in or nero the duet until
solvents or flammable mamfials have been
rem()ved. There me many highly flmnmable
items used in homes such as acetone, denatured
alcohol, gasoline, kerosene, some household
cleaners, some spot removers, turpentines,
waxes, wax rem()vers and products containing
petroleum distillates.
•The lmmd Uprocess can reduce the flmne
tetradam T offitbfics. To avoid such a result,
cmefiflly fi)llow the gmment manufimmrer's
cme instructions.
•Do not dUmficles containing robber, plastic,
ti_nn, or similm materials such as padded bras,
tennis shoes, galoshes, bath mats, nags, bibs, baby
pants, plastic bags, pillows, etc., that m W meh or
burn. Some robber materials, when heated, can
under certain dr(umstances produce fire by
spontane_)us combustion.
•Do not store plastic, paper or clothing that may
bum or melt on top of the duet &ning operation.
•Gmments labeled DryAway from Heator Do
Not Tumble Dry (sm h as life jackets containing
Kapok) must not be put in your &yet.
•Do not &7 fiberglass articles in your &yet.
Skin initadon couM resuh fiom the remaining
particles that may be picked up by clothing
(hn'ing subsequent (hyer uses.
•To minimize the possibility of electric shock,
unplug this appliance tiom the power supply
or disconnect the (hyer at the househoM
(fistfibufion panel by rem(Mng the tuse or
switching offthe circuit breaker before
attempting aW maintenance or cleaning
(except the removal and cleaning of the lint
fiher). NOTE."Turning the (ycle Selector knob
to an OFFposifion does NOT(fisconnect the
appliance flom the p()wer supply.
4

• Never attempt to operate this appliance if
it is dmnaged, maltm_ctioning, partially
disassembled, or has missing or broken pmls,
including a damaged cord or plug.
• The interior of the machine and the exhm_st duct
connection inside the dryer sh{)uM be cleaned at
least once a yem by a qualified technician. See the
Loadingand Usingthe Dryersection.
• Ifyoms is a gas (hTer, it is equipped with an
automatic electric ignition and does not have a
pilot light. DONOTATTEMPTTOLIGHTWITHA
MATCH.Burns may resuh flom having y(nn hand
in the xidnib_ of the burner when the mnomafic
ignition turns on.
• You may wish to soften your laundered fitbfics
or reduce the s/adc electricity in them by using
a due>applied titbfic softener or an anfi-slafic
conditioner. We recommend you use either a
fabric softener in the wash _Tcle,according to
the mamdhcturer's instructions fin those
producls, or uTa due>added product ti)r
which the mantflhclurer ,givesx_Tittenassurance
on the package that their pro(h_ct can be safidy
used in y{nn &yet. Service or pedbmlance
problems cm_sed by use of these pro&_cts are
the responsibili Uof the manufitcmrers of those
producls and are not c()vered under the wanan b
to this appliance.
WHENNOTUSINGYOURDRYER
• Grasp the plug firefly when disconnecting this
appliance to avoid (hmage/o the cord while
pulling, Place the cord away fiom traffic areas so
it will not be stepped on, uipped {)vet or
subjected to ¢hmage,
• Do not attempt to repair or replace any part of
this appliance or attempt any servicing unless
specifically recommended in this ()_mer's Manual
or in published user-repair insuucdons that you
understand and have the skills to canTout.
• Befi)re discmding a duet, or feraL)x-ingit fiom
service, rem_)ve the (hTer door to prevent
chil&en flom hiding inside.
• Do not/amper with controls.
ReadandfollowthisSafetyInformationcarefully.
SAVETHESEINSTRUCTIONS

About the dryercontrolpanel.
Youcan locate your model number on the label on the front of the dryer behind the door.
Throughout this manual, features and appearance may vary from your model
Model Type405
START FABRIC CARE WRINKLE CARE SIGNAL
4 HEAlSEf TINGS EXTENDEDCOOLAIRTUMBLE ELECTRONICTONE
START
DryneSs _sor Cycle
WRINKLECARE MORE[}RY
LESSDRY
EASY CARE
PERM PRLSS
TIMED DRY
DAMPDRY30
1
!
!
!
DIDI " El
Optional Feature,
on some models
Model Type483
LESSDRY
DEUCATES
START FABRIC CARE WRINKLE CARE SIGNAL
4 HEAT SE_INGS EXTENDED COOL NR TUMBLE
MI DIUM
COTTONS + EASY CARE ........
REG HEAT MED H£AT OFF_%_ iSf:i__ ON
_CATES
NOHEAr LOW HEAT
COTTONS
AUTOMATIC
I
I
I
I
O n o,,o.'.,,o.,..o. D
on some models
Model Type513
EASY CARE
AUTOMATIC
PERMP_bSS
DFIICATFS
TIMED DRY
START FABRIC CARE WRINKLE CARE
5 HEAT SE_NGS EXTENDED COOL NR TUMBLE
START C0_0NS EASY CARE ........
#_" ..... _EUCATES
LOW IEAT
......... i }
ULTRACARE
G_NTIE H_AT
SIGNAL
ELECTRONIC TONE
TIMED DRY
WRINKLE
ULTRACARE
OEl

Control Settings
IMPORTANT'.Clean the lint filter each time you use the dryer.
Fabric Care
Co'IrONS Forregularto heavycottons.
REG.HEAT
EASYCARE Forsynthetics,blends,delicatesanditemslabeledpermanentpress.
MED.HEAT
FLUFFForfluffingitemswithoutheat.UsetheTIMEDDRYcycle.
NOHEAT
DELICATESFordelicates,syntheticsanditemslabeledtumbledrylow
LOWHEAT
ULTRACAREForlingerieandspecial-carefabrics.
GENTLEHEAT
D
le
Drying Cycles-Automati( Q_clesautomatically determine fabric (hTness. Select MOREDRYforhemder
fabrics, LESSDRYfor lighter fabrics. Timed o_cles run for the selected time.
AUTOMATICForcottonsandmostlinens.FormostloadsselectOPTIMUMDRY
co'n'ONS
EASYCARE Forwrinkle-free,permanentpressanddelicateitems,andknits.
AUTOMATIC
ULTRACARE
TIMEDDRY
DAMPDRY
QUICKDRY
DRYEL®
Forspecial-carefabricssuchasrayons,woolens,andsilks.
SettheCycleSelectoratthedesireddryingtime.
Forleavingitemspartiallydry.
Foroneortwo items.
Forusewith DRYEL"drycleanonly"fabriccaresystem.UsetheMED-H_Tfabric caresetting.
Seeproductpackageforinstructions.
DEWRINKLEForremovingwrinklesfromitemsthatarecleananddryorthatareverylightlydamp.
QUICKFLUFFForfresheningorfluffingupalreadydryclothing,fabric,linens,andpillows.Usewith FLUFFNOHEAT
Provides10minutesofno-heattumbling.
Start Close the duet door. Select STARTOpening the door during operation will stop the &Ter.
To restart the duet, close the door and select STARTto complete the _Tcle.
NOTE:
Drying times will vary according to the type of heat used (Electric, Natural or LP gas), size of
load, types of fabrics, wetness of clothes, and condition of exhaust ducts.
7

Aboutyourdryerfeatures.
Color Logic
Selecl tile (onect FABRICCAREseuing. Mat(h
the particular color below tile words _fith tile
same color on the Cyde Dial.
Example:Dryinga loadof clothinglabeled
permanentpress.
El ( hoose tile FABRICCAREseuing--for tllis
load it wouM be the EASYCAREMED.
HEAT(whi(h is a particular (olor).
['_ Tmn tile (ycle Dial to tile _uea that has
the same (olor as the FABRICCAREsetting
you have _hosen-fi)r this load it wouM be
tile EASYCAREAUTOMATIC.
WRINKLE CARE
EXTENDED COOL AIR TUMBLE
Wrinkle Care
Use this option to minimize tile wrinkles
in clothes. It provides approximately 15
minutes of no-heat rambling after the
clothes are (hy.
This option can only be used with tile
COTTONS,EASYCARE,DELICATES,and
ULTRACAREcycles.If you _ue using the CYCLE
SIGNALand y{)uselect the WRINKLECARE
option, a signal will sound at tile end of tile
(hTing time and sevetM times during tile
WRINKLE CARE_ycle. This will remind you
that it is time to remove the (lothes.
If WRINKLECAREisnot ON,the (hyer will stop
on(e tile timer rea(hes tile WRINKLECARE
mark on tile o_(le dial.
SIGNAL
ELECTRONICTONE
(appearance may vary)
End of Cycle Signal
This signal _dll sound just beli)re tile end
of tile _):_leto remind you to rem_)ve tile
clothes. On some models, tile signal sound
level can be adjusted.
If you selected tile WRINKLECAREoption
tile signal will sound at tile end of tile
duing time and will sound several times
during the WRINKLE CAREcycle. This will
remind you that it is time to remove tile
clothes.
NOTE:
•Remove garments promptly at the sound
of the signal. Place clothes on hangers
so wrinkles won't set in.
•Use the END OF CYCLESIGNAL especially
when drying fabrics like polyester knits
and permanent press. These fabrics should
be removed so wrinkles won't set in.
Dryness
Sensor Cycle
Dryness Sensor Cycle-on some models
This teatme is only activated in tile
COTTONS,EASYCARE,DELICATE&and
ULTRACAREcycles.
Tile DrynessSensorprovides greater
&wing accuracy than standard machines,
resuhing in shorter dUtimes and better
clothes care. As the clothes tumble, they
touch a moisture sensor. The sensor will
stop the heating qcle its soon as the clothes
have reached the selected duness.
On some models, there is a Dryness
SensorCycleindicator light. This light is
illuminated during automatic cycles.
When tile DrynessSensorleatme stops tile
heating cycle, the light will go out and the
cool down period will begin.
Note: Tile clothes xdll be hot if they are
removed immediately after tile indicator
light goes out.
Drum Lamp
Before repladng tile light bulb, be sure to
unplug tile (hyer power cord or (fis(onnect
tile (hyer at tile household disuibution panel
by remox4ng tile fhse or switching off tile
drcuit breaker. Reach above duet opening
fiom inside tile dram. Remove tile bulb and
replace with the salne size bulb.
Automatic Cycle
Signal
Automatic Cycle Signal-on some models
At tile end of each {ycle there is
approximately 15 minutes of no-heat
rambling after tile laun(hy is (hy.
A reminder signal will sound periodically
during this time to remind you to remove tile
laund U.
8

Drying Rack-on some models
A handy (hying ra(k rnay be used for (h)4ng
mticles suda as stuffed toys, pillows or
washable sweaters.
Hook the rack over the lint tiher so tlle rack
extends into the duer dram.
NOTE:
• The duing rack nmst be used _dth the
TIMEDCYCLE.
• Do not use this duing rack when there are
other clothes in the (hyer.
About reversing the door.
Reversing the Door
Toolsneeded:
[] Standard//2 [] Tape-tipped [] Needle-nosed
Phflhpsscrewdriver putty knife pliers
[_] Open tl,e door and remove dm fillet plugs opposite tl_e hinges. Wid_ fl_e door
Ompletelv open remoxe dm bot[om strew fii)m eat h hinge on the dtver _:,_(e Insert
tl,ese screws about halfway into tile TOPholes, fi)reach hinge, on dm opposite side
(where you removed die filler plugs). Apply firm pressure m gel die strew stoned in
untapped holes.
[_I_oosen u)p screw fiom each hinge on dm dryer fi_(:ehaffway. Wifl_ one hand hokfing
d_e u)p of die door and the odler hand holding d_e bouom, remoxe d_e door fiom tlle
duer by lifting it UPand OUT
[_ Rolate dm door 180 °.Insert it on the opposite side of din opening by moving the door
IN and OOWNundl tlle u)p hinge and dm bom)m hinge are resting on dm uip screws
inserted in step I.
[E Remox e tile remaining screws from the side of tl_e opening fi'om which tlle door was
remox ed. With dmse screx_ssecure each hinge at the bottom. Tighten the two top
screws of each hinge. Reinsen d_e plastic plugs on tile side fiom which tile door was
I'ellloved,

Loadingand usingthedryer.
Always foflow the fabric manufacturer's care label when laundering.
SortingandLoadingHints
As a general rule, ifclothes are sorted properly tor tile washer, they are sorted properly tor tile (hyer.
Donotaddfabncsoftenersheetsoncetheloadhasbecomewarm.Theymaycausefabricsoftenerstains.
Bounce@FabricConditionerDryerSheetshavebeenapprovedforuselbaftGEDryerswhenusedinaccordancewiththe
manufacturer#instructions.
Donotoverload.Thiswastesenergyandcauseswnhkl/bg.
Donotdrythefollowingitems:fl#erg/assitems,woolens,rubber-coateditems,plastics,itemswithplastictrimand
foam-tiffeditems.
CareandCleaningof theDryer
TheExterior:Wipe or (hlst any spills or washing
compounds with a damp cloth. Duer control
panel and finishes tllay be dmnaged by some
laund Upretreatment soil and stain rem{_ver
products. Apply these prochlcts away flom the
duer. The titbric may then be washed and dried
normally. Damage to your duer cruised by these
pro&lcts is not c()vered by y()ur wananb.
TheLintFilter:Clean tile lint fiher befi)re ea(h
use. Moisten your fingers and rea(h into tile fiher
opening. Run your fingers a(ross the fiher. Haxe a
qualified technician vacuum tile lint flom tile (hyer
on(Te a year,
TheExhaustDuct:lnspe(t and clean tile exhaust
dulling at least (m(e a ),eat to prevent (logging. A
partially ch)gged exhaust can lengthen the (hying
time.
Follow these steps:
[2] Turn off electrical supply by disconnecting tile
plug tiom tile wall so( ket.
[_ Disconnect tile duct flom tile (hyer.
_] VactlllItl tile du(T[ _dth tile hose atta(Thitlen[ and
reconnect tile duct.
TheExhaustHoo&Check xdth a mirror that tile inside
flaps of tile hood move fieely when ot)erating. Make
sure that there is not xdldlite (birds, insects, etc.)
nesting inside tile duct or hood.
10
FabricCareLabels
Beh)w are fabric care label "s}anbols" that afle(:t tile clothing you xdll be laundering.
WASH LABELS DRYLABELS
wash i i
cycle Nomlal Permanent Press/ Gentle"_/ an was D° n°t wash Do iiot wring
wrinkle resistant delicate h
Water • • • • • •
temperature Ho_ wo._ co_/ooo,
(50'C/120 F) (40 C/105"F) (30 C/85 F)
BLEACHLABELS
BIo_oh A/'iX
symbols An,L,,eoo_,0,flynonchlorinebleach DonotNeaeh
[when needed) {when needed}
I--q
dry DonOdw
[usedwith
Dry Normal Perma_lentPreSS/wriliMeresistallt de{icateGentle/ Bonottumbiedry donotwashJ
setting H_gh Medium L_w Nohea/a_r
Line dry/ Bfip dw BH flat In the shade
hangto dry

Ventingthedryer.
For d_e best drying perfi)rman(e the (hTer needs to be properly vented. Thedryerwill use mereenergy
andrun longerif it isnot vented tothebelow specifications. Carefullyfollow thedetails onExhaustingin the
InstallationInstructions.
[] Use only rigid metal o1 flexible metal 4" diameter
ductwork inside tlle dryer ( abinet o1:fin: exhausting
to tlle outside.
[] Do not use plasti( or other (ombusfible duttwork.
[] Use tlle shortest length possible.
[] Do not crush or collapse.
[] Avoid resting the &lct on sharp objects.
[] Ventingmustconformtolocalbuildingcodes.
Correct
Venting
Incorrect
Venting
//

Beforeyoucall forservice...
Troubleshooting tips
Save time and money] Review the charts on the following
pages first and you may not need to call for service.
Possible Causes What ToDo
Dryer is unplugged • Make sure tile duet plug is pushed completely into
tile outlet.
Fuse is blown/circuit breaker is • Check tile house tnse/circuit breaker box and
tripped replace fllse or reset breaker. NOTE:Most electric
(hyers use two filses/breakers.
Dryer doesn't heat Fuse is blown/circuit breaker is • Check the house filse/drcuit breaker box and
tripped, the dryer may tumble replace fllse or reset breaker.
but not heat
Gas service is off •Make sure gas shutoffat &yer and main shutoffare
fillly open.
Dryer shakes ormakes Some shaking/noise is normal. • Move (hyer to an even floor space, or a(!just
noise Dryer may be sitting unevenly leveling legs as necessa Uuntil even.
Greasy spots on clothes Improper use of fabric softener • Follow directions on lid)tic softener package.
Drying dirty items with clean ones • Use your duet to dUonly clean items. Dirty items can
slain clean items and the &yer.
Clothes were not completely clean • Sometimes st_fins which cannot be seen when tile
(lothes are wet appearafier duiug. Use proper
x_;tshing procedures beti)re &ying.
lint on clothes Lint filter is full • Clean lint s(reen betbre each load.
Improper sorting • Sort lint producers (like chenille) from lint collectors
(like corduroy).
Static electricity can attract lint • See suggestions in this section under STATIC.
Overloading • Separate large loads into smaller ones.
Paper, tissue, etc., left in pockets • Empty all pockets betore laundering clothes.
Static occurs No fabric softener was used • T Ua ihbric softener.
• Boun(e _PFabric (_onditioner D_yer Sheets have
been approved fi)r use in all liE Ihyers when used in
ac(ordance with the manufacturer's inslnactions.
Overdrying • T D"a fhbric sofieuer.
• At!jllSl controls ti)l" less (h)4ng.
Synthetics, permanent press and • TD_ a thbric softener.
blends can cause static
Inconsistent dryingtimes Type of heat • Autom;ttic dD_ing times xdll vmy accorcfing to the type
of heat used (electric, natural or l A' gas), size of h)ad,
types offabrics, wemess of clothes and condition of
exhausl ducls.
12

Possible Causes What ToDo
Clothestaketoolong
todry .... Improper sorting • Separate heaxT items flom lightweight items (generally,
a well-sorted washer h)ad is a well-sorted duet load).
Large loads of heavy fabrics (like • I,mge, heaxTfhbrics contain more moisture and take
beach towels) longer to dU. Sepmate large, heaxT fitbrics into smaller
loads to speed &ying time.
Controls improperly set • Matdl (ontrol settings to the h)ad you are &)dng.
Lint filter is full • (lean lint fiher bet_)re eveUload.
Improper or obstructed ducting • Check installation instm_ tions for proper
&_cting/venting.
• Make sure (h_cting is clean, fiee of kinks and
unobstructed.
• Check to see if outside wall dmnper operates easily.
• Check the Installation Instructions to make sure the dxTer
venting is correct.
Blown fuses or tripped circuit • Replace fi_sesor reset drcuit breakers. Since most
breaker thyers use 2 fl_ses/breakers, make sure both me
operating.
Overloading/combining loads • Do not put more than one w;tsher load in the duet at
a/illle.
Underloading • If you me &ying only one or two items, add a few items to
ensure proper rambling.
Clothes are wrinkled Overdrying • Select a shorter (h)dng time.
• Remove items while they still hold a slight mn_unt of
moisture.
Letting items sit in dryer after • Rem_)ve items when _Tcle ends and fold or hang
cycle ends immediately.
Clothes shrink Some fabrics will naturally shrink • To avoid shrinkage, ti_llow gm'ment cme labels exactly.
when washed. Others can be • Some items may be pressed back into shape :tiler &)dng.
safelywashed, but will shrink
in the dryer •Ifyou al'e concerned abou/sln'inl_tge in a pal'/iculal" i/elll,
do not machine w:tsh or tumble &y it.
/3

w
€_
_rJ
B_
Q_
m_
Q_
Notes
14

GE Service Protection Plus '_'
GE, a name recognized worldwide %r quality and dependability, oKbrs you
SaMce Protection Plus'"-comprehensive protection on all your appliances-
No Matter What Brand!
Benefits Include:
• Backed by GE
•All brands covered
• Unlimited service calls
• All parts and labor costs included
• No out-of-pocket expenses
• No hidden deductibles
• One 800 number to call
We TI Cover Any Appliance.
Anywhere. Anytime.
You will be completely satisfied with our service protection or you may request your money back
on the remaining value of your (ontra(t. No questions asked. It's that simple.
Protect your refligerator, dishwasher, washer and dryer, range, TV, VCR and nmch more-anybrand!
Plus there's no extra charge fi)r emergenq, service and low monthly financing is available. Even icemaker
(:overage and food spoilage protedion is offered. You can rest easy, knotting tl_at all your valuable
household produds are protected against expensive repairs.
Place your ( onfiden(e in GE and tall us in d_e U.S. toll-flee at 800-626-2224
for more infi)rmafion.
_AII I)13nds (overed, up Io 20 yeals old, ill I]le (olqlh]elll31 U.S.
._ Cut here
Please place in envelope and mail to:
General Electric Company
Warranty Registration Department
P.O. Box 32150
Louisville, KY 40232-2150
/5

Consumer Product Ownership Registration
[)ear Customer:
Thank you ff)r purchasing our product and thank you fi)r placing your confidence in us.
We are proud to have you as a customer!
Follow these three steps to protect your new appliance investment:
Complete and mail
your Consumer
Product Ownership
Registration today.
Have Ihe pea__c (fl"
mind el knowing we
(all con(acl }()u ill tilt
unlikely cxcnl of a
saRqy modifica/ion.
Afier mailing Ihe
regislralion below,
store Ibis document
in a saiL'place, h
contains inlbnnalion
you will need should
you require set-rice.
Our service number is
800 GECARES
(800-432-2737).
Read your Owner's
Manual carelully.
It will help you
operate yOUFnew
appliance properly.
liyou have questions,
or need more
inlormalion, call Ihe
GE Answer Center ®
800.626.2000.
Model Number Serial Number
IIIIII
Important: If you did not get a registration card with your
product, detach and return the form below to
ensure that your product is registered, or register
online at www.geappliances.com. ._ (;tit herr
Consumer Product Ownership Registration
Model Number Serial Number
I,,,,,, , , , , , I I , , , , , ,
Mr. Ms. Mrs. Miss
First I I Last]
Name I I I I I I I I I Nana( I I I I I I I I I I I I
, I
S_t'ce'I I
Addr(ss I I I I I I I I I I I I I I I I I I I I I I I I
Ap*#1 , , I,:m i,Add,ess
Zi )
Dale Placed • _um,_eFII , II , ,
Nlonll-t I)ax
Q()ccasionall}, we may, allow s(lec/ed companies/o send you inlbnnation.
Cl-let k htrt il'_()u (h) nol want this inii)rmali(m.
6EAppliances
General Electric Company
Louisville, Kentucky
www ge_pplial_ce$ com
I
I-I ,
IC

GE _ryer _¢a£raH_ (For customers in the United States)
All warranty service provided by our Factory This warranty is valid only in the United States.
Service Centers, or an authorized Customer Care®Warranty may vary in Canada. See your approved
technician. For service, call 800-GE-CARES. Profile dealer for details.
GE Will Replace:
Any part of the (hyer whidl tails due to a detect in materials or w_)rkmanship. During this full
Fromthedateof the one-yearwarranty,GE x_illalsopr()xi(le, freeofcharge,all labor and in-home servicem replace the
originalpurchase detective pmt.
Anyextralargeorsupercapacitydryerdrumwhich fails due to a defect in materials or
Fromthedateof the workmanship. During this additionalfour-yearlimited warranty,youwill be responsible for any
originalpurchase labor or in-home ser_4cecosts.
•Service trips to your home to teach you how to use the
product.
• Improper installation.
•Failure of the product if it is abused, misused, or used for
other than the intended purpose or used commercially.
•Replacement of house fuses or resetting of circuit
breakers.
•Damage to the product caused by accident, fire, floods or
acts of God.
•Incidental or consequential damage to personal property
caused by possible defects with this appliance.
This warranty is extended to the original purchaser and any succeeding owner for products purchased for home
use within the USA. In Alaska, the warranty excludes the cost of shipping or service cafls to your home.
Some states do not allow the exclusion or limitation of incidental or consequential damages. This warranty gives
you specific legal rights, and you may also have other rights which vary from state to state. Toknow what your
legal rights are, consult your local or state consumer affairs office or your state's Attorney General
Warrantor: General Electric Company.Louisville, KY 40225
/7

Unpartenariat de service.
Ta_
I
=v,_ 4
I
Mesures de securite . .19 21
Directives de
fonctionnement
Tableauxdecommande..22,23
Autrescaract#ristiques ..... 24
Inversionde I'ouver_ure
de laporle ............... 25
Utilisationde la
s#cheuse ................ 26
Evacuationde la s#cheuse ..27
Conseils de depannage
Avant d'appeler
un r@arateur .......... 28, 29
Service a la clientele
Garantie ............ 30
Num_msde
service................... 31
IMPORTANT!
Remplir la carte d'enregistrenmnt du produit de consommation.
Deuxmoyensfaciles d'enregistrervotre appareil menager!
• Par l'internet ;__v.geapplian(es.com
• Remplir et poster la carte d'enregistrement du produit
ci-jointe
/_CONSERVERSOIGNEUSEMENT
Transcrivezles numerosde modele et deserie ici.
No
No
Vous les trouverez deni(he le tableau de (ommande.
LISEZVOTREMANUEL
Vous yUouverez (]e nombreux conseils pour l'ufilisafion et
l'enuefien de voue s_cheuse. (es quelques mesures preventives v_us
pemmttront d'(_conomiser du temps et de I'mgent, et, ainsi, de
prolonger lavie de votre secheuse.
EVACUATIONCORRECTE
Pour un meilleur rendement, la s(_cheuse doit &ue conectement
(wacu(_e.I_as(_cheuse usera plus d'(_nergie et fonctionnera pendant
l)lus longtemps si elle n'est [)as(wacude suivant les consignes donndes
dansla se(tion Evacuationdela s_cheuseet dansla section Evacuation
dans les Directives d'installation.
SIVOUSAVEZBESOINDESERVICE
Vous trouverez des soh]fions mix problbmes courants que vous
pouniez renconuer (bins la section Avant d'appeler un r#parateur.
Et, en consultant d'abord nos Conseils de d_pannage, vous pounez
peu/_tre (_vi/er de fitire appel ;_un rt_paratem.
Sivt)us avez besoin de service, vous savez que vous n'avez qu'_'_
nous telephoner. Vous trouverez a la fin (h_present mam_el les
numeros sans fiais du setYice fila clientele. Aux Etats-Unis,w)us
pouvez appeler 24 heures pro join, 7jours pro semaine au GE
Answer Center', 800.626.2000. Au Canada,appelez le 1-800-361-3400.
18

MESURESDESf:CURITf:IMPORTANTES.
LISEZD'ABORDTOUTESLESDIRECTIVES.
MISE EN GARDEt.
Pourvotresecurite,suivezles directivesfourniesdansle presentmanuelafinde minimiserlesrisques
d'incendie,d'explosionet dechocselectriquesetprevenirdesdegMsmaterielset desblessuresgraves
ormortelles.
•N'entreposezpas oun'utilisezpasd'essence
ou autres vapeursou liquides inflammablesgl
proximite de cet appareil oude toutautre
electromenager.
•L'installationet les reparationsdoivent_tre
effectueespar uninstallateurqualifie, une
entreprisede reparationouvotrefournisseur
de gaz.
SI VOUSREMARQUEZUNE ODEURDEGAZ:
[] Ne faites fonctionner aucun appareil
electrique.
[] N'actionnez aucun interrupteur; n'utilisez
aucun telephone dans votre edifice.
[] k'vacuez la piece, I_difice ou les environs.
[] Appelez immediatement votrefournisseur
de gaz en utilisant le telephone d un voisin.
Suivez les directives quTI vousdonnera.
[] Si vousne pouvez joindre votre fournisseur
de gaz, appelez les pompiers.
Loi sur les produits toxiques et I'eau potable de la Cafifomie
En verm de (erie loi, le Gouvemeur de la ( alifornie est tenu de publier une liste des substan(es re(onnues par
l'f_tat comme pouvant causei le cancer, des malfi)nnations cong_nitales ou autres probl_mes du genre et d'obliger
les enuepfises 5 averfir leurs (lients de route exposition potenfielle ;', de telles substan(es.
I,es _le(trom_ilageis _zgaz peuvent entrahler une exposition millet]re fi quatre de (es substall(es, en l'oc(tnren(e
le benzene, le monoxyde de carbone, le fi)m_aldehyde ou la suie, auribuables principalement _ la combustion
incomplete du gaz namrel ou du gaz de pduole liqudfid.
Une sdcheuse bien rdglde rdduit au nfininmm les fisques de combustion incomplbte. Pour rdduire au nfininnnn
l'exposition f_(es substan(es, faites eva(uer l'air de la sedmuse _ l'extefiem'.
UNEINSTALLATIONADEQUATE
Avant d'utiliser votre s#cheuse, assurez-vous qu'elle a #t# ad#quatement install#e, conform#ment
aux Directives d'installation. Si vous n'avez pas regu de Directives d'installafion avec votre s6cheuse,
appelez sans frais aux Etats-Unis au Centre de r#ponse GEau 800-626-2000.Au Canada appelez sans
frais au 1-800-361-3400.
•Meuez l'app_ueil a la tene (onfinm_ment a tous
les codes et r_.glements en xfguem. Suivez les
Directives d'installation.
•Installez ou enueposez l'appareil dans une pi,_ce
oO la temp6ramre est sup6rieure _ 0 °(. et oO elle
sera _ l'abri des intempdries.
•Branchez l'appareil sur un circuit protege et de
capacit4 appropri4e atin d'4xfter route surcharge
_lectrique.
•Retirez tous les retitles uanchants d'emballage
et jetez tousles mat_fiaux de transport.
Conduit d_vacuafion :
]I 2air des secheuses _'_ DOITOueevacue _
gaz
l'ext_fiem.
[]ll est fortementrecommand#d'evacuer l'air
des s_cheuses _lectriques _ l'ext_fiem afin
d'_viter l'accumulation d'une grande quantit_
d'humiditd et de charpie dans la piece. Suivez
les consignes donndes pour l'dvacuation dans
les Directives d'installation.
[] N'utilisez qu'un conduit metallique rigide ou
souple de 4 po de diam_.ue _'_l'intdfieur de la
cmrosserie de la s4cheuse ou pour l'4xv,uation
vers l'ext4rieur, t'OTItlSATIONO'UN CONDUIT
DEPLASTIQUEOUFABRIQUEa VECTOUTAUTRE
MATERIAUCOMBUSTIBLEPEUTCAUSERUN
INCENDIELORSQU'UNCONDUITESTPERFORE
OUDEVIENTOBSTRUEAU COURSDE
L'UTILISATIONOUDEL'INSTALLATION,ILPEUT
CAUSERUNINCENDIE.
Pour plus de details, suivez les Directives
d'installation, l

MESURESDESECURITEIMPORTANTES.
LISEZD'ABORDTOUTESLESDIRECTIVES.
MISE EN GARDE!
AUTOURDEVOTRESECHEUSE
• Ne laissez pas s'accunmler autour et au-dessous
de vos _lecuom_nagers des mat_rbmx
combustibles, comme de la charpie, ch_papier,
des chifl_ms, des produits chimiques, etc.
• Gmdez le sol propre et sec ;l proximit4 de x_s
41ecuom4nagers afin de ne pas glisser.
• ll flint exercer une euoite surveillance lorsque
vc)ustaites toncfionner cet appareil en presence
d'entants. Ne les laissez pasjctuer avec l'appmeil
ni monter dessus, ou s'inuoduire a l'interieur
d'un vieil appareil qui ne sert plus.
• Gardez tousles pro&ills pout la lessive (comme
les d4tersiLs, laJavel, etc.) en dehors de la port4e
des entants, de pret_rence dans une re'moire
terrace a cK. Suivez toutes les raises en garde sur
les etiquetms penn eviter des blessures.
• Ne montez jmnais sur le dessus de la secheuse.
2O
LORSOUEVOUSUTILISEZLASECHEUSES
• Ne xx)us penchez jmnais (hns la secheuse pendant
que le/ambour tc)urne. Avant de chmger ou
d4charger la s4cheuse ou d'y ajc)uter des
vetements, attendez que le tambour se soit
completement arr_/e.
• Ax;mt chaque sechage, nettoyez lefilue _'tcharpie
afin de pr4venir l'accunmladon de chmpie a
l'im4rieur de la secheuse ou dans la piece. NE
FAITESPASFONCTIONNERLASE'CHEUSESANSLE
FILTREA CHARPIE.
• ll ne tmlt pas meme (Lms la secheuse, ou a
proximite de celle-ci, tout article ayant ete ufilise
avec un solvant degraissant ou contenant une
substance inflmnmable (comme des chiflims (D
nettoyage, des vadrouilles, des secvietms utilisees
dans les salons de coifline, etc.), a moins qu'ils ait
ere debarrasse de tc)ute trace et tc)ute v:tpeur de
substance inflmnmable. On utilise a la maison de
nombreux produits it_lmnmable : acetone, alcool
denature, essence, kerosene, nettoyants
menagers, detachants, terebenthine, tire,
decapants, contenant du distillat de peu-ole.
• Ne rangez pas dans voue secheuse des articles qui
ont ere en contact avec des huiles de ofisson;
ceux-ci peuvent prc)voquer une reaction
chimique susceptible de fifire s'enflammer vos
vOtements.
•Ne lavez pas ou ne titites pas secher des mficles
qui ont ete laves avec des pro(hilts combustibles
ou explosiLs, ou qui ont 4t4 uemp4s dans ces
pro&ills ou qui en sont taches (tire, peinmre,
huile, essence, degraissan/s, solx_m/s pour le
nettoyage a sec, kerosene, etc.) car ils risquent cD
s'enflmnmer ou d'exploser. Ne versez pasces
substances dans l'em_ de la laveuse. N'milisez pas
ces substances a proximi/e de voue laveuse ou de
votre secheuse pendant qu'elles tbncfionnent.
•I.a lessive peut attenuer les proprietes
ignifi_geantes des tissus. Pour eviter cette
situation, suivez a la lettre les directives donnees
par le fitbricant du v_tement.
•Ne fitites pas secher des articles contenant (hi
caoutchouc, du plasfique, de la mousse ou mnres
mat4rimlx similaires (comme des soufiensgorge
pr4lorm4s, des chm_ssures de tennis, des
caoutchoucs, des tapis de bain, des carpettes, des
bavoirs, des culottes de bebe, des sacs de
plasfique, des ordllers, etc.) cat ces matefiaux
peuvent timdre ou brfiler. De plus, dans certaines
ciiconslances, ceil;tins illaleiiaux de caoutchouc
peuvent cm_ser un incendie par combustion
spontanee lorsqu'ils sont chatfltes.
•Ne rangez pas des mticles qui peuvent fimdre ou
brMer, comme (h_plastique, papier, ou des
v_mmen/s sur le dessus de la secheuse pendant
qu'elle tbncfionne.
•I,es vetements portant la mention <_Fairesecher
loin de la chaleur- ou <_Net_fitespas secher par
culbutage- (comme les gilels de sauvelage
contenant du kapok) no doivont pas 6tro s6ch6s
clansvotres6cheuse.
•Ne fitites pas secher d'articles en fibre de verre
dans votre secheuse. I.es parfiofles qui restent
dans la secheuse et qui pcnnTaient Otre recueillies
par les vgatemen/s lors d'un s4chage subsequent
risquent de causer des irritations cutanees.
•Pour re&fire les risques de chocs elecuiques,
d4branchez u)ujours l'appardl ou d4branchez la
secheuse at1 panneau de disuibution en enlev:mt
lefl_sible ou declenchant le (fisjoncteur :4xztntde
le repm'er ou de le nettoyer (smffpour enlever et
neu_)yer le filue a ch_upie). REMARQUE:I,e fitit de
placerle s41ecteur de programme a une position
d'ARRETne cctupe PASl'alimentadon 41ectrique
de l'appmeil.
Other manuals for Profile 405
2
This manual suits for next models
2
Table of contents
Languages:
Other GE Dryer manuals