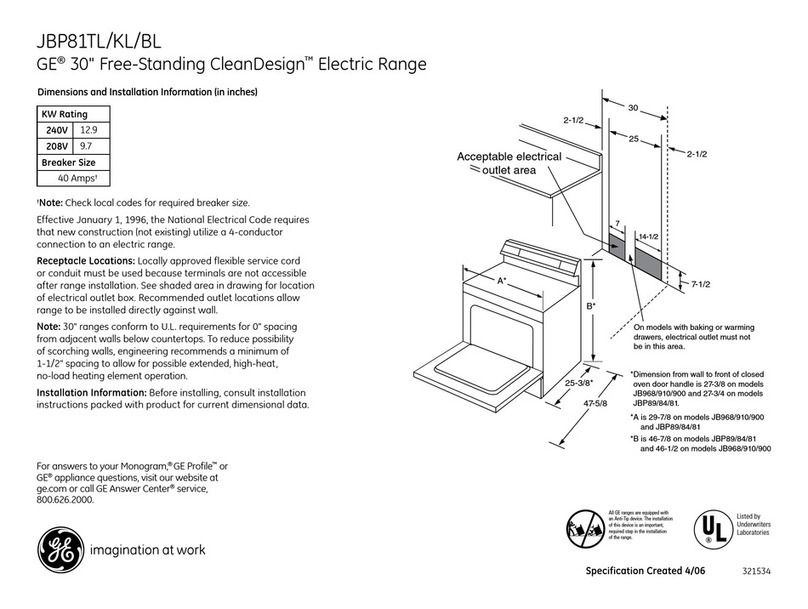
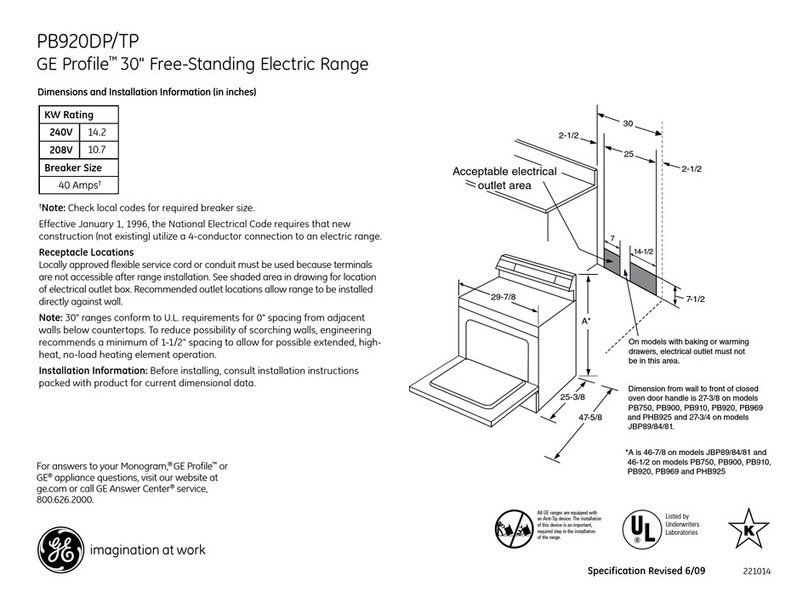
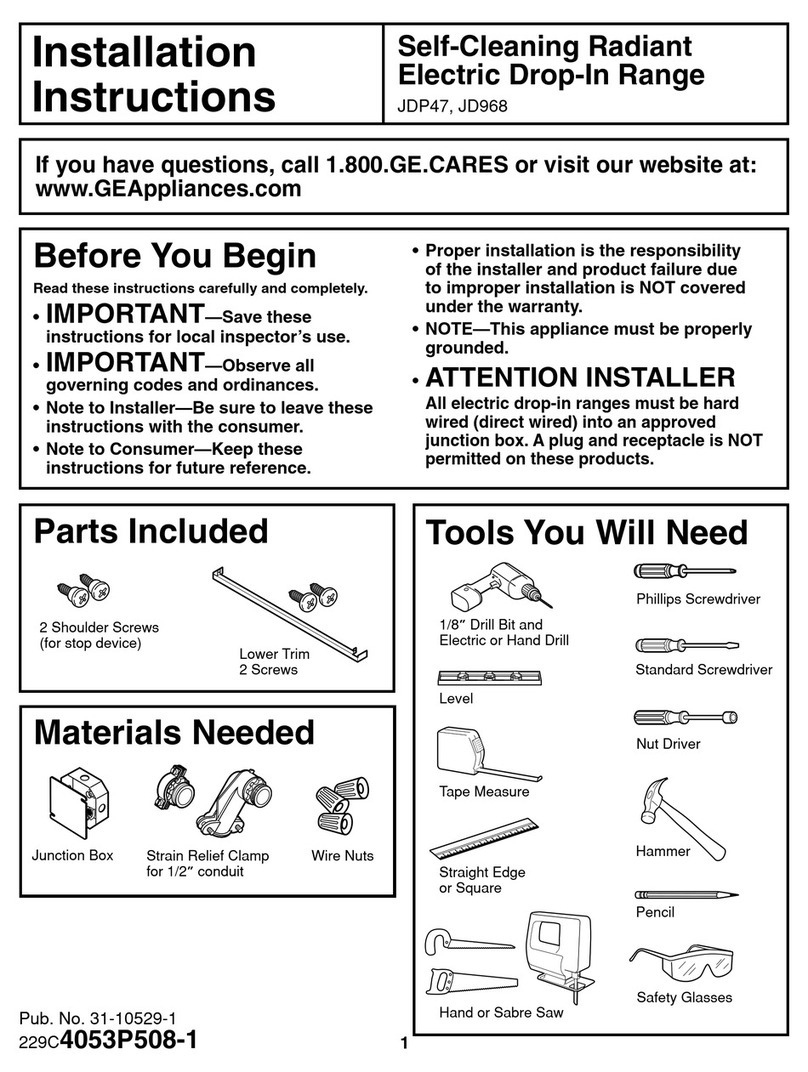
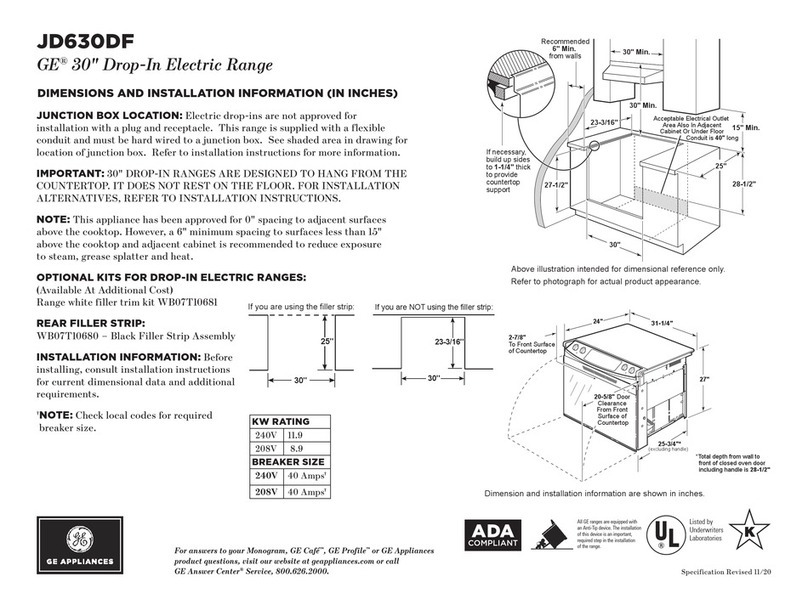
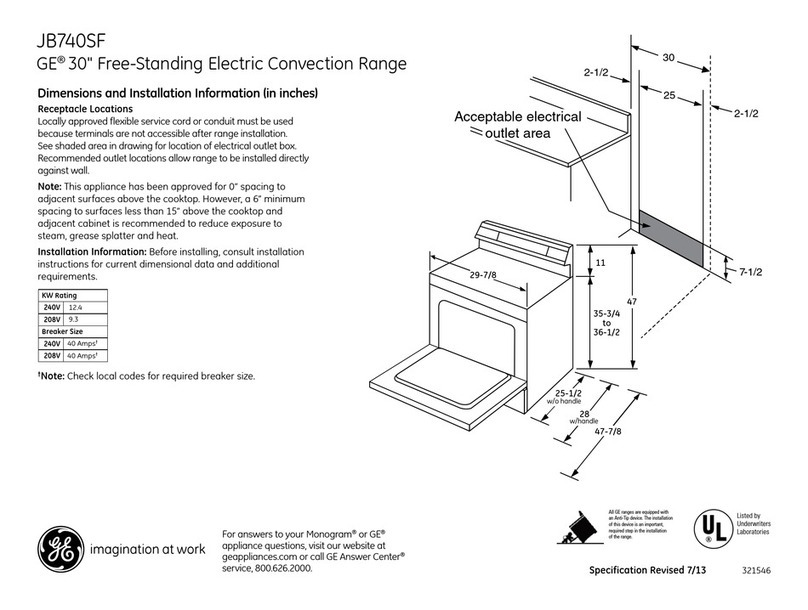
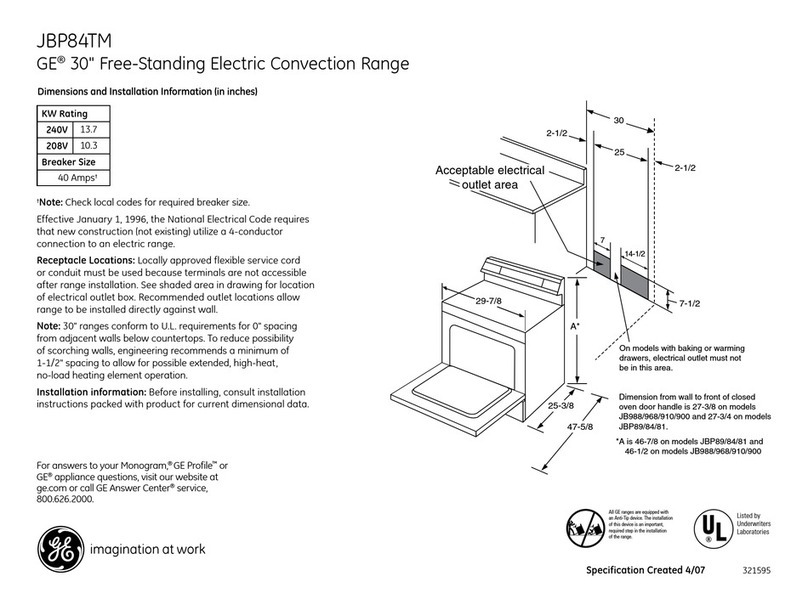
GE C2S980 Operating instructions

ge.com
©
©
Safety Instructions ....... 2-8
Operating, ImO_udions
Com_cfion Oven ....... 19-23
Roasting Guide .......... 22
Timed (%nx_ction Baking ...23
Gas/Conuol Lockout ....... 25
Gas Surface Burners ..... 9, l l
Griddle ................... 10
Lower Oven Drawer . ...... 28
Thermostat ............ 27, 28
Upper ()yen ........... 12-27
'Aluminum Foil ........... 14
Baking or Roasting ....... 14
Broiling Guide ........... 15
Clock and Timer . ........ 16
Oven Controls ........... 12
Preheating .............. 14
Probe ................ 18, 21
Sabbath Featule .......... 26
Self-Cleaning ......... 29, 30
Special Features ....... 24, 25
Timed Baking and
Roasting Features ........ 17
Care and Cleaning
Burner Grates ............. 33
Burner Caps and Heads .... 32
Control Panel and I_mobs ...37
Cooktop Surfl_ce .......... 33
Griddle ................... 34
I Jft-Off Oven Door . ....... 35
Lower Oven Drawer . ...... 36
Oven Air Vents ............ 37
()yen Heating Elements .... 35
()yen Light Replacement ...38
Oven Sheh'es .............. 38
Sealed Burner A_ssemblies...31
Self-Cleaning .......... 29, 30
Stainless Steel SmPaces ..... 34
Writethemodelandserial
numbershere:
Model #
Serial #
You can find thenl on a label on
the fl'ont of the range behind the
lower ()veil drawer.
Installation
Instruations ........... 39-52
Anti-Tip Device ............ 52
Check Ignition of
Surface Burners ........ 50, 51
Connect Rang_
to Electric ............. 44, 46
Connect Range to Gas ...43, 45
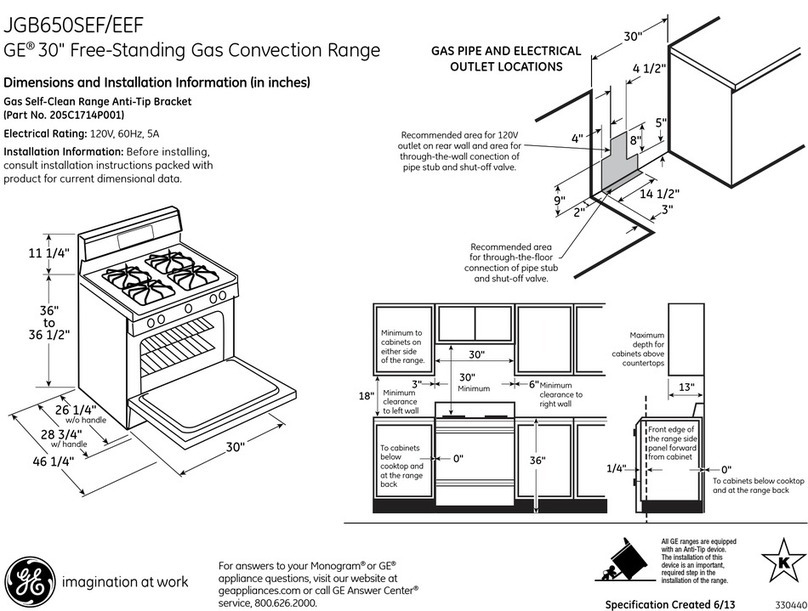
Dimensions and
Clearances ................ 41
Electrical Connections ...47-49
I_x_l the Range ........... 51
Location (;uidelines ....... 42
LP ....................... 52
Safew Instructions ...... 39, 40
Accessories ................. 57
Troubleshooting Tips..53-56
Consumer Support
Consumer
Support .......... Back Cox_r
Product Registration .... 61,62
_'atTanW ................. 63
C2S980
183D5580P214 49-85130 05-07JR

iMPORTANTSAFETYiNFORMATiON.
READALLiNSTRUCtiONSBEFOREUSING.
ANTI-TIPDEVICE
ALL RANGES CAN TIP
iNJURY TOPERSONS
COULD RESULT
iNSTALL ANTi-TiP
DEVICES PACKED WiTH
RANGE
SEE INSTALLATION
INSTRUCTIONS
,&WARNING:iftheinformation
in this manual is not followed exactly,
a fire or explosion may result causing
property damage, personal injury
or death.
-- Do not store or use gasoline or other
flammable vapors and liquids in the
vicinity of this or any other appliance.
WHATTODOiF YOU
SMELLGAS
Do not try to light any appliance.
Do not touch any electrical switch;
do not use any phone in your building.
Immediately call your gas supplier
from a neighbor's phone. Follow the
gas supplier's instructions.
If you cannot reach your gas supplier,
call the fire department.
-- Installation and service must be
performed by a qualified installer,
service agency or the gas supplier.
2

ge.com
m
For your safety, the information in this manual must be followed to minimize the risk of fire or explosion,
electric shock, or to prevent property damage, personal injury, or loss of life.
....
ANTI-TIPDEVICE
All ranges can tip and injury could result.
Toprevent accidental tipping of the range, attach it to the wall by installing the Anti- 77pdevice supplied.
If the Anti-77pdevice supplied with the range does not fit this application, use the universal Anti-77p device
WB2X7909.
Tocheck if the device is installed and engaged properly, carefully tip the range forward. TheAnti-77p
device should engage and prevent the range from tipping over.
If you pull file range out flom file wall %r any reason, make sure the device is propedy engaged
when you push the range back against the wall. If it is not, there is a possible risk of the range
tipping o_r and causing i_jury if you or a child stand, sit or lean on an open door.
Please refer to the Anti-Tip device infbnnation in this manual. Failure to rake this precaution
could result in tipping of the rang_ and injury.
ili{/!i/j_?}}ii{i
m
w
m
g
w
3

iMPORTANTSAFETYiNFORMATiON.
READALLiNSTRUCtiONSBEFOREUSING.
A '!
IMPORTANTSAFETYNOtiCE
The California Safe Drinking Water and ToxicEnforcement Act requires the Governor of California to
publish a list of substances known to the state to cause birth defects or other reproductive harm, and
requires businesses to warn customers of potential exposure to such substances.
Gas appliances can cause minor exposure to four of these substances, namely benzene, carbon
monoxide, formaldehyde and soot, caused primarily by the incomplete combustion of natural gas or
LP fuels. Properly adjusted burners, indicated by a bluish rather than a yeflow flame, will minimize
incomplete combustion. Exposure to these substances can be minimized by venting with an open
window or using a ventilation fan or hood.
SAFETYPRECAUtiONS
When using electrical appfiances, basic safety precautions should be followed, including the following."
Use this appliance only for its intended Do not leave children alone--<hildren
purpose asdescribed in this Owner's
Manual.
Be sure your appliance is properly installed
and grounded by a qualified technician in
iiiiiiiii_i_i_iiiiii
iiiiiiiii_i;_ii_i
instructioIls.
Do not attempt to repair or replace any
part of your range tmless it is specifically
recommended in this manual. All other
servicing should be referred to a qualified
technician.
Before performing any service, discom_ect
the range power supply at the household
distribution panel by remo\'ing the Rise or
switching off the circuit breakei:
should not he Heft alone or unatmnded in
an area where an appliance is in use. They
should never be allowed to sit or stand on
any part of the appliance.
Do not allow anyone to climb, stand or hang
on the dooi; storage drawer, or cooktop.
They could damage the range and even tip
it o_i; causing severe pecsonal i_jury.
Do not store flammable mamrials in an o_en
or near the cooktop.
ACAUTION:Itemsofinteresttocb//dren
sbou/dnotbe storedin cabinetsabovea rangeor on
thebackspiashof a range--children climbingon the
rangetoreachitemscouldbe seriouslyinjured.
SAFETYPRECAUtiONS
Have the installer show you the location of the range gas shut-off valve and how to shut it off if necessary.
Have your range installed and properly
grounded by a qualified installei; in
accordance with the Installation Instructions.
Any adjusunent and service should be
perfbnned only by qualified gas range
installei_ or service mchnicians.
Do not attempt to repair or replace any
part of your range unless it is specifically
recommended in this manual. All other
service should he referred to a qualified
technician.
4

go.corn
SAFETYPRECAUTIONS
Locate the range out of kitchen traffic path
and out of drafty locations to pre_ent poor
air circulation.
Be sure all packagdng ma/erials are
remox>d flom fl_e range be%re operating it
to prevent fire or smoke damage should the
packaging material ignite.
Be sure your range is coriectly adjusted by
a qualified service mchnician or installer %r
the type of gas (natural or LP) that is to be
used. Your range can be convermd fbr use
with either type of gas. See the Installation of
the range section.
AWARNING:rheseaCustments
mustbemadebya qualifiedservicetechnician
in accordancewith tiremanufacturer'sinstructions
andaft codesandrequirementsof tireauthority
havingjurisdiction. Failureto follow these
instructionscouldresult in seriousinjuryor property
damage.Tirequalifiedagencyperformingthis
work assumesresponsibilityfortire conversion.
After prokmged use of a range, high floor
mmperatures may iesult and many' floor
coverings will not withstand this kind of use.
Never install the range over viny'l tile or
linoleum that cannot withstand such ty'pe
of use. Never install it directly over inmrior
kitchen caq)eting.
Do not lea\_ children alone or unatmnded
where a range is hot or in operation. They
could be seriously' burned.
Do not allow anyone to climb, stand or hang
on the o\_n door, drawer or cooktop. They
could damage the range and even tip it o_ei;
causing severe personal i_jury.
ACAUTION:Itemsofinteresttochildren
shouldnotbe storedin cabinetsabovea rangeor on
tirebacksplashof a range--children climbingon tire
rangeto reachitemscouldbe seriouslyinjured.
For your safety, never use your appliance
for warming or healing the room.
Large scratches or impacts to glass dooi_
can lead to broken or shauered glass.
Never wear loose-fitting or hangdng garments
while using the appliance. Be carefld when
reaching for imms stored in cabinets over the
range. Flammable mamrial couM be ignited
if brought in contact with flame or hot o_n
surfi_ces and may cause severe bums.
Do not store flammable mamrials in an
oven, a range drav_>r or near a cooktop.
Do not store or use combustible mamrials,
gasoline or other flammable _apors and
liquids in the vicinity' of this or any other
appliance.
Do not let cooking grease or other
flammable mamrials accumulam in or
near the rang>.
Do not use v_mr on grease fires. Never
pick up a flaming pan. Turn the controls offl
Smother a flaming pan on a surfime burner
by' covering the pan complemly with a
well-fitting lid, cookie sheet or fiat tray.
Use a mulfi-puq)ose d Uchemical or
foam-type fire extinguisher
Flaming grease outside a pan can be put
out by' covering it with baking soda oi;
if available, by' using a multi-purpose dU
chemical or foam-type fire extinguisher
Flame in the upper o\>n or lower oven
drawer can be smotheied completely by
closing the o_>n door or drawer and mining
the control to of[, or by using a muhi-
puq)ose dry chemical or foam-ty'pe fire
extinguisher.
l_t the burner grates and other surfi_ces
cool befbre touching them or leaving them
where children can reach them.
Ne_>r block d_e vents (air openings) of the
range. They provide the air inlet and outlet
that are necessa_w fbr the range to operate
properly with correct combustion. ,Mr
openings are locamd at the rear of the
cooktop, at the lop and bottom of the oven
door, and at the bottom of the range under
the km>r o\'en drav_>r or kick panel.
Do not lift the cooktop. Lifting the cooktop
can lead to damage and improper operation
of the range.
ili{/!i/j_?}}i;{i
m
w
m
g
w
5
iMPORTANTSAFETYiNFORMATiON.
READALLiNSTRUCtiONSBEFOREUSING.
SURFACEBURNERS
Use proper pan size--avoid pans that are unstable or easily tipped. Select cookware having flat bottoms
large enough to cover burner grates. Toavoid spiflovers, make sure cookware is large enough to contain
the food properly. This wifl both save cleaning time and prevent hazardous accumulations of food, since
heavy spattering or spillovers left on range can ignite. Usepans with handles that can be easily grasped
and remain cool
Always use tile LITE posidon when igniting
the top bmnecs and make sure the burners
hme ignited.
Never leave the surfi_ce burners unattended
at high flame settings. Boilovers cause
smoking and greasy' spillo_rs that may'
catch on fire.
Adjust the top burner flame size so it does
not extend beyond the edge of the
cookware. Excessive flame is hazardous.
Use only dr},'pot holders--moist or damp
pot holders on hot surfi_ces may result in
bums fiom smam. Do not let pot holders
come near open flames when lifting
cookware. Do not use a towel or other bulky'
cloth in place of a pot holdei:
When using glass cookware, make sure it
is designed fbr top-ofZrange cooking.
To minimize the possibility' of bums, ignition
of flammable mamrials and spillage, mm
cookware handles toward the side or back
of the range without exmnding o_r
adjacent burners.
Carefifllv watch foods being flied at a high
flame setting.
Alway's heat fi_t slowly', and watch as it heats.
Do not leave any items on the cook/op. The
hot air fiom fl_e vent Y0ay ignite flammable
items and will increase pressure in closed
containers, which may cause them to burst.
If a combination of oils or fi_tswill be used
in fi?'ing, stir together be%re healing or
as fi_ts melt slowly.
Use a deep fat thermometer whenever
possible to prevent o_rheating fi_tbeyond
the smoking point.
Use the least possible amount of fi_t for
eflecti\'e shallow or deep-fi_t fiTing. Filling
the pan too fifll of fi_tcan cause spillo_rs
when food is added.
Do not flame foods on die cooktop, gyou do
flame %ods under fl_e hood, mm the fire on.
Do not use a wok on the cooking surfhce
if the wok has a round metal ring that is
placed over the burner g_am to support the
wok. This ring acts as a heat trap, which may
damage the burner gram and burner head.
Also, it may cause the burner to work
improperly. This may cause a cai%on
monoxide level abox_ that allowed bv current
standards, resuhing in a health hazard.
Foods fbr fiTing should be as dry as possible.
Frost on flozen foods or moisture on fiesh
foods can cause hot fi_tto bubble up and
o_r the sides of the pan.
Never try to move a pan of hot fi_t, especially
a deep fi_tflTei: _\.dt until the fi_t is cool.
Do not leave plastic items on the cooktop--
fl_ey may' melt if left too close to the vent.
Keep all plastics away'fiom fl_e surfi_ce
burners.
To avoid the possibility' of a burn, always be
certain that the controls fbr all burners are
at the OFFposition and all grams are cool
befbre attempting to remove them.
If range is locamd near a window, do not
hang long curtains that could blow over the
surfi_ce burners and creak a fire hazard.
If you smell gas, turn offthe gas to file rang_
and call a qualified service mchnician. Never
use an open flame to locam a leak.
Always turn the surfi_ce burner controls off
befbre removing cookware.
When disabling (;as/(kmtrol i,ockout, make
sure fl_e smfi_ce controls are set to the OFF
position. This will preclude g_s flow when the
range is turned on

_e.COITI
LOWEROVENDRAWER
The purpose of die warm setdng of the
lower oven drawer is to hold hot cooked
foods at serving temperature. Always start
with hot fbod; cold fbod cannot be heamd
or cooked using the warm setting of the
lower <>,Jell drawer.
Do not use the lower oven drawer to dry
newspapers. If o_rheated, they' call catch
OIl fire.
Do not leave paper products, plastics,
canned fbod or combustible materials ill
tile drmver
Nexer leave jars or calls of fat drippings ill
or near VOl/r lower oven drmver.
Do not warm fbod in the lower o_en drawer
fbr more than two hours.
Do not touch theheating element or the interior
surface ofthe lower oven drawer.
These surfi_ces may be hot enough tO burn.
REMEMBER:The inside surfi_ce of the lower
oven drawer may be hot when the drm,_r
is opened.
Use care when opening the lower oven
drawer Open file drawer a crack and let
hot air or steam escape befbre removing
or replacing %od. Hot air or steam which
escapes can cause burns to hands, fi_ce
and/or eyes.
Do not use aluminum %il to lille file lower
oven drawer. Foil is an excellent heat
insulator and will trap heat beneath it. This
will upset the perfbmlance of the drawer
and it could damage the inmfior finish.
Never place, use or selfklean tile lower o_>n
drm,_r pail ill file upper o_n.
i
i
w
7

iMPORTANTSAFETYiNFORMATiON.
READALLiNSTRUCTIONSBEFOREUSING.
COOKMEATANDPOULTRYTHOROUGHLY...
Cook meat and poultry thoroughly--meat to at least an INTERNAL temperature of 16001:and poultry to
at least an INTERNAL temperature of 180°ECooking to these temperatures usually protects against
foodbome illness.
UPPEROVEN
Stand away from the range when opening the door of a hot oven. Thehot air and steam that escape can
cause bums to hands, face and eyes.
Do not use file oxen fk)r a storage area.
Items stored in the os_n can ignite.
Keep the o_n flee fiom grease buildup.
Place the oven shelves in the desired
position while the oven is cool. If shelves
must be handled when hot, do not let
pot holder contact the heating elements.
Pulling out the shelf to the stop-lock is a
com>nience in lifting heavv foods. It is also
a piecau/ion against hurns f}tom touching
hot surfaces of the door or o_>n walls. The
lowest position "R, is not designed m slide.
Do not heat unopened food containers.
Pressure could build up and the container
could burst, causing an iI_jury.
*4_en using cooking or roasting bags in the
o_en, follow the mamffhcturei s directions.
Do not use your oxen to di T newspapers.
If o, erheated, they can catch fire.
Do not leave paper products, cooking
utensils or food in the o_en when not in use.
Keep the oven x_nt unobstructed.
Make sine any broiler pan is in place
correctly to reduce the possibility of
grease fires.
Kyou should have a grease fiIe in a broiler
pan, press the CLEAR/OFFpad and keep
the oven door closed to contain fire until
it burns out.
Nexer place, use or self clean the lower o_en
drawer pan in the upper o_en.
SELF-CLEANINGUPPEROVEN
Be sure to wipe up excess spillage be%re
selfkleaning operation.
gefbre self cleaning the oven, remove
die shelves, any broiler pan, grid and
other cookware.
iiiiiiiii_i;_ii_i
iiiiiiiii_i_i_iiiiii
Nex_r place, use or selfklean the lower o_>n
drm._>r pan in die upper oven.
Do not clean the door gasket. The door
gasket is essential fbr a good seal. Care
should be token not to rub, damage or
move the gasket.
iiiiiiiii_i;_ii_i
iiiiiiiii_i;_ii_i
iiiiiiiii_i_i_iiiiii
Clean only parts listed in this Owner's
Manual.
If the selfkleaning mode malflmctions,
turn the o_en off and disconnect the power
supply. Have it serviced by a qualified
technician.
Do not use oven cleaners. No commercial
o_>n cleaner or oven liner of aW kind
should be used in or around any part of
the oven. Residue flom o_>n cleaners will
damage the inside of the o_>n when the
selfidean cycle is used.
READANDFOLLOWTHISSAFETYINFORMATIONCAREFULLY.
SAVETHESEINSTRUCTIONS
8

Usingthegassurfaceburners. 9eco,.
Throughout this manual, features and appearance may vary from your model.
Before tLghting a Gas Burner
Make sure all burnel_ are in place.
Make sure all grates on the range are
properly placed before using any burnel;
If yonr nmge has tile Gas/Control
Lockout tbamre, make sine it is disabled
befi)ie attempting to light the surJime
btlrnelN.
After tLghting a Gas Burner
Do not operate tile bm'ner for im
extended period at time without
cookware oil tile grate. Tile finish on
tile grate may chip without cookware
to absorb tile heat.
Be sure tile burnel_ and grates are cool
befb_e you place yore" hand, a pot holdel;
cleaning cloths or other materials on
them.
Push the control knob in and turn it
to the L/TEposition.
How to Light aGas Surface Burner
Make sure all the stadia e bm'ne_ are
placed ill their respective positions.
Push tile control knob in and turn it to
tile L/rE position.
Y_u will hear a little C/iCking noise--
the sound _ff the electric spark igniting
tile burne_;
Turn the knob to ac!iust the flame size.
If tile knob stays at UTE, it will continue
to click.
When one bm'ner is turned to LIFE, all
tile burne_ spark. Do not attempt to
disassemble or clean aiound any burne_
while another burner is on. All electric
shock may restflt, which could cause you
to knock o\vr hot cookwiH'e.
Ova
Extralarge Dualflame
axTra large
&nail, medium and center burner
graphics onl;z
Sealed Gas Burners
Your gas rlmge cooktop has five sealed
gas bumeI_. Tile}' offer comvnience,
cleanabiliD' and fle_bilitv to be used ill
a wide range ot cooking applications.
Tile smallest burner ill tile fight rear
position is the simmer btlrlleE This burner
call be turned (h_wn to tO fi)r a very low
simmer setting. It provides predse cooking
pe_ibnnance fi)r delicate fi)ods such as
sauces or %ads that require low heat %r a
long cooking time.
The medium (left rear) and the large (left
ti'ont) burners are tile prima Uburnel_ tar
most cooldng. These general-puq)ose
burnem call be turned down fl'om H/to LO
to suit a wide range (ff cooldng needs. Tile
extra large (left fl'ont) burner also has a
spedal POWER BOIL_%etfing designed to be
used with cookware 10 inches o* larger in
diametel:
Tile dual flame extra lmge burner (fight
fl'ont) is tile maximum output burnel: Like
tile other ibm" burneis, it can be turned
(h_wn flwm HI to LO ibr a wide range ot
cooking applications; howeve*; this burner is
designed to quicHy bling lane amounts (ff
liquid to a boil It has a spedal POWER BOlL TM
setting designed to be used with cookwm'e
10 inches or larger ill dimnetei:
Extra large and dual flame extra large burners onl;z
Tile center o\:d burner is tile largest ill
size and is for large o\_d pots/pans, rotmd
pots/pans 10" or greater in diameter or
to be used with tile griddle.
Hew to Select Flame Size
Forsafe hand//ngof cookware, neverbt the f/ames
extend up thesides of the cookware.
_Aatch tile flame, not tile knob, as yon
reduce heat. When filst heating is desired,
tile flame size on a gas burner should
match tile cookware you are using.
Flames larger than tile bottom (ff the
cookware will not result ill fi_ster heating of
tile cookware and could be hazardous.

Usingthegriddle.
i i
Yore" non-stick co:lted gl-kk|le provk|es
:m extra-large cooklll_ sur_ilce for meats,
panc;_kes or other food usual]_ prep;n'ed
in a fl'ving }xm or sldllet,
NOTE"YourgriddlewilldlL_co/orovert/riTeasit
becomesseasonedwithuse.
How to Insert the Griddle
ACAUTION: leceandremovethe
griddle only when all grates andgriddle are cool
and all surface units are turned OFF.
The griddle can only be used with the
center btlFnel: To insert the griddle,
remove center gr_lte m_d repLice with
griddle.
Using the Griddle
Most gfiddled foods recluire cooldng
on a preheated sm'fiace. Prehe:_t griddle
accmding to the guide belong, then switch
to the desired cook setting.
LTypeofFood Preheat CookSetting
Conditions
Warming none 3(MED-LOW)
Tortillas
Pancakes 4(MED) 4(MED)
10min
Hamburgers HI 5(MED)
5min SearonHIfor 1
minuteeachside
FriedEggs HI 4(MED)
5rain
Bacon None 5(MED)
Breakfast HI 5 (MED)
SausageLinks 5min
HotSandwiches HI HI
(suchas 4min
GrilledCheese)
NOTE:Griddlesettingsmayneedtobe adjustedif griddleis
usedfor anextendedtime.
IMPORTANTNOTES:
Avoidcook/bgextremelygreasyfoodsandbe
careblofgreasesp/lloverwhilecooklbg.
Donotuseoilonthegnddleforextendedlengths
oft#ne.Permanentsta/b/bgand/orcraze//beson
thesurfacecouldresdt.
Neverplace or storeany items on thegndflle,
even when it is not b use. Thegnddle can
becomeheatedwhen uslbg the surroundlbg
burners.
Do not overheat the griddle. Leav/bgthe
griddle,burneron at H! for anextendedamount
of t/nTewithout foodcandamagethe non-stick
coatlbg.
Avoid us/bgmetal utensils with sharppobts
orrough,sharpedgesthat might damagethe
griddle surface.
Donot cut foodson the gnddle.
lO

Usingthegas surfaceburners. 9eco,,
Top-of-Range Cookware
Aluminum: Medium-weight (ookwm'e is
recommended because it heats quirkly
and evenly. Most toods brown evenly in an
aluminum sldllet. Use saucepans with tight-
fitting lids when cooldng with minimum
;ll//O{llltS ()1_ watel2
Cast-Iron: If heated sk)wly, most sldllets Mll
give satis_hctorv results.
Enamelware: LIrider some conditions,
the enamel el some cool<ware may melt.
Follow coolzwilre Illilnllfilcgt/rer's
recoli/l//elldations lk)r cooldng methods.
Glass: There are two t) pes _ffglass
cookwale---those tk_r ()\Psi use only and
those fiw top-otZmnge cooldng (saucepans,
coflbe and teapots). Glass conducts heat
veUslowly
Heatproof Glass Ceramic: Can be used liar
either smfime or oxwn cooking. It conducts
heat _v*y slowly and cools ve,y slowly. Check
cookware manufimtm'er's directions to be
sm'e it can be used on gas ranges.
Stainless Stool: This metal ahme has poor
heating properties and is usually combined
with coppe_; aluminum or other metals tiw
improved heat distribution. Combination
metal sldllets usually work satisfi_ctorily if
they are used with medium heat as tile
l/lall t/fitCttlrer recoi//I/lellds.
Stove Top Grills
Do not use stove top grills on veto" sealed
gas bm'nel_. If you use the stove top grill
on tile sealed gas burner, it will cause
incomplete combustion and call result
in expostlre to carbon I//OllOxJ(le levels
abo\e allowable cmTent standards.
Thiscanbehazardoustoyourhea/th.
Use a flat-bottomed wok.
Wok This Way
We recommendthatyouusea 14@chor smaller
flat-bottomed wok.Makesure the wok bottom sits
f/at on thegrate. Theyareavailableat your/ocal
mtai/ store.
()nix a fiat-bottomed wok shoukl be used.
Do not use a wok support ring. Plating tile
ring o\vr tile bm'ner or grote may cause tile
burner to work improperl> resulting in
carbon monoxide levels above allowable
standaIds. This could be dangerous to
yore" health.
in Case of Power Failure
In case ot a power fidlure, you call light tile
gas sm_i*ce burnel_ on yore" range with a
match. Hold a lit match to tile bm'nel; then
push in and tm'n tile control knob to tile
tire position. Llse extreme caution when
lighting burners this way.
Sm_ime burnel_ in use when an electrical
power fiulure occm's will continue to
operate nora/all>
NOTE"If Gas/ControlLockout/L_/buseat the tlflTeof
apower fai/ure,the surfaceburnerscannotbe fit.
77

Usingtheupperovencontrols.
(Throughout this manual, features and appearance may vary from your model.)
O
Features and appearance may var_
72
OvenControl Clock,TimerandFeatures
BAKEPad
Touch to _lect the bake function.
BROILHI/LOPad
Touch to _lect the broil function.
CONVECTIONBAKEMULTI/I RACKPad
Touch to select baking" vdth the comection
function.
OCONVECTIONROASTPad
Touch to select roasting with the convection
function.
STARTPad
Must be touched to start any cooking or
cleaning function.
Display
Sho_ die time of (ta), o',en telllperattn'e',
Mlether the {)_en is in the bake, broil or
selfkleaning mode, the times set for
the timer or automatic oven opecations,
and if the range is locked.
SELF-CLEANPad
Touch to select selfkleaning function. See the
Usingthe self-cleaning oven section.
If "F- andanumberor letter"flashin thedisplayand
theovencontrolsignals,this indicatesa functionerror
code.TouchtheCLEAR/OFFpadAllowtheoventocoolfor
onehourPuttheovenbackintooperation,ffthefunctionerror
coderepeats,disconnectthepowertotheovenandca//for
service.
If your oven was set for a timed ovenoperation and a
power outage occurred, the clockanda#programmed
functionsmustbereset.
Thetime of day will flashin the displaywhen there has
been apower outage.
OOVENLIGHTPad
Touch to tm'n the oven lig'ht on or oftl
DELAYSTARTPad
Else along with COOKINGTIME or SELFCLEAN
pads to set the o\en to start and stop
automaticall) at a time you set.
COOKINGTIME Pad
Touch _)ll(lthen touch the number pads to set
the amount of time you _mt }our fbod to
cook. The o\en will shut offwhen the
cooking time has mn out.
CLEAR/OFFPad
Touch to cancel ALL upper oven operations
except tile clock, timer and Gas/Control
Lockout.
@
CLOCKPad
Touch befbre setting the clock.
Number Pads
Use to set an) fimction requiring numbers
such as the time of da} on the clock, the
timeI; the oven telnpelamre, the internal
tbod temperature, tile start time and
length of operation for timed baking
and selfkleaning.
KITCHENTIMERON/OFFPad
Touch to select the timer ff'amr_.
PROBEPad
Touch Mien tlshlg" tile probe to cook food.
GAS/CONTROLLOCKOUTPad
Touch and hoM the GAS/CONTROLLOCKOUT
pad fbr 3 seconds to lock/unlock the surfiwe
burners, o_en burners and control panel so
the} cannot be actJ\ated.

Usingtheupperoven. ge.com
Toavoid possible bums, place the shelves in the desired position before you turn the oven on.
Before you flegin...
Tile sheers have stop-loci<s, so that when
placed correctly oil the suppol_s, they will
stop before coming completely out, and
will not tilt.
When plating and removing cookware,
pull the shelf out to the bump on the
shelf support.
Toremove ashelf, pull it toward you, tilt tile
fl'ont end up and pull it out.
To replace, place the end ot the shelf
(stoi>locl<s) on the suppoi% tilt up the
fi'ont and push the shelf in.
NOTE" Theshelf is not des/)ned toslide out at the
speciallow shelf {R)position.
Ttieoven has 5shelf positions.
It also has aspecial low shelf
position (R)for extra large items,
such as a large turke}4
Plastic reins on me COOKmOmay
melt If left too close to tl?e vent,
Vent appearance and location var}4
Upper Oven Vent
Your o\en is _vnted through ducts at tile
rear _Y tile range. Do not block these ducts
when cooldng in tile o\ en--it is important
that the flow of hot air fl'om the o\ ell
and fl'esh air to the o\ ell burner be
mfintermpted. A\ (rid touching the \writ
openings or nearby StlK[iIces (hllJng oven or
broiler operation--they may become hot.
Handlesofpotsandpansonthecooktopmay
becomehotif left tooclosetothevent
Donotleaveplastleitemsonthecooktop--
theymaymeltif left tooclosetothevent
Donotleaveanyitemsonthecooktop.Thehotair
fromtheventmay/_Tniteflammableitems
andwilllecreasepressureleclosedcontaleers,
wh/bhmaycausethemtoburst
Metalitemswillbecomeveryhotif theyare
leftonthecooktop,andcouldcauseburns.
Upper Oven tight
Touch tile OVEN LIGHTpad to turn tile light
on or ofl_
13

Usingtheupper oven.
I
I
Theoven has aspecial low shelf (R)
position just above the oven bottom,
Useit when extra cooking space is
needed, for example, when cooking
a large turkey, The shelf is not
designed tosfide out at this position,
How to Set the Upper Oven for Baking or Roasting
[] Touch the BAKE p;ld.
] Touch tile number pads to set tile
desired ten/perature.
[] Touch tile STARTpad.
Tile word ON and I00 ° will be displayed.
As tile oven heats up, tile display will show
the changing temperature. _X]len the oven
reaches tile teml)er;ittlre you set, a tone
will sound.
Tochangethe oventemperaturedunbgBAKEcyc/e,
press the BAKEpad and thenthe numberpads to
get the new temperature.
Typeof Food Shelf Position
Frozenpies(oncookiesheet) C
Angelfoodcake A
Bundtorpoundcakes C
Biscuits,muffins,brownies, Bor C
cookies,cupcakes,
layercakes,pies
Casseroles Bor C
Turkey Ror A
Roasting AorB
4] (_heck filed fiw dlmeness at minim um
time on recipe. Cook hmger if
llecessar_,.
[] Touch the CLEAR/OFFpad when
cooldng is complete.
Preheating and Pan Placement
Preheat tile oven if tile Iecipe calls flw it.
To preheat, set tile oven at tile correct
tempenm/re. Preheating is necessal_' when
baldng cakes, cooldes, pastl y and breads.
Forovens withouta preheat/bd/kator//ght or tone,
preheat 10mbutes.
Baking resuhs will be better if baldng pans
;ire centered ill tile o',en ;is l/l[Ich its
possible. Palls should not touch each other
or tile walls of tile oven. If VllU need tl)
use _'() shelves, stagger tile pans Sl)one
is not directly above the ethel; and leave
approximately 1½" between pans, fi'om
tile fi'ont, back and sides of tile wall.
Aluminum Foi!
Do not usea/urn/humfoi/ on thebottom of the oven.
Do nl/t use aluminum fi/il to catch spilloxel>
when using tile Circu_'_l_ e tim. Tile foil
will be sucked toward tile convection tim.
Never entirely co``era shelf with alum!him/
foil. This will disturb tile heat circulation
and resuh ill poor baldng.
A smaller sheet of fldl may be used to catch
a si/illo`` er by plating it on a lower shelf
several inches below tile food.
Oven Moisture
a_SVO/lr oven heats up, tile teillpel'ifft/re
change iff tile air ill tile oven mm cause
watel droplets to titan/m tile door glass.
These droplets are harmless and will
e``;iporate as tile ()``ell COlltintles to heat up.
14

ge.com
(
Closethedoo_Alwaysbroilwith
thedoorclosed.
NOTE:Broil will not work if tire
temperatureprobe isplugged in.
How toSet the Upper Ovenfor Broiling--Close the oven door
[] Place the meat (w fish on a broiler grid
in a broiler pan.
[] Follow suogested shelf )ositions in
tile Broiling Guide.
[] Tile oven door mustbe closed dining
broiling
[] Woudl tile BROILHI/tO pad once for
HI Broil
To (hange to LO Broil, touch tile
BROIL Hi/tO pad again.
[] Touch tile START pad.
NOTE The d/splaywillalwaysautomaticallyremind
you to close the door
[] _v\qlen broiling is finished, touch tile
CLEAR/OFFpad.
Serve tile toed immediately, and leave tile
pan outside tile oxen to cool dining tile
meal for easiest cleaning.
[)se tO Broil to cook fi_ods such as poultr}
or thick cuts of meat thoroughl} without
oVel:bl'oWlli Ilg them,
Broiling Guide
Tile size weight thickness
starting temperature and Food
}our prefbrence of (|oneness Ground Beef
will affect broiling times.
This guide is based on meats
at reflJgerator temperature. Beef Steaks
Raret
tThe U.S. Department of Agriculture Medium
says "Rarebeef is popular, but you Well Done
should know that cooking it to only Raret
140°Fmeans some food poisoning Medium
organisms may survive, "(Source: Well Bone
Safe Food Book, YourKitchen Guide, Chicken
USDARev.June 1985.)
Bakery Product
Bread (toast)
English Muffin
LobsterTails
FishFillets
Salmon
Steaks
Fillets
Ham Slices
(precooked)
Pork Chops
Well Bone
LambChops
IV]edklm
Well Done
Medium
Well Done
Quantityand/
or Thickness
1 lb.(4 patties)
Yzto _4"thbk
4 Ibs.(16 patties}
Y4to 1" thbk
1to ll/zlhs.
lY2"thick
2to 2Y2Ihs.
1whole cut up
2to 2YzIhs.,
split lengthwise
Breast
2to 4 slices
2(split)
2_4
1lb.(Y4toIlL"thick)
2(1" thick)
2(Y2to g4" thick}
_/z"thick
1" thick
2(Yz"thick}
2(I" thick)about I lb.
2(1" thick}about 10
to 12oz.
2(11/L"thick)about 1 lb.
Shelf
Position
E
D
D
C
C
D
B
B
D
E
B
D
D
C
C
C
C
B
D
D
D
FirstSide
Time(rain.)
13
1B
6
8
10
10
15
20
25
25
3
34
18 20
10
10
6
B
10
15
7
10
9
14
Second Side
Time{rain.)
8
4
6
8
8
10 12
20
25
15
1
Donot
turn
oveE
6
8
10
15
4
9
6
10
Cnlnlrleflts
Space evenly.
Steakslessthan3/4"thick
aredifficulttocookrare.
Slashfat.
Brusheachsidewith
meltedbutter.
Broilskin-sidedown first.
Spaceevenly.PlaceEnglish
muffinscut-side<lpand
brushwkh butterif desired.
Cutthroughbackof shell.
Spreadopen.Brushwith
meltedbutterbefore
broilingandafter half of
broilingtime.
Handleandturnvery
carefully.Brushwith
lemonbulter before
andduringcooking,
if desired.
Turncarefully.Donot
turnskin sidedown.
Slashfat.
Slashfat.
/5

Usingthe clock and timer.
Not all features are on all models.
Make sure the clock is set to fl?e
correct time of day,
To Set the Clock
Tile (lock must be set to tile correct time
of da_ for tile autonlatic (well timing
ftlllCfiOllS to work proper]}. Tile time of da}
cannot be changed during a timed baldric
o* sell:cleaning c}cle.
[] Touch tile CLOCK pad.
[] Touch tile number pads.
Touch tile mmlber pads tile same ",_a} }ou
read them. For example, to set 19:34, touch
tile number pads 1, 2, 3and 4in that order:
If nmnber pads are not touched within one
minute atter you touch tile CLOCKpad, tile
display re\ elq:s to tile original setting. If this
happens, touch tile CLOCKpad and reenter
tile time (ff day.
[] Touch tile START pad tmtil tile time
of da_ shows in tile dispkq. This entel_
tile time and starts tile clock.
Tocheckthet/nTeofdaywhenthedisplayis
showingotherbformat/on,s/nTplytouchthe
CLOCKpad.Thet/nTeofdayshowsuntilanother
pad/_touched.
®®®®@
@®@®@
@
Therimer is a minute Toneromv.
TheCLEAR/OFFpad does not affect
the time_
ToSet the Timer
Thet/}nerdoesnot control oven operations.
Themax/}77umsetting on the t/?ner/s 9 hours
and59minutes.
[]
[]
Touch tile KITCHENTIMERON/OFF
pa &
Touch tile number pads until tile
al]lOtln[ of time you w;lI/t shows ill
tile display: Tile maim um mm_ber
(4 mim/tes that call be entered is 60.
To set additional time, you will need
to set it by hom_ and minutes.
For example, to enter 1 hour and
30 minutes, touch 1, 3and Oill
that order:
If youmakeamistake,presstheKITCHENTIMER
ON/OFFpadandbegbagab.
[] Touch tile STARTpad. _Mter wessino
tile SYARYpad,SETdisappem>; this
tells you tile time is counting down,
although tile display does IlOt change
until one minute has passed.
[] _qlen tile timer reaches :00, tile
c(mtrol will beep 3 times fi)llowed bv
one beep e\ err 6 seconds until tile
KITCHENTIMERON/OFFpad is touched.
>e 6secondtonecanbecanceledbyfollowing
the steps/h the Special features of your oven control
section under Tones at the End of a Tkned Cycle.
ToReset the Timer
If tile display is still showing tile time
remaining, you may change it by touching
tile KITCHEN TIMER ON/OFFpad; then touch
tile number pads until tile time you want
appears ill tile display.
If tile remaining time is not ill tile display
(clock, delay stall or cooldng time are in
tile display), recall tile remaining time by
touching tile KITCHEN TIMER ON/OFF pad
and then touching tile number pads to
ellter tile Ilew time TOil Willlt,
To Cancel the Timer
Toudl tile KITCHEN TIMER ON/OFF pad twice.
Power Outage
lfa flashingt/kneisin thedisplay,youhave
expenencedapowerfailure.Resettheclock. To reset tile clock, touch tile CLOCK pad.
Enter tile correct time of clay by touching
tile appropriate number pads. Touch tile
START pad.
16

Usingthetimedbakingand
mastingfeatures(upperovenonly). 9eco,,
NOTE: Foods that spoil easily--such as milk, eggs, fish, stuffings, poultry and pork--should not be allowed to sit for more
than 1hour before or after cooking. Room temperature promotes the growth of harmful bacteria. Be sure that the oven
light is off because heat from the bulb will speed harmful bacteria growth.
How to Set an immediate Start and Automatic Stop
Theupper ovenwill turn on/nTmed/ate/yandcook for
a selectedlengthof time.At the end of the cook/hg
t/kne,the oven will turnoff automat/bal/y.
[] Touch tile BAKEpad.
[] Using tile number pads, enter tile
desired temperatm'e.
[] Touch the COOKING TiME pad.
NOTE."If yourreciperequkespreheating,youmay
needtoaddadd/t/ona/t/nTetothelengthofthe
cookingt/nTe.
The word ON and 100°will be displayed,
The cook time will begin to count down,
As the oven heats up, the display will show
the changing temperature, When the oven
reaches the temperature you set, 3 beeps
will sound,
At tile end of timed baldng, the oven will
tm'n off. Tile end of cycle tone will sound.
Touch tile CLEAR/OFF pad to clear tile
display.
[] [)sing tile mmlber pads, enter tile
desired baldng time. Tile o_en
temperature and tile cooking time
that }ou entered will be displa}ed.
[] Touch tile START pad.
@
@®®®@
@®®®@
®®®®@
@
®®@®@
®®@®@
@
@
How to Set a Belayed Start and Automatic Stop
Youcanset the upperoven control todelay-start the
oven,cookfor a sped@ bngth of tkne andthen turn
off automat/ca//y
Make sm'e tile clock shows tile correct
time of day.
[] Touch tile BAKEpad.
[] [)sing tile munber pads, enter tile
desired temperature.
[] Touch tile COOKING TiME pad.
NOTE."If yourreciperequkespreheating,youmay
needtoaddadd/t/ona/t/nTetothelengthofthe
cookingt/nTe.
[] Using tile mmlber pads, enter tile
desired baldng time,
[] Touch tile OELAYSTART pad.
[] Llsing tile ram/her pads, enter tile
tinle of (la _, _,otl wail[ the ()veil to
ttlrll OlX alld start cooldllg.
[] Touch tile sNRrpad.
If you would like to check tile times vou
have set, touch tile OELAFSTART pad to
check the staI* time w_u have set or touch
tile COOKING TIME pad to check tile length
of cooking time you have set,
Tile o\vn will turn on automatically.
Tile word ON and 100°will be displayed.
Tile cook time will begin to count down,
_s tile oven heats up, tile display will show
tile changing temperature, The oven will
cook fiw tile programmed cooldng time and
shut off automatically.
At tile end of timed baldng, tile oven will
turn ott_ Tile end of cycle tone will sound.
Touch tile CLEAR/OFFpad to clear tile
display.
NOTE."Anattentiontonewillsoundif youareusing
tintedbak/hganddonottouchtheSTARTpadafter
entenngthebakingtemperature.
/7

Usingtheprobe.
For many foods, especially roasts and poultry, internal food temperature is the best test for doneness.
The temperature probe takes the guesswork out of roasting by cooking foods to the exact doneness you want.
Thetemperature probe has a
skewer-fike probe at one end and
a plug at the other end that goes
into the outlet in tl?e oven,
Use of probes other than the one provided Cable
with this product me) result in damage to plug )
tile probe.
l_)se the handles of tile probe and plug _._., I_4 Handles
when inserting and remox4ng thel'n fl'om
tile fi)od and outlet.
Toavoiddamag/bgyourprobe,donotusetongs
topuffonthecablewhenremowngit.
Toavoidbreaklhgtheprobe,makesurefoodi_
completelydefrostedbefore/bsert/bg.
Topreventpossiblebums,donotunplugthe
probefromtheoutletuntiltheovenhascooled.
Never leaveyourprobe/bs/de the ovendunng
ase/f-c/ean/bgcycle.
Do not store theprobe/b the oven.
_Mter preparing the meat and plating
it on a trivet or on a broiler pan grid,
iollow these directions for proper })robe
placem ent.
Insert tile probe completely into tile meat.
It should not touch tile bone, fht or gristle.
For roasts with no bone, insert tile probe
into tile meatiest pal_ of tile roast. For
bone-in ham or lamb, insert tile probe into
tile center of tile lowest large muscle.
Inse_ tile probe into tile center of dishes
such as meat loaf or casseroles.
Insert the probe into tile meatiest l);u_ of
tile imler thigh flora belo_,_ and pm'allel to
tile leg of a whole turke}
®®®@@
@®®®@
@
®®®@@
®®®®@
@
@
How to Set the Upper Oven For Roasting When Using the Probe
] lnsel_ tile probe into tile fi)od.
] Plug tile )_obe into tile outlet in tile
oven. Make sure it's pushed all tile
way in. Close tile oven door
[] Toudl tile PROBE pad.
] Touch tile number pads to set tile
desired internal fi)od or meat
temperature.
[] Touch tile BAKEpad.
] Touch tile mmfl)er pads to set tile
desired oxen temperature.
[] Touch tile START pad.
Thedisplaywill flashiftheprobe/sbsertedbto the
outlet and you have not set a probe temperature and
touchedtheSTARTpad.
_Jter tile internal temper;ffure of the fl)od
reaches IO0°K tile changing internal
temperature will be shown ill tile display.
] \'Xq_en tile internal temperature of tile
fi)od ieaches tile number }ou have set,
tile probe and tile ()\'ell turn off and
tile oven control signals. To stop tile
signal, touch tile C£EAlglOEFpad. l_)se
hot pads to remo\ e tile probe fi'om
tile %od. Do not use tongs to pull
on it--they might damage it.
To change tile ()\ell temperature during
tile Roast rycle, touch tile BAKEpad and
then tile number pads to set the new
temperature,
lf Ne probe/} removedfrom No foodbefore No
f/hal temperature/s reached,a tone w/71sound
and thed/splaywill flashuntil theprobe/s
removed fromthe oven.
Youcan usethe tinter eventhough youcannot
use tintedoven operationswhiteus/bgtheprobe.
18

Usingtheconvectionoven. oco,.
The convection oven fan shuts off when the oven door is opened. DO NOT leave the door open for long periods
of time while using convection cooking.
In aconvection oven, afan
circulateshotair over,underand
aroundthefood.Thiscirculating
hotair isevenlydistributed
throughoutthe ovencavity.
Asaresult,foodsareevenly
cookedandbrowne_often in
lesstimethanwith regular heat,
NOTE:Tomaximizecooking
evenness,thefanisdesigned to
rotatein bothdirectionswith a
pausein between,Thisis normal
To help you understand the difference
between convection bake and roast _llld
traditional bake and roast, here are some
general guidelines.
ConvectionBake
Preheatthe oven.See the Using the Oven-
Preheating and Pan Placement section.
Ideal forfoodscookedonmultiple shelves.
Goodfor large quantifies of bakedfoods.
Goodresultswith cookies,biscuits,brownies,
cupcakes,creampuffs, sweet rolls, angelfood
cakeand bread.
The convection tim drculates the heated
air e',enlv o',er and arotmd the food.
Convection Roast
Goodforlarge tendercutsof meat, uncovered.
Ovendoormust beclosed for convectionroast/bg.
The convection tim rirrulates the heated air
e\vnly over and arotmd the f()od. Heated
air will be circulated ()vex and arotmd the
tbod being roasted. The heated air seals
in juices quicldy for a moist and tender
product while, at the same time, creating
a rich golden brown exteriol:
Roastsorpoultry shouldbecookedon shelf
position(A).
\_]_en you are convection roasting, it is
important that you use a broiler pan and
grid tbr best convection roasting results.
The pan is used to catch grease spills and
the grid is used to prevent grease spatters.
Placethe shelf /bshelfposition (A).
Adapting Recipes...
You can use yore" fi_vorite recipes in the
COllvection oven.
\'\'hen baking or roasting, reduce baldng
temperature by 25°E
No need to preheat when cooldng longer
than 15 minutes.
Usepansloere,commended.
Somepackage/bstruct/ons for frozencasserolesor
ma/bdisheshave beendevelopedus/bg
commercialconvection ovens.Forbest results
/b thisoven,preheat the oven andusethe
temperatureon the package.
19

Usingtheconvectionoven.
Cookware for Convection Cooking
Before using your convecti(m ()\'ell, check
to see if 7)ur cookware leaves room fi)r air
circulation in the o\vn. If \x)u are baldng
with se\vral pans, leave space between
them. _Ms(),be sure tile pans do not touch
each other or tile walls of tile ()\'ell.
Paper and Plastic
Heat-resistant paper and pk_stic containel_
that ale reconm/ended for use ill regular
()veils Call be used ill convectioll o\_ns.
Plastic cookware that is heat-resistant to
temperatures of 400°F call also be used,
when oven is beh)w 400°K
Metal and Glass
Any type (if cookware will work ill wmr
convection ()\'ell. HoweveI; metal pails heat
tile iitstest and are reconm/ended fi)r
convection baldng.
Darkenedormatte-f/b/_hedpans w///bake faster
thansh/hypans.
G/assor ceramlcpans cookmorn s/ow/y
\'\lien baking cooldes, you will get tile best
results if you use a fiat coolde sheet instead
(4 a pan with low sides.
For recipes like oven-baked chicken, use a
pan with h)w sides. Hot air cannot dieulate
well around %od ill a pan with high sides.
®®@®®
®®®®@
@
@
How to Set the Upper Oven for Convection Baking or Roasting
[]
[]
Touch tile CONVECTION BAKEMULTI/I
RACKpad once for Ill ulti-rack
con\re(ion baking. This mode is used
fi)r cooldng fi)od items on I//Ol'e [billl
one rack (i.e., 9, 24or more racks) at
the same time ill convecti(m bake. See
the Multi-SbeKBaking section fi)r mole
in%nnation. Touch tile CONVECTION
BAKEMULTI/I RACKpad twice fi)r one
rack convection baldng. This mode is
tlsed t()r cooking filed items on only
one rack ill convection bake.
Touch tile CONVECTIONROAST pad fi)r
con\vction I'()astillg.
Touch tile lmmber pads to set
tile desired oven temperature.
Renlen/ber to at!just baking
temperature accordingl> See tile
Adapting Recipes section.
[] Touch tlle STARTpad.
To change the ()\'ell temperature, touch tile
CONVECTION BAKE or CONVECTIONROAST
pad and then tile nmnber pads to set tile
new temperilt ure.
\'\lien tile ()\'ell staI_s to heat tile changing
temperature, starting at 100°E will be
displayed. \'\lien tile ()\'ell reaches tile
temperature you set, 3 beeps will sound.
[] Touch tile CLEAR/OFFpad ",,Jlen
finished.
NOTE: Youw/ll heara fan white cook/bEwith
convect/bn.Thefan will stop when the door/_
openedbut the heat will not turnoff.
Thefan will not start unt// thepreheat temperature
I?.reached
/n convectionbake modes, formaxl}77umcooklbg
evenness,the fan/_ des/_Tnedto rotate/b both
directions,with a pause/b between. Th/} /_normal.
When convection baking withonly
Ishel_ _flowthe shelfposifions
recommended m _eUsmgthe
Oven section,
Multi-Shaft Baking
Because heated air is circulated e\ enlv
tbu)ughout tile o\en, fi)ods call be baked
with excellent results using multiple shel\vs.
Multi-shelf baking may increase cook times
slightl 5fi)r some fi)ods but tlle o\vrall result
is time saved. Cooldes, I/lt/J_ins, biscuits, and
other quick breads gi\v \vry good results
with Ill ulti-shelf baldng.
To cook fi)od Oil l//Ol'e {han one I'ack ill
comvction bake, use CONVECTIONBAKE
MULTI.
\_]len baldng larger iliads on 3 shelves,
place one shelf ill tile 2nd (A) position,
one on the 4th (C) position and (lie third
shelf ill tile 6th (El position.
\\lien baldng cooldes, place tile shelves ill
tile 3rd (B), 4th (C) and 5th (D) positions.
2O
Other manuals for C2S980
3
Table of contents
Other GE Range manuals
Popular Range manuals by other brands

Maytag
Maytag MGR5710 user guide

Amana
Amana Gas Range installation instructions

Indesit
Indesit KG 6044 WV/G Instructions for installation and use

Whirlpool
Whirlpool WFG320M0BS3 Use & care guide

Frigidaire
Frigidaire Gallery FGGS3045K F Specification & installation instructions

Wolf
Wolf C24S-2FT12 installation instructions