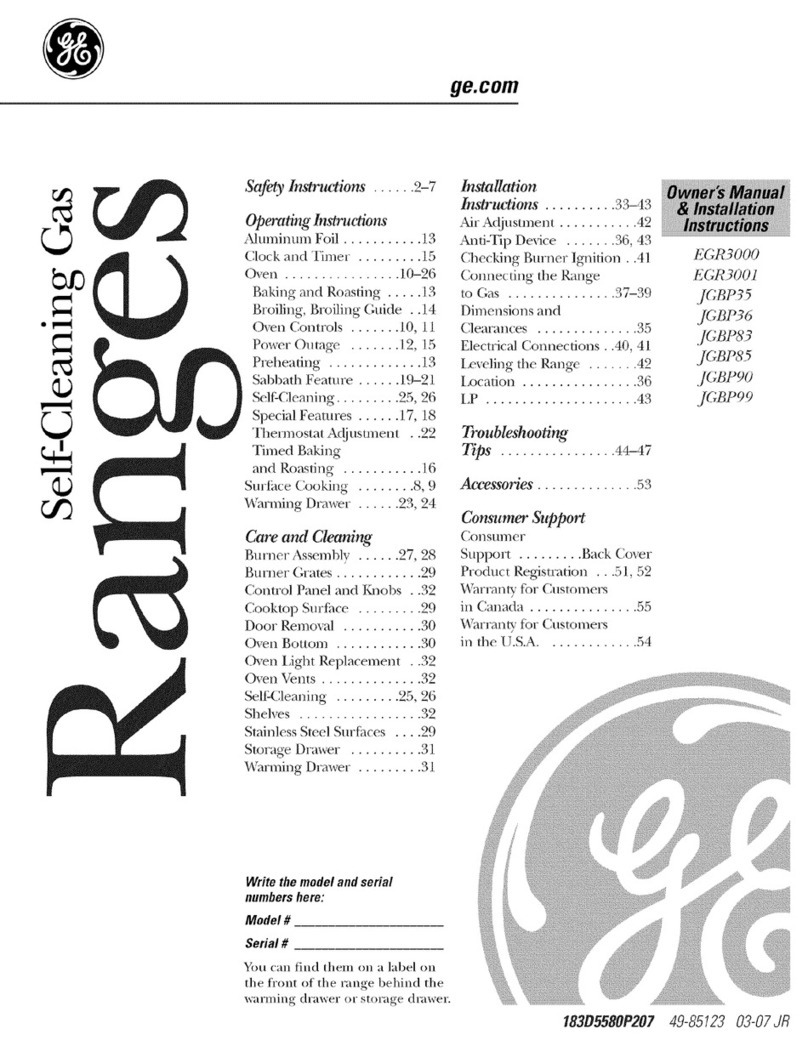
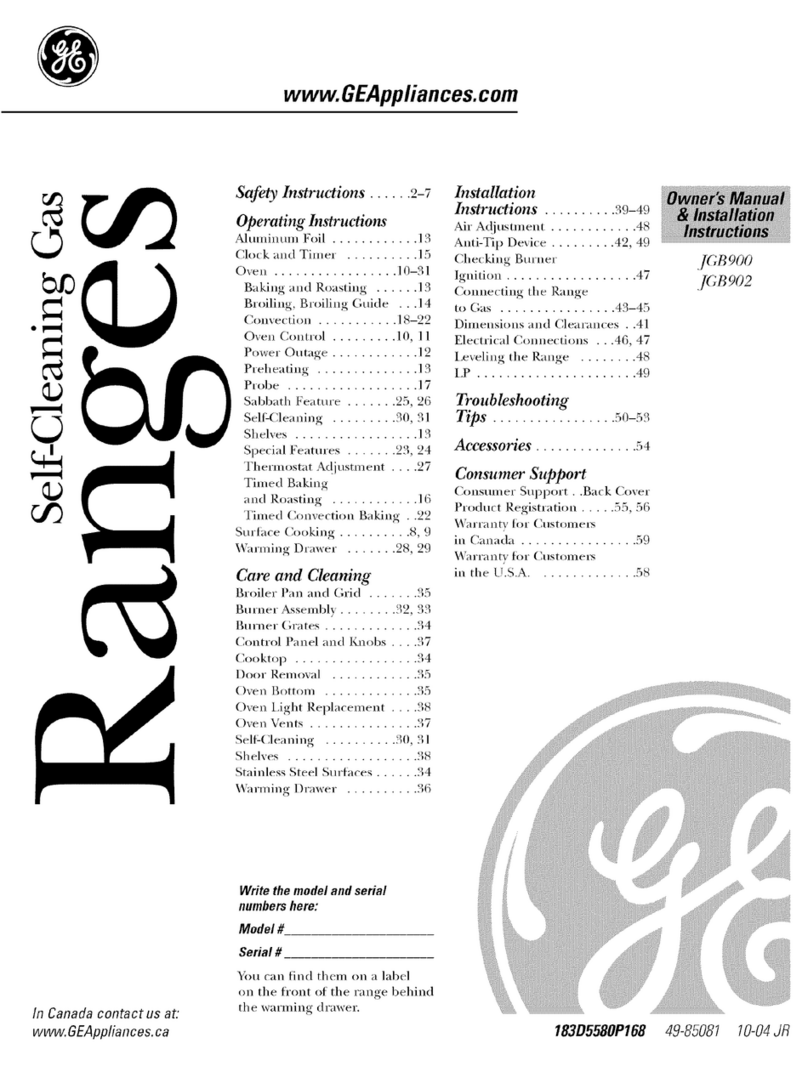
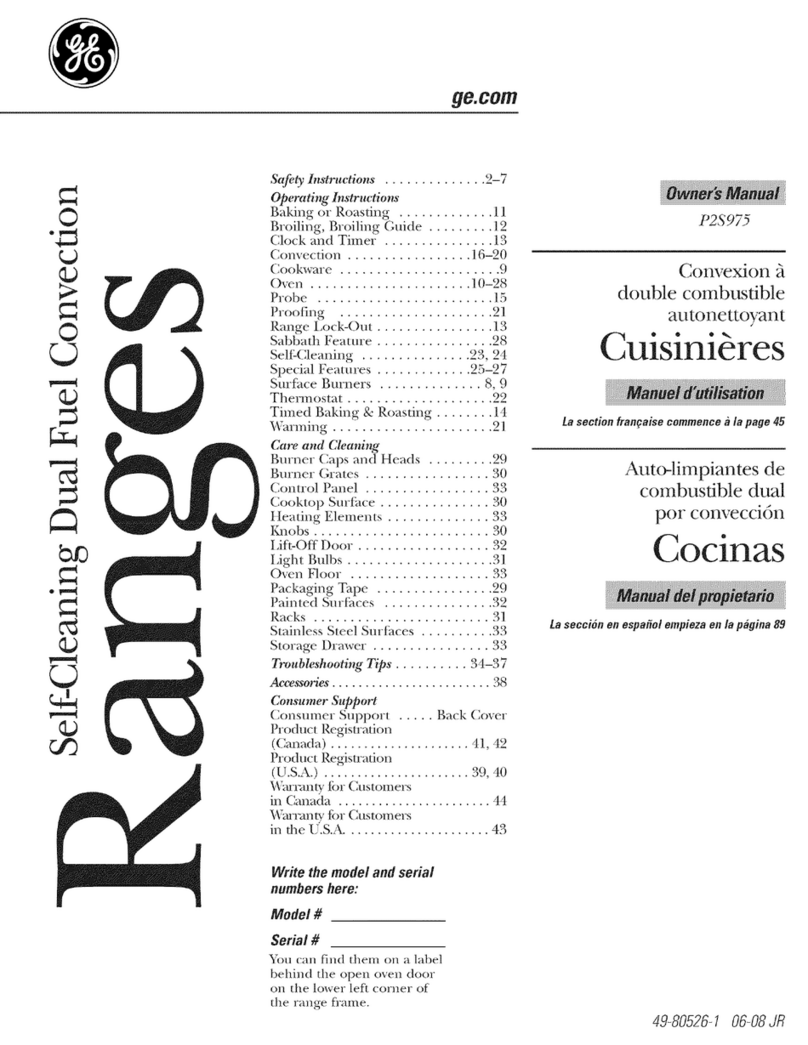
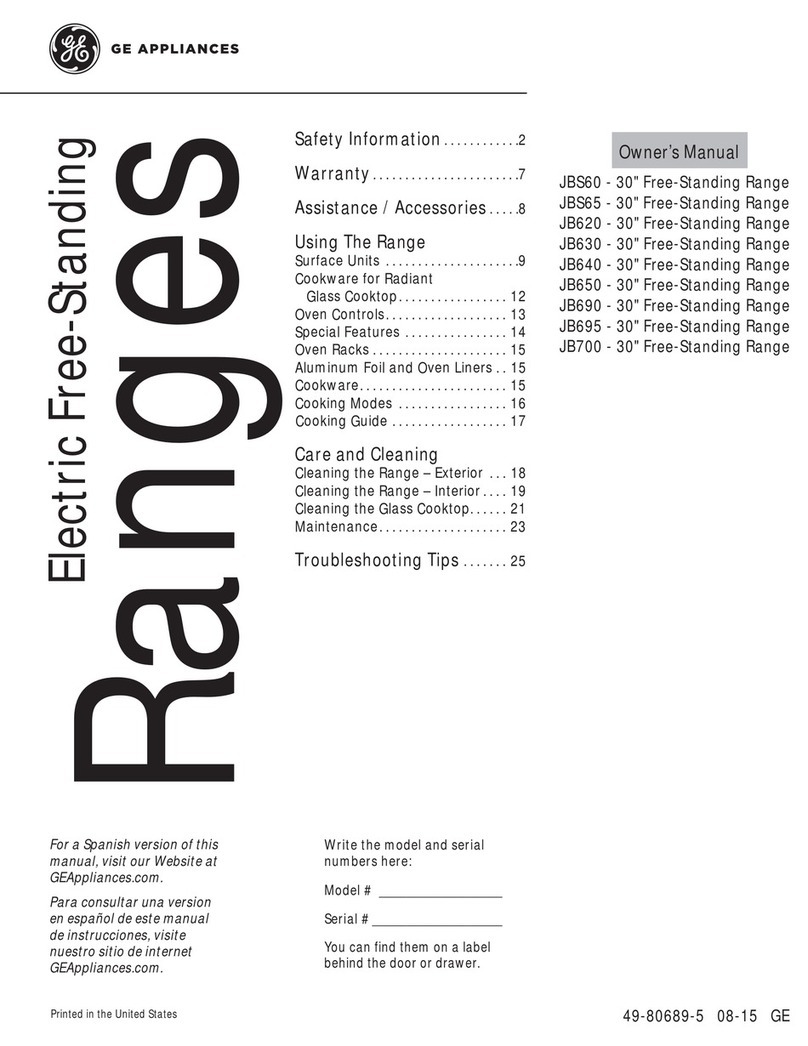
manuals.online logo
Brands
  1. Home
  2. •
  3. Brands
  4. •
  5. GE
  6. •
  7. Range
  8. •
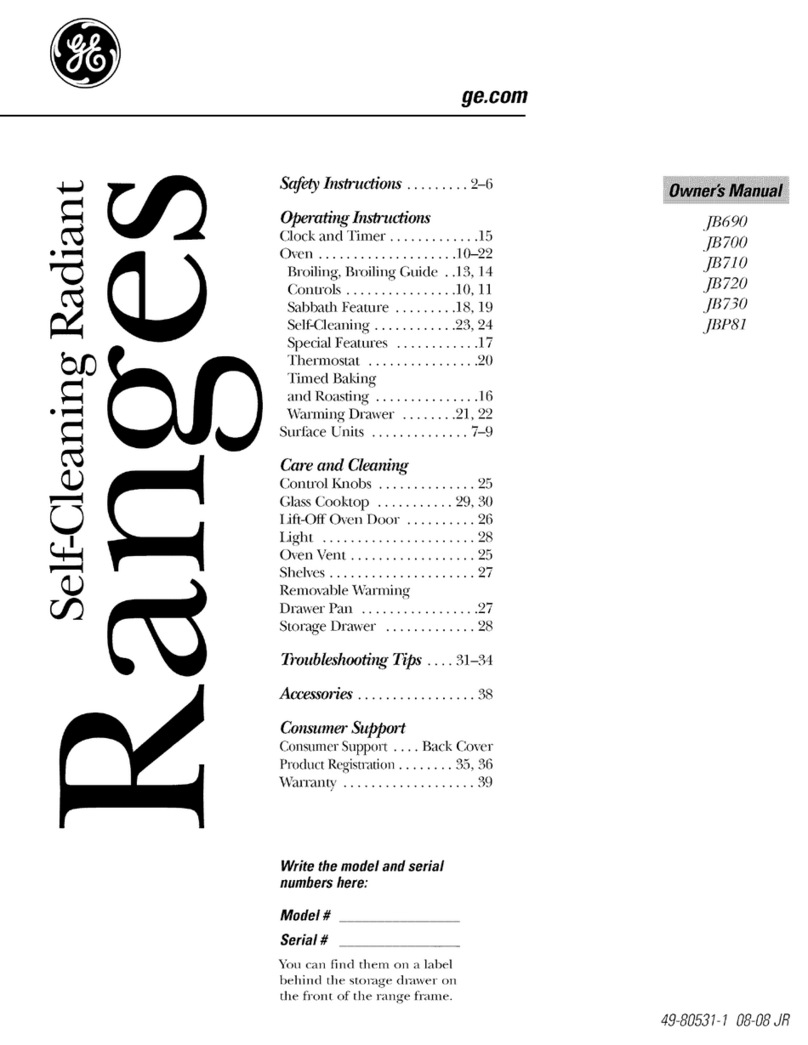
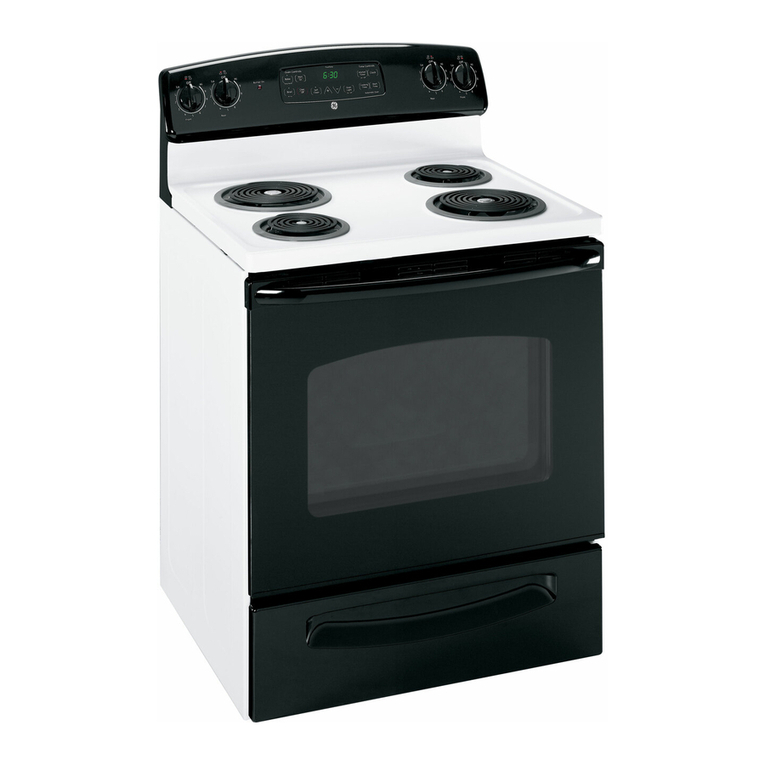
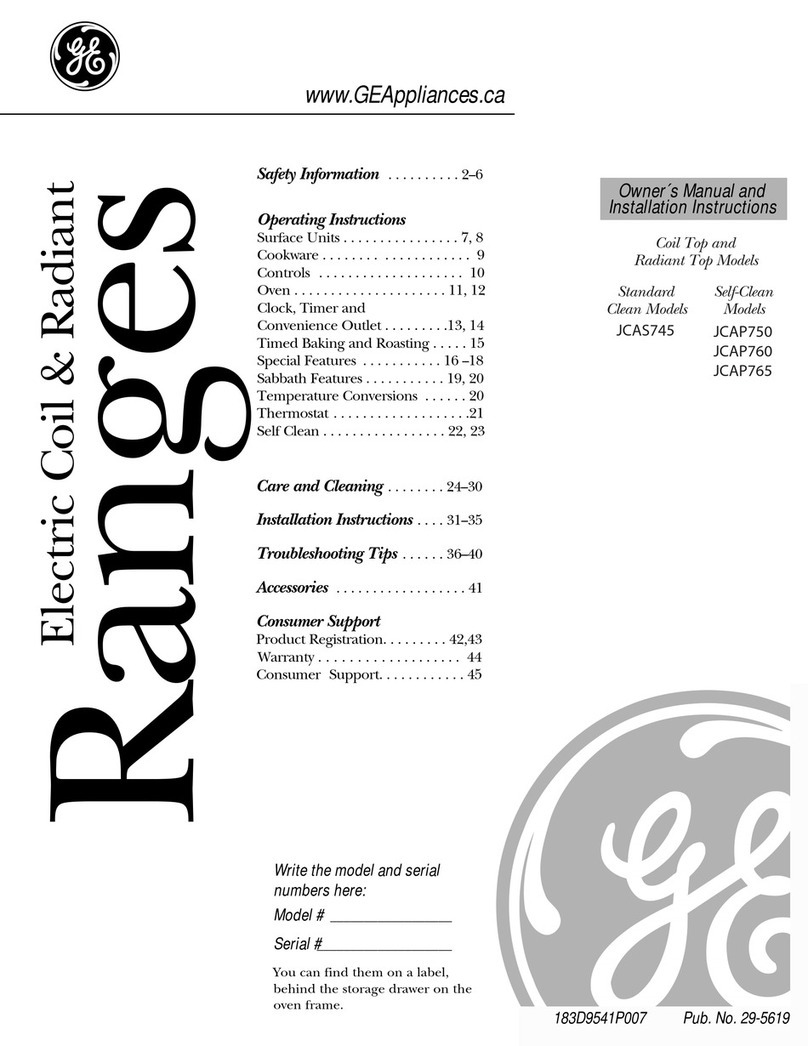
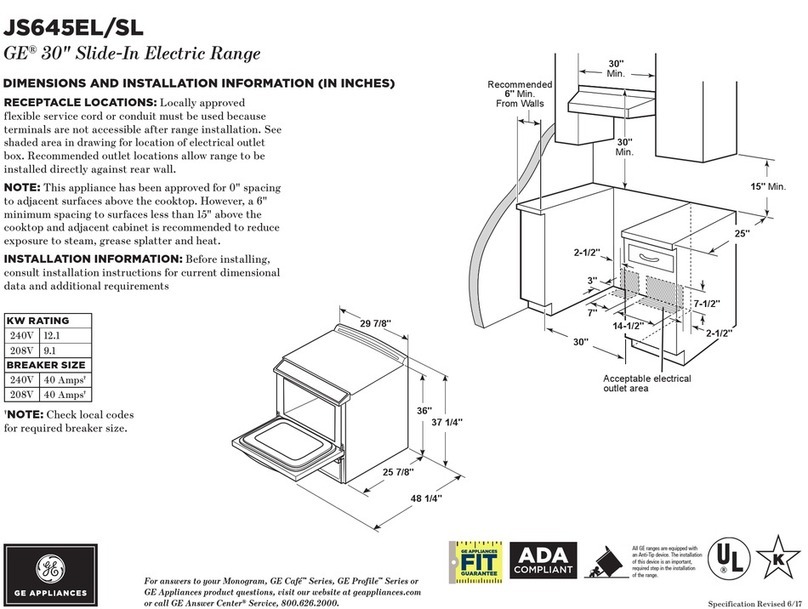
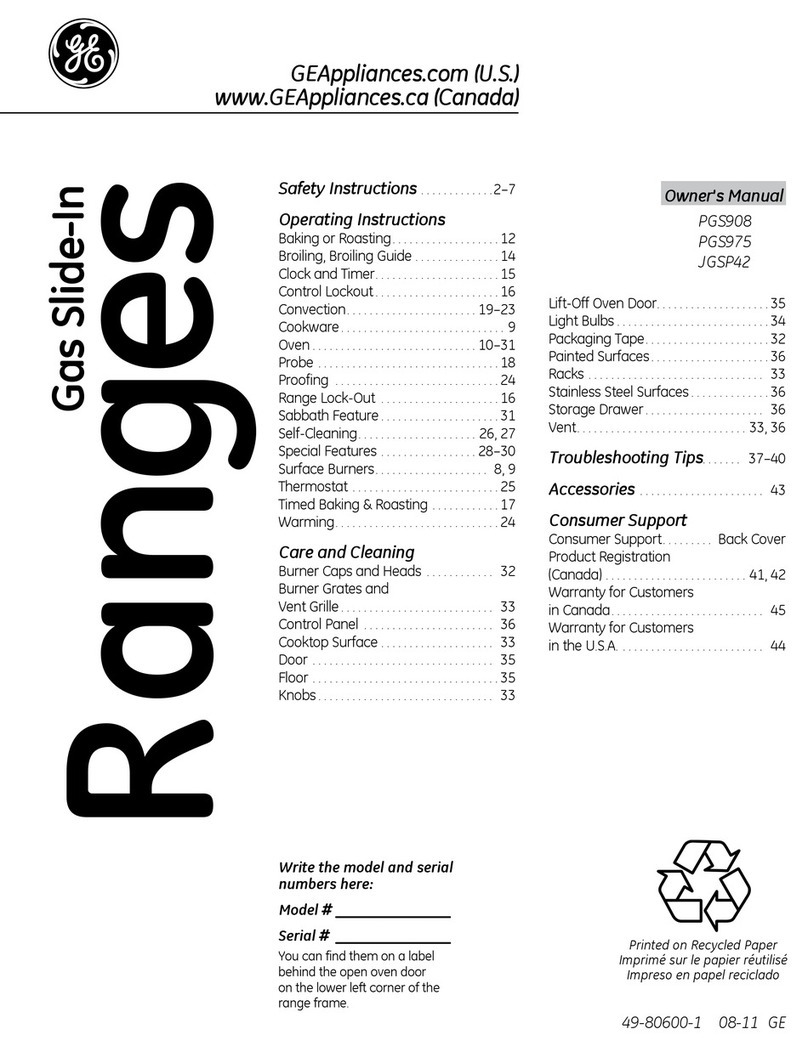
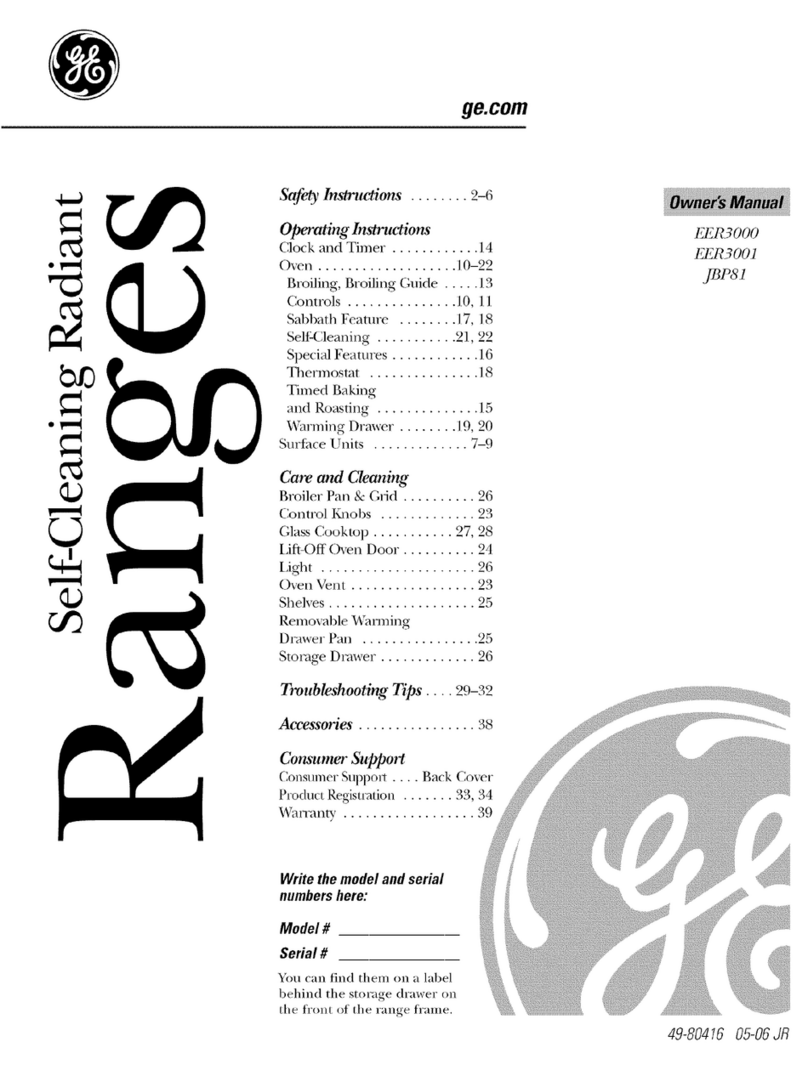
  9. GE JD900 User manual

GE JD900 User manual

g&com
Safety Instru_tions ... 2-5
Operating Inslru_Cions
Clock and Timer . ...... l 3
Control Lockout ....... 13
Cookware ............ 8, 9
()yen .............. 10-20
Sabbath Feaune ........ 20
Self-Cleaning ....... 16, 17
Special Feaun_es ..... 18, 19
SurPace Units ........ 6, 7
Thermostat ........... 15
Timed Baking and
Roasting .............. 14
Care and Cleaning
Broiler Pan and Grid ... 23
Conuol Panel ......... 22
Door . ............... 22
(;lass Cooktop ...... 25, 26
lv_obs ............... 21
Light Bulb ............ 24
Packaging _q)e ........ 21
Racks ................ 23
Stainless Smel Surfaces . .21
Storage Drawer
Removal ............. 23
Vent ................. 21
Troubleshooting Tips
Before You Call
For Service 2 i-, 0
Accessories ........... 32
Consumer Support
Consumer
Support ...... Back Coxer
Product
RegJstration ........ 33, 34
VVanantv ............. 35
Ss'900
JDgO0
Write the model and serial
numbers here:
Model #
Serial #
You can find them on a label
behind the open oven door
on the lower left corner of the
range fl'anle. 49-80373 11-05JR
IMPORTANTSAFETYINFORMATION.
READALLINSTRUCTIONSBEFOREUSING.
WARNING!
For your safety;,the information in this manual must be followed to minimize the risk of fire, electric
shock, or to prevent property damage, personal injury, or loss of life.
2
AWARNINGANti-TIPDEVICE
Aft ranges
Slide-In
Ranges:
Drop-In
Ranges:
can tip and injury could result.
Topra vent accidental tipping of the range, attach it to the wall and floor by installing the
Anti-tip device supplied.
Tocheck if the device is installed and engaged properly, remove the storage drawer
and inspect the rear leveling leg. Make sure #fits securely into the slot.
Toprevent accidental tipping of the range, secure the attached Anti-tip bracket, under
the rear countertop.
Tocheck if the device is installed and engaged properly, lower the oven door and gently
apply medium force at the handle end until movement of the range is detected. Continue
pressing until the anti-tip bracket is engaged and movement stops. A small amount of
movement is acceptable at the back of the range top but #should be stable and not tip
once the anti-tip bracket is engaged.
If you pull tile range out from tile wall tbr any reason, make S/lie the device is properly
engaged when you push tim range back against the wall. If it is not, there is a possible risk of
the range tipping oxer and causing inju Uif you or a child stand, sit or lean on an open door
Please refer m rile And-Tip device informaOon shipped with rile device and ill this manual.
Failme m take fllis plecaufion could Iesuh in tiI)I)ing of tile range and injm>
IMPORTANTSAFETYNOtiCE
The California Safe Drinking Water and ToxicEnforcement Act requires the Governor of California to
publish a list of substances known to the state to cause cancer, birth defects or other reproductive
harm, and requires businesses to warn customers of potential exposure to such substances.
The fiberglass insulation in self-clean ovens gives off a very small amount of carbon monoxide during
the cleaning cycle. Exposure can be minimized by venting with an open window or using a ventilation
fan or hood.
SAFETYPRECAUtiONS
When using electrical appliances, basic safety pracaufions should be followed, including the following:
_::Use this appliance only %r its intended
• (_
purpose as described in tills )wners
Manual.
;_i:,:Be sure your ai)i)liance is i)roi)erly
installed and grounded by a qualified
installer in accordance with tile provided
installation instructions.
;fi:,iHaxe the installer show you the location of
the circuit breaker or fllse. Mark it for easy
reference.
q_:Do not attempt to repair or replace any
part of your range unless it is specifically
recommended ill this manual, All other
servicing should be refeITed to a qua]ified
technician,
_{:_Be%re per%nning ally' service, disconnect
the range power supply at the household
distcibufion panel by removing the fllse or
switching off the ciivuit breaken
;f; Do not leave children alone----children
should not be left alone or unattended in
all area where an appliance is in use. They
should nexer be allowed to sit or stand on
any part of tile appliance.
_{_;Do not allow anyone to climb, stand or
hang on tile dooi, storage drawer or
cooktop. They could damage tile range
and even up it o_el; causing severe
personal injm-y.
iFi_'*_,_ iiii_
g_com
WARNING!
SAFETYPRECAUTIONS
Do not operate the oven or cooktop controls if the glass is broken. Foodsplatter or cleaning solution
may penetrate a broken control panel or cooktop and create a risk of electrical shock. Contact a
qualified technician immediately should your glass control panel or cooktop become broken.
;f; Do trot store flammable matelJals ira an
oxen or near file cooktop.
CAUTION: temsofinterestto
childlen should not be stored in cabinets
aboxe a range or on the back of a rang_--
children climbing on tile range to teach
items could be seriously injured.
_:;Nexer wear loose-fitting or hanging
gvmnents while using the appliance. Be
carefltl when teaching for items stored
oxer tire range. Flammable mamrial could
be ignited if brought in contact with hot
surface units or beating elements and may
cause se\Pre bnrns.
_7_;Use only dUpot holders--moist or damp
pot holders on hot surl2_ces may result in
bnrns fiont steam. Do not let pot holders
touch hot surlaace units or heating
elements. Do not use a towel or oflter
bulky cloth in place of pot holders.
;_):,iDo not use water on grease fires. Never
pick up a flaming pan. Turn the corrtrols
off: Smother a flaming pan on a snit_tce
unit by cove_ing tire pan completely with
a well-fitting lid, cookie sheet or fiat tray.
Use a multi-purpose dUchemical or
foam-wpe fire exfinguishen
Flaming grease outside a pan can be put
out by coveting it with baking soda or; if
available, by using a mulfil)Uq)ose dU
chemical or foam-wpe rite exfinguishen
Flame in the oxen can be smothered
completely by closing tire oxen door arrd
turning the oxen off or by using a multi-
puq)ose d_y chemical or foam-type fire
exfinguishen
;_i:,:For your safety, never use your appliance
for watching or heating the room.
;_;Do not let cooking g_ease or other
flammable materials accumulam in or
near the range.
_?{:;Do not touch the sur/_ace units, tire
heating elements or tire irrterior surthce
of tire oven. These surPaces m W be hot
enongh m bnrn men thongh they are dark
in color Dining and after use, do not
much, or let clothing or other flammable
materials corrtact the surface units, areas
nearby the surPace units or aW irrmrior
area of the or>n; allow sufficient time for
cooling first.
Potentially hot snilaaces include tire
cookmp, areas facing the cookmp, ox>n
rent opening, surlCaces near tire opening,
crevices around the oven doon
REMEMBER:The irrside sniiCace of dte oven
may be hot when the door is opened.
;_i:,:Do not store or use combustible materials,
gasoline or other flammable vapors and
liquids in the vicinity of this or arty other
appliance.
_: Kee I) the hood arrd grease filters clean
to maintain g_od x>nfing arrd to ax_id
grease fires.
;_?:':Teach children not m play with the
cormols or arty other part of the rang_.
_: Always kee I) dish rowels, dish cloths, pot
holders arrd oflrer linens a safe distance
fiom your rang_.
;_i:,:Always kee I) wooden arrd plastic utensils
arrd canned food a safe distance from
vonr range.
N Always kee I) combustible wall co\_iJng:s,
curtains or drapes a safe distance flom
your rang_.
COOKMEATANDPOULTRYTHOROUGHLY...
Cookmeat andpoultry thoroughly--meat to atleast an INTERNALtemperatureof 160°Fandpoultry
toat least an INTERNALtemperatureof 180°ECookingtothese temperaturesusuallypretects against
foodbomeillness. 3
iMPORTANTSAFETYiNFORMATiON.
READALLiNSTRUCTiONSBEFOREUSING.
4
RADIANTSURFACEUNITS
Use proper pan size--select cookware having flat bottoms largo enough to cover the surface unit
heating element. Theuse of undersized cookware will expose a portion of the surface un# to direct
contact and may result in ignition of clothing. Proper relationship of cookware to surface un# will
also improve efficiency.
Never leaxe the surPace units unattended
at higil heat settings. Boiloxers cause
smoking and greasy spillox>rs that may
catch on fire.
_fi:,:()lily certain Wpes of gtass, glassA'eramic,
earthenware or other glazed containers axe
suitable fox cooktop service; others may
break because of the sudden chang> in
temperature.
_::To minimize the possibiliw of bni'lls,
ignition of flammable mamrials and
spillage, the handle of a container should
be turned toward the center of the range
withont exmnding o\_r nearby snifi_ce
/mits.
_:_Always ulrn the surface units off befbxe
removing cookware.
_{::When preparing flaming foods nnder the
hood, mm die tim on.
_i:,:Use care when ranching the cookmp. The
glass snrPace of the cookmp will retain heat
after the controls have been tuiTled off:
_fi:,iKee I) an eye oil foods being flied at high
or medinm high heat settings.
_fi:,iFoods for flTing should be as &T as
possible. Frost on fiozen foods or moisture
on flesh foods can cause hot fZatto bubble
up and ox>r the sides of the pan.
_fi:,iUse litde fiat for effective shallow or deep
fht flTing. Filling tile pan too till of£_t can
cause spillox>rs when food is added.
_fi:,iIf a combination of oils or fiats will be used
in flTing, stir tog>ther before heating, or
as fats melt slowly.
_ Alwws heat fiat slowly, and watch as it heats.
_:_Use a deep t:at them/omemr whenever
possible to pievent ox>rheafing tZatbeyond
die smoking point.
_fi:,:Avoid scramhing die glass cookmp. The
cookmp can be scratched with items such
as sharp instruments, lings or otherjeweh>
and xivets on clothing.
_::Larg_ scratches or impacts to glass
doors or cooktops can lead to broken
or shattered gtass.
_{:_Do not operate the radiant sniP,_ce units if
the glass is broken. Spillovers or cleaning
solution m W penetram a broken cooktop
and cream a xisk of elecuical shock.
Contact a qualified mchnician immediately
should your glass cooktop become broken.
_{:_Nexer use the gtass cooktop surface as a
cutting board.
_i:,:Do not place or store items that can melt
or catch fire on the gtass cooktop, ex>n
when it is not being used.
_i:,:Be carefid when placing spoons or other
sfirdng utensils on gtass cooktop surface
when it is in rise. They m W become hot
and could cause bums.
_i:,:Clean die cooktop Mill caution. If a wet
sponge or clofll is used to Mpe spills oil a
hot surfitce unit, be caxeflfl to mold steam
bums. Some cleaners can produce
noxious flm/es if applied to a hot surtZace.
NOTE; YVerecommend that you mold
wiping any sniiCace unit axeas until they
have cooled and the indicator ligilt has
gone off'. Sugar spills are the exception to
this. Please see die CIoaning the glass
cooktop section.
_i:,:_llen the cooktop is cool, use only die
CE_ BRYTE ¢'_Ceramic Cooktop
Cleaner and tile CE_ BRYTE
Ceramic Cooktop Cleaning Pad to clean
the cooktop.
_]{:;To mold possible damage to the cooking
surface, do not apply cleaning cream to
the glass surface when it is hot.
_]{:;After cleaning, use a dUcloth or paper
towel to remove all cleaning cream
residue.
_:;Read and tbllow all instructions and
warning:s oil the cleaning cream labels.
ge.com
WARNING!
OVEN
Stand away from the range when opening the oven door. Hot air or steam which escapes can cause
bums to hands, face and/or eyes.
;fi:,iDo *lot heat unopened food containers.
Pressure could build/l I) and die container
could burst, causing all iI)jn]_].
_:;Kee I) tile oven x.ent tmobstructed.
;f; Kee I) the ox.en flee flom grease bnildup.
_f;Place the ox.en rack in tile desired position
while tile oven is cool. If racks must be
handled when hot, do not let pot holder
contact tile heating elements.
_i:,:_]len using cooking or roasting bags in
tile oven, follow tile manul_acturer's
directions.
;_i:,:Do not use the ox.en to dlT newspapers.
If ox.erheamd, they call catch on fire.
;_i:,:Do not use die ox.en for a smrag.e area.
Imms stored ill all ox.en call ignite.
_i:,:Do not leave paper products, cooking
umnsils or food ill tile ox.en when not
in use.
_{:_Do not use ahm/innm foil to lille oxen
bottoms, except as suggested in this
mannal. Improper installation of
almninun_ foil may result ill a risk of
electric shock or fire.
qT{:;Pulling out tile rack to tile stop-lock is a
comenience ill lifting hem T tbods. It is also
a precantion against bnrrls flom tonching
hot snrl_aces of the door or oxen walls.
SELF-CLEANINGOVEN
Donot use oven cleaners. No commercial oven cleaner or oven liner protective coating of any kind
should be used in or around any part of the oven. Residue from oven cleaners will damage the inside
of the oven when the self-clean cycle is used.
;f; Do not clean tile door gasket. Tile door
gasket is essential tbr a g_od seal. Care
should be taken not to rub, damag.e or
mox.e the gasket.
_fi:,:Before self-cleaning tile ox.en, remox.e
the racks, broiler pan, gdd and other
cookware.
_{:;Be sure to wipe/l I) excess spillage before
starting tile self-cleaning operation.
_f;K tile self-<leaning mode malflmcdons,
turn tile oven off and disconnect tile
power supply. Hm.e it serviced by a
qualified technician.
;fi:,iClean only parts listed ill this Owner's
Manual.
READANDFOLLOWTHISSAFETYINFORMATIONCAREFULLY.
SAVETHESEINSTRUCTIONS
5
Usingthesurfaceunits.
Throughout this manual, features and appearance may vary from your model.
LO HI
8
3 7
4s6
Be sure you turn tlTecontro!
knob to OFFwhen you finish
cooking.
How to Set
Push the knob in and turn in either sra/on evenaftertheunitisturnedoK
dh'e(tilm tl) [lie setting y(m want. glOW until Theunit IScooled toapproximately15OOZE
At both OFF and HI the control clicks into
posifiou. You may hear slight clicking som_ds
during coo]dng, indi(ating the (ontl'o] is (_4_ I
cool<to _ _dll glow when mlV radiam element
}' ,,2 7is mined (m./t will remain (m m_ti] the
sm'fiwe is cooled to iq)pro_dmlitely ISOOF. 4 5
Hotsuffaco indicator light will: The WARM setting on the right REARSt,IbfilCe
i_: comeonwhentheunitishottothetouch, unit keeps ah'eadvheated food wam] m]til
,'eadv to serve. Do not t,Se 1o heat cold food.
Dual Surface Un# Control Knob
Ther/ghtfrontsuffaceunithas2cook/ngs/_esto
selectfromsoyoucanmatchthesl2eoftheunitto SMALL (_ LARGE
•G
theeizeofthecookw reyou ueing.
To use the small (C_inch) smti,ce ,,,,it, mrn t // _ _ _ 8
the control knob to the SMALLsettings. 6\ 6]
To use the large (9-inch) smti,ce m]it, tm'n 4]
the control knob to the LRRGEsettings. _t0 2
ge.com
The following information will help you choose cookwara which will give good performance on glass cooktops.
About the radiant surface units...
Never cook direct y o17rne gross.
alwal s use cooKware.
Always place the pan f17the center of
the surface unit you are cookflTgon.
The radiant cooktop ligatures heating
units beneath a smooth glass surf h0e. _!_®
._GGlNG '_,
NOTE:A s//#htodorisnormalwhenanew __
cooktop/susedforthefkst t/kne.It ,scausedby
the heatbg of new partsand bsulatbg materials , ,
andwill disappearbashorttime.
The surfi_ce unit will cycle on and off to
maintain your selected control setting.
It is safe to place hot cookware on the
glass surii_ce even when the cooktop
is cool.
Even after the surti_ce units are turned
off, the glass cooktop retains enough
heat to continue cooking. To avoid
ore>cooking, I'elIlOVe p_llIS ][i'OIIl the
sure_ce milts when the tood is cooked.
Avoid plating anything on the stmfi_ce
unit until it has cooled completely.
Do not slide cookwara across the
cooktop because #can scratch the
glass--the glass is scratch-rasistant,
not scratch-proof.
;;Ji::Waterstabs(mbemldeposits)areremovable
usbgthecleanbgcreamorfurlstrengthwhite
wnegar
_Useofwindowcleanermayleavean
iridescentfilmonthecooktop.Thecleanbg
creamwillremovethisd/scoloretbn.
;;Ji::Don'tstoreheavyitemsabovethecooktop.
If theydropontothecoold:op,theycancause
damage.
_Donotusethesurfaceasacuttingboard.
Temperature Limiter
Every radiant stuth('e unit has a
temperature limited:
The temperature limiter protects the
glass cooktop fl'om getting too hot.
The temperature limiter may cycle
the units off fi)r a time if':
_;_ii_Thepan boils dry
_Thepan bottom/s not flat.
;;;:ii:Thepan is off center
_Thereisno pan on the unit
Selectingtypesofcookware.
The following information will help you choose cookware which will give good performance on glass cooktops.
iiF
Check pans for flat bottoms by
usflTga straight edge.
Stainless Steel:
recommended
Aluminum:
heavyweightrecommended
(;ood con(luctix]q:. Muminunl residues
sometimes appear as scratches on the
cooktop, but can be removed if cleaned
immediately: Because of its low melting
point, lightweight aluminum should not
be used.
CopperBottom:
recommended
Col)per may leave residues which ('_lll
appear as scratches. The residues can
be removed, as long as the cooktop is
cleaned immediately. Howevei; do not let
these pots boil (hT: Overheated metal can
bond to glass cooktops. All overheated
COl)per bottom pot will leave a residue
that will pemmnenfly stain the cooktop
if not removed immediately.
Glass-Ceramic:
usable,but not recommended
Pool" perfimnance. May scratch the
StlI];l('e,
Stoneware:
usable,but not recommended
Pool- perlimnance. May scratch the
Still;Ice.
Home Canning lips:
Be sure the canner is centered over the
SUlSfhce unit.
Make sure the canner is fiat on the
l)()ttom.
Use redpes and procedures from
reputable sources. These are available
fl'om manufi_cturei_ such as Ball '_and
KerF _and tile Department of Agiiculture
Extension Service.
To prevent burns fl'oln stealn or heat,
use caution when canning.
Pans with rounded, curved, ridged
or warped bottoms are not
recommended.
Porcelain-Enamel CoveredCastIron:
recommended
_&_long as the cookware is covered
colnpletely with porcelain enalnel, this
cookware is recolnlnended. Caution is
recommended fin" cast iron cookware
that is not colnpletely covered with
smooth porcelain enalnel, since it inav
scratch the glass ceralnic cooktop.
WokCooking
Werecommendthat youuseonlya flat-bottomed
wok. Theyareavailableat yourlocalretail store.
Do not rise i'otlnd-bottOlll wo_s. Y()tl
could be seriously burned if the wok
tipped ovei;
Use only flat-bottomed woks.
8
Righfl
ge.com
WFono I
Note: Flat-bottomed canners are
required for glass cooktops,
Observethe Following Points in Canning
Pots that extend beyond 1" of the
surfiice unit's circle are not
l'ecol/llllellded _k)r l/lost st/r_ilce
cooking. However, when camdng
with wate>bath or pressure carnie1;
large>diameter pots may be used.
This is because boiling water
temperatures (even under pressure)
are not harmful to the cooktop
- stu'fiwes surrotmding the snriitce units.
HOWEVER, DO NOT USE lARGE-
DL_dMETER ( ;ANNERS OR OTHER
I,_M{t;E-DIAMETER POTS FOR
FRYING OR BOIliNG FOODS
OTHER THAN _'X%_,TER.Most syrup or
sauce mixtures--and all types of
fl'ying--cook at teinperatures much
higher than boiling watel: Such
temperatures could eventually harm
the glass cooktop sttrfilces.
] Be sure the cromer fits over the
center of the sm'ihce unit. If your
cooktop or its location does not
allow the cam_er to be centered
on the surthce unit, use smalle>
diameter pots for good cmming
results.
[] Remember that c'mniw,_ is, "/
process that ,generates l'u'oe,
all/Otlnts of stealll. To avoid brims
fl'om steam or heat, be carefld
when canning.
NOTE: If your house has low voltage,
canning may take longer than expected,
even though directions have been
carefufly followed The process time will
be shortened by:
(1) using a pressure canner and
(2) starting with HOTtap water for fastest
heating of large quantities of water
CAO_O_
_Safe canning requires that harmful
microorganisms are destroyed and that
thejars are sealed completely. When
canning foods in a water-bath canner,
a gentle but steady boil mustbe
maintained for the required time. When
canning foods in a pressure canner, the
pressure mustbe maintained for the
required time.
_:After you have adjusted the controls,
it is very important to make sure the
prescribed boil or pressure levels are
maintained for the required time.
[] Flat-bottomed carolers must be
used. Do llO[ ilse Callners xdth
flanged or tippled bottoms (oiten
found ill enalnelware) because
they don't make enough contact
with the surthce units and take a
long time to boil water.
_; Since you mustmake sure to process
the canningjars for the prescribed
time, with no interruption in processing
time,do not can on any cooktop
surface unit if your canner isnot flat.
[] When cmming, use recipes and
procedures from reputable
sources. P,eliable recipes and
procedures are a_;dlable fl'om the
I/lantl_;lctt/rer of VOtlr callner;
manufhcturers of glassjai_ fi)r
camdng, such as Ball' and Kerr'
brand; and the United States
Department of Agriculture
Extension Se_Mce.
9
Usingtheovencontrols.
Throughout this manual, features and appearance may vary from your model.
I
OVEN CLEANING - • TOUCH "SELF CLEAN"PAD. •TOUCH "START" PAD.
Features and appearance may var_
I
OvenControl,Clockand TimerFeaturesandSettings
oBAKE Pad
Press tiffs pad to select the bake fimcfion.
Dbplay
Shows the time of day, oxen temperature,
whether the oxen is in the bake, broil or
self=cleaning mode and the times set for
the tilller or atltOi//atic o'_en operations.
If "F-anda numberorletter"flashin thedisplayandthe
ovencontrolsl_?na/s,thisindicatesa functionerrorcode.
Ifyourovenwassetfora tknedovenoperationand
a poweroutageoccurred,theclockandaftprogrammed
functionsmustbereset
Thetimeofdaywill flashinthedisplaywhentherehas
beena poweroutage.
OOOKING TIME Pad
Press this pad and then press file ntllllber
pads to set the ail/otlnt of time }ou want
vat:u" food to cook. The oxen will shut off
when the cooking time has run out. 'qW
@DELAYSTARTPad 0
Use along with COOKINGTIMEor SELF
CLEANLO/STD[)ads to setthe oxen to start
and stop automatically at a time xou set.
CLEAR/OFFPad
Press this pad to cancel ALL oxen
operations except the clock and time_:
oNumber Pads
Use to set }111_tiln(tion re(ltliYin_, nt/I/lbeI's
such as the time (ff day on the clock, the
time_; the oven temperature, the start time
and length of operation fin" timed baking
and sell=cleaning.
OSTARTPad
Must be pressed to start an) cooking or
cleaning fimction.
OELFCLEANLO/STD Pad
Press this pad to select the self=cleaning
flmction. See the Usingtheself-cleaning
oven section.
OVENLIGHTPad
Press this pad to turn the o_en light on
oI" el[IV.
BROIL H!/LOPad
Press this pad to select the broil function.
OCLOCKPad
Press this pad before setting the clock.
OKITCHEN TIMER ON/OFFPad
Press this pad to select the timer feature.
10
Usingtheoven. gecem
Toavoid possible bums, place the racks in the desired position before you turn the oven on.
ii ]'[]
ii ,,[]
Theoven has 7rack positions.
Before you begin...
The racks have stops, so that when placed
correctly on the supports (A through G),
they will stop before coming completely
out, and will not tilt.
_,_]_en pladng and removing cookware,
pull the rack out tmtil it stops.
Toremove a rack, pull it toward you, tilt
the ti'ont end up and pull it out.
Toreplace, place the end _ff the rack
(stop-locks) on the support, tilt up the
ti'ont and push the rack in.
CAUTION:Whenyouareusingthe
rackin the/owestposition (,4),youwH/needto
usecautionwhen puffing the rackout We
recommendthat youpuff the rackout several
inchesand then,using two pot holders,puff the
rackout by ho/dlbgthe sidesof it Therackis low
andyou couldbe burnedif youplace yourhand in
the middleof therackandpu// a// the way out Be
verycarefulnot to burnyour handon the door
when using therack lb the/owestposition (A).
........::::::::::::..........21,
-. I
How to Set the Oven for Baking or Roasting
[] Press the BAKE pad.
] Press the nulnber pads to set the
desired temperature.
[] Press the START pad.
[] Check fi)od fi)r doneness at
minimum time on recipe. Cook
longer if necessar)'.
[] Press the CLEAR/OFFpad when
cooking, is comi)lete.
TypeofFood Rack Position
Frozenpies(oncookiesheet) CorD
Angelfoodcake A
Bundtorpoundcakes BorC
Biscuits,muffins,brownies, CorD
cookies,cupcakes,
layercakes,pies
Casseroles CorD
Turkey A
NOTE:A coolingfanmayautomaticallyturnon
andoff tocoolinternalparts.Thisisnormal,and
thefanmaycontinuetorunevenaftertheoven
lb turnedoff.
If baking four cake layers at the same time,
place two lave_ on m('k B and two lave_
on rack D. Stagger pans on the rock so
one is not directly above the othe_:
Center baking pans in the oven.
Preheating and Pan Placement
Preheat the oven if the recipe calls for it.
Preheating is necessary tot good _esults
when baking cakes, cookies, past_ T and
breads.
Topreheat,set theovenat the correcttemperature.
Thecontrol wi// beepwhen the ovenis preheated
and the &splay wi// show yourset temperature.
Thiswi// take approximately6 to 8minutes.
Baking results will be better if baking
pans are centered in the oven as much
as possible. If baking with more than one
pan, place the pans so each has at least
1 to 1½" of air space around it.
Aluminum Foil
You can use aluminum fi)il to line the
broiler pan and broiler grid. Howex eL
)ou must mold the foil tighd) to the grid
and cut slits in it just like the grid.
_ithout the slits, the foil will prevent fi_t
Cutslitsin thefoiljust likethegrid. and meat juices from draining into the
broiler pan. The juices could become
hot enough to catch on fire. If ?ou
do not cut the slits ",ou are essentiall?
ti'vin,, not broilin ,
Donot usea/urn/bumfoi/ on thebottom of
the oven.
Ne\vr entirely cover a rock with
ahmfinum fifil. This will disturb the heat
circulation and result in poor baldng.
A smaller sheet of foil may be used to
catch a spillover by placing it on a lower
rock several inches below the food. II
Usingtheoven.
Ifyourrangeisconnectedto
208volts,raresteaksmaybe
broiledbypreheat/bgthebroiler
andpositioningtheovenrack
onepositionhigher
How to Set the Oven for Broiling
Leavethedooropento thebroil stopposition.
Thedoorstaysopenbyitself, yet theproper
temperatureis maintainedin theoven.
NOTE:Foodcanbe broiledwith thedoor
closed,butit maynotbrownas wellbecause
theovenheatingelementwill cycleonandof_
[] Place the meat or fish on the broiler
grid in the broiler pan.
[] Follow suogested rack )osifions in
the Broiling Guido.
[] Press the BROILHI/LO pad once
fiw HI Broil
To change to LO Broil, press the
BROILHI/LO pad again.
Use LOBroil to cook foods such as
poultry or thick cuts of meat thoroughly
without ove_q)rowning them.
[] Press the STARTpad.
[] _._en broiling is finished, press the
CLEAR/OFFpad.
The size, weight, thickness,
starting temperatm'e,
and yore" preference
of doneness will afti_ct
broiling times. This guide
is based on meats at
refi'igera tot teml)eratm'e.
+The _SL l)@(nhne_t o/
potnz/a_; but yo_z should h_ow thdt
__M,du,¢i{ m rod) 1401" meres
some /ood /_oism i_q owzz_L_ms
m(0 _urz i'ue."(Sou_zw _(" l"(x)d
B_x)h. }_mr 1,2i/(he_ (;ui(h'. USI)A
t?*-u..]m_e I9$5. )
The oven has 7shelf positions.
Broiling Guide
Food
GroundBeef
Well Done
Beef Steaks
Rarer
Medium
Well Done
Rarer
Medkuo
Well Done
Chicken
LobsterTails
Fish Fillets
Hmn Slices
(precooked)
Pork Chops
Well Done
LambChops
Medkuo
Weii Done
Medium
Well Done
SaloronSteaks
Quantityand/
or Thickness
11b.(4patties)
1/2to3/4" tbick
1" thick
1to 1Vzlbs.
1V/'thick
2 to2VzIbs.
1whole cut Lip
2 to2VzIbs.,
split lengthwise
2 Breasts
2_4
10to 12oz.eacb
1/4to 1/2" tbick
1/2" thick
2 (1/2"tldck)
2 (1"tbick)about1 lb.
2 (1"tbick)about 10
to 12oz.
I
2 (1//" tlfick)about 1lb.
2 (1"tbick)
4 (1"tbick)about1 lb.
Shelf
Position
F
E
E
D
D
D
C
E
E
E
E
D
D
FirstSide
Time(min.)
9
11
7
9
11
14
18
22
25
25
18 20
8
10
14
17
10
12
SecondSide
Time(rain.)
6
10
5
67
89
11
1416
20
10
1015
Donot
turn
over.
10
15
78
910
12
12 14
78
10
Comlnents
Space evenly. Up to 8
patties take about tbc
same time.
Steakslessthan1"
thickcookthrough
beforebrowning.Pan
fryingis recommendec
Slashfat.
Broilskimsidedown
first.
Cutthroughbackof
shell. Spreadopen.
Brushwith melted
butterbeforebroiling
andafter Mf of
broilingtime.
Handleandturnvery
carefully.Brushwith
lemonbutterbefore
andduringcooking,
if desired.
Increasetime 5 to 10
minutespersidefor
1Y/' tldck orhome-
curedham.
Slashfat.
Slashfat.
Grease pan. Brush
steaks with melted
butter.
72
Usingtheclock, timerand controllockout, gecom
Makesuretheclockissettothe
correcttimeofda,¢
ToSet the Clock
The clock must be set to tile correct time
of dm tot tile autonmfic oxen tinting
flmctions to work properl). Tile time of
da) cannot be changed during a timed
baking or self=cleaning cycle,
[] Press tile CLOCKpad.
[] Press tile number pads.
[] Press the START pad.
Thetimer is a minute t#ner onl_
Thetimer does not control oven
operations. TtTemaximum setting on
the timer is 9hours and 59mhTutes.
ToSet the Timer
[]
[]
Press tile KITCHENTIMERON/OFF
pad.
Press tile number pads tmtil tile
aiilot/nt of tiI/le _()tl want shows ill
tile display. For example, to set 2
houI_ and 45 nlinutes, press 2, 4
and 5in that ordex:
If )ou make a mistake press tile
KITCHENTIMERON/OFFpad and
begin again.
[] Press tile STARTpad.
After pressing the STARTpad, SETdisappears,
this tells you the time is counting down,although
the displaydoesnot changeuntil oneminute has
passed Secondswill not be shown in the display
until the lastminute iscounting down.
[] _'_hen tile timer reaches :00, tile
control will beep 3 times followed
by one beep every 6 seconds tmfil
tile KITCHEN TIMER ON/OFF pad
is pressed.
The&second tonecanbe cance/edby following
the stepsin the Special featuresof youroven
control section under Tonesat the Endofa
TimedCycle.
ToReset the Timer
If tile display is still showing tile time
remaining, you may change it by pressing
tile KITCHEN TIMERON/OFFpad, then
press tile number pads tmtil tile time w)u
want appea_ in tile display.
If tile remaining time is not in tile display
(dock, delay start or cooking time are in
tile display), recall tile remaining time by
pressing tile KITCHEN TIMER ON/OFF pad
and then pressing tile ntli/lbei" pads to
enter tile new tillle v()[i w}lnt,
ToCancel the Timer
Press tile KITCHEN TIMER ON/OFF pad
twice.
Control Lockout
Yourcontrolwill allowyoutolockoutthepress
padssotheycannotbeactivatedwhenpressed
To h)ck/tmh)ck tile controls:
[] Press the 9and 0pads at tile same
time tot 3 seconds, tmtil tile display
shows LOCON.
[] To tmlock tile control, press tile
9and 0pads at tile same time fi)r
3 seconds, lmfil tile displa) shows
LOCOFF.
When this teatm'e is on and tile press
pads are pressed, tile control will beep
and tile display will show LOCON.
::Ji::Thecontrollockoutmodeaffectsall press
pads.Nopresspadswi//workwhenthis
featureisactivated
!i> Theadjustment will be retained in memory
after apower failure.
13
Usingthe timed bakingand mastingfeatures(onsomemodels).
NOTE."Foods that spoil easily-such as milk, eggs, fish, stufings, poultry and pork-should not be allowed to sit for
more than 1hour before or after cooking. Room temperature promotes the growth of harmful bacteria. Be sure that
the oven light is off because heat from the bulb will speed harmful bacteria growth.
Z_
@G@GG
How to Set an Immediate Start and Automatic Stop
Theoven will turn on iknmediatelyandcook for a
selectedlengthof tlYne.At the end of thecooking
tkne the ovenwill turn off automatina//y
[] Press the BAKEpad.
[] Using the number pads, enter the
desired temi)eramre.
[] Press the COOKINGTIMEpad.
NOTE:If yourreciperequirespreheatingyou
mayneedtoaddadditionalt/metothelengthof
thecookingtime.
[] Using the number pads, enter the
desired baking dine. The oxen
temperatm'e and tile cooking time
that you entered will be displa) ed.
The display will show the changing
temperature (starting at 100°F) and the
cooking time. The display starts changing
once the temperature reaches 100°F.
The oven will c_mtinue to cook fin" the
programmed amount of time, then shut
off automatically, tmless the Cook and
Hold feature was set. See the Specls/
featuresof yourovencontrolsection.
Press the CLEAR/OFF pad to clear the
displa);
[] Press the STARTpad.
ii
iQ@OG@
How to Set a Delayed Start and Automatic Stop
Youcanset the ovencontrol todelay-start the
oven,cook for aspecific lengthof time andthen
turn off automatically
Make sure the clock shows the correct
tii/le of day.
If you would like to check the times w)u
have set, press the DELAYSTARTpad to
check the start time you have set or press
the COOKINGTIMEpad to check the
length _ff cooking time wm have set.
[] Press the BAKEpad.
[] Using the number pads, enter the
desired temperature.
[] Press the COOKINGTIMEpad.
NOTE:If yourreciperequkespreheating,you
mayneedtoaddadditionaltimetothelengthof
thecookingtime.
[] Using the number pads, enter the
desired baking time.
When the oven turns on at the time of
da_ you haxe set, the display will show the
changing, ,teinl)erature (st;Irting, at IO0"F)
and the cooking iUne. The displa) starts
changing once the temperature reaches
10t)°K
The oven will continue to cook ,fin"the
programmed amotmt of time, then shut
off automaticall 5 tmless the Cook and
Hold teatm'e was set. See the Special
featuresof yourovencontrolsection.
[] Press the DELAYSTARTpad.
[] Using tile number pads, enter the
time of de)you want the oxen to
[liEn on lind S[;lI'[ cooking,
Press the CLEAR/OFFpad to clear the
display.
[] Press the STARTpad.
NOTE:Anattentiontonewill soundifyouare
usingtl_nedbakinganddonotpresstheSTART
padafterenteringthebakingtemperature.
/4
Adjust the oven thermostat--Do it yourself! ge.com
Youmay find that your new oven cooks differently than the one #replaced. Use your new oven for a few
weeks to become more familiar with it. If you still think your new oven is too hot or too cold, you can adjust
the thermostat yourself.
Do not use thermometers, such as those found in grocery stores, to check the temperature setting of your oven.
These thermometers may vary 20_40 degrees.
NOTE,"This adjustment will only affect baking and roasting temperatures; #will not affect the broiling or the self-
cleaning temperatures. The adjustment will be retained in memory after a power failure.
(
00000
000 ®
ToAdjust the Thermostat
[] Press the BAKE and BROILHI/LO
})ads at the same time fin 3 seconds
until the display sho_v_ SE
[] Press the BAKEpad. A rwo<ligit
ntlIllbeI" shows in the display.
Press BAKEagain to alternate
between increasing and decreasing
the oven tempe_mH'e.
[] The oxen temperature can be
a(!justed up to (+) 35°F hotter or (-)
35°F coole_; Press the number pads
the same way you read them. For
example, to change the oven
temperature 15°K press Iand 5.
[] _q_en you haxe made the
a(!justment, press the STARTpad
to go back to the time of day display,
[Jse _'OtlI" oven as Veil would
nOlill}lllv;
Thetype ofmargarine will affect bakingpefformance!
Most recipes for baking have been developed using high fat products such as butter or margarine (80% fat). If you
decrease the fat, the recipe may not give the same results as with a higher fat product.
Recipe failure can result if cakes, pies, pastries, cookies or candies are made with Iow-fat spreads. Thelower the fat
content of a spread product, the more noticeable these differences become.
Federal standards require l)ro(hl('ts labeled "margarine" to contain at least 80% tilt by weight. I,(mqiK spreads, on the
other hand, contain less tilt and mo_e water The high moistme content of these spreads aftects the texture and flavor
of baked goods. For best results with wmr old tilvofite redpes, use mmgafine, butter or stick spreads containing at least
70% vegetable oil.
/5
Usingtheself-cleaning oven.
Wipe up heavy soil onflTeoven
bottom.
Before a Clean Cycle
_\'e recommend venting your kitchen
with an open window or using a
ventilation tan or hood (hmng the fi_st
sell=clean cycle.
Remove tile rac!cs, broiler pan, broiler
grid, all cookware and any ahmfinum fi_il
ti'om tile o%eil,
Tile oxen facies can be selfk'leaned,
but they will darken, lose their luster
and become hard to slide.
Soil on tile fl'ont fl'ame of tile range and
outside the gasket on the door will need
to be cleaned by hand. Clean these areas
with hot water; soap-tilled steel wool pads
or cleansers such as Soft Scrub _. Rinse
well with clean water and dry:
Do not clean tile gasket. Tile fiberglass
material ot tile oven door gasket cannot
withstand abrasion. It is essential fin" the
gasket to remain intact. If w)u notice it
becoming worn or fl'ayed, replace it.
_._]l)e up any hea\ T spillove_ on tile oven
bottom.
Make sure tile oven light bulb cover is in
place and tile oven light is off:
IMPORTANT'. Tile health of some birds is
extremely sensitive to the fim/es given off
during tile sell=cleaning cycle of any
range. Move birds to another well-
ventilated room.
(D (D (X)(3) (X)
(g) OCD(D
START)
How to Set the Oven for Cleaning
[] Press tile SELFCLEANLO/STD pad
once tk)i" a 4-hotlI" clean tiine or
twice tot a B-hour clean time.
A 3-hour selt_lean time is
i'ecoi/lillended tOf rise when
cleaning small, contained spills. A
self=clean time of 4 hom_ or hmger,
is recommended f()r a dirtier oxen.
[] If a time other than 4 ho/u_ or
3 ho/u5 is needed, use the number
pads and enter the desired clean
tim e.
You can change tile clean time to any
time between 5hom_ and 5 hom_,
depending on how dir b your oxen is.
[] Press tile START pad.
Tile door locks automatically. Tile display
will show the clean time remaining. It will
not be possible to open tile oven door
tmfil tile mmperature drops below tile
lock temperature and tile LOCKEDlight
goes off.
X,_]/en tile LOCKEDlight goes off', you will
be able to open tile doox:
::Ji::The word LOCKED will flash and the
oven control will signal if you set the
clean cycle and flnget to close tile oven
(loo_:
::Ji::To stop a clean cycle, press tile
CLEAR/OFFpad.X,_]/entile LOCKED
light goesoff indicating tile oven has
cooled below tile locking temperature,
you will be able to open tile (loo_:
/6
ge.com
The oven door must be closed and all controls must be set correctly for the cycle to work properly.
!
(3)(3)(3)(3)(i)
G) (Z)(Z)
(D (Z)CDO G)
00(Z)@ZD
STARjT
How to Delay the Start of Cleaning
[] Press the SELFCLEANLO/STD pad
once for a 4-ho/ir clean tiil/e or
twice ti)r a 3-hem clean time.
A 3-hem seltXclean time is
i'ecoiilillended [Oi" rise when
cleaning small, contained spills. A
seltklean time of 4 hems or longer
is recommended t0r a dirtier o',en.
[] If a time other than 4 hom_ or
3 hotu_ is needed, use tile number
pads and enter the desired clean
tim e.
Yim can change tile clean time to any
rune" between .3 ho/u_ and 5 ho/u_,
dei)ending, on how dirt? your o;en is.
[] Press tile DELAYSTART pad.
[] Using tile number pads, enter tile
time of day _ou want tile clean c_cle
to start.
[] Press tile STARTpad.
Tile door locks automatically. Tile display
will show the start time. It will not be
possible to open tile oven door tmtil
tile temperature drops below tile lock
temperature and tile LOCKEDlight
goes off.
When the LOCKED light goes ell; you will
be able open tile (loo_:
After a Clean Cycle
You may notice some white ash in tile
oxen. X_il)e it up with a damp ch)th atter
tile oxen cools.
If whitespots remain,removethemwitha
soap-filledsteelwoolpadandrinsethoroughly
witha vinegarandwaterml?(ture.
These deposits are usuallx a salt residue
that cannot be remoxed b_ tile clean
cxcle.
If tile oven is not clean after one clean
c)cle, repeat the cxcle.
!i?:Yi)u cannot set tile o_en fiw cooking
until tile oxen is cool enough for tile
door to unlock.
::Ji::X,_l/ile tile oven is self:cleaning, you
can press the CLOCKpad to display
tile time of day. To return to tile
clean countdown, press tile SELF
CLEANLO/STD pad.
?_:If tile racks become hard to slide, apply
a small amount of cooking oil to a
paper towel and wipe tile edges of tile
oven racks with tile paper towel.
17
Special featuresofyourovencontrol.
Yournew touch pad control has additional features that you may choose to use. The following are the features and
how you may activate them.
The special feature modes can only be activated while the display is showing the time of day. They remain in the
control's memory until the steps are repeated.
When the display shows your choice, press the $TARTpad. Thespecial features will remain in memory after a
power failure.
iiii!((i (ilil))i il)
12-Hour Shutdown
Withthisfeature,shouldyouforgetandleavethe
ovenon,thecontro/wi//automatlca//yturnoffthe
ovenafter 12hoursduringbakingfunctionsor
after3 hoursduringa broilfunction.
If xou wish to turn OFFthis teature, follow
tile steps below.
[] Press tile BAKE and BROILHI/LO
pads at tile same time fin" 3 seconds
until tile display shows SE
[] Press tile DELAYSTART pad until n0
shdn (no shut-off) appeals in tile
display.
[] Press the START pad to activate the
no shut-off and leaxe the control set
in this special teatm'es mode,
÷÷
@
Fahrenheit or Celsius Temperature Selection
Youroven contro/isset to use theFahrenheit
temperatureselectionsbut youmay changethis
to use the Ce/siusselections.
[] Press tile BAKE and BROILHI/LO
pads at tile same time fi)r 3 seconds
tmtil tile display shows SF
[]
[]
Press tile COOKING TIME and BROIL
HI/LO pads at tile same time. Tile
displa) will show F (Fahrenheit).
Press tile COOKING TIME and BROIL
HI/LO pads again at tile same time.
Tile displa)will show C (Celsius),
[] Press tile STARTpad.
BAKE Tonesat the End of a TimedCycle
At theendofa timedcyc/e,3 shortbeepswill
soundfo//owedbyonebeepevery6 secondsuntil
theCLEAR/OFFpadispressedThiscontinua/
&secondbeepmaybecanceled
To cancel tile 6-second beep:
[] Press tile BAKE and BROILHI/LO
pads at tile same time fin" 3 seconds
tmtil tile display shm_s SF.
[]
[]
Press tile KITCHENTIMERON/OFF
pad. Tile displa)shows CONBEEP
(continuous beep). Press tile
KITCHENTIMERON/OFFpad again.
Tile display shows BEEP.(This
cancels tile one beep every 6
seconds.)
Press tile STARTpad.
/8
ge.com
¢
®
12-Hour, 24-Hour or Clock Blackout
Yourcontrolissettousea 12-hourclo&
If you would prefer to have a 24-hour
military time clock or black out the clock
display, fi_llow the steps below.
[] Press the BAKE and BROIL HI/LO
pads at the same time fo_ 3 seconds
tmtil the display sho_vs SE
[] Press the CLOCK pad once. The
display will show 12hr. If this is
the choice you want, press the
STARTpad.
Press the CLOCKpad again to change to
the 24 hour military time clock. The
display will show 24hr. If this is the choice
vou want, press the START pad.
Press the CLOCKpad again to black out
the clock displa> The display will show
OFF.If this is the choice you want, press
the STARTpad.
NOTE"Ifthe dock isin the Mack-outmode you
wi//notbeabletousetheDelayStartfunction.
Cook and Hold
Yourcontrol hasa cookand hold feature that []
keepscookedfoodswarm for up to 3hoursafter
tinnedBak/)_gor Roast/))gisf/))ished
NOTE" Thisfeaturecanonly beprogrammedto
work with tined Bakl)_gor Roasting.(Seethe
Usingthe fined baklbgor roastlWfeatures
section.)After timed Bak/)_gor Roastl)_ghas
automaticallystoped, theprogrammedcookand []
hold w///automaticallystart.
To actix Ke this teatm'e fi)r use after
Timed Baking or Roasting, folh)w the
steps below.
[] Press the BAKE and BROIL HI/LO
pads at the same time flw 3 seconds
tmtil the display shows SE
Press the COOKING TIME pad.
The display will show Hid OFF.
Press the COOKING TIME pad again
to activate the ti_atm'e. The display
will show Hid ON.
Press the START pad to activate
the cook and hold teatm'e and
leave the control set in this special
_%'att Ires i/lode.
19
UsingtheSabbathFeature(onsomemodels).
(Designed for use on the Jewish Sabbath and Holidays.)
TheSabbathfeature canbe usedfor baking/roastingonlg It cannot be usedfor broiling,self-cleaningor DelayStart cooking.
NOTE:TheovenlightcomesonautomaticallywhenthedoorisopenedandgoesoffwhenflTedoorisclosed.Thebulbmayberemoved.SeetheOven
LightReplacementsection.Onmodelswithalightswitchonthecontrolpanel,theovenlightmaybeturnedonandlefton.
C .,,,
IGGGGG
When the display shows Dthe
oven is set in Sabbath. When the
display shows D C the oven is
bakflTg/roasting.
How to Set for Regular Baking/Roasting
Make sure theclock shows the correct time of da/
I_q Press mid hold both th( BAKE and BROIL
I.'1 HI/LO pads, at the same time, mldl the
distil <, sho\vs SE
NOTE:I/bake or broil alltlears in tit('
distil m, the BAKEand BROIL HI/LO tlads
were LID[ presse(t at tit(' SalIle tillle. Press
tile CLEAR/OFFllad and begin ak_fin.
] Ta l) the DELAYSTART pad until SAb
bAtHalll)ears in the display.
] Press the START tlad and D will al)l)ear
in the distlla _
[] t)'ess tlte BAKE tlad. No signal will be
_t'_ elL,
] Llsing dte nmnt)er t)ads, enwr the d(sired
temllemture 1)et\*Teelt 170°F and 551)°E
No signal or temperature will be given.
] Press the START pad.
]\t+ter a ran(ton/delay period ot
tt p ox'm'a(1) )0 s((onds to 1 mhmte,
D C will appear in tile display
indicadng that tile oven is baking/rlmsdng.
IfD C doesn't aptlem: in the dist)la}, start
ag_dn at Step 4.
"Ib a(!just tile o\en temllerature, tlress the
BAKft)ad, enter tile new temtlerature using
the nmnber pads and press tile STARTpad.
NOTE:TheCLEAR/OFFand COOKINGTIMEpads
are acdve (hwing tile Sabbath t_'ature.
BAKE
iGGGOG
When the display shows Dthe
oven is set fl7Sabbath. When the
display shows D C the oven is
bakflTg/roasfing.
How to Set for Timed Baking/Roasting -Immediate Start and Automatic Stop
Make surethe clockshows thecorrect time of da/
] Press and hoM both the BAKE mid BROIL
HI/tO llads, atthe same time, mldl the
dist)lay S] _()_r_ SE
NOTE: If bake ot" t)roil al)pem:s in tile
(lisl)la _, the BAKEand BROIL HI/LOt)ads
were trot t)resse(I at the s_l//(' tiltte. Press
the CLEAR/OFFpad and begill again.
[] Tail the DELAYSTART pad mttil SAb bAtH
appears in the disl)lay.
] Press the START pad aH(t D will atltlear in
the disl)lay.
[] Press the COOKING TIME tlad.
[]
[]
Press the It/llIll)er t)a(ls to set the desired
length of looking time lletweelt
1 mimne mid 9 hours mid 99 mimltes.
The cooking thne that you entered will
be displa}_'d.
Press the START tlad.
] P!'ess the BAKEtlad. No signal will be
] Llsing the munber pads, enter dw
desired ten/l)eratm:e. No sigl/_d or
temperature will l)e g,rixell.
] Press the START pad.
[_ At+LeTa randon/delay t)eriod of
atltlroximatel" _30 se(on(Is to 1 mintne,
D C will allllear in the distil m indicating
that tile oven is baking/r(msdng. If D C
doesn't appear in the diN)la b start
a_fin at Step 7.
To a(!iust tile o\en temt)emture, press tile
BAKEt)ad, enter tile new temt)emture using
the mmlber t)ads and press the STARTpad.
When cooking is tinished, the display will
cl/ange/i'om D C to D att(t 0:00\*,rill appear
indicating that the oven has turned
OFFbut is still set in Sabl)ath. Remove
the cooked/oDd.
BAKE
2O
How to Exit the Sabbath Feature
[]
[]
[]
[]
Press the CLEAR/OFFtlad.
If the oven is cooking, wait for a r;tlldom
delay period of at)t)roxin/ately 30
secollds to 1 l//ilt/lte, IIIttil olllv D
is in the (tistlla" _
Press and hold both dte BAKE and BROIL
HI/LO tlads, at the same time, mttil the
dist)lay shows SE
"[;tt) dte DELAYSTART tlad until 12shdn
or no shdn appears in the display.
12shdn indicates that the o_x'n will
automatic_fllv turn off alter 12 horn's, no shdn
indicates that the o\en will not autonmdeallv
t/lrl/oll_
] Press the START tlad.
NOTE:I/a l)ower outage occurred while
tile o'+etl was ill Saltl)ath, the o_'n will
a/ltOlttatie_dlv tllrll off attd st_w off e\ el/
whetl the power rettlrtts. The ovetl
control lIl[ISt be reset.

Other manuals for JD900

1

This manual suits for next models

1

Other GE Range manuals

GE JS760 User manual

GE

GE JS760 User manual

GE 164D3333P184 User manual

GE

GE 164D3333P184 User manual

GE JDP36 User manual

GE

GE JDP36 User manual

GE JGBS60REFSS Manual

GE

GE JGBS60REFSS Manual

GE Profile PB975SMSS Manual

GE

GE Profile PB975SMSS Manual

GE Profile PGS908 User manual

GE

GE Profile PGS908 User manual

GE JBP28DR Manual

GE

GE JBP28DR Manual

GE PHS930 User manual

GE

GE PHS930 User manual

GE Profile PGS908 User manual

GE

GE Profile PGS908 User manual

GE JGBS14PCFWW Manual

GE

GE JGBS14PCFWW Manual

GE Profile JBP49 Manual

GE

GE Profile JBP49 Manual

GE Profile JGS968 SERIES User manual

GE

GE Profile JGS968 SERIES User manual

GE JCB530 User manual

GE

GE JCB530 User manual

GE JSP46SNSS Manual

GE

GE JSP46SNSS Manual

GE Profile PHS925STSS User manual

GE

GE Profile PHS925STSS User manual

GE PS920 User manual

GE

GE PS920 User manual

GE JB870SRSS Manual

GE

GE JB870SRSS Manual

GE JGBS10 User manual

GE

GE JGBS10 User manual

GE JGBS20WEHWW Manual

GE

GE JGBS20WEHWW Manual

GE JBP84BKBB Manual

GE

GE JBP84BKBB Manual

GE JBS02 User manual

GE

GE JBS02 User manual

GE P2B918DEMWW - 30" Dual Range Manual

GE

GE P2B918DEMWW - 30" Dual Range Manual

GE RAS240 User manual

GE

GE RAS240 User manual

GE 27" DROP-IN RANGE User manual

GE

GE 27" DROP-IN RANGE User manual

Popular Range manuals by other brands

Kenmore 790.7040 Use & care guide

Kenmore

Kenmore 790.7040 Use & care guide

Vulcan-Hart GHX45 Specifications

Vulcan-Hart

Vulcan-Hart GHX45 Specifications

Bosch HES5062U-01 installation manual

Bosch

Bosch HES5062U-01 installation manual

Samsung FCQ321HTUW Service manual

Samsung

Samsung FCQ321HTUW Service manual

Fulgor Milano SOFIA Use & care manual

Fulgor Milano

Fulgor Milano SOFIA Use & care manual

Kenmore 790.9010 Series Use & care guide

Kenmore

Kenmore 790.9010 Series Use & care guide

Diamond G65/2F4T manual

Diamond

Diamond G65/2F4T manual

Samsung NX58K9500WG user manual

Samsung

Samsung NX58K9500WG user manual

Electrolux EW30GF65G - 30'' Gas Range Specifications

Electrolux

Electrolux EW30GF65G - 30'' Gas Range Specifications

Whirlpool RF376PXD Use and care guide

Whirlpool

Whirlpool RF376PXD Use and care guide

Avanti G2002CW instruction manual

Avanti

Avanti G2002CW instruction manual

Dacor HIPR30S installation instructions

Dacor

Dacor HIPR30S installation instructions

Capital CGMR366 Specifications

Capital

Capital CGMR366 Specifications

Samsung FE-R500WW user manual

Samsung

Samsung FE-R500WW user manual

Whirlpool GGE388LXB Use & care guide

Whirlpool

Whirlpool GGE388LXB Use & care guide

Kenmore C970-68802 Series Use & care guide

Kenmore

Kenmore C970-68802 Series Use & care guide

LG LSC5622WW Owner's manual & cooking guide

LG

LG LSC5622WW Owner's manual & cooking guide

Thermador PRL304EG Service manual

Thermador

Thermador PRL304EG Service manual

manuals.online logo
manuals.online logoBrands
  • About & Mission
  • Contact us
  • Privacy Policy
  • Terms and Conditions

Copyright 2025 Manuals.Online. All Rights Reserved.