manuals.online logo
Brands
  1. Home
  2. •
  3. Brands
  4. •
  5. GE
  6. •
  7. Range
  8. •
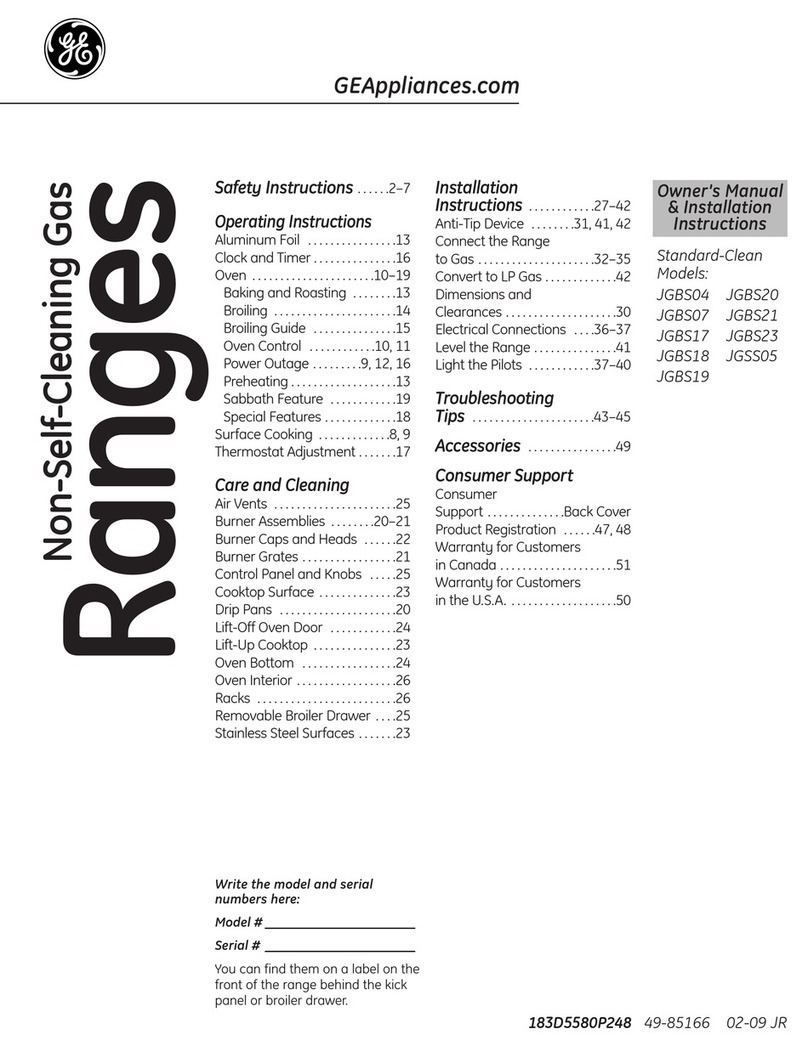
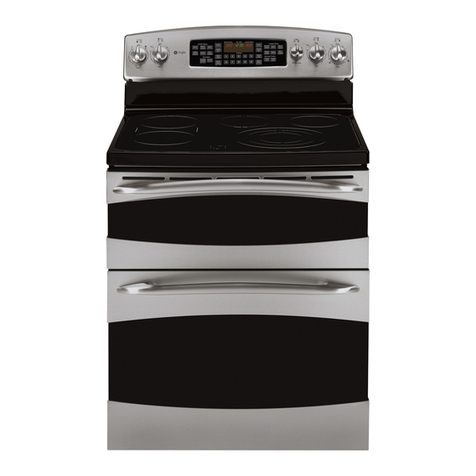
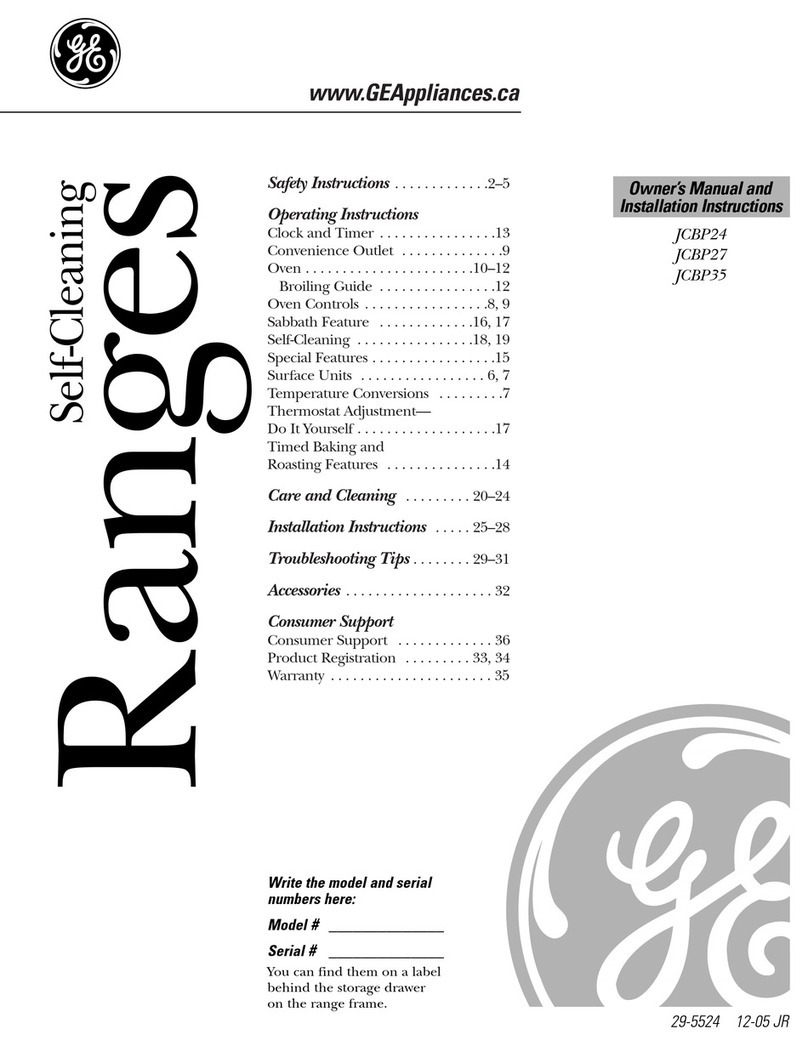
  9. GE JGBP35 Operating instructions

GE JGBP35 Operating instructions

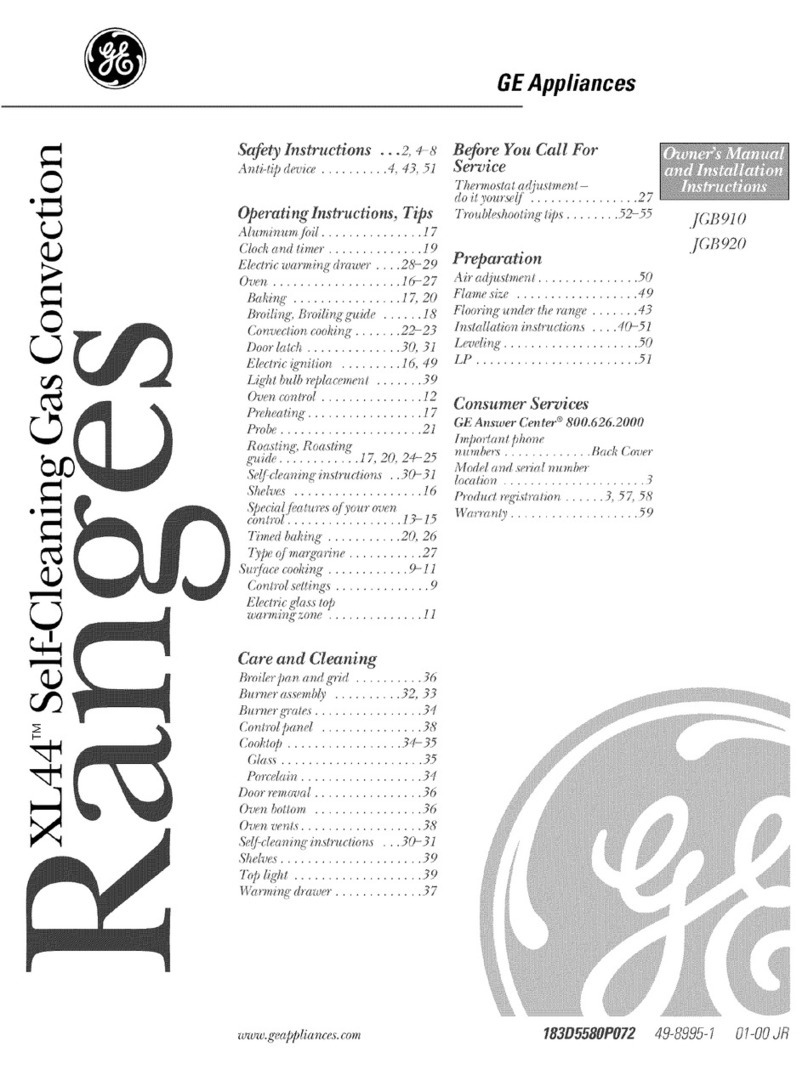
GEAppliances
©
8
Safety Instructions .... 2, 4-8
Anti-Tip Device ..... 2, 4, 35, 43
Electric Warlning Drawer ..... 8
Oven ....................... 7
Safety Precautions ......... 4, 5
SelfXCleaning Oven .......... 7
Surface Burners ............. 6
Operating lnstructions, Tips
Ahuninuln Foil ............. 17
Clock and Timer ........... 19
Electric Wanning Drawer .22, 23
Oven .................. 11-21
Baking and Roasting ....... 17
Broiling, Broiling Guide .... 18
Electric Ignition ........ 16, 41
Light Bulb Replacement .... 29
Oven Conu'ol .......... 11, 12
Preheating ................ 17
Self Cleaning
Instructions ............... 24
Shelves ................... 16
Special Features of Your
Oven Control ......... 13-15
Timed Baking
and Roasting .............. 20
Surface Cooking .......... 9, 10
Conu'ol Settings ............ 9
Care and Cleaning ...25-31
Broiler ran and Grid ........ 28
Burner Assembly ........ 25, 26
Burner Grates .............. 27
Control Panel and Knobs .... 30
Cooktop ................... 27
Door Removal .............. 28
Oven Bottom ............... 27
Oven Vents ................ 30
Self Cleaning Instructions ...24
Shelves and Racks .......... 31
Storage Drawer ............. 29
Top Light .................. 31
Warming Drawer ........... 29
Before You Call For
Service
Thermostat Adjustment-
Do It Yourself .............. 21
Troubleshooting Tips .... 44-47
Installation ........... 34-43
Air Adjustment ............. 42
Anti-Tip Device ......... 35, 43
Checking Burner Ignition 40, 41
Connecting the Range
to Gas ................. 36-38
Dimensions and Clearances . .34
Electrical Connections ...39, 40
Leveling the Range ......... 42
LP ........................ 43
Consumer Services
hnportant Phone
Numbers .......... Back Cover
Model and Serial Number
Location .................... 3
Product Registration...3, 51, 52
Warranty for Customers
in Canada ................. 55
Warranty for Customers
in the U.S.A ................ 54
JGBP35
fl;BP79
JGBP85
JGBP86
JGBP90
www.geappliances.com 18305580P071 49-8993-1 5-00 JR 350A4502P218
IMPORTANTSAFETYINFORMATION.
READALLINSTRUCTIONSBEFOREUSING.
WARNING!
ANTI-TIPDEVICE
ALLRANGESCANTIP
INJURYTOPERSONS
COULDRESULT
INSTALLAN_ TIP
DEVICESPACKEDWITH
RANGE
SEEINSTALLAtiON
INSTRUCtiONS
WARNING: If the information in this
manual is not followed exactly, a fire or
explosion may result causing property
damage, personal injury or death.
Do not store or use gasoline or other
flammable vapors and liquids in the
vicinity of this or any other appliance.
WHAT TO DO IF YOU SMELL GAS
Do not try to light any appliance.
Do not touch any electrical switch;
do not use any phone in your building.
Immediately call your gas supplier
from a neighbor's phone. Follow the
gas supplier's instructions.
If you cannot reach your gas supplier,
call the fire department.
-- Installation and service must be
performed by a qualified installer,
service agency or the gas supplier.
2
GE& You,A ServicePartnership.
IMPORTANT!
Fill out the Consumer Product Registration Card.
Twoeasy waystoregisteryourappliance!
• Through the internet at'v_-_-_v.geappliances.coln
• Complete and mail the enclosed Product Registration Card
FORYOURRECORDS
Write themodel and serial numbershere:
#
#
You can find them on a label on the front of din range behind the warming drawer or storage drawer.
Staple sales slip or cancelled check here.
Proof of the original purchase date is needed to obtain service under the wmr'anty.
READTHISMANUAL
Inside you _4ll find many helpfid hint_son how to use and maintain your range properly.
Just a little preventive care on your part can save you a great deal of time and money over the life
of your range.
IFYOUNEEDSERVICE
You'll find many answers to common problems in d_e Before YouCallForServicesection.
If you review our chart of Troubleshooting Tipsfirst, you may not need m call fur service at all.
If you do need service, you can relax knowing help is only a phone call away. A list of mll-fi'ee
customer sets_icenumbers is included in the back section of this manual. Or, in the United States,
you can always call the GE Answer Center ®at 800.626.2000, 24 hours a day, 7 days a week.
In Canada, call 1-800-361-3400.
OR
Visit ourWebsite at: _w.geappliances.com
3
IMPORTANTSAFETYINFORMATION.
READALLINSTRUCTIONSBEFOREUSING.
WARNING!
Foryour safety, the information in this manual must be followed to minimize the risk of fire or explosion,
electric shock, or toprevent property damage, personal injury, or loss of life.
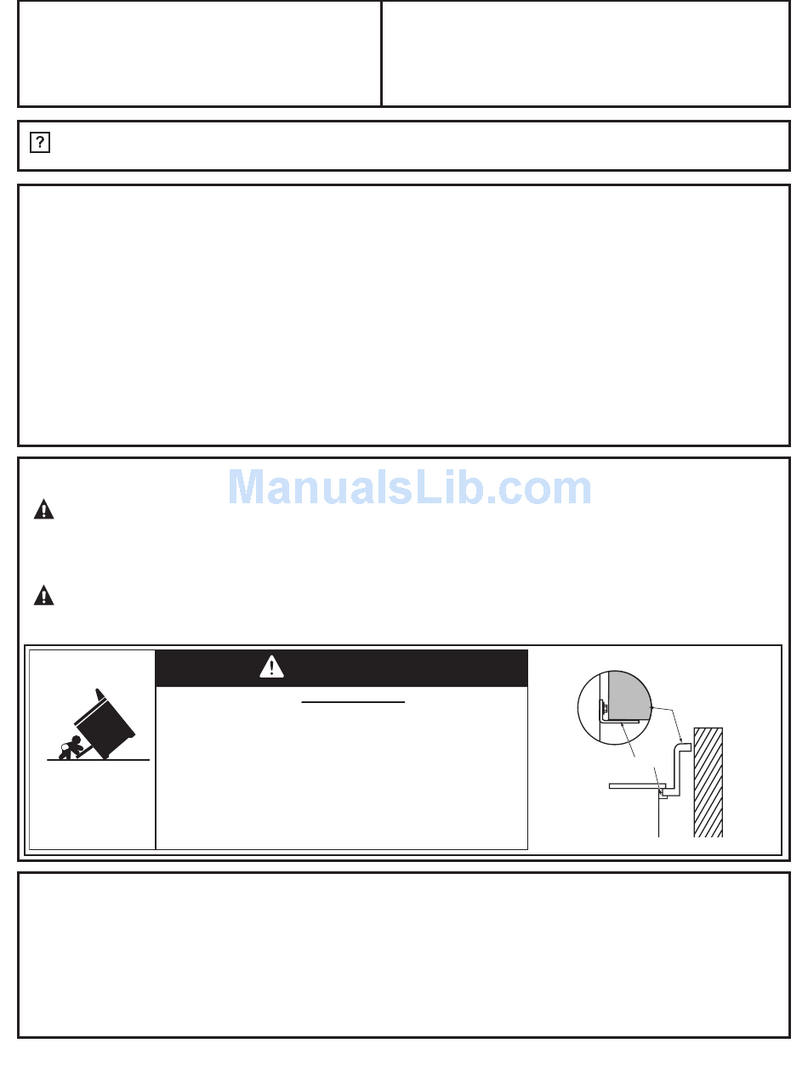
WARNINGANti-TIPDEVICE
All ranges can tip and injury could result.
Toprevent accidental tipping of the range, attach it to the wall by installing the Anti-Tip device supplied.
Tocheck if the device is installed and engaged properly, carefully tip the range forward. TheAnti--tip
device should engage and prevent the range from tipping over.
It'you pull the range out tiom the wall for any reason, make sure the device is properly engaged
when you push the range back against the wall. ff it is not, there is a possible risk of the range
tipping over and causing injuiy ityou or a child stand, sit or lean on an open door.
Please refer to the Anti-Tip de_4ce i_ff()rmation in this manual. Failure to take this precaution
could result in tipping of the range and injuiy.
IMPORTANTSAFETYNOtiCE
The California Safe Drinking Water and ToxicEnforcement Act requires the Governor of California to
publish a list of substances known to the state to cause birth defects or other reproductive harm, and
requires businesses to warn customers ofpotential exposure to such substances.
Gasappliances can cause minor exposure to four of these substances, namely benzene, carbon
monoxide, formaldehyde and soot, caused primarily by the incomplete combustion of natural gas or
LPfuels. Properly adjusted burners, indicated by a bluish rather than a yellow flame, will minimize
incomplete combustion. Exposure to these substances can be minimized by venting with an open
window or using a ventilation fan or hood.
Fluorescent light bulbs and safety valves on standing pilot ranges contain mercury. If your model has
these features, they must be recycled according to local, state and federal codes.
SAFETYPRECAUTIONS
Have the installer show you the location of the range gas shut-off valve and how to shut it off if
necessary.
.....Have your range installed and properly
grounded by a qualitied installer, in
accordance with the Installation Insuuctions.
Any adjustment and sei_dce should be
perf{wmed only by qualitied gas range
installers or se_Mcetechnicians.
Do not attempt to repair or replace any part
of your range unless it is specitically
recommended in this manual. All other
sei_dce should be referred to a qualitied
technician.
.....Plug your range into a 120wolt grounded
outlet only. Do not remove the round
grounding prong from the plug. It in doubt
about the grounding of the home electrical
system, it isyour personal responsibility and
obligation to have an un_ounded outlet
replaced with a properly grounded, three-
prong outlet in accordance with the National
Elecuical Code. Do not use an extension
cord with this appliance.
4
SAFETYPRECAUTIONS
Locate the range out of kitchen traftic path
and out of drafty locations to prevent pilot
outage (on standing pilot models) and poor
air circulation.
Be sure all packaging materials are removed
flom the range before operating it to prevent
fire or smoke damage should the packaging
material ignite.
Be sure your range is correctly a(!justed by a
qualified sei_4ce technician or installer for
the type of gas (natural or LP) that is to be
used. Your range can be converted for use
with either type of gas. See the Installation of
the range section.
WARNING:These adjustments must be
made by a qualified sei_4ce technician in
accordance with the manufacturer's
instructions and all codes and requirements
of the authority hax4ng,jurisdiction. Failure to
follow these instructions could result in
serious inju Uor property damage. The
qualified agency performing this work
assumes responsibility for the conversion.
.....After prolonged use of a range, high floor
temperatures may result and many floor
coverings will not withstand this kind of use.
Never install the range over _4nyl tile or
linoleum that cannot withstand such type of
use. Never install it directly over interior
kitchen carpeting.
Do not leave children alone or unattended
where a range is hot or in operation. They
could be seriously burned.
Do not allow anyone to climb, stand or hang
on the oven door, storage drmver, warming
drmver or cooktop. They could damage the
range and even tip it over, causing severe
personal injuU.
CAUTION:Items of interest to children
should not be stored in cabinets above a
range or on the backsplash of a range-
children climbing on the range to reach
items could be seriously injured.
For your safety, never use your appliance
for warming or heating the room.
.....Never wear loose fitting or hanging garments
while using the appliance. Be careful when
reaching for items stored in cabinets over the
range. Flammable material could be i_fited
if brought in contact with flame or hot oven
surfaces and may cause severe burns.
Do not store flammable materials in an oven,
a range storage drawer, awanning drawer or
near a cooktop.
.....Do not store or use combustible materials,
gasoline or other flammable vapors and
liquids in the vicinity of this or any other
appliance.
Do not let cooking grease or other
flammable materials accumulate in or near
the range.
.....Do not use water on grease fires. Never pick
up aflaming pan. Turn the conuols off.
Smother a flaming pan on a surface burner
by covering the pan completely with awell-
fitting lid, cookie sheet or flat uay. Use a
multi-purpose dUchemical or foam-type fire
extinguisher.
Flaming grease outside a pan can be put
out by covering it with baking soda or, if
available, by using a multi-purpose dU
chemical or foam-type fire extinguisher.
Flame in the oven or wanning drawer can be
smothered completely by closing the oven
door or drawer and turning the control to off
or by using a multi-purpose dUchemical or
foam-type fire extinguisher.
Let the burner grates and other surfaces cool
before touching them or leax4ng them where
children can reach them.
Never block the vents (air openings) of the
range. They prox4de the air inlet and outlet
that are necessm T for the range to operate
properly with correct combustion. Air
openings are located at the rear of the
cooktop, at the top and bottom of the oven
door, and at the bottom of the range under
the storage drawer or kick panel.
5
IMPORTANTSAFETYINFORMATION.
READALLINSTRUCTIONSBEFOREUSING.
6
WARNING!
SURFACEBURNERS
Use proper pan size--avoid pans that are unstable or easily tipped. Select cookware having flat bottoms
large enough to cover burner grates. Toavoid spillovers, make sure cookware is large enough to contain
the food properly. This will both save cleaning time and prevent hazardous accumulations of food, since
heavy spattering or spillovers left on range can ignite. Use pans with handles that can be easily grasped
and remain cool
.....Always use the LITEposition (on elecuic
ignition models) or the HI position (on
standing pilot models) when igniting the top
bmners and laake sme the bmners have ignited.
.....Never leave the surface burners unattended
at high flame settings, goilovers cause smoking
and greasy spillovers that may catch on fire.
.....Adjust the top burner flame size so it does
not extend beyond the edge of the cookware.
Excessive flame is hazardous.
.....Use only diT pot holders- moist or damp pot
holders on hot surfaces may result in burns
fiom steam. Do not let pot holders come
near open flames when lilting cookware. Do
not use a towel or other bulky cloth in place
of a pot holder.
.....When using glass cookware, make sure it
is designed for top-of-range cooking.
.....To minimize the possibility of burns, ignition
of flammable materials and spillage, turn
cookware handles toward the side or back
of the range without extending over adjacent
burners.
.....Carethlly watch foods being tiied at a high
flame setting.
Ahvays heat tat slowly, and watch as it heats.
.....Do not leave any items on the cooktop. The
hot air Dom the vent may i_fite flammable
items and will increase pressure in closed
containers, which may cause them to burst.
.....It a combination of oils or tats will be used in
tiTing, stir together before heating or as tats
melt slowly.
.....Use a deep tat thermometer whenever
possible to prevent overheating tat beyond
the smoking point.
.....Use the least possible amount of fat for
effective shallow or deep-tat tiTing. Filling the
pan too thll of fat can cause spillovers when
food isadded.
.....When flaming foods are under the hood,
turn the tan off. The tan, it operating, may
spread the flames.
.....Do not use awok on the cooking surface it
the wok has a round metal ring that isplaced
over the burner grate m support the wok. This
ring acts as a heat trap, which may damage
the burner grate and burner head. Also, it
may cause the burner m work improperly.
This may cause a carbon monoxide level
above that allowed by current standards,
resulting in a health hazard.
.....Foods for tiTing should be as dUas possible.
Frost on tiozen foods or moisture on tiesh
foods can cause hot tat to bubble up and
over the sides of the pan.
.....Never uT to move a pan of hot tat, especially
a deep tat tiTer. Wait until the fat is cool.
.....Do not leave plastic items on the cooktop-
they may melt it left too close to the vent.
.....Keep all plastics away Dom the surface
burners.
.....To avoid the possibility of a burn, ahvays be
certain that the controls for all burners are
at the OFFposition and all grates are cool
before attempting to remove them.
.....Itrange islocated near a window, do not
hang long curtains that could blow over the
surface burners and create a fire hazard.
.....When a pilot goes out (on standing pilot
models), you will detect a taint odor of gas
as your signal to relight the pilot. When
relighting the pilot, make sure burner
controls are in the OFFposition, and follow
instructions in this manual to relight.
.....ffyou smell gas, and you have already made
sure pilots are lit (on standing pilot models),
turn off the gas to the range and call a
qualilied soMce technician. Never use an
open flame to locate a leak.
.....Be carethl when you clean the cooktop
because the area over the pilot (on standing
pilot models) will be hot.
.....Ahvays turn the surface burner controls off
before removing cookware.
COOKMEATANDPOULTRYTHOROUGHLY...
Cookmeatandpoultrythoroughly--meattoat leastanINTERNALtemperatureof 160°Eandpoultrytoatleastan
INTERNALtemperatureof 180°ECookingtothesetemperaturesusuallyprotectsagainstfoodbomeillness.
OVEN
Stand away from the range when opening the door of a hot oven. The hot air and steam that escape can
cause bums to hands, face and eyes.
Do not use the oven for a storage area. Items
stored in the oven can i_dte.
Keep the oven fiee fiom _ease buildup.
Place the oven shelves in the desired position
while the oven is cool.
Pulling out the shelf to the stop-lock is a
convenience in lilting heaxT foods. It is also
a precaution against burns fiom touching
hot surfaces of the door or oven walls. The
lowest position "R" is not desi_md to slide.
Do not heat unopened food containers.
Pressure could build up and the container
could burst, causing an in,juU.
Never use aluminum foil to line the oven
bottom. Improper use of foil could start a fire.
Do not use aluminum foil anDvhere in the
oven except as described in this manual.
Misuse could result in a fire hazard or
damage to the range.
.....When using cooking or roasting bags in the
oven, follow the manufacturer's directions.
.....Do not use your oven to dUnewspapers.
If overheated, they can catch fire.
.....Use only glass cookware that is
recommended for use in gas ovens.
.....Ahvays remove the broiler pan fiom range as
soon asyou finish broiling. Grease left in the
pan can catch fire il oven isused without
remox4ng the grease fiom the broiler pan.
.....When broiling, il meat is too close to the
flame, the fat may ignite. Trim excess fat m
prevent excessive flare-ups.
.....Make sure the broiler pan is in place correctly
to reduce the possibility of _ease fires.
.....Ifyou should have a grease fire in the broiler
pan, press the C£E/IR/0/:/:pad, and keep
the oven door closed to contain fire until
it burns out.
SELF-CLEANINGOVEN
Be sure to wipe up excess spillage before
sell-cleaning operation.
Before sell-cleaning the oven, remove the
broiler pan, _id and other cookware.
Do not clean the door gasket. The door
gasket isessential for a good seal. Care
should be taken not to rub, damage or
move the gasket.
Clean only parts listed in this (Xvner's Manual.
.....If the sell-cleaning mode malfunctions, turn
the oven off and disconnect the power supply.
Have it sei_dced by a qualilied technician.
.....Do not use oven cleaners. No commercial
oven cleaner or oven liner of any kind should
be used in or around any part of the oven.
Residue fiom oven cleaners will damage
the inside of the oven when the self-clean
cycle is used.
7
IMPORTANTSAFETYINFORMATION.
READALLINSTRUCTIONSBEFOREUSING
ELECTRICWARMINGDRAWER(onsomemodels)
.....The purpose of the warming drawer
is to hold hot cooked fi)ods at serving
temperature. Ahvays start with hot fi)od;
cold fi)od cannot be heated or cooked in
the warming drawer.
.....Do not use the warming drawer to dry
newspapers. If overheated, they can catch
on fire.
Do not leave paper products, cooking
utensils or fi)od in the warming drawer
when not in use.
.....Never leave jars or cans oftat drippings in
or near your warming drawer.
.....Ahvays keep wooden and plastic utensils and
canned food a safe distance away flom your
warming _hawer.
.....Do not warm fi)od in the warming drawer
fi)r more than two hours.
Do not touch the heating element or the
interior surface of the warming drawer.
These surfaces may be hot enough to
burn.
REMEMBER: The inside surface of the
warming drawer may be hot when the
drawer is opened.
.....Use care when opening the drawer. Open
the drawer a crack and let hot air or steam
escape befiwe removing or replacing fi)od.
Hot air or steam which escapes can cause
burns to hands, face and/or eyes.
.....Do not use aluminum fi)il to line the
drawer. Foil is an excellent heat insulator
and will trap heat beneath it. This will upset
the perfiwmance of the drawer and it could
damage the interior finish.
READANDFOLLOWTHISSAFETYINFORMATIONCAREFULLY.
SAVETHESEINSTRUCTIONS
8
Usingthesurface burners.
Throughout this manual, features and appearance may vary from your model
Push the control knob in and turn it
to the LITEposition.
How to Lighta Surface Burner
Push the control knob in and turn it to the
LITEposition.
You will hear a little c/ickinff noise-the
sound of the elecuic spark igniting the
burner.
Turn the knob m adjust dm flame size.
Kthe knob stays at L/YE,it will continue
to click.
When one bm_mr is turned to tirE, all
the burners spark. Do not attempt to
disassemble or clean around any burner
while another burner is on. An electric
shock may result, which could cause you
to knock over hot cookware.
On Ranges With Sealed Burners
Tile smaller burner (right rear position) xdll
give tile best simmer results. It otters precise
cooking perfbmlance fbr delicate foods,
such as statues or foods which need to cook
over low heat fbr a long time. It can be
turned doom to ave Ulow simmer setting.
Tile largest burners are higher powered
than the others and _dll bring liquids to a
boil quicker.
How to Select Flame Size
Forsafe handllbg of cookware, never/et the f/ames
extend up the sides of the cookware.
Watch dm flame, not tile knob, asyou
re&me heat. Tile flame size on a gas burner
should match the cookware you are using.
AW flame larger allan dm bottoln of the
cookware is wasted and only sets_esto heat
the handle.
In Case of Power Failure
In case of a power failure, you can light tile
surface burners on your range _dth a match.
Hold a lit match to the burner, then push
in and turn tile control knob to tile LifE
position. Use extrelne caution when
lighting burners this way.
SuKhce burners in use when an electrical
power fidlure occurs _dll continue to
operate normally.
Before Lighting a Burner
Ifdrip pans are supplied _4th your range,
they should be used at all times.
Make sure all grates on the range are in
place before using any burner.
After Lighting a Burner
Do not operate tile burner fbr an
extended period of time xdfllout
cookware on the D'ate. The finish on the
_'ate ulay chip _dthout cookware to
absorb the heat.
Be sure tile burners anti grates are cool
befbre you place your hand, a pot holder,
cleaning cloths or other materials on
theul.
9
Usinothesurface burners(cont.).
Top-of-Range Cookware
Aluminum: Medium-weight cookware is
recommended becmlse it heats quickly
and evenly. Most foods brown evenly in an
aluminum skillet. Use saucepans _ith tight-
fitting lids when cooking _ith lninimum
amounts of water.
Cast-Iron:ffheated slowly, most skillets will
give satisfhctoty results.
Enamelware'.Under some conditions,
the enamel of some cookware may melt.
Follow cookware manufacturer's
recommendations fbr cooking methods.
Glass: There are two bqpes of glass
cookware-those for oven use only and
those for mI>of-range cooking (saucepans,
coffee and teapots). Glass conducts heat
veUslowly.
HeatproofGlassCeramic:Can be used fbr
eiflmr surfhce or oven cooking. It conducts
heat vepy slowly and cools very slowly. Check
cookware manufacturer's directions to be
sure it can be used on gas ranges.
Stainless Steel: This metal alone has poor
heating properties and is usually combined
with copper, aluminum or other metals far
improved heat distribution. Combination
metal skillets usually work satisfactorily if
they are used with medium heat as the
lnanufacturer recolnlnends.
Stove Top Grills (onmodelswith sealedburners)
Do not use stove top _'ills on your sealed
gas burners. Ifyou use fl_estove top grill on
the sealed gas burner, it will cruise
incomplete colnbustion and can result in
exposure m carbon monoxide levels above
allowable current standards.
Thiscan behazardousto your health.
¸¸¸7¸¸
Use a fiat-bottomed wok.
Wok T_i$ Waif (onmodelswith sealedburners)
Werecommendthatyouuseaflat-bottomedwok.They
areavailableat yourlocalretailstore.
A traditional round bottom wok can be
used with Wok Holder accessoiy, model
JXWK which can be ordered fi'om your
appliance dealer. The Wok Holder fits on
top of the range grate to provide support
and proper air circulation for u'aditional
round bottom woks only. Do not use flat
bottomed wolcswith the Wok Holder.
Do not use a wok on aW other support ring.
Placing the ring over the burner grate may
cause the burner to work improperly,
resulting in carbon monoxide levels above
allowable current standards. This could be
dangerous to your health. Do not tUto use
such woks without the ling unless you are
using the Wok Holder. You could be
seriously burned if the wok tipped over.
70
Usingtheovencontrols.
Throughout this manual, features and appearance may vary from your model
TOOOa TOO'OO
DELAY BAKE CLEAN START CLOCK
kBROIL LOCKED DOOR COOK STOP TIMER )
(on models with INCREASE[÷] and DECREASE[-] pads only)
OLS
OvenControl,Clockand timer Featuresand Settings
oBAKEPad
Press dlis pad to select die bake fimction. 0
BROIL HI/LO Pad
Press dlis pad to select die broil fimction.
ounction Indicators
Light up to show whether the oven is in the
bake, broil or self:clean mode.
OOven Temperature and Broil Display
Shows the oven temperature or the broil
setting selected.
Oime Display
Shows the time of day, the times set fbr the
timer or automatic oven operation.
0Program Status
Words light up in the display to indicate what
is in the time displ W.Pro_'ammed
infbrmation can be displayed at aW time by
touching the pad of the operation you want
to see. For example, you can displ Wthe
current time of dWwhile the timer is
counting doom by pressing the CLOCKpad.
ff "F--and a numberorletter"flashinthedisplay
andtheovencontrolsignals, thisindicatesa function
error code.
Onmodelswith anovendoorlatch, ff thefunctionerror
codeappearsduringtheself-cleaningcycle,checktheoven
doorlatch.Thelatchhandlemayhavebeenmoved,evenif
on/;/slightly,fromthe/atchedposition.Makesurethelatchis
movedtotherightasfarasit willgo.
PresstheCLEAR/OFFpad.Allowtheoventocoolforone
hourPuttheovenbackintooperation.If thefunctionerror
coderepeats,disconnectthepowertotherangeandcallfor
service.
ff a flashingtimeofdayis in thedisplay,youhave
experiencedapowerfailure.Resettheclock.
If your oven was set for a timed ovenoperation when
the power outage occurred, the dock and all programmed
functionsmust be reset.
0
0
0
0
@
0
COOKING TIME Pad
Press this pad and then press the INCREASEor
DECREASEpads to set the amount of time
you want your fbo(t to cook. The oven will shut
off when the cooking time has run out.
STARTTIME Pad
Use along wkh d_eCOOKINGTIMEor SELF
CLEANpad to set the oven to start and stop
mltomatically at a time you set.
CLOCKPad
Press this pad befbre setting tim clock. The
time old Wwill flash in the displ Wwhen the
oven is first turned on.
KITCHEN TIMER ON/OFFPad
Press this pad to select the timer feature.
STARTPad
Must be pressed to start any cooking or
cleaning flmction.
DECREASEPad
Short taps to tiffs pad will decrease the time or
telnperamre by small amount.s. Press and
hoM the pad to decrease the time or
telnperamre by larger anlounLs.
INCREASEPad
Short taps to dfis pad _4ll increase the time
or temperature by small amounts. Press
and hoM the pad to increase the time or
telnperamre by larger anlounLs
CLEAR/OFFPad
Press this pad to cancel ALLoven operations
except the clock and timer.
SELFCLEAN Pad
Press this pad to select the self:cleaning
fimction. See dm Usingthe self-cleaningoven
section.
11
Usingtheovencontrols(cont.).
(on models with number pads only)
ElII I!_.lr_
Tt--iQQ
DELAY BAKE CLEAN
BROIL LOCKED DOOR
)LS
12
OvenControl,Clockand 77merFeaturesand Settings
oBAKEPad
Press dds pad to select die bake fimction. O
oBROIL HI/LO Pad
Press fits pad to select file broil fimction.
ounction Indicators
Light up to show whether the oven is in the
bake, broil or self-clean mode.
OOven Temperature and Broil Display
Shows the oven temperature or the broil
setting selected.
Oime Display
Shows the time of day, the times set for the
timer or automatic oven operation.
OProgram Status
Words light up in the display to indicate what
is in the time displ W.Pro_'ammed
infbrmation can be displayed at aW time by
touching the pad of the operation you want
to see. For example, you can displ Wthe
current time of dWwhile the timer is
counting (to_a by pressing the CLOCKpad.
ff "F--and a numberorletter"flashinthedisplay
andtheovencontrolsignals,thisindicatesa function
errorcode.
Onmodelswith anovendoorlate& ff thefunctionerror
codeappearsduringtheself-cleaningcycle,checktheoven
doorlatch.Thelatchhandlemayhavebeenmoved,evenif
on/;/slightly,fromthe/atchedposition.Makesurethelatchis
movedtotherightasfarasit willgo.
PresstheCLEAR/OFFpad.Allowtheoventocoolforone
hourPuttheovenbackintooperation.If thefunctionerror
coderepeats,disconnectthepowertotherangeandcallfor
service.
ff a flashingtimeofdavis in thedisplay,youhave
experiencedapowerfailure.Resettheclock.
ff your oven was set for a timed ovenoperation when
the power outage occurred, the dock and all programmed
functionsmust be reset.
0
0
0
0
0
0
COOKINGTIMEPad
Press d_ispad and dlen press die number pads
to set the amount of time you want your foo(t
to cook. The oven will shut offwhen the
cooking time has mn out.
DELAYSTARTPad
Use along with d_e COOKINGTIMEor SELF
CLEANpad to set the oven to start and stop
mltomatically at a time you set.
CLOCKPad
Press this pad before setting dm clock. The
time old W will flash in the displ Wwhen the
oven is first turned on.
KITCHEN TIMER ON/OFFPad
Press this pad to select the timer feature.
STARTPad
Must be pressed to start any cooking or
cleaning traction.
CLEAR/OFFPad
Press this pad to cancel ALLoven operations
except the clock and timer.
Number Pads
Use to set any fimction requiring numbers
such as the time of(t W on the clock, the
timer, the oven telnperamre, the internal
foo(t telnperamre, the start time and length
of operation for timed baking and self:
cleaning.
TOPLIGHT Pad
Press this pad to ttllTI the StllJ-:dcelight on
or off.
SELFCLEAN Pad
Press this pad to select the self cleaning
fimction. See the Usingthe self-cleaningoven
section.
Special featuresofyourovencontrol(onsomemodels).
Yournew touch pad control has additional features that you may choose to use. The following are the features and how
you may activate them.
Thespecial feature modes can only be activated while the display is showing the time of day clock. They remain in the
control's memory until the steps are repeated.
When the display shows your choice, press the STAR'I'pad.Thespecial features will remain in memory after a power failure.
TIME O[ _
Appearance may vary.
12 Hour Shut-Off
Withthisfeature,shouldyouforgetandleavethe
ovenon,thecontrolwill automaticallyturnoff the
ovenafter 12hoursduringbakingfunctionsorafter
3hoursduringa broilfunction.
Ifyou _4sh to Ulrn offthis feature, follow the
steps below.
[_] Press the BAKEand BROILHI/LOpads at
the same time fbr 3 seconds until the
display shows SE
[]
%
Press the STARTTIMEor DELAYSTART
pad. The display will show 12shdn(12
hour shut-off). Pressthe STARTTIME
or DELAYSTARTpad again and the
display will show noshdn (no shut-off).
Press the STARTpad to activate tim no
shut-offand lemTetim control set in tiffs
special features mode.
Appearance may vary.
Fahrenheit or Centigrade Temperature Selection
YourovencontrolissettousetheFahrenheit _] Press the BROILHI/LOpad. The display
temperatureselectionsbutyoumaychangethisto _ill show F(Fahrenheit).
usetheCentigradeselections.
[-_ Press the BAKEand BROILHI/LOpads at _] PresSdisplaythewillBROILshowHI/LOc(Cenfigr_lde).pad again. The
the same time fbr 3 seconds until the
display shows SE [_] Press the START pad.
Appearance may vary.
Control Lockout
Yourcontrolwillallowyoutolockdownthetouch
padssotheycannotbeactivatedwhenpressed.
[_] Press the BAKEand BROILHI/LOpads at
the same time fbr 3 seconds until the
display shows SE
[_ Press the SELFCLEANpad. The display
will show LOCOFF.
Press the SELFCLEANpad again. The
display will show LOC.
[] Press the STARTpad to activate tim
control lockout feature and lem_e
the control set in this special features
mode.
When this feature is on and the touch pads
are pressed the control will beep and the
display will show LOC.
NOTE:Thecontrollockoutmodewillnotaffectthe
CLOCK,KITCHENTIMERON/OFFandOVENLIGHT
touchpads.
13
Special features ofFour ovencontrol (on some models) (cont.).
Appearance may vary.
Tones at the End of a Timed Cycle
At the end of a timed cycle,3 short beepswill
soundfollowed byone beepevery6 secondsuntil
the CLEAR/OFFpad ispressed. Thiscontinuous6
secondbeep maybe canceled.
To cancel the 6 second beep:
[] Press dm BAKE and BROIL Hi/tO pads at
dm same ume %r 3 seconds undl dm
display shows SE
_] Press dm KITCHEN TIMER ON/OFF
pad. The display shows CON BEEP
(condnuous beep). Press the MTCHEN
TIMER ON/OFF pad again. The display
shows BEEP.(This cancels the one beep
evel T 6 seconds.)
Press d_e STARTpad.
Appearance may vary.
12 Hour, 24 Hour or Clock Black-Out
Yourcontrolissettousea 12hourclock.
If you wouM prefer to have a 24 hour
militmy time clock or black-out the clock
display, follow the steps below.
[_] Press the BAKEand BROILHI/LOpads at
the same time fbr 3 seconds until the
display shows SE
_J] Press the CLOCKpad once. The display
_dll show 12hr.If this is the choice you
want, press the STARTpad.
Press the CLOCKpad again to change to
the 24 hour lnilitmy time clock. The
display_dll show 24hr. If this is the
choice you want, press the STARTpad.
Press the CLOCKpad again to black-out
the clock display. The display _dlÁshow
OFF.If this is the choice you want, press
the START pad.
NOTE:If theclockis in theblack-outmodeyouwill
notbeabletousetheDelayStartfunction.
14
Appearance may vary.
Cook and Hold
Yournewcontrolhasacookandholdfeaturethat
keepscookedfoodswarmforupto3hoursafterthe
cookingfunctionisfinished.Youcanonly.useCook
andHoldwith timedcookingfeatures.
To activate dds feature, follow dm steps
below.
[_ Press the BAKE and BROILHI/LOpads at
the stone time fbr 3 seconds until the
display shows SE
_] Press the COOKINGTIMEpad. The
display _ill show Hid OFF.
%
Press the COOKINGTIMEpad again to
activate the feaulre. The display _ill
show HidON.
Press the STARTpad to activate the
cook and hold feaulre and lem_efl_e
control set in this special features mode.
&
O
Changing the Speed of the Increase or Decrease Pads (onsome models)
AsyouusetheINCREASEorDECREASEpadswhen
settinga timeortemperature,youmay.noticethe
display.changesslowly.Thisspecialfeatureallows
youtochangethespeed.
To set file speed you prefer, follow file steps
below.
f_ Press the BAKEand BROILHI/LOpads
at dm stone time fbr 3 seconds undl
the display shows SE
[] Press the INCREASEpad. The display
will showyou a set speed between
1and 5.
[_ Press the INCREASEpad to increase the
speed up to die number 5.
Press the DECREASEpad to decrease
the speed down to the number 1.
_] Press STARTto activate the setting and
lem_ethe control set in this special
Damres mode.
15
Usingtheoven.
Toavoid possible bums, place the shelves in the desired position before you turn the oven on.
Before you begin...
The shelves hm_estop-locks, so dmt when
placed correctly on the supports, they will
stop before coming completely out, and will
not tilt.
When placing and removing cookware,
pull the shelf out to the bump on the shelf
support.
Toremovea shelf pull it towm'd you, tilt the
fi'ont end up and pull it out.
Toreplace, place the end of the shelf (stop-
locks) on the support, tilt up the front and
push the shelf in.
Theoven has 5 sheff positions.
It also has a special low shelf
position (R)for roasting extra large
items, such as a large turkey.
Plastic items on the cooktop may
melt if left too close to the vent.
Oven Vent
Your oven is vented fllrough &rots at the
rear of the range. Do not block these ducts
when cooking in the oven-it is important
that the flow of hot air fl'om the oven and
fl'esh air m the oven burner be
unintetr'upted. Avoid touching the vent
openings or nearby smtaces during oven or
broiler operation-they may become hot.
{{{iiiiiii;i
Handlesofpotsandpansontheco&topmay
becomehotif left tooclosetothevent.
Donotleaveplasticitemsonthecooktop_they
maymeltifleft tooclosetothevent.
Donotleaveanyitemsonthecooktop.Thehot
airfromtheventmayigniteflammableitemsand
willincreasepressureinclosedcontainers,which
maycausethemtoburst.
Metalitemswillbecomeveryhotif theyareleft
onthecooktop,andcouldcausebums.
Power Outage for Electric Ignition Models
CAUTION: Do not make anyattempt tooperate the
electric ignition ovenduring an electricalpower
failure.
The oven or broiler cannot be lit during a
power failure. Gas will not flow unless tim
glow bar is hot.
Ifthe oven is in use when a power failure
occurs, the oven buxner shuts off and
cannot be re-lit until power is restored. This
is because the flow of gas is automatically
stopped and will not resume when power is
restored until the glow bar has reached
operating temperature.
Oven Light
Use the s_4tch on the lower control panel to
rain the light on or off.
16
If your model has a door latch, do not lock the oven door with the latch during baking or roasting.
Thelatch is used for self-cleaning only.
Theoven has a special low shelf(R)
position just above the oven bottom.
Use it when extra cooking space is
needed, for example, when roasting
a large turkey. The sheffis not
designed to slide out at this position.
How to Set the Oven for Baking or Roasting
[]
[] Press the BAKEpad.
Press the +or -pad (on some models)
or file number pads (on some models)
until the desired temperaulre is
displayed.
Tile oven will start automatically. Tile word
ONand 100°will be displayed. As tile oven
heat_sup, the display v_illshow tile chan_ng
temperature. When the oven reaches the
teznperature you set, a tone will sound.
TochangetheoventemperatureduringBAKEcycle,
presstheBAKEpadandthenthe+or- ornumber
padstogetthenewtemperature.
Typeof Food Shelf Position
Frozenpies(oncookiesheet) BorC
Angelfoodcake, A
bundtorpoundcakes
Biscuits,muffins,brownies, BorC
cookies,cupcakes,
layercakes,pies
Casseroles BorC
Roasting R,AorB
_] Press tile CLEAR/OFFpad when baking
is finished and then remove tile food
fl'Oln tile oven.
Preheating and Pan Placement
Preheat tile oven if the recipe calls for it.
To preheat, set tile oven at file cotr'ect
temperature. Preheating is necessa Ufor
good results when baking cakes, cookies,
pastpy and breads.
Forovenswithoutapreheatindicatorfightor tone,
preheat10minutes.
Baking result_swill be better if baking pans
are centered in tile oven aslnuch as
possible. Pans should not touch each other
or the walls of the oven. If you need to use
two shelves, stagger tile pans so one is not
directly above tile other, and leave
approximately 1V,_,"between pans, fi'ozn
the front, back and sides of the wall.
Cut slits in the foiljust like the grid.
Aluminum Foil
Never cover tile oven bottoln with
aluminum fbil.
You can use aluminum foil to line the
broiler pan and broiler grid. However, you
must mold tile fbil tightly to the grid and cut
sli_sin itjust like the _'id.
Aluminumfoilmayalsobeusedtocatchaspillover.
Never entirely cover a shelf_idl aluminum
foil. This will disturb the heat circulation
and result in poor baking.
A sznaller sheet of foil mW be used to catch
a spillover by placing it on a lower shelf
several inches below the food.
Oven Moisture
As your oven heat_sup, tile teznperature
change of file air in file oven may cruise
water &oplets to fbxm on the door glass.
These &oplet_s are hmmless and will
evaporate as tile oven continues to heat up.
17
Usingtheoven(cont.).
If your model has a door latch, do not lock the oven door with the latch during broiling.
Thelatch is used for self-cleaning only.
Always use the broiler pan and grid
that came with your oven. It is
designed to minimize smoking and
spattering by trapping juices in the
shielded lower part of the pan.
How to Set the Oven for Broiling
[71 Place the meat or fish on the broiler
grid in dm broiler pan.
Follow suggested shelf posidons in the
Broiling Guide.
_] The oven door must be closed during
broiling.
[_] Press the BROIL HI/LOpad once for
HI Broil.
_] Press the STARTpad.
_] When broiling is finished, press the
CLEAR/OFFpad.
Se_e the food immediately, and leave the
pan outside the oven to cool during the
meal for easiest cleaning.
To change to LOBroil,press the BROIL
HI/LOpad again.
Broiling Guide
The size, weight, thickness,
starting temperature, and Food
yollr preference of Bacon
doneness will _fffectbroiling
times. This guide is based
on meats at refiigerator
telnperamre. Beef Steaks
Raret
t The U.S.Bepartment of Agriculture Medium
says "Rarebeef ispopular, but you Well Done
should know that cooking it to only
140°F.means some food poisoning Raret
organisms may survive."(Source: Medium
Well Done
Safe FoodBook, YourKitchen Chicken
Guide, USDARev. June 1985.)
GroundBeef
Well Done
LobsterTails
FishFillets
Ham Slices
(precooked)
Pork Chops
Well Done
LambChops
Medium
Well Done
Medium
Well Done
Quantityand/
orThickness
1/2 lb.
(about8thin slices)
1lb. (4 patties)
1/2to 3/4" thick
1" thick
1to 1_ Ibs.
1>" thick
2 to 2½Ibs.
1whole
2 to 2½Ibs.,
split lengthwise
4 bone-inbreasts
2-4
6 to 8oz.each
1/4to 1/2" thick
1" thick
1/2" thick
2 (1/2" thick)
2 (1"thick)about 1lb.
2 (1"thick)about 10
to 12oz.
1
2 (1_"thick) about 1lb.
Shelf
Position
C
C
C
C
C
C
B
B
C
D
D
D
D
D
D
D
FirstSide
Time(rain.)
10-11
9
12
13
10
12-15
25
30-35
25-30
13-16
6
10
15
8
10
10
17
SecondSide
Time(min.)
7
5-6
8-9
6-7
10-12
16-18
15-20
10-15
Donot
turn
over.
6
8
8
4-7
10
4-6
12-14
Comments
Arrangein singlelayer.
Spaceevenly.Upto 8
pattiestake aboutthe
sametime.
Steakslessthan 1"thick coob
throughbeforebrowning.
Panfrying is recommended.
Slashfat.
Brusheachsidewith melted
butter.Broilskin-side-down
first.
Cutthroughbackofshell.
Spreadopen.Brushwith
meltedbutterbeforebroilinc
andafter half of broiling
time.
Handleandturn very
carefully.Brushwith lemon
butterbeforeandduring
cooking,if desired.Preheat
broilerto increasebrowning
Slashfat.
Slashfat.
18
Usingthe clock and timer.
Not all features are on aft models.
Make sure the clock is setto the
correct time of day.
To Set the Clock
The clock must be set to the correct time of
(tW for the automatic oven timing flmcdons
to work properly. The time of day cannot be
changed during a timed baking or self:
cleaning cycle.
[] Press file CLOCKpad.
_] Depending on which model you have,
you will set the clock by pressing either
the number pads or +or - pads.
Press the number pads the same way you
read them. For exmnple, to set 12:34, press
the number pads 1,2,3 and 4in that order.
If number pads are not pressed within one
lninute after you press the CLOCKpad, the
display reverts to the original setting. If this
happens, press the CLOCKpad and reenter
the time of day.
[] Press the STARTpad. This enters the
time and starts the clock.
Tocheckthetimeofdaywhenthedisplayis
showingotherinformation,simp/ypresstheCLOCK
pad.Thetimeofdayshowsuntilanotherpadis
pressed.
i iiIi
Thetimer is a minute timer only.
The CLEAR/OFFpad does not affect
the timer.
To Set the timer
Thetimer doesnot control ovenoperations.The
maximumsetting onthe timeris 11hoursand59
minutes.
%
[] Press file KITCHENTIMERON/OFFpad.
Press the +or - or number pads to set
the time. For exmnple, to enter 2 hours
and 45 minutes, touch 2, 4and 5 in
that order.
If youmakeamistake,presstheKITCHENTIMER
ON/OFFpadandbeginagain.
%Press the STARTpad. After pressing tim
STARTpad, SETdisappears; this tells
you the time is counting down,
although the display does not change
until one minute has passed.
When die timer reaches :/70,die
control will beep 3 times followed by
one beep eveU6 seconds until the
KITCHENTIMERON/OFFpadis pressed.
The6 secondtonecanbecanceledbyfollowing
thestepsintheSpecialfeaturesofyouroven
controlsectionunderTonesattheEndofa timed
Cycle.Displaythenshowsthetimeofday.
Power Outage
If aflashingtimeisin thedisplay,youhave
experiencedapowerfailure.Resettheclock
To reset the clock, press fl_e CLOCKpad.
Enter the correct time of day by pressing the
+or - or the appropriate number pads.
Press the STARTpad.
19
Usingthetimedbakingandmastingfeatures.
If your model has a door latch, do not lock the oven door with the latch during timed cooking.
The latch is used for self-cleaning only.
NOTE:Foods that spoil easily-such as milk, eggs, fish, stuffings, poultry and pork-should not be allowed to s# for more
than I hour before or after cooking. Room temperature promotes the growth of harmful bacteria. Be sure that the oven
light is off because heat from the bulb will speed harmful bacteria growth.
Thelow temperature zone of this range (between 150°F.and 2OO°F.)is available to keep hot cooked foods warm.
Food kept in the oven longer than 2 hours at these low temperatures may spoil.
i iiii iiiii
How to Set an Immediate Start and Automatic Stop
Theovenwillturnonimmediatelyandcookfore
selectedlengthoftime.At theendofthecooking
timetheovenwillturnoffautomatically
Make sure the clock shows the correct time
of day.
[77 Press tt_e BAKEpad.
[] Press the ÷or- or number pads to
set tt_e oven temperature.
[] Press tt_e COOKINGTIMEpad.
[_ Press the ÷or - or number pads to
set tt_e baking time.
The oven temperature and tl_ecooking
time that you enmred will be displayed.
_] Press the STARTpad. The display shows
the oven temperature that you set and
tt_e cooking dine countdown.
(The display starts changing once
tt_e temperature reaches 100°F.)
The oven will continue to cook fbr tt_e
pro_'ammed amount of dine, titan shut
off automatically.
Press tt_e CLEAR/OFFpad to clear tt_e
display ifnecessmy.
Removethefoodfromtheoven.Remember,even
thoughtheovenshutsoffautomatically,foods
continuecookingaftercontrolsareoff
How to Set a Belayed Start and Automatic Stop
Youcansettheovencontroltodelay-starttheoven,
cookfora specificlengthoftimeandthenturnoff
............ automatically
Make sure the clock shows dm correct time
of day.
[_ Press the BAKEpad.
Press the +or - or number pads to
set the temperature.
[_ Press the COOKINGTIMEpad.
[_] Press the +or - or number pads to
set the baking time.
Press the DELAYSTARTor STARTTIME
pad.
[_] Press the ÷or - or number pads to set
the time of dayyou want the oven to
turn on and start cooking.
If you wouM like to check the times you
have set, press the DELAYSTART or START
TIME pad to check the start time you have
set or press the COOKING TIME pad to check
the length of cooking time you have set.
When the oven rams on at the time of day
you have set, the display xdll show the
changing temperature (starting at IO0°F.)
and the cooking time countdo_a.
At dm end of cooking time the oven will
mrn off and dm end of (?_cletone will
sound.
[_ Press the CLEAR/OFFpad to clear the
end of (?_cletone if necessapy.
Removethefoodfromtheoven.Remember,even
thoughtheovenshutsoffautomatically,foods
continuecookingaftercontrolsareoff.
[_ Press the STARTpad.
20

Other manuals for JGBP35

2

This manual suits for next models

9

Other GE Range manuals

GE PCS940 User manual

GE

GE PCS940 User manual

GE JMS10 User manual

GE

GE JMS10 User manual

GE Appliances XL44 JGBP24 Training manual

GE

GE Appliances XL44 JGBP24 Training manual

GE JGBS23BEACT Manual

GE

GE JGBS23BEACT Manual

GE JB940 User manual

GE

GE JB940 User manual

GE CR411 Operating instructions

GE

GE CR411 Operating instructions

GE RB720DHBB User manual

GE

GE RB720DHBB User manual

GE Monogram ZDP484LGPSS Manual

GE

GE Monogram ZDP484LGPSS Manual

GE JGBS23DEMBB - 30 in Standard Clean Gas Range Manual

GE

GE JGBS23DEMBB - 30 in Standard Clean Gas Range Manual

GE JGBS66DEKWW User manual

GE

GE JGBS66DEKWW User manual

GE PCGB995 Original instructions

GE

GE PCGB995 Original instructions

GE JS760 User manual

GE

GE JS760 User manual

GE Profile JGS968 SERIES User manual

GE

GE Profile JGS968 SERIES User manual

GE RB758 User manual

GE

GE RB758 User manual

GE Profile P2S975DEP User manual

GE

GE Profile P2S975DEP User manual

GE Monogram ZDP304L User manual

GE

GE Monogram ZDP304L User manual

GE JBP56 Training manual

GE

GE JBP56 Training manual

GE PGS960YPFSGE User manual

GE

GE PGS960YPFSGE User manual

GE Profile PGB975SEMSS Manual

GE

GE Profile PGB975SEMSS Manual

GE JB690SFSS Manual

GE

GE JB690SFSS Manual

GE Monogram ZDP36L4DWSS Dimensions and s User guide

GE

GE Monogram ZDP36L4DWSS Dimensions and s User guide

GE Profile JB988KHCC User manual

GE

GE Profile JB988KHCC User manual

GE Artistry AGBS45DEFBS User manual

GE

GE Artistry AGBS45DEFBS User manual

GE GE Profile JGBS10BEF User instructions

GE

GE GE Profile JGBS10BEF User instructions

Popular Range manuals by other brands

Danby DR2009WGLP Owner's use and care guide

Danby

Danby DR2009WGLP Owner's use and care guide

Frigidaire 318200710 Use & care manual

Frigidaire

Frigidaire 318200710 Use & care manual

Frigidaire FEF365BGDD Factory parts catalog

Frigidaire

Frigidaire FEF365BGDD Factory parts catalog

Amana AER5523XAB Product dimensions

Amana

Amana AER5523XAB Product dimensions

Maytag MGR5755QD installation manual

Maytag

Maytag MGR5755QD installation manual

Kenmore 970-3368 Series Use & care guide

Kenmore

Kenmore 970-3368 Series Use & care guide

LG LRE30955 Specifications

LG

LG LRE30955 Specifications

Amana EvenAir ARTC7114 owner's manual

Amana

Amana EvenAir ARTC7114 owner's manual

Electrolux EW30EF65G S installation instructions

Electrolux

Electrolux EW30EF65G S installation instructions

Dacor DOP36 86D Series user manual

Dacor

Dacor DOP36 86D Series user manual

Metos MG3753594MM instruction manual

Metos

Metos MG3753594MM instruction manual

Frigidaire GCRG3060AD installation instructions

Frigidaire

Frigidaire GCRG3060AD installation instructions

Chronologic uAttend MN Series user guide

Chronologic

Chronologic uAttend MN Series user guide

Frigidaire FEF450WF Factory parts catalog

Frigidaire

Frigidaire FEF450WF Factory parts catalog

Whirlpool RF3020XK Use and care guide

Whirlpool

Whirlpool RF3020XK Use and care guide

Whirlpool RE960PXV Use and care guide

Whirlpool

Whirlpool RE960PXV Use and care guide

Penlon Prima SP2 user manual

Penlon

Penlon Prima SP2 user manual

KitchenAid KAC-29 Technical education

KitchenAid

KitchenAid KAC-29 Technical education

manuals.online logo
manuals.online logoBrands
  • About & Mission
  • Contact us
  • Privacy Policy
  • Terms and Conditions

Copyright 2025 Manuals.Online. All Rights Reserved.