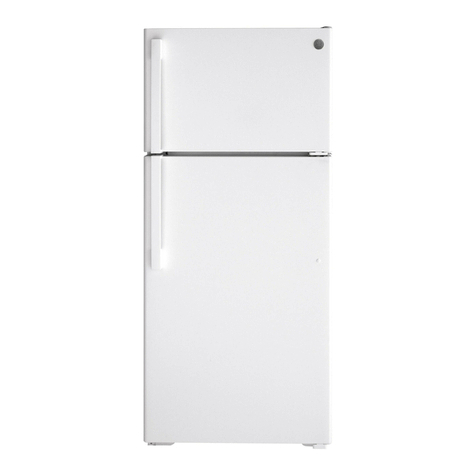
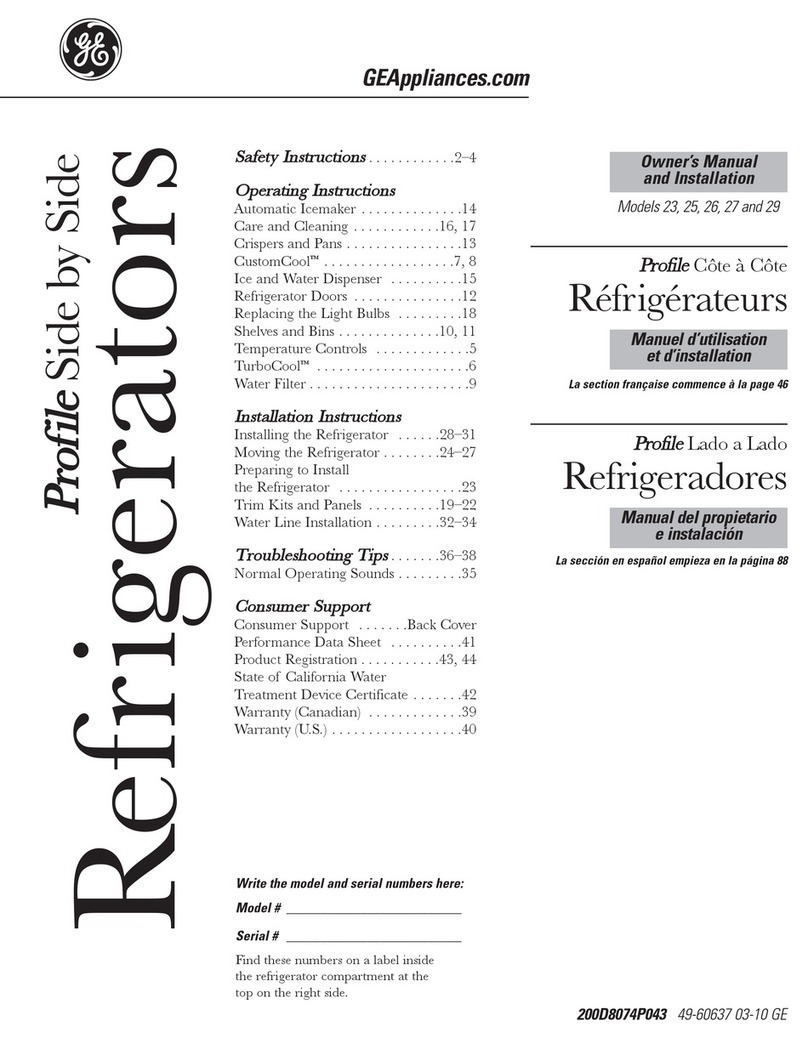
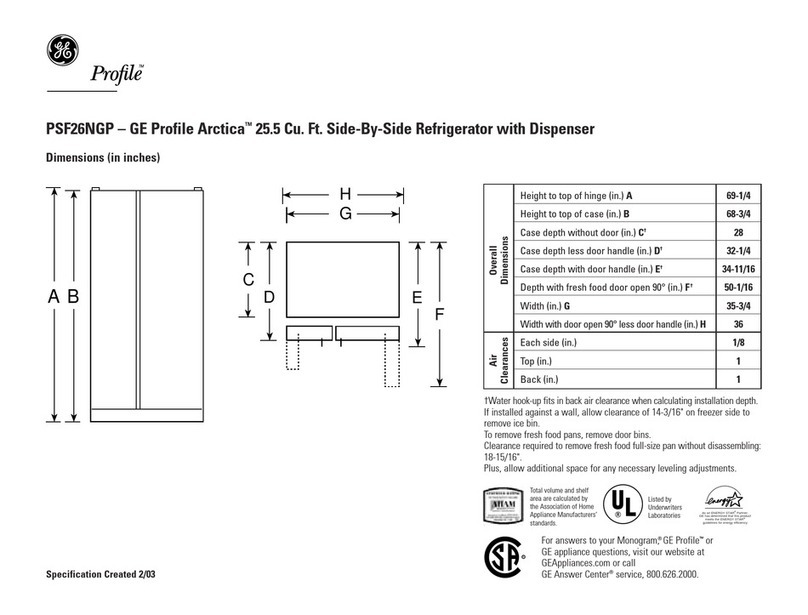
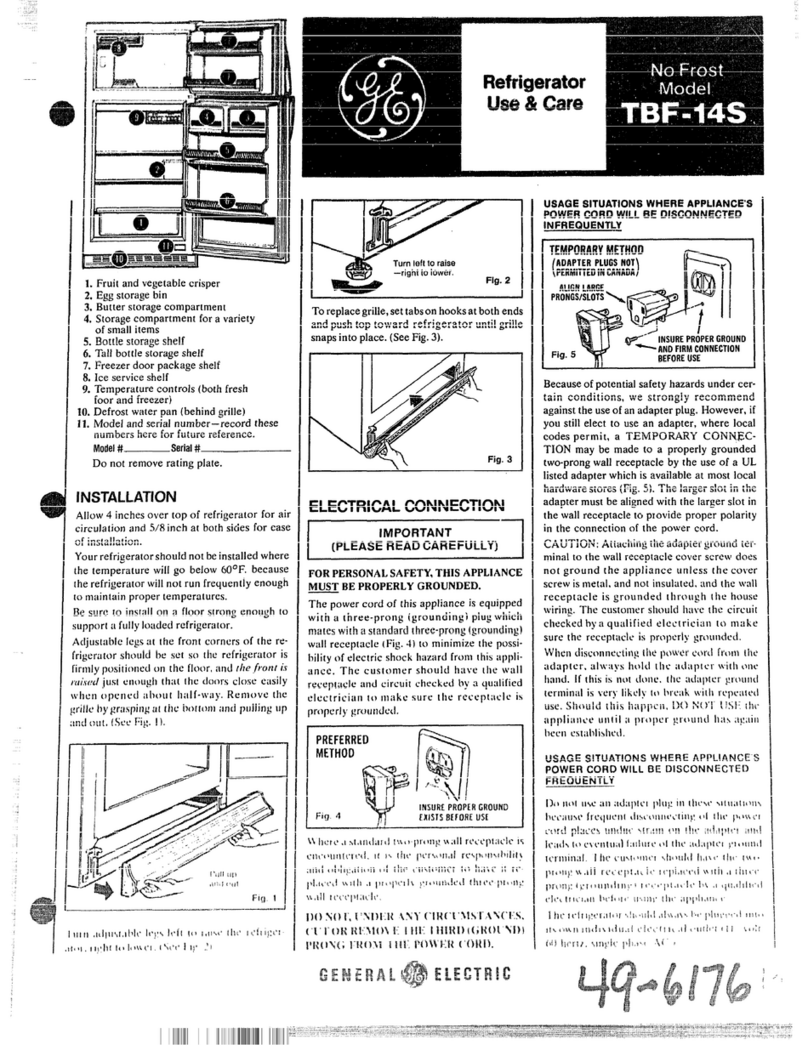
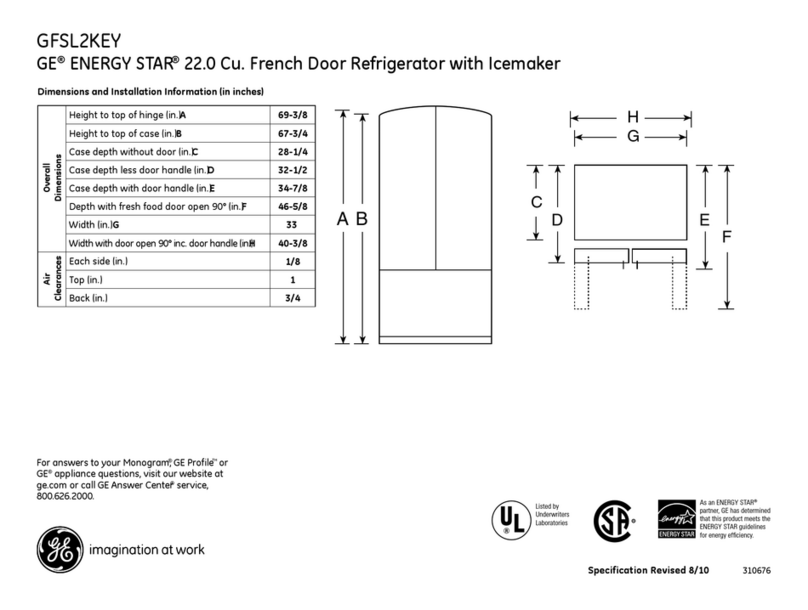
GE M2S9FPMKII Original instructions

Write the model and serial numbers
here:
Model #_________________
Serial # _________________
Find these numbers on a label
inside the fresh food compartment.
OWNER’S MANUAL &
INSTALLATION
INSTRUCTIONS
Bottom-Freezer
REFRIGERATORS
29-6283 11/18 M
SAFETY INFORMATION........... 3
USING THE REFRIGERATOR
Controls ............................... 5
Shelves and Racks and Pans .............. 6
CARE AND CLEANING ............ 7
INSTALLATION INSTRUCTIONS
Preparing to Install the Refrigerator ....... 9
Reversing the Door Swing................10
Preparing The Cabinet Opening...........12
TROUBLESHOOTING
Normal Operating Sounds................13
Troubleshooting Tips ....................14
WARRANTY ........................16
CONSUMER SUPPORT ............18
GE is a trademark of the General Electric Company. Manufactured under trademark license.
M2S9FPMKII
ENGLISH/FRANÇAIS

229-6283
THANK YOU FOR MAKING GE APPLIANCES A PART OF YOUR HOME.
Whether you grew up with GE Appliances, or this is your first, we’re happy to have you in the family.
We take pride in the craftsmanship, innovation and design that goes into every GE Appliances
product, and we think you will too. Among other things, registration of your appliance ensures that we
can deliver important product information and warranty details when you need them.
Register your GE appliance now online. Helpful websites and phone numbers are available in the
Consumer Support section of this Owner’s Manual. You may also mail in the pre-printed registration
card included in the packing material.

329-6283
STATE OF CALIFORNIA PROPOSITION 65 WARNINGS:
WARNING This product contains one or more chemicals known to the State of California to cause cancer
and birth defects or other reproductive harm.
CAUTION To reduce the risk of injury when using your refrigerator, follow these basic safety precautions.
Ŷ 'RQRWFOHDQshelvesZLWKZDUPZDWHUZKHQ
cold. Components may break if exposed to sudden
temperature changes or impact, such as bumping or
dropping.
Ŷ .HHSILQJHUVRXWRIWKH³SLQFKSRLQW´DUHDV
clearances between the lid and cabinet are
necessarily small. Be careful closing lid when
children are in the area.
Ŷ 'RQRWWRXFKWKHFROGVXUIDFHVLQWKHIUHH]HU
compartment when hands are damp or wet, skin
may stick to these extremely cold surfaces.
Ŷ 'RQRWUHIUHH]HIUR]HQIRRGVZKLFKKDYHWKDZHG
completely.
READ AND SAVE THESE INSTRUCTIONS
WARNING To reduce the risk of fire, explosion, electric shock, or injury when using your refrigerator, follow
these basic safety precautions:
Ŷ 7KLVrefrigeratorPXVWEHSURSHUO\LQVWDOOHGDQG
located in accordance with the Installation
Instructions before it is used.
Ŷ 8QSOXJWKHrefrigeratorEHIRUHPDNLQJUHSDLUVRU
cleaning.
NOTE: Power to the refrigerator cannot be
disconnected by any setting on the control panel.
NOTE: Repairs must be performed by a qualified
Service Professional.
Ŷ 5HSODFHDOOSDUWVDQGSDQHOVEHIRUHRSHUDWLQJ
Ŷ 'RQRWVWRUHRUXVHJDVROLQHRURWKHUIODPPDEOH
vapors and liquids in the vicinity of this or any other
appliance.
Ŷ 'RQRWVWRUHH[SORVLYHVXEVWDQFHVVXFKDVDHURVRO
cans with a flammable propellant in this appliance.
Ŷ 'RQRWXVHDQH[WHQVLRQFRUG
Ŷ 7RSUHYHQWVXIIRFDWLRQDQGHQWUDSPHQWKD]DUGVWR
children, remove the doors of the refrigerator
before disposing of it or discontinuing its use.
Ŷ 7RDYRLGVHULRXVLQMXU\RUGHDWKFKLOGUHQVKRXOGQRW
stand on, or play in or with the appliance.
Ŷ &KLOGUHQDQGSHUVRQVZLWKUHGXFHGSK\VLFDOVHQVRU\
or mental capabilities or lack of experience and
knowledge can use this appliance only if they are
supervised or have been given instructions on safe
use and understand the hazards involved.
Ŷ 7KLVDSSOLDQFHLVLQWHQGHGWREHXVHGLQKRXVHKROG
and similar applications such as: staff kitchen areas
LQVKRSVRIILFHVDQGRWKHUZRUNLQJHQYLURQPHQWV
IDUPKRXVHVE\FOLHQWVLQKRWHOVPRWHOVEHG
EUHDNIDVWDQGRWKHUUHVLGHQWLDOHQYLURQPHQWV
catering and similar non-retail applications.
IMPORTANT SAFETY INFORMATION
READ ALL INSTRUCTIONS BEFORE USING THE APPLIANCE
SAFETY INFORMATION
WARNING EXPLOSION HAZARD Flammable Refrigerant
This appliance contains isobutane refrigerant,
R600a, a natural gas with high environmental
compatibility. However, it is also combustible.
Adhere to the warnings below to reduce the risk of
injury or property damage.
1. When handling, installing and operating the
appliance, care should be taken to avoid damage to
the refrigerant tubing.
2. Service shall only be performed by authorized
VHUYLFHSHUVRQQHO8VHRQO\PDQXIDFWXUHUDXWKRUL]HG
service parts.
3. 'LVSRVHRIDSSOLDQFHLQDFFRUGDQFHZLWK)HGHUDO
DQG/RFDO5HJXODWLRQV)ODPPDEOHUHIULJHUDQWDQG
insulation material used require special disposal
procedures. Contact your local authorities for the
environmentally safe disposal of your appliance.
4. .HHSYHQWLODWLRQRSHQLQJVLQWKHDSSOLDQFH
enclosures or in the built-in structure clear of
obstruction.
5. 'RQRWXVHPHFKDQLFDOGHYLFHVRURWKHUPHDQVWR
accelerate the defrosting process.
6. 'RQRWGDPDJHUHIULJHUDQWFLUFXLW
7. 'RQRWXVHHOHFWULFDODSSOLDQFHVLQVLGHWKHIRRG
storage compartment of the appliance.
29-6283 4
SAFETY INFORMATION
READ AND SAVE THESE INSTRUCTIONS
IMPORTANT SAFETY INFORMATION
READ ALL INSTRUCTIONS BEFORE USING THE APPLIANCE
INSTALLATION
WARNING EXPLOSION HAZARD
.HHSIODPPDEOHPDWHULDOVDQGYDSRUVVXFKDVJDVROLQHDZD\IURPrefrigerator)DLOXUHWRGRVRFDQUHVXOWLQfire
explosion, or death.
WARNING SUFFOCATION AND ENTRAPMENT HAZARD
)DLOXUHWRIROORZWKHVHGLVSRVDOLQVWUXFWLRQVFDQUHVXOWLQGHDWKRUVHULRXVLQMXU\
IMPORTANT: Child entrapment and suffocation are not
problems of the past. Junked or abandoned appliances
DUHVWLOOGDQJHURXVHYHQLIWKH\ZLOOVLWIRU³MXVWDIHZ
GD\V´,I\RXDUHJHWWLQJULGRI\RXUROGDSSOLDQFH
please follow the instructions below to help prevent
accidents.
Before You Throw Away Your Old Refrigerator:
Ŷ Take off the fresh food and freezer door.
Ŷ Leave the baskets in place so that children may not
easily climb inside.
PROPER DISPOSAL OF YOUR OLD APPLIANCE
Do not, under any circumstances, cut or remove the third (ground) prong from the power cord. For
personal safety, this appliance must be properly grounded.
The power cord of this appliance is equipped with a
3-prong (grounding) plug which mates with a standard
3-prong (grounding) wall outlet to minimize the
possibility of electric shock hazard from this appliance.
Have the wall outlet and circuit checked by a qualified
electrician to make sure the outlet is properly
grounded.
Where a standard 2-prong wall outlet is encountered, it
is your personal responsibility and obligation to have it
replaced with a properly grounded 3-prong wall outlet.
The refrigerator should always be plugged into its
own individual electrical outlet which has a voltage
rating that matches the rating plate.
A 115 Volt AC, 60 Hz, 15- or 20-amp fused, grounded
electrical supply is required. This provides the best
performance and also prevents overloading house
wiring circuits which could cause a fire hazard from
overheated wires.
Never unplug your refrigerator by pulling on the
power cord. Always grip plug firmly and pull straight
out from the outlet.
Immediately discontinue use of a damaged supply
cord. If the supply cord is damaged, it must be
replaced by a qualified service professional with an
authorized service part from the manufacturer.
When moving the refrigerator away from the wall,
be careful not to roll over or damage the power
cord.
CONNECTING ELECTRICITY
WARNING ELECTRICAL SHOCK HAZARD
Plug into a grounded 3-prong outlet.
'RQRWUHPRYHWKHJURXQGSURQJ
'RQRWXVHDQDGDSWHU
'RQRWXVHDQH[WHQVLRQFRUG
)DLOXUHWRIROORZWKHVHLQVWUXFWLRQVFDQUHVXOWLQGHDWKILUHRUHOHFWULFDOVKRFN
Refrigerant and Foam Disposal:
'LVSRVHRIDSSOLDQFHLQDFFRUGDQFHZLWK)HGHUDODQG/RFDO5HJXODWLRQV)ODPPDEOHUHIULJHUDQWDQGLQVXODWLRQ
material used require special disposal procedures. Contact your local authorities for the environmentally safe
disposal of your appliance.

29-6283 5
USING THE REFRIGERATOR: Controls
Controls
Display screen
setting 1: 8°C
setting 2: 6°C
setting 3: 4°C Recommended
setting 4: 2°C
Display
When the unit is powered on for the first time, the display
screen will remain on for a full 3 seconds and default
to "Setting 3", which is the recommended operating
temperature.
Setting the Temperature
Each time the button is pressed once,the temperature
setting changes one time.
After the has been completed, the refrigerator will run
according to the set value after 15s.
Locking and Unlocking the Controls
The temperature control panel locks within 15 seconds
of no activity. When the temperature control panel is
locked, press the lock pad for 3 seconds to unlock it in
order to adjust the settings.

629-6283
Shelves and Racks and Pans
Shelf
LED lighting
Door shelves
Crisper bin
Storage box
Drawer
Temperature-
control panel
CAUTION Do not clean glass shelves or covers
with warm water when they are cold. Glass shelves and
covers may break if exposed to sudden temperature
changes or impact such as bumping or dropping.
Tempered glass is designed to shatter into many small
pieces if it breaks.
NOTE: Do not block air outlet by placing food items
directly against it. Erratic temperatures may result.
Multipurpose Pan
This pan can use for storing vegetable, fruit, snack etc.
To remove, pull the pan straight out.
Fridge Door Bins
To remove door bins, slide bin up over the rib in the door
and pull out.
To install door bins, slide the bin over the rib in the door.
The small bin goes at the top on either set of ribs. Large
bins go at the bottom and in the middle.
NOTE: Placing the door bins in the wrong locations will
cause the Fresh Food door not to close.
Freezer Drawers
Storage Box
The divider can be placed in 2 positions for better
organization of the drawer. Lift the divider out to rem ove
it. Slip it over one of the 2 ribs in the drawer to install.
Drawers
The lower drawers are intended for larger and bulky
items that may get heavier as they are frozen over time.
To remove the drawers, simply lift it out.
SING THE REFRIGERATOR: Shelves, Racks and Pans

29-6283 7
CARE AND CLEANING
Care and Cleaning
Cleaning the Outside
The door handles and trim (on some models). Clean with
a cloth dampened with soapy water. Dry with a soft cloth.
Keep the outside clean. Wipe with a clean cloth lightly
dampened with mild liquid dish detergent. Dry and polish
with a clean, soft cloth.
Do not wipe the refrigerator with a soiled dish cloth or
wet towel. These may leave a residue that can erode
the paint. Do not use scouring pads, powdered cleaners,
bleach or cleaners containing either bleach or ammonia
because these products can scratch and weaken the
paint nish.
The stainless steel doors and door handles (on some
models) can be cleaned with a commercially available
stainless steel cleaner. Cleaners with oxalic acid such as
Bar Keepers Friend Soft Cleanser™ will remove surface
rust, tarnish and small blemishes. Use only a liquid
cleanser free of grit and rub in the direction of the brush
lines with a damp soft sponge. Do not use appliance wax
or polish on the stainless steel.
Cleaning the Inside
To help prevent odors, leave an open box of baking
soda in the fresh food and freezer compartments.
Unplug the refrigerator before cleaning.
If this is not practical, wring excess moisture out of
sponge or cloth when cleaning around switches, lights or
controls.
Use warm water and baking soda solution—about a
tablespoon (15 ml) of baking soda to a quart (1 liter) of
water. This both cleans and neutralizes odors. Rinse and
wipe dry.
After cleaning the door gaskets, apply a thin layer of
petroleum jelly to the door gaskets at the hinge side.
This helps keep the gaskets from sticking and bending
out of shape.
CAUTION Do not clean glass shelves or covers
with warm water when they are cold. Glass shelves and
covers may break if exposed to sudden temperature
changes or impact such as bumping or dropping.
Tempered glass is designed to shatter into many small
pieces if it breaks.
Do not wash any plastic refrigerator parts in the
dishwasher.
Cleaning the Inside
Be careful when moving the refrigerator away from
the wall. All types of oor coverings can be damaged,
particularly cushioned coverings and those with
embossed surfaces.
Pull the refrigerator straight out and return it to position
by pushing it straight in. Moving the refrigerator in a side
direction, or leaning the unit to the corner to pull or push,
may result in damage to the oor covering or refrigerator.
When pushing the refrigerator back, make sure you don’t
roll over the power cord or ice maker supply line (on
some models).
Adjust leveling legs and make sure the unit is leveled.
Light
This refrigerator has LED lighting. Call service If the light
is broken or goes out.

829-6283
Preparing for Vacation
For long vacations or absences, remove food and unplug
the refrigerator. Unplug the refrigerator. This refrigerator
will remember the current setting when you plug it in
again. Clean the interior with a baking soda solution
of one tablespoon (15 ml) of baking soda to one quart
(1 liter) of water. Leave the doors open.
If an Icemaker has been Installed it must be turned o;
move the switch to the OFF position on the power switch
model. Shut o the water supply to the refrigerator.
If the temperature can drop below freezing, have a
qualied servicer drain the water supply system (on
some models) to prevent serious property damage due to
ooding.
Preparing to Move
Secure all loose items, such as shelves and drawers, by
taping them securely in place to prevent damage.
To prevent the doors from opening while moving, secure
them to the case with tape. Be sure the refrigerator stays
in an upright position during moving.
Care And Cleaning
CARE AND CLEANING

29-6283 9
Installation Instructions
If you have questions, call 1.800.561.3344 or visit our Website at: GEAppliances.ca.
BEFORE YOU BEGIN
Read these instructions completely and
carefully.
• IMPORTANT – Save these instructions for
local inspector’s use.
• IMPORTANT – Observe all governing codes
and ordinances.
• Note to Installer – Be sure to leave these
instructions with the Consumer.
• Note to Consumer – Keep these instructions
for future reference.
• Skill level – Installation of this appliance requires
basic mechanical skills.
• Completion time – Refrigerator Installation
15 minutes
Reversing the Door Swing
15 minutes
• Proper installation is the responsibility of the
installer.
• Product failure due to improper installation is not
covered under the Warranty.
REFRIGERATOR LOCATION
• Do not install the refrigerator where the
temperature will go below 55°F (12.7°C) because
it will not run often enough to maintain proper
temperatures.
• Do not install the refrigerator where the
temperature will go above 100°F (37°C) because
it will not perform properly.
• Do not install the refrigerator in a location exposed
to water (rain, etc.) or direct sunlight.
• Install it on a oor strong enough to support it fully
loaded.
CLEARANCES
Allow the following clearances for ease of
installation, proper air circulation and plumbing and
electrical connections.
Sides 1/8” (3 mm)
Top 1/8” (3 mm)
Back 1”(25mm)
ROLLERS AND LEVELING LEGS
Leveling legs near each front corner of the
refrigerator are adjustable. They rmly position the
refrigerator and prevent it from moving when the
doors are opened. Leveling legs should be set so
the front of the refrigerator is raised just enough that
the doors close easily when opened about halfway.
Turn the leveling legs clockwise to raise the
refrigerator, counterclockwise to lower it.
Leveling Leg
High
Low
INSTALLATION INSTRUCTIONS

10 29-6283
REVERSING THE DOOR SWING
WARNING Follow all steps when reversing
the door swing. Failure to follow these instructions,
leaving o parts, or overtightening screws, can lead
to the door falling o and result in injury and property
damage
IMPORTANT NOTES
• When reversing the door swing:
• Read the instructions all the way through before
starting.
• Tighten all hinge screws but avoid over-tightening
to prevent stripping.
• Handle parts carefully to avoid scratching paint.
• Set screws down by their related parts to avoid
losing them.
• Provide a non-scratching work surface for the
doors.
CAUTION Lifting Hazard
The Fresh Food and Freezer doors are heavy. Use
both hands to secure the doors before lifting.
IMPORTANT: Once you begin, do not move the
cabinet until door-swing reversal is completed.
These instructions are for changing the hinges from
the right side to the left side—If you ever want to
change the hinges back to the right side, follow
these same instructions and reverse all references
to left and right.
TOOLS REQUIRED
Phillips screwdriver Masking tape Pliers
Flat head screwdriver
BEFORE YOU START
1. Unplug the refrigerator from its electrical
outlet.
2. Empty all door shelves, including the dairy
compartment.
IMPORTANT: Do not let door drop to the oor. To do
so could damage the door stop.
1. Unscrew 2 screws on top of front case and
remove screw caps as shown
2. Lift the door straight o of
the bottom hinge. Set the
door aside.
Screws Bottom Hinge
3. Unscrew and
remove the
bottom hinge
from the
cabinet the
screw cover
on the left
side.
Installation Instructions
INSTALLATION INSTRUCTIONS

29-6283 11
REVERSING THE DOOR SWING (CONT.)
4. Exchange the R:bottom hinge and R:upper hinge,
then install them according to below steps, and
install the top hole caps.
R: bottom hinge
R: upper hinge
Step 1:
install left
bottom hinge
Step2:
put refrigerator
door on left bottom
hinge vertically
Step 3:
install left
upper hinge
5. Remove the two xed blocks of the refrigerator
door and rotate them 180 and install on the
opposite side.
180°
hole caps
xed block
6. Remove the the upper hinge of freezer door.
F:upper hinge
7. Remove the freezer door, the bottom hinge and
the hole caps.
F:bottom hinge
8. Exchange the F:bottom hinge and F:upper hinge,
then install them according to below steps, and
install the top hole cover and lower hole caps.
9. Remove the two xed blocks of freezer door and
rotate them 180°C, and install them on other side
of freezer door.
F:bottom hinge
F:upper hinge
Step 3:
install left
upper hinge
Step2:
put refrigerator
door on left bottom
hinge vertically
Step 1:
install left
bottom hinge
180 °
hole cover
xed block
hole caps
INSTALLATION INSTRUCTIONS
Installation Instructions

12 29-6283
PREPARING THE CABINET OPENING
• Cabinet size requirement.
Min.
P P
Min.
Mi n.
• Push the refrigerator into the cabinet and adjust
it to make sure the top bae completely touches
the top edge of the cabinet, and the limit hook
of supporting leg completely touches the bottom
edge of the cabinet.
Top bae of
top bae
Limit hook
• Fix the supporting leg with screws, then install the
screw caps.
Screw cap
Screw
• Fix the top bae to the top of the cabinet inner
with screws, then install the screw caps.
Screw cap
Screw
• Open the lower door of cabinet to its maximum
angle, and open the lower door of the refrigerator
to the corresponding position. Slide the block to
make sure inner edge aligns with the lower door
edge of refrigerator, then x the block to the door
of cabinet with screws and install screw caps. Fix
the upper refrigerator door to the cabinet door in
the same way.
Block
• Remove the sealing strip from accessory bag, and
press it in the gap between the cabinet and the
refrigerator. Installation is complete.
Sealing strip
Installation Instructions
INSTALLATION INSTRUCTIONS

29-6283 13
Normal Operating Sounds
Newer refrigerators sound dierent from older refrigerators. Modern refrigerators have more features and use newer
technology.
Do you hear what I hear? These sounds are normal.
■ The new high
eciency compressor
may run faster and
longer than your old
refrigerator and you may hear a high-pitched hum or
pulsating sound while it is operating.
■ You may hear a whooshing sound when the doors
close. This is due to pressure equalizing within the
refrigerator.
WHIR! ■ You may hear the fans spinning at
high speeds.
This happens when the refrigerator is
rst plugged in, when the doors are
opened frequently or when a large
amount of food is added to the
refrigerator or freezer compartments.
The fans are helping to maintain the
correct temperatures.
CLICKS, POPS,
CRACKS and CHIRPS
■ You may hear cracking or popping sounds when the
refrigerator is rst plugged in. This happens as the
refrigerator cools to the correct temperature.
■ The compressor may cause a clicking or chirping
sound when attempting to restart (this could take up to
5 minutes).
■ Expansion and contraction of cooling coils during and
after defrost can cause a cracking or popping sound.
■ On models with an ice maker, after an ice making
cycle, you may hear the ice cubes dropping into the ice
bucket.
WATER SOUNDS
■ The ow of refrigerant through the freezer cooling coils
may make a gurgling noise like boiling water.
■ Water dropping on the defrost heater can cause a
sizzling, popping or buzzing sound during the defrost
cycle.
■ A water dripping noise may occur during the defrost
cycle as ice melts from the evaporator and ows into
the drain pan.
■ Closing the door may cause a gurgling sound due to
pressure equalization.
HUMMM...
WHOOSH...
TROUBLESHOOTING TIPS: Normal Operating Sounds

14 29-6283
Troubleshooting Tips... Before you call for service
Save time and money! Review the charts on the following pages first and you may not need to call for service. If
needed, service can be scheduled by visiting us online GEAppllances.com or calling 800.GECARES 800.432.2737.
In Canada visit GEAppllances.ca or call 800.561.3344.
Problem Possible Causes What to Do
Refrigerator does not operate Refrigerator in defrost cycle. Wait about 30 minutes for defrost cycle
to end.
Either or both controls set to OFF Set the controls to a lower temperature
setting.
Refrigerator is unplugged. Push the plug completely into the
outlet.
The fuse is blown/clrcult breaker is
tripped.
Replace fuse or reset the breaker.
Motor operates for long periods
or cycles on and o frequently.
(Modern refrigerators with more
storage space and a larger freezer
require more operating time. They
start and stop often to maintain even
temperatures.)
Normal when refrigerator is rst
plugged in.
Wait 24 hours for the refrigerator to
completely cool down.
Often occurs when large amounts
of food are placed in refrigerator.
This is normal.
Door left open. Check to see if package is holding door
open.
Hot weather or frequent door
openings.
This is normal.
Temperature controls set at the
coldest setting.
See Temperature Control section.
Refrigerator or freezer compartment
too warm
Temperature control not set cold
enough.
See Temperature Control section.
Warm weather or frequent door
openings.
Set the temperature control one step
colder. See Temperature Control
section.
Door left open. Check to see if package is holding door
open.
Frost or ice crystals on frozen food
(frost within package is normal)
Door left open. Check to see if package is holding door
open.
Too frequent or too long door
openings.
This is normal.
Divider between refrigerator and
freezer compartments feels warm. Automatic energy saver system
circulates warm liquid around
the front edge of the freezer
compartment.
This helps prevent condensation on the
outside.
Automatic ice maker does not work
(if installed).
Ice maker power switch is in the
OFF position. Set the power switch to ON position.
Water supply turned o or not
connected.
See Installing the water line section of
the ice maker installation instructions.
Freezer compartment too warm. Wait 24 hours for the refrigerator to
completely cool down.
Piled up cubes in the storage bin
cause the ice maker to shut o. Level cubes by hand.
Ice cubes stuck in ice maker. Turn othe ice maker, remove cubes,
and turn the ice maker back on.
Slow ice cube freezing Door left open. Check to see if package is holding door
open.
TROUBLESHOOTING TIPS

29-6283 15
Troubleshooting Tips... Before you call for service
Problem Possible Causes What to Do
Frequent buzzing sound from the ice
maker (if installed).
Ice maker power switch is in the
ON position but the water supply
to the refrigerator has not been
connected.
Set the power switch to the OFF
position. Keeping it in the ON position
will damage the water valve.
No ice cube production (if ice maker
is installed).
Supply line or shuto valve is
clogged.
Call a plumber.
Refrigerator has odor. Foods transmitting odor to
refrigerator.
Foods with strong odors should be
tightly wrapped.
Keep an open box of baking soda in the
refrigerator; replace every 3 months.
Interior needs cleaning. See Care and Cleaning section.
Moisture forms on outside of
refrigerator.
Not unusual during periods of high
humidity.
Wipe surface dry.
Moisture collects inside (in humid
weather, air carries moisture into
refrigerator when doors are opened)
Due to the higher humidity in the
refrigerator, you may on occasion
experience fog or small amounts
of moisture in the refrigerator
compartment.
This is normal and may come and
go as dierent food loads and
environmental conditions change. Wipe
dry with a paper towel if desired.
Interior light does not work No power at the outlet.
Light bulb is burned out. See Care and Cleaning section.
Hot air from the bottom of the
refrigerator
Normal airow cooling motor. In the
refrigeration process, it is normal
that heat be expelled in the area
under the refrigerator. Some oor
coverings are sensitive and will
discolor at these normal and safe
temperatures.
This is normal.
Refrigerator never shuts o but the
temperatures are ok.
Adaptive defrost keeps compressor
running during door openings.
This is normal. The refrigerator will
cycle o after the door remains
closed for 2 hours.
Door not closing properly. Door gasket on hinge side sticking
or folding over.
Apply paran wax to the face of the
gasket.
Door does not close by Itself Leveling legs need adjusting. See Rollers and Leveling Legs in the
Installation instructions section. Freezer door opens when
refrigerator door is closed.
This is normal if the door closes after it
pops open.
Food too close to the air vent at the
back of the refrigerator.
Move food away from the air vent.
Food freezing in the refrigerator. Refrigerator control is set too cold. Move the refrigerator control to a
warmer temperature.
TROUBLESHOOTING TIPS

16 29-6283
Refrigerator Warranty
For US Customers, all warranty service provided by our Factory Service Centers, or an authorized Customer Care®
technician. To schedule service, on-line, 24 hours a day, visit us at GEAppliances.com, or call 800.GE.CARES
(800.432.2737). Please have serial number and model number available when calling for service.
In Canada, call 800.561.3344.
For the Period of: GE Appliances Will Replace
One Year
From the date of the
original purchase
Any part of the refrigerator which fails due to a defect in materials or workmanship.
During the limited one-year warranty, GE Appliances will also provide, free of
charge, all labor and related service to replace the defective part.
What is Not Covered:
■ Servicetripstoyourhometoteachyouhowto
use the product.
■ Improperinstallation,deliveryormaintenance.
■ Failureoftheproductifitisabused,misused,or
used for other than the intended purpose or used
commercially.
■ Lossoffoodduetospoilage.
■ Replacementofhousefusesorresettingof
circuit breakers.
■ Damagecausedafterdelivery.
■ Replacementofthewaterltercartridge,if
included, due to water pressure that is outside
thespeciedoperatingrangeorduetoexcessive
sediment in the water supply.
■ Replacementofthelightbulbs,ifincluded,or
waterltercartridge,ifincluded,otherthanas
noted above.
■ Damagetotheproductcausedbyaccident,re,
oodsoractsofGod.
■ Incidentalorconsequentialdamagecausedby
possible defects with this appliance.
■ Productnotaccessibletoproviderequiredservice.
■ Damagecausedbyanon-GEAppliancesBrand
waterlter.
■ Damagetonish,suchassurfacerust,tarnish,or
small blemishes not reported within 48 hours of
delivery.
■ Productswhicharenotdefective,broken,orwhich
are working as described in the owner’s manual.
EXCLUSION OF IMPLIED WARRANTIES — Your sole and exclusive remedy is product repair
as provided in this Limited Warranty. Any implied warranties, including the implied warranties
of merchantability or tness for a particular purpose, are limited to one year or the shortest
period allowed by law.
For our Customers: This warranty is extended to the original purchaser and any succeeding owner for
products purchased for home use within Canada. If the product is located in an area where service by a
GE Authorized Servicer is not available, you may be responsible for a trip charge or you may be required to
bring the product to an Authorized GE Service location for service.
Warrantor US: GE Appliances, aHaier company
Warrantor Canada: MC Commercial Inc., Burlington, Ontario, L7R 5B6
Staple your receipt here. Proof of the original purchase
date is needed to obtain service under the warranty. WARRANTY

29-6283 17
GE Appliances Website
Have a question or need assistance with your appliance? Try the GE Appliances Website 24 hours a day, any day
of the year! You can also shop for more great GE Appliances products and take advantage of all our on-line support
services designed for your convenience. In the US: GEAppliances.com In Canada: GEAppliances.ca
Register Your Appliance
Register your new appliance on-line at your convenience! Timely product registration will allow for enhanced
communication and prompt service under the terms of your warranty, should the need arise. You may also mail in the
pre-printed registration card included in the packing material.
In the US: GEAppliances.com/register
In the Canada: Prodsupport.mabe.ca/crm/Products/ProductRegistration.aspx
Schedule Service
Expert GE Appliances repair service is only one step away from your door. Get on-line and schedule your service at
your convenience any day of the year. In the US: GEAppliances.com/service or call 800.432.2737 during normal
business hours.
In Canada: GEAppliances.ca/en/support/service-request or call 800.561.3344
Extended Warranties
Purchase a GE Appliances extended warranty and learn about special discounts that are available while your
warranty is still in eect. You can purchase it on-line anytime. GE Appliances Services will still be there after your
warranty expires. In the US: GEAppliances.com/extended-warrantv or call 800.626.2224 during normal business
hours.
In Canada: GEAppliances.ca/en/support/purchase-extended-warrantv or call 800.290.9029
Remote Connectivity
For assistance with wireless network connectivity (for models with remote enable),
visit our website at GEAppliances.com/connected-home-start-appliances/ or call 800.220.6899 in the US only.
Parts and Accessories
Individuals qualied to service their own appliances can have parts or accessories sent directly to their homes (VISA,
MasterCard and Discover cards are accepted). Order on-line today 24 hours every day.
In the US: GEApplianceparts.com or by phone at 877.959.8688 during normal business hours.
Instructions contained in this manual cover procedures to be performed by any user. Other servicing
generallyshouldbereferredtoqualiedservicepersonnel.Cautionmustbeexercised,sinceimproper
servicing may cause unsafe operation.
Customers in Canada should consult the yellow pages for the nearest Mabe service center, visit our website at
GEAppliances.ca/en/products/parts-lters-accessories or call 800.661.1616.
Contact Us
If you are not satised with the service you receive from GE Appliances, contact us on our Website with all the details
including your phone number, or write to:
In the US: General Manager, Customer Relations | GE Appliances, Appliance Park | Louisville, KY 40225
GEAppliances.com/contact
In Canada: Director, Consumer Relations, Mabe Canada Inc. | Suite 310, 1 Factory Lane | Moncton, N.B. E1C 9M3
GEAppliances.ca/en/contact-us
Consumer Support
Printed in China
CONSUMER SUPPORT

Inscrivez ici les numéros de modèle
et de série:
Nº de modèle ____________
Nº de série ______________
Vous trouverez ces numéros sur
une étiquette placée à l’intérieur du
compartiment réfrigérateur.
MANUEL DE
L'UTILISATEUR ET
INSTRUCTIONS
D'INSTALLATION
RÉFRIGÉRATEURS
À CONGÉLATEUR EN BAS
29-6283 11-18 M
CONSIGNES DE SÉCURITÉ .......20
UTILISATION DU RÉFRIGÉRATEUR
Commandes. . . . . . . . . . . . . . . . . . . . . . . . . . . .22
Balconnets, clayettes et bacs .............23
ENTRETIEN ET NETTOYAGE .....24
INSTRUCTIONS D'INSTALLATION
Préparation avant l'installation du réfrigérateur
....26
Inversion de la porte ....................27
Préparation de l'ouverture de l'armoire ....29
DÉPANNAGE
Bruits de fonctionnement normaux........30
Conseils de dépannage ..................31
GARANTIE..........................33
SERVICE À LA CLIENTÈLE .......34
M2S9FPMKII
ENGLISH/FRANÇAIS
GE est une marque de commerce de General Electric Company. Fabriqué sous licence
d'utilisation de marque de commerce.

29-6283 19
MERCI DE PERMETTRE À ÉLECTROMÉNAGERS GE DE FAIRE PARTIE
DE VOTRE FOYER.
Que vous ayez grandi avec des électroménagers GE ou qu'il s'agisse de votre premier appareil GE,
nous sommes heureux de vous avoir dans la famille.
Nous sommes fiers du savoir-faire, de l'innovation et du design qui font partie intégrante de tous les
électroménagers GE que nous fabriquons, et nous pensons que vous le serez aussi. À cet égard,
l'enregistrement de votre appareil nous assure que nous pourrons vous fournir des informations
importantes sur votre appareil et des détails sur sa garantie si vous en avez besoin.
Enregistrez votre électroménager GE en ligne dès maintenant. Des sites Web et des numéros de
téléphone utiles sont disponibles dans la section « Service à la clientèle » de ce manuel de l'utilisateur.
Vous pouvez également envoyer par courrier la carte d'enregistrement préimprimée qui se trouve dans
l'emballage de votre appareil.

2029-6283
AVERTISSEMENTS DE LA PROPOSITION 65 DE L’ÉTAT DE LA CALIFORNIE:
AVERTISSEMENT Ce produit contient une ou plusieurs substances chimiques reconnues par l’État de Californie pour
causer le cancer et des anomalies congénitales ou d’autres problèmes liés à la reproduction.
ATTENTION Pour réduire le risque de blessures lorsque vous utilisez votre réfrigérateur veuillez suivre les consignes de
sécurité suivantes :
Ŷ 1HQHWWR\H]SDVOHréfrigérateurDYHFGHO¶HDXWLqGHTXDQG
celui-ci est froid. Les composants peuvent se casser
s’ils sont exposés à des changements soudains de
température ou si vous les cognez ou les faites tomber.
Ŷ eORLJQH]OHVGRLJWVGHVSDUWLHVGXréfrigérateurRO¶RQSHXW
facilement se pincer : les espaces entre le couvercle et
ODFXYHVRQWWRXMRXUVpWURLWV6R\H]SUXGHQWORUVTXHYRXV
fermez le couvercle en présence d’enfants.
Ŷ 1HWRXFKH]SDVOHVVXUIDFHVIURLGHVGXréfrigérateur
lorsque vous avez les mains humides ou mouillées. La
peau risque d’adhérer à ces surfaces extrêmement froides.
Ŷ 1HUHFRQJHOH]SDVOHVDOLPHQWVVXUJHOpVTXLRQW
complètement dégelé.
LIRE ET CONSERVER CES INSTRUCTIONS
AVERTISSEMENT Pour réduire le risque d’incendie, d’explosion, de choc électrique ou de blessures lorsque vous
utilisez votre réfrigérateur, veuillez suivre ces consignes de sécurité :
Ŷ &HFRQJpODWHXUGRLWrWUHFRUUHFWHPHQWLQVWDOOp
conformément aux Consignes d’Installation avant toute
utilisation.
Ŷ 'pEUDQFKH]OHréfrigérateurDYDQWG¶HIIHFWXHUXQH
UpSDUDWLRQGHUHPSODFHUXQHDPSRXOHRXGHOHQHWWR\HU
Remarque : L’alimentation du réfrigérateur ne peut être
déconnectée par aucune des fonctions sur le panneau
de commande.
Remarque : Les réparations doivent être effectuées par
un professionnel qualifié.
Ŷ 5HPHWWH]WRXWHVOHVSLqFHVHWSDQQHDX[HQSODFHDYDQW
d’utiliser l’appareil.
Ŷ $EVWHQH]YRXVG¶HQWUHSRVHURXG¶XWLOLVHUGHO¶HVVHQFHRX
d’autres vapeurs et liquides inflammables aux alentours de
cet électroménager ou d’autres appareils.
Ŷ 1¶HQWUHSRVH]SDVGDQVFHWpOHFWURPpQDJHUGHV
substances explosives telles que des bombes aérosols qui
contiennent un gaz propulseur.
Ŷ 1¶XWLOLVH]SDVGHFRUGRQGHUDOORQJH
Ŷ 3RXUpYLWHUWRXWULVTXHGHVXIIRFDWLRQRXG¶HQIHUPHPHQW
retirez le couvercle d’un réfrigérateur avant de le mettre
au rebut ou si vous arrêtez de l’utiliser.
Ŷ $ILQGHSUpYHQLUOHVDFFLGHQWVJUDYHVRXODPRUWOHV
enfants ne doivent pas se tenir ni jouer dans ou sur
l’électroménager.
Ŷ /HVHQIDQWVHWOHVSHUVRQQHVGRQWOHVFDSDFLWpVVRQW
UpGXLWHVVXUOHSODQSK\VLTXHVHQVRULHORXPHQWDORXTXL
manquent d’expérience ou de connaissances, peuvent
utiliser cet électroménager seulement si elles sont
surveillées ou ont reçues des consignes de sécurité sur
VRQXVDJHHWOHVULVTXHV\VRQWDVVRFLpV
Ŷ &HWpOHFWURPpQDJHUHVWFRQoXSRXUXQHXWLOLVDWLRQ
domestique et applications similaires : salle du personnel
dans une usine, un bureau ou d’autres lieux de travail;
maison de ferme; clients dans un hôtel, un motel, un gîte
touristique et d’autres lieux résidentiels; approvisionnement
et applications similaires non reliées au commerce de
détail.
INSTRUCTIONS IMPORTANTES DE SÉCURITÉ
LIRE TOUTES LES INSTRUCTIONS AVANT D'UTILISER L'APPAREIL
INFORMATION DE SÉCURITÉ
RISQUE D’EXPLOSION Fluide frigorigène inflammable
Cet électroménager contient le réfrigérant isobutane,
R600a, un gaz naturel à compatibilité élevée avec
l’environnement. Il s’agit cependant d’un combustible.
Observez les consignes de sécurité ci-dessous afin
de réduire le risque de blessure ou de dommage à la
propriété.
1. Lors de la manipulation, de l’installation et de l’utilisation de
cet appareil, prenez soin de ne pas endommager les tubes
de circulation du fluide frigorigène.
2. L’entretien ou la réparation doivent être effectués par un
personnel de service autorisé. Utilisez seulement des
pièces de rechange autorisées par le fabricant.
3. Mettez le appareil au rebut conformément aux
réglementations fédérales et locales. Le fluide frigorigène
inflammable et le matériel isolant utilisés nécessitent des
procédures de mise au rebut spéciales. Communiquez
avec les autorités locales compétentes pour la mise au
rebut de votre appareil sans danger pour l’environnement.
4. 1¶REVWUXH]SDVOHVpYHQWVGDQVO¶HQFHLQWHSUpYXHSRXU
l’appareil.
5.1¶XWLOLVH]SDVG¶DSSDUHLOVRXDXWUHVPR\HQVPpFDQLTXHV
pour accélérer le processus de dégivrage.
6. 1¶HQGRPPDJH]SDVOHFLUFXLWGXIOXLGHIULJRULJqQH
7. 1¶XWLOLVH]SDVG¶DSSDUHLOVpOHFWULTXHVGDQVOHFRPSDUWLPHQW
réfrigérateur de cet appareil.
AVERTISSEMENT
Table of contents
Languages:
Other GE Refrigerator manuals

GE
GE GFSF2KEX Manual

GE
GE Model 22 User manual

GE
GE GTS18ABBRWW Manual

GE
GE Cafe ENERGY STAR CFE29TSDSS Manual

GE
GE Profile PSCF3RGX User manual

GE
GE Monogram ZDOD240 User manual

GE
GE ENERGY STAR GTH18ECCWW Manual

GE
GE GYE18J Original instructions

GE
GE Profile PGCS1PJXSS Manual

GE
GE Profile PSW26LSRSS Manual

GE
GE PTS18SHSSS Assembly instructions

GE
GE 200D8074P036 Safety guide

GE
GE Monogram ZIBI240 User manual

GE
GE GSHS5KGXSS Manual

GE
GE Cafe CWE23SSHDSS Operating instructions

GE
GE GE Profile Arctica PSF26NGN User instructions

GE
GE Profile ENERGY STAR PDS20MBP User guide

GE
GE GSS25LGT Manual

GE
GE PSS25NGNACC and Safety guide

GE
GE ZISP480DHSS User manual