GE PSI23NGPBBB and Safety guide

gO. COrn
°v..q
:/3
°v..q
:/3
Safety Instructions ............... 2-4
Operating Instructions
Automatic Icemaker ............... 14
Care and Cleaning .............. 16, 17
Crispers and Parrs ................. 13
CustomCool'" .................... 7, 8
Ice and _4'ater Dispenser ............ 15
Refrigerator Doors ................ 12
Replacirag the i fight Bulbs ........... 18
Shelves arrd Bins ............... 10, 11
Temperature Controls ............... 5
TurboCool r'* . ...................... 6
_'ater Filter . ...................... 9
Installation Instructions
Installing the Refrigerator . ....... 28-31
Moving the Refligerator . ........ 24-27
Preparing to Install
the Reflig_ramr . .................. 23
Trim Kits and Panels ............ 19-22
Water Line Installation .......... 32-34
Troubleshooting Tips ........... 36-38
Normal Operating Sounds .......... 35
Consumer Support
Consumer Support ......... Back Cover
Performance Data Sheet ............ 41
Product Registration (U.S.) ....... 43, 44
Product Registration (Canadian) . . .45, 46
State of California ¼'amr
Treatment Device Certificate ......... 42
¼'arranty (Canadian) ............... 39
_A'arranty (U.S.) ................... 40
Models23,25,26,27and29
Profile C6te fi C6te
R frig rateurs
La sectionfran_aise commenceala page 48
Profile Lado a Lado
Refrigeradores
Laseccion en espa#olempieza en lapagina 90
Write the model and serial numbers here:
Model #
Serial #
Find these numbers on a label inside
the refrigerator compartment at the
top on the right side. 200D2600P046 49-60371-1 09-05dR

IMPORTANTSAFETYINFORMATION.
READALLINSTRUCTIONSBEFOREUSING.
WARNING!
Use this appliance only for its intended purpose as described in this Owner's Manual
SAFETYPRECAUTIONS
When using electrical appliances, basic safety precautions should be followed, including the following:
i)::This refi'igerator must be properly installed
and located in accordance with tile Installation
Instructions before it is used.
i)::Do not allow children to climb, st;rod or hang
on the shelves in the reti-igerato_: They could
damage the refrigerator and seriously iqjm'e
themselves.
::_ Do not touch tile cold SUltilces in tile fl'eezer
compartment when hands are damp or wet. Skin
may stick to these extremely cold sudhces,
}/<Do not store or use gasoline or other flammable
\_q)ors and liquids in tile vicinity of this or any
other appliance.
i)_:In refl'igerato_ with automatic icemake_,
avoid conta ct with the moving parts of the
ejector mechanism, or with tile heating element
located on tile bottom of tile icemake_: Do not
place finge_ or hands on tile automatic
icemaking mechanism while tile refl]gerator
is i)lugged in.
i)_:Kee I) finget_ ()/It of tile "pinch point" areas;
clearances between the doo_ and between
the doo_ and cabinet are necessarily small.
Be caretul closing doo_ when children are
in the area.
i)_:Unplug tile refl'igerator before cleaning and
making repai_.
NOTE."We stronglyre.commendthat anyservicingbe
performedby a qualified individual
i)_:Setting either or both controls to 0(Off)does not
remove power to tile light circuit.
_ Do not refl'eeze fi'ozen fi)ods which have
thawed completel>
_i_Mwa_:s clean tile CustomCooY_Tray after thawing
fi)od.

ge.com ........
ADANGER! RISK OFCHILDENTRAPMENT
PROPERDISPOSAOFTHEREFRIGERATORL0 0 0
Child entral)ment and ,;tiff' cati n are n t pr blems Refrigerants
of the past.Junked or abandoned refl_igerato_ are
still danoerous exen if they will sit for "'ust a few M1 refl_igeration products contain refl'i_erants,,
days." If)ou are getting cid of)our old refcigeratox; which trader federal law must be removed prior
to )roduct disposal If you are ,ettin , cid of
I:| refit] gerati°n }ff°d uct: ('li:c k '_i: hthe
0 } '* ' " '_ 8 }lIl
accidents. cmpan) handlin_ the di,;p ,;al ab ut what _'D
Before YouThrowAway YourOldRefrigerator t,, d,,.
or Freezer: _"
iJi::Take off the cloox_. _"
!i_:I,eaxe the shelxes in place so that children ma)
not easilx climb inside.
USEOFEXTENSIONCORDS
Because of potential safety hazards under certain conditions, we strongly recommend against the use
of an extension cord.
However, ifxou must use an extension cord, it is absolutely necessary that it be a UlAisted (in the United _"
States) or a (:SA-listed (in Canada), 3-wire grounding type appliance extension cord haxing a grounding
_])e I)lu_*_and outlet and that the electcical rating, of the cord be 15 amperes (minimum) and 120 xolts. g
g
g
3

IMPORTANTSAFETYINFORMATION.
READALLINSTRUCTIONSBEFOREUSING.
WARNING!
HOWTOCONNECTELECTRICITY
Do not, under any circumstances, cut or remove the third (ground) prong from the power cord. For
personal safe_ this appfiance must be properly grounded.
The power cord of this appliance is equipped
with a 3-prong (grounding) plug which mates
with a standard 3-prong (grounding) wall outlet
to minimize the possibili Vof electric shock hazard
fi'om this appliance,
Have the wall outlet and circuit checked by a
qualflied electridan to make sure the outlet is
propedy grounded.
If the outlet is a standard 2-prong outlet, it is _mr
personal responsibili b, and obligation to have it
replaced with a properly grounded %prong wall
outlet.
The refl_igerator, should ahvavs, be I)lugged,, into its
own indixidual electrical outlet which has a xoltage
rating that matches the rating plate.
This provides the best perlimnance and also
I)rexents oxerloading, house wiring circuits which
could cause a fire hazard fl'om oxerheated wires.
NeverIun )lug,,_our refl_igerator, 1)_,I)tilling, on the
I)°wer cord . _Mwavs,,ii,gri) )lug firefly, and pull ,strai_4_t
out fl'om the outlet.
Repair or replace immediately all power cords that
have become fl'ayed or otherwise damaged. Do not
use a cord that shows cracks or abrasion damage
along its length or at either end.
\_]_en moving the refiigerator away from the
wall, be careflfl not to roll over or damage the
power cord.
READANDFOLLOWTHISSAFETYINFORMATIONCAREFULLY.
SAVETHESEINSTRUCTIONS
4

Aboutthe temperaturecontrols, gecom
J
The temperature controls are preset in the factory at 37°F for the
refrigerator compartment and O°Ffor the freezer compartment. Allow
24 hours for the temperature to stabilize to the preset recommended
settings.
The temperature controls can display both the SET temperature
as well as the actual temperature in the refrigerator and freezer.
The actual temperature may vary slightly from the SET temperature
based on usage and operating environment.
Setting either or both controls to OFFstops cooling in both the freezer
and refrigerator compartments, but does not shut off electrical power
to the refrigerator.
NOTE: The refrigerator is shipped with protective film covering the
temperature controls. If this film was not removed during installation,
remove it now.
Tochange the temperature, press and release the
WARMER or COLDERpad. Tile SETlight will come
on and tile display will show tile set teml)eramre.
To change tile teml)eratm'e, tap either tile
WARMER or COLDERpad tlntil tile desired
temperature is displayed. Refl'igerator temperatures
can be ac!justed between 34°F and 44°F and tile
fl'eezer teml)eratm'es can be a(!iusted between
-()°F and +6°E
Once tile desired temperature has been set,
tile temperatm'e display will retm'n to tile actual
reflJgerator and fl'eezer temperatm'es alter 5
seconds. Several a(!iusunents may be required.
Each time you a(!iust controls, allow 24 horn's fin" tile
refl_igerator to reach tile temperatm'e you have set.
Toturn the cooling system off, tap tile WARMER pad
fi)r either tile reflJgerator or tile fl'eezer tmtil tile
display shows OFF.Toturnthe unit back on,press tile
COLDERpad fin" either tile refl_igerator or fl'eezex:
The SETlight will ilhmfinate on the side you
selected, Then press the COLDERpad again (on the
side where the S_"Tlight is ilhmfinated) and it will
go to tile preset points ot O°Ffi,r tile fl'eezer and
37°Ffln" the reti'igeratox: Setting either or both
controls to OFFsmps cooling in both the fl'eezer
and refl'igerator compartments, but does not shut
off' electrical power to tile reli'igerato_:
PerformanceAir FlowSystem
Tile Perfimnance _M>glow System is designed to
maximize temperatm'e control in tile refligerator
and fl'eezer compartments. This mfique special
teature consists of tile :Mr Tower along tile back
wall ot the refl-igerator and the _dr Tmmel on the
bottom portion of tile fl'eezer rear wall. Placing fi)od
in fl'ont of the louvers on these components will not
affect pettormance. _&dthough tile :Mr Tower
and the ?dr Tmmel can be removed, doing so
will affect temperature ped0mmnce. (For remowfl
instructions, on-line, 24 horns a day, contact us at
ge.com or call 800.GE.CARES. In Canada, contact
us at geappliances.ca or call 1.800.361.3400.)

About TurboCool.TM
How#Works
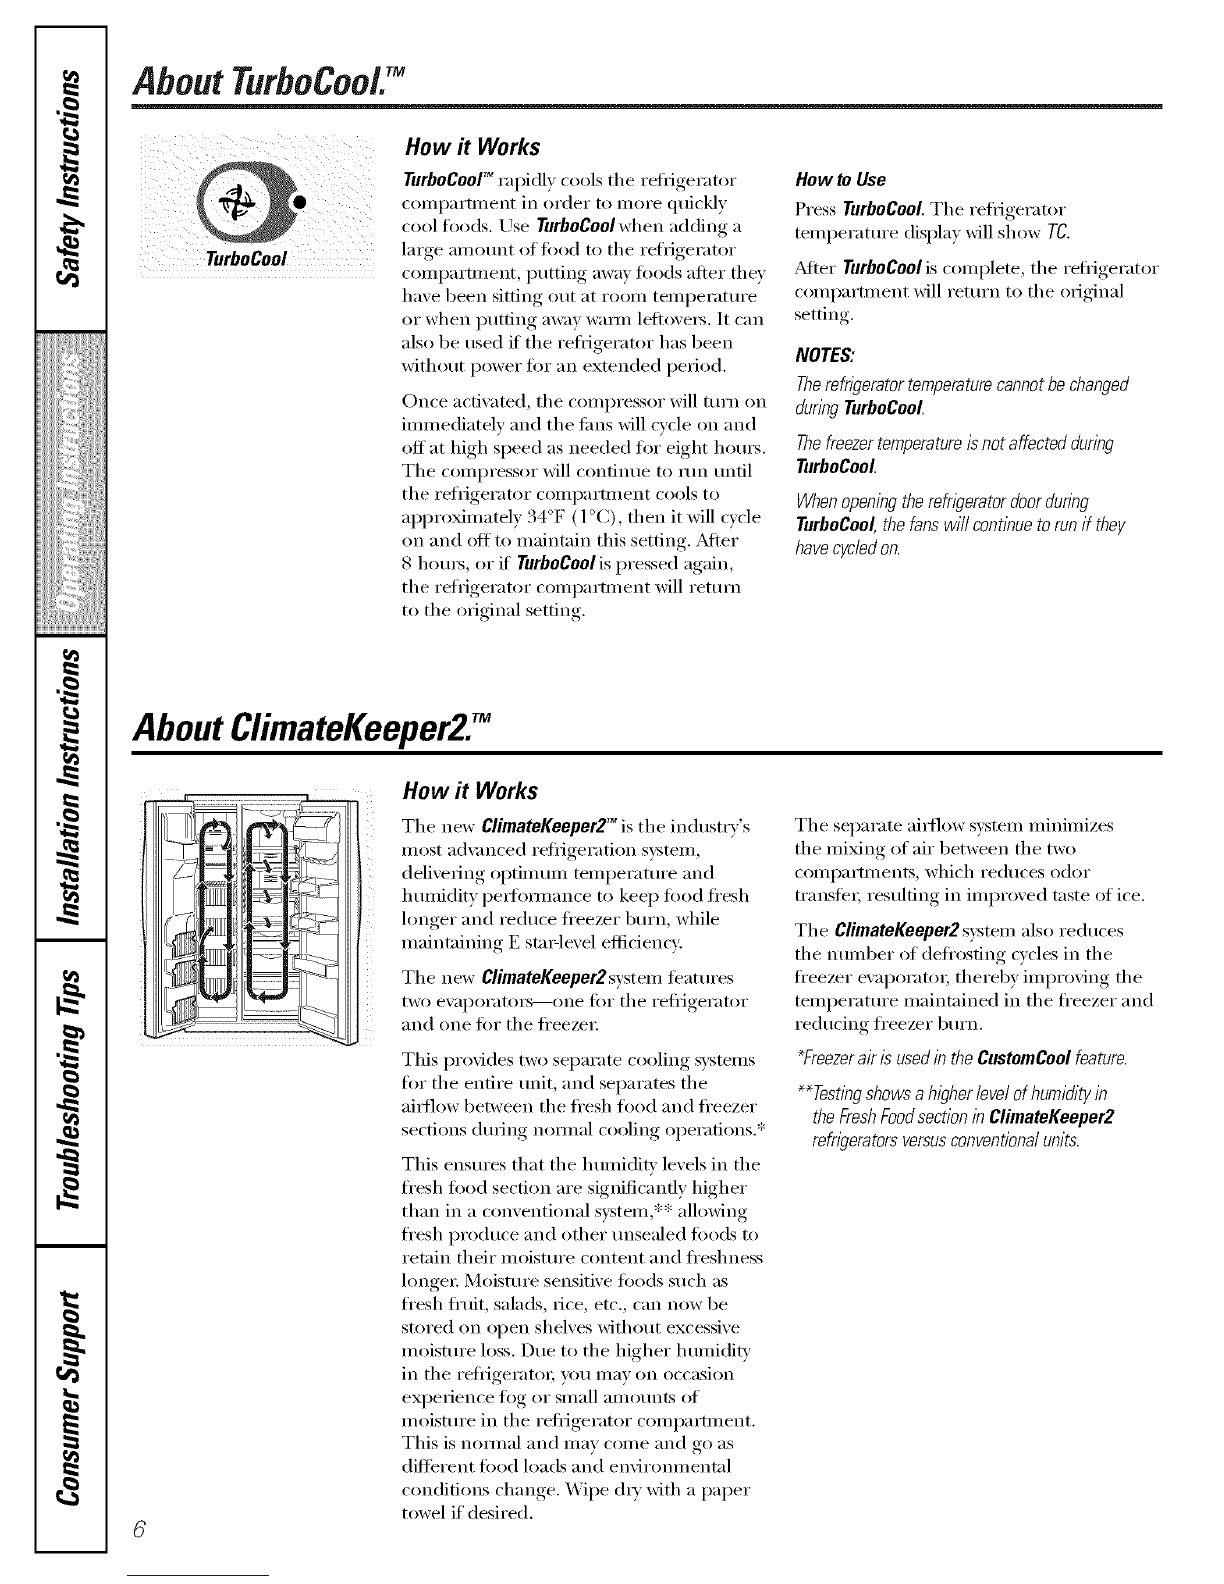
TurboCoolTM rapidly cools the refl_igerator
colni)artn_ent in order to inore quickly
cool fi_ods. Use TurboCoolwhen adding a
TurboCool large amount of fi)od to the refiJgerator
COilll)artlilent _ p/ltting away [OO(Is atier they
have been sitting out at room temperatm'e
or when putting away warn/leflovei_. It can
also be used if the refi_igerator has been
without power fin" an extended period.
Once acfiwKed, the colni)ressor will turn oil
ilnlnediatelv and the tiros will cycle oil and
off at high speed as needed fi)r eight houls.
Tile colnl)ressor will continue to run until
tile reflJgerator colnl)artnlent cools to
approximately 34°F (1 °C), then it will cvcle
on and off to maintain this setting. _Mier
8 houi_, or if rurboCoolis pressed again,
tile refrigerator coml)artment will return
to the original setting.
How to Use
Press TurboCooLTile reti_igerator
temperature display will show TO.
_MteI"TurboCoolis complete, tile reliJgerator
colnl)artment will return to tile original
setting.
NOTES:
Therefngeratortemperaturecannotbechanged
duringTurboCool.
Thefreezertemperatureisnotaffectedduring
TurboCool.
Whenopeningtherefngeratordoordunng
TurboCool,thefarowillcontinuetorunif they
havecycledon.
AboutClimateKeeper2JH
How it Works
Tile new ClimateKeeper2 TM is tile industrv's
most a(l\mlced reli_geration systeln,
delivering oi)timun_ teml)erature and
hulnidity l)ei_imnance to kee I) food fl'esh
longer and reduce ti'eezer burn, while
maintaining E Stalqevel efficiency.
Tile new ClimateKeeper2system teatuI'es
two ewq)oratoi_--one fin" tile refligerator
and one fin" the fl'eezei:
This provides two separate cooling systems
tot tile entire unit, and separates tile
aiI_lOw between tile fl'esh food and fl'eezer
sections (hwing nomml cooling operations.*
This ensures that the humidi Vlevels in the
fresh t0od section are significantly higher
than in a conventional system,** allowing
fresh produce and other unsealed foods to
retain their inoismre content and fl'eshness
longei: Moisture sensitive t0ods such as
fresh ti'uit, salads, rice, etc., can now be
stored on open shelves without excessive
moisture loss. Due to the higher humidiQ'
ill tile reli_igei'atoi; you Inay on occasion
experience log or small amounts of
moisture in tile refl_igerator c()mi)artment.
This is nomml and may come and go as
difli_rent food loads and environlnental
conditions change. Wipe (liT with a paper
towel if' desired.
Tile separate aii{low s}:stem minimizes
the mixing of air between the two
colnl)artments , which reduces odor
tI'ansfeI; resulting ill imi)roved taste of ice.
Tile ClimateKeeper2systeln also reduces
tile imlnber of defi'osting cycles in tile
fl'eezer eval)oratoI; thereby improving tile
teml)erature maintained ill tile fl'eezer and
reducing fl'eezer burn,
_Freezer ak is used in the CustomCool feature.
**Testingshowsa higher/eve/ofhumidityin
theFreshFoodsectionlbClimateKeeper2
refweratorsversusconventiona/units.

AboutCustomCoolY ge.com
How it Works
The CustomCoolTM feature is a system of
dampe_, a tim, a temperature thermistor
and a heater. Depending on the fllncfion
selected, a combination at these will be
used to quickly chill items, thaw items or
hold the pan at a specific temperature.
The pan is tightly sealed to prevent the pen's
temperature fl'om causing temperature
fluctuations in the rest of the refl_igeratm:
Some CustomCool models teature a beverage
centei; It is designed to store beverages at
colder temperatures, Select the Beverage
Center pad if you like to kee I) extra-chilled
refl'eshments on hand.
The controls _/r this pan are located at the
top of the refl_igerator with the temperature
conti'ols.
ExpressThawTM
ExpressChfllTM
How to Use
0 Erupt}, the pan. Place the (;hill/Thaw
tra) in the pan. Place the items on the
tra) and close the pan completely,
@Select the ExpressThaw_,"ExpressChill"
or SelectTemf" pad. The display and
SK/'light will coine on. Tap the pad
until the light appeais next to the
desired setting. Use the chart to
detemfine the best setting to use.
_:_ To stop a feature before it is
finished, tap that teature's pad
until no options are selected and
the display is off.
iJi::During ExpressThaw and
ExpressChill,the displa)on tl_e
controls will count down the time
in the cycle.
_: _dter the ExpressThaw cycle is
complete, the I)an will reset to the
MEATsetting (32°F) to hel I) preserve
thawed items until they are used.
_: The displayed actual temperature (ff
the CustomCoolpan may wm' slightly
ti'om the SETtemperature based on
usage and operating enviromnent.
NOTE."Forfoodsafetyreasons,it is recommended
thatfoodsbe wrappedinplastic wrap when using
ExpressThaHz Thiswill help containmeatjuices
andimprove thawingperformance.
How to Remove and Replace the Drawer
Toremove:
@ Pull the drawer out to the stop position.
@ Rotate all fore" swing locks to the unlock
position.
i,ifl the ti'ont (ff the drawer up and ()tit.
Toreplace:
@ Make sure all four swing locks are in the
unlock position.
Place the sides of the drawer into the
drawer supports, making sure the swing
locks fit on the drawer slots.
I,ock all four s_dng hicks by rotating
them to the hick I)osition.

AboutCustomCool:
CustomCoo/TMChart
NOTE: Results may vary depending on packaging, starting temperature and other food traits.
ExpressChill SelectTemp
0.5 Lb. (4 hours)
::Ji::Hanfl)urger Patties (0.5 lb)
::Ji::Individually Wrapped
Filet Mignon (0.5 lb)
1.0 Lb. (6 hours)
_: Chicken Breasts (l.0 lb)
::Ji::Ground Beef (1.0 lb)
_: Steak (],0 lb)
2.0 Lbs. (10 hours)
::Ji::Chicken Breasts (2.0 lbs)
!_'J Ground Beet (2.0 lbs)
_: Steak (2.0 lbs)
3.0 Lbs. (12 hours)
::Ji::Chicken Breasts (3.0 lbs)
_: Grotmd Bed (3.0 lbs)
N Steak (3.0 lbs)
15 Minutes
::Ji::1 Beverage Can (12 oz)
::Ji::2 Small Juice Boxes (6-8 oz each)
30 Minutes
_: 2 to 6 Beverage Cans (l 2 oz each)
::Ji::2 Plastic 20 oz Bottles of Beverage
_: 4 to 6 Small Juice Boxes
(C_8 oz each)
::Ji::3 Foil Juice Packets
::Ji::X,_]ne (750 ml bottle)
45 Minutes
_: 2 liter of Beverage
:t::::1/2 Galhm {ifJuice
::Ji::Gelatin-1 package
Citrus Setting (43°F)
::Ji::Oranges, i,emons, IJmes,
Pineal)pie, (:antalouI)e
::J?::Beans, (]tlCtli//bei's, Tomatoes,
Peppe_, Eggplant, Squash
Produce Setting (35°F)
_: Strawberries, Raspberries, I_wifl'uit,
PeaI_, Cherries, Blackberries,
Grapes, PlulnS, Nectarines, Apples
::iT::_&sparagus, Broccoli, ())rn,
Mushroon]s, Si)inach ,CaulifloweI;
tCde, Green Olfion, Beets, Olfions
Meat Setting (32°F)
}i_:Raw Meat, Fish and Poultr*
How to Use
[
ii i _ i i
O Select the Beverage Centerpad. The set
light will come on and the feature xfill
operate as required.
_To turn off the feature, press Beverage
Centerpad and set light will mrn off.
NOTE:Unlessturnedoffasabove,featurewi//
remainactiveforsixmonths.PresstheBeverage
Centerpadtorestart.
DaiB/Bin How to Remove and Replace the Beverage Center
Toremove: _Replace dairy bin.
O Renlove (laiI T bin fiI_t. Holding the
bottom ot the daily bill lift the fl'ont
straight up, then lift up and out.
@Holding left and right side of beverage
center; lift straight up and out.
Oi,eave adapter in place.
Toreplace:
Engage back4de ot beverage center in
molded SUl)l)orts on adapte_: Then
push down on the sides ot the beverage
centeI: The beverage cenmr will lock
into place.
Adapter
il
il

About the water filter. (onsomemodels) ge.com
Water Filter Cartridge
The water filter cartridge is located in the back upper right
corner of the refrigerator coml)artn/ent.
When toReplace the Filteron Models With a
ReplacementIndicatorLight
There is a replacement indicator light tin" the water tilter
cartridge on the dispense_; This light will mrn orange to tell
w)u that you need to replace the filter soon.
The filter cartridge should be replaced when the
replacement indicator light turns red or if the flow ot water
to the dispenser or icemaker decreases.
O i,ine up the arrow on the cartridge and the cartridge
holder; Place the top of the new cartridge, uI ) inside the
holder; Do not push it up into the holder;
O Slowly turn it to the right until the filter cartridge stops.
DO NOTOVERTIGHTEN. As you turn the cartridge, it will
automatically raise itself into position, The cartridge will
moxe about l/2 turn,
When toReplace the Filteron Models Without a
ReplacementIndicatorLight
The filter cartridge should be replaced every sixmonths
or earlier if the flow of water to the water dispenser or
icemaker decreases.
Removingthe Filter Cartridge
If you are replacing the cartridge, ti_t remove the old one
by slowly turlfing it to the lefL Do not pull down on the
cartridge. A slnall alnoui_t of water may drip down.
Installing the Filter Cartridge
@There is an adapter attached to the top ot the new filter
cartridge
If you are replacing a SmartWater cartridge, the adapter
must be removed before installing the cartridge. To
remove the adapte_; turn it to the left about 1/4 turn.
If you are replacing a Water by Culligancartridge,
leave the adapter in place. This adapter will stay in the
reli_Jgerator when you replace fllttu'e cartridges.
!i ii
With adapter Withoutadapter
(appearance may vary)
@ On models xfithout a replacement indicator light,
appl) the month and )ear sticker to the new cartridge
to remind you to replace the filter in six months.
0t(Fi)ll i1111)e: _l) )1! ;I)(;;l[e] ie I_lto( , i lf'tl.l('J)iII_ tl/_ ;i t(ll; S\l*_i;;tnesl; it! _i:_ i i [lel(;i_ it;_le_V
after installation.
@ Run x_ater from the dispenser fi)r 3 mimttes (about 1-1/2
gallons) to clear the sxstem and prexent sputtering.
@Press and hold the RESETWATERFILTERpad (on some
models) on the dispense_ fin 3 seconds.
NOTE:Anewlvqnstalled water filter cartridge ma x cause
water to spurt ti'om the dispenser,
FilterBypassPlug
You must use the filter bypass [)lug when a replacement
filter cartridge is not a\_filable. The dispenser and the
icemaker will not operate without the filter or filter
byl)ass I)lug.
i__ii:_=li_
Filter_,m
Bypass
Plug_
WaterbyCu/!igan
To use the filter bypass I)lug on Water by Culligan models,
you must fi_t remove the filter adapter fl'om the cartridge
i_older by turning it to the left.
If you have questions--visit our Website
at ge.colll,
or call 1.800.GE.CARES (1.800.432.2737).
Replacement fillers:
To order additional filter cartridges in the United States,
visit our Website at ge.com, or call GE Parts and Accessories,
800.626.2002.
MWF
Suggested Retail $38.95-47.95
Custome_ in Canada should consult the yellow pages fin"
the nearest Camco Serxice Centei:

Abouttheshelvesandbins.
Not all features are on all models.
Refrigerator bin
Freezer tilt-out bin
/
Refrigerator Door Bins and Freezer Door Tilt-Out Bins
Large Bins The snuggerhelps [)re\'ent tipping, spilling
or sliding of small items stored on the door
The larger refrigerator door bins and shelf. Place a finoer on either side of the
snugger near the rear ancl move it back
and fi)rth to fit your nee&s.
D0 n0t bl0ck CAUTION:
fl'eezer dlt-out door bins are ac!iusml)le.
To remove: Lift the fl'ont of the bin straight
up, then lift up and out.
To replace or relocate: Engage the back side
of the 1)in in the molded supports on the
dora; Then push down on the fl'ont of the
bin. Bin will lock in place,
SmallBins
Toremove: iJfl the front of the bin straight
up then ()tit.
Toreplace: Position the bin above the
rectangular molded SUl)ports on the (looi:
Then slide the bin down onto the SUl)p()rt
to lock it in place.
Topfreezer bin
Becareful when
placing items in the
topbin. Make sure
that items do not
blockor fail into
the ice chute.
;i
Donotblock
CAUTION:
Partmustbe in
p/aceasshown
forproper ice
dispensing.Food
cannotbe stored
/b thislocation.
Top freezer bin (on some models)
Press tab andpull shelf forward
to remove
Slide-Out Spillproof Shelf
The slide-out spillproot shelf allows you
to reach items stored behind othei_. The
special edges are designed to hel I) prexent
spills from dripping to lower shelxes.
To remove:
Slide the shelf out until it reaches the stop,
then press down on the tal) and slide the
shelf straight out.
Toreplace or relocate:
iJne the shelf up with the SUl)ports and
slide it into place. The shelf can be
reposifioned when the door is at 90 ° or
more. To reposition the shelf, slide the shelf
past the stops and angle downward. Slide
shelf down to the desired position, line up
with the supports and slide into place.
Make sure you push the shelves a// the way back
in before you close the door
10
OuickSpace TM Sheff
This shelf splits in half and slides under
itself for storage of tall items on the shelf
below.
This shelf can be removed and replaced
or reh)catedj ust like Slide-Out Spillproof
Shelves.
On some models, this shelf cannot be used
in the h)west position.

ge.com
Not all features are on all models.
Freezer Baskets
Toremove, push the basket all the way to the
back oI the fl'eezex: Lift iiI) until the back
pins are disengaged, i,ifl the entire basket
tl I) and pull out.
Makesureyoupushthebasketsall thewayback
in beforeyouclosethedoo_
i) ¸ ¸¸ j /)7 Slide-Out Freezer Shelves
To remove, slide ()tit to tile stop l)osition,
lift the front past the stop position and
slide out.
Makesureyoupushtheshelvesall thewayback
in beforeyouclosethedoor.
Fixed Freezer Shelves
There are two types of fixed
ti'eezer shelves.
Toremove this type of shelf."
O I,ift the shelf uI) at the left side.
Bring the shelf Stilt.
Toremove this type ofshelf"
i,ifl up the left side of the shelf and
slide it left into the center of the shelf
supports.
Rotate the fight side of the shelf up
and out of the shelf sui)ports.
NOTEFORDISPENSERMODELS:/nordertotake
furladvantageofthetilt-outicebin,onlystoreitems
ontheshelfbelowtheicebinthatarenotallerthan
the/owestpointonthebin.
Door Wine/Beverage Rack (onsomemodels)
This rack holds up to 5 cans, (tile botde of
wine or one 2-liter bottle of soda.
The rack hangs from the sides of the
dair_ bin.
To remove:
O Erupt} the xdne/beverage rack.
Toreplace:
Reattach the rack to the sides
of the bin.
Engage the back side of the bin in
the molded SUl)ports on the (h)o_:
Then push down on the ti'ont of the
bin. The bin will lock into place.
Holding the bottom of the dairy bin,
lift the ti'ont straight Ill), then lift III)
and (t/it.
To detach the rack from the dairy bin,
pull the rack's side wires out of the
holes on each side (ff the dairy bin.
:
i
11

Abouttherefrigeratordoors.
ii
When the door is only partially open,
it will automatically close.
Beyond flTisstop flTedoor will stay open.
Refrigerator Doors
The reii_igerator (loo_ may teel different
than the ones you are used to. The special
door opening/closing teatuI'e makes sure
the (loo_s ch)se all the way and are securely
sealed.
When opening and closing the door you
will notice a stop position. If the door is
opened past this stop point, the door will
i'elllain open to allow VOII to load and
unload tood more easily. When the door
is only partially open, it will automatically
close.
The resistance you ti_el at the stop
position will be reduced as the door
is loaded with food.
Door Alignment
If (loo_s are unexen, a(!just the refrigerator
dooi-
Using a 7/16" wrench, turn the door
a(!justing screw to the right to raise the
door; to the left to lower it. (A nylon
plug, imbedded in the threads ot the
pin, prevents the pin from turning
unless a wrench is used.)
O _Mter one or two turns of the wrench,
oi)en.... and close the refrigerator, door
and check the alignment at the top of
the (h)o_s.
/2

Aboutthecrispersandpans. ge.cem
Not all features are on all models.
Fruit and Vegetable Crispers
Excess water that may accunmlate in tile
bottom of tile drawe_ should be wiped (h_':
On some models, tile bottom drawer has
filll extension slides that allow fifll access
to tile (h'awe_:
Hi _LO Adjustable Humidity Crispers
Slide tile control all tile way to tile HIsetting
to provide high humidity recommended fin.
most vegetables.
Slide tile control all tile way to tile LO
settino_ to proxide lower humidly' lexels
recolmnended fi)r inost fl'uits.
I ii ii
Convertible Deli Pan
Tile convertible dell pan has its own cold
air duct to allow a stream of cold air fl'om
the fl'eezer compartment or fl'esh fi)od
compartment to flow to tile pan.
The variable temperature control regulates
tile air flow fl'om tile Climate Keeper:
Set tile control to tile coldest setting to
store fl'esh meats.
Set tile control to coldto convert tile pan
to nomml refl'igerator temperatm'e and
provide extra vegetable storage space, The
cold air duct is turned off. Variable settings
between these extremes can be selected.
Aboutcrisperremoval.
Not all features are on all models.
Crisper Removal
Crispers can easily be removed by pulling
the drawer straight out and lifting the
drawer up and over tile step location,
If the door pre\w_ts you fl'om taldng out
tile drawers, first tIT to remove tile (loot
bins. If this does not offer enough
clearance, the reflJgerator will need to
be rolled ibrward tmtil tile door opens
enough to slide tile drawers out. In some
cases, when you roll tile retiigerator ()lit,
you will need to move the refl-igerator
to tile left or right as you roll it ()tit.
/3

Abouttheautomaticicemaker.
A newly instafled refrigerator may take 12to 24 hours to begin making ice.
Automatic Icemaker
On dispenser models,
to access ice or reach
the power switch:
oLift thebin, then pull it
forward until the bin stops.
Lower the bin to access ice
or reach the power switch.
NOTE:In order to take full advantage
of the tilt-out ice bin, only store items
on the shelf below the ice bfl7that
are no taller than the Iowest point
on the bhT.
The icemaker will produce seven cubes
per cycle---al)l)roximately ] 00-130 cubes
in a 94-hour period, depending on fl'eezer
COilli)ai'tlllent teillpei'att]i'e_ i'OOill
temperatm'e, nmnber ot door openings
and other use conditions.
If the refl{gerator is operated befi)re the
water connect.ion is made to the icemaket;
set the power switch in the 0 (Off)position.
When the reti-igerator has been com_ected
to the water SUl)pl}; set the power switch to
the I (on) position.
The icemaker will fill with water when it
cools to ]5°F (-10°C), A newly installed
refi_igemtor may take 12 to 24 hems to begin
making ice cubes.
You will hear a buzzing sotmd each time
the icemaker fills with water
Special note about dispenser models:
::Ji::Dispenser models have a tilt-out ice bin.
The bin can be tilted out as shown in the
illustrations, and it will hold itself up
while you take ice ()tit or turn the
icemaker power switch on and off'. Be
sure to put the bin back in place before
closing the doo_:
::Ji::To restore your ice level from an empty
bucket stage, the following steps are
recommended:
12 hotu_ after the filSt batch of ice
has fidlen into the bin, dispense
3 to 4cubes.
@ _MteI" an additional 6 hom_, dispense
3 to 4 cubes again.
These steps will restore your ice level
in the shortest amount of tiine.
Throw awm the fit_t tew batches of ice to Power
allow the water line to clem: Switch Icemaker
ge stlre nothin£_ interferes with the sweep
of the teeler amL
When the bin fills to the level (ff the teeler
am_, the icemaker will stop producing
ice. It is nomml for several cubes to be
joined together.
If ice is not used ti'equentl); old ice cubes
will become chmdy, taste stale and shrink.
Green
P0wer Light FeelerArm
NOTE:/n homes with lower-than-averagewater
pressure,youmayhear the icemakercycle mult/}91e
times whenmaklhg onehatchof ice.
oLift thebin, then pull it
forward until the bin stops.
oLift andpull forward again
to remove the bin.
Removing Ice Bin (dispenser models)
CAUtiON:Theicebin is heavywhenfull.
Set the power switch to the 0(otO position
before removing the bin.
When replacing the bin, be sm'e to press it
firefly into place. ]f it does not go all the
way back, remove it and rotate the drive
mechanism 1/4 ttlFn. Then push the bin
back again.
Dispenser Models on v
14

About the ice and water dispenser. (onsome models) ge.com
SpillShelf
ToUse the Dispenser
Select CUBEDICE _gll, CRUSHEDICE t_
or WATER _) x
Press the glass geml) against the top ot
the dispenser cradle.
The spill shelf is not sel6draining.
To reduce water spotting, the shelf and
its grille should be cleaned regularl).
Oispenser Light
LIGHT
If no water ls dispensed when the refrigerator ls
first installed, there may be air in the water line
system. Pressthe dispenser arm for at least two
minutes to remove trapped air from the water Ouick Ice
line and to fill the water system. Toflush out
impurities in the water fine, throw away the first
six glassfuls of water Q
CAUTION: Never put fingers or any other
objects into the ice crusher discharge opening.
Lockingthe Dispenser QUICKICE
Press the LOCKCONTROL
lid pad tO_ 3 seconds to
lock the dispenser and DoorAlarm
control panel. To
tmlock, press and lid
LOCKCONTROL hold the pad again
HOLD3SECS _)11
fi:,r 3 seconds.
DOORALARM
This pad turns tile night
light in tile dispenser
on and off. The light
also coiiles on when
the dispenser cradle is
pressed. On some
models, if this light
burns out, it should be
replaced with a 6 watt
12V maximmn bulb.
_,\'hen you need ice
ill ahurry, press this
l/ad to speed u l) ice
production, This will
increase ice l/roducfion
for the fi)llowing
48 hom_ or tmfil you
press tile pad again.
To set the alal]n, lll'ess
this pad mlti] the
indicat(>r light C()lues
on. This almlu will
sound if either door is
open fi)r l//Ol'e thall
3 minutes. The light
goes out and tile
beeping stops when
you close the door.
important Facts About Your Dispenser
_: Do not ;1(1(1ice fl'om trays or bags to
tile storage drawer: It may not crush or
dispense well.
?_:Avoid overfilling glass with ice and use of
narrow glasses. Backed-up ice can jam the
chute or cause the door in the chute to
fi'eeze shut. If ice is blocking the chute,
poke it through with a wooden spoon.
iJi::Beverages and foods should not be
quick-chilled in the ice storage drawe_:
Cans, bottles or food packages in tile
storage drawer may cause the icemaker
or auger to.jaln.
iJi::To kee I) dispensed ice fl'om missing
the glass, put the glass close to, but not
touching, tile dispenser opening.
_: Some crushed ice may be dispensed
even though you selected CUBED ICE.
This hal)pens occasionally when a few
cubes acddentally get directed to
the crusher.
_: _Mter crushed ice is dispensed, some
water may drip ti'om tile chute.
iJi::Sometimes a small too/rod of snow will
titan on tile door in tile ice chum. This
condition is nomml and usually occm_
when you have dispensed crushed ice
repeatedly. Tile snow will eventually
eval)orate.
15

Careand cleaningoftherefrigerator.
Dispenserdriparea.
Cleaning the Outside
The dispenser drip area, beneath the grille,
should be _l)e(1 (h_': _,\_Ker lett in this area
may leaxe deposits. Remoxe the deposits by
adding undiluted vinegar to the well. Soak
tmtil the deposits disappear or become
loose enotlgh to I_nse al_;Iv.
The dispenser cradle, getore cleaning, lock
the dispenser by pressing and holding the
LOCK CONTROLpad fi)r 3 seconds, Clean
with w;mn water and baking soda
solution--about a tablespoon (15 ml) oI
baking soda to a quart (l liter) ol wateI:
Rinse thoroughly and wipe dry.
The doorhandles and trim. Clean with
a cloth dampened with soapy water:
Dry with a soft cloth.
The stainless steel panels and door handles
(on solne models) can be cleaned with
a commercially available stainless steel
cleanex: A spra)_on stainless steel cleaner
works best.
Do not use appliance wax or polish
on the stainless steel,
Keep the outside clean. Wipe Mth a clean
cloth lightly dampened Mth kitchen
appliance wax or mild liquid dish dete_g-ent.
D_y and polish with a clean, soft cloth.
Do not wipe the refrigerator with a soiled dish
cloth or wet towel Thesemay leave aresidue
that can erode the paint Do not use scouring
pads,powdered cleaners, bleach or cleaners
containing bleach because these products can
scratch and weaken the paint finish.
Cleaning the Inside
Tohelp prevent odors, leave an open box of
baking soda in the fl'esh tood and fl'eezer
CoI//pa i'tlllents,
Unplug the refrigerator before cleaning. If this
is not practical, wring excess moisture out
()f sponge or cloth when cleaning around
switches, lights or controls.
Use wmm wamr and lx_king soda solution--
about a tablespoon (15 ml) (ff baking soda
to a quart (l liter) of wam_: This both
cleans and neutralizes o(lo_s, Rinse and
wipe dry:
Useof any cleaning solution other than that
which isrecommended, especially those that
contain petroleum distillates, can crack or
damage the interior of the refrigerator.
Avoid cleaning cold glass shelves with hot water
because the extreme temperature difference
may cause them to break. Handle glass shelves
carefufi_zBumping tempered glass can cause
it to shatter
Donot washanyplasticrefngeratorparts
in thedishwasher
Thechili/thaw trayis dishwashersafe.
/6

ge.com
Behind the Refrigerator
Be careflll when moving the reti_igerator
away fl'om the wall. _dl types of floor
coverings can be damaged, particularly
cushioned coverings and those with
elilbossed S/llS[;ices.
Pull the refl_igerator straight out and return
it m position by pushing it straight in.
Moving the refl_igerator in a side direction
may result in damage to the floor covering
or refl_igerato_:
Whenpushingtherefrigeratorback,makesure
youdon't roll overthepowercordor icemaker
supplyline.
Preparing for Vacation
For long ;;ications or absences, relllOve
load and uI_plug the reliigerato_: Clean the
intelior with a baking soda sohltion of one
tablespoon (l 5 ml) of baking soda to one
quart (1 liter) of water: i,eave the (loo_
open.
Set the icemaker power switch to the 0 (off)
position and shut off the water supply to
the refl_igerato_:
If the temperature can drop below fl'eezing,
have a qualified servicer drain the water
supply s)'stem to prevent serious propert},
damage due to flooding.
Preparing to Move
Secure all loose items such as shelves and
drawers by taping them securely in place
to prevent damage.
_4]_en using a hand truck to move the
refligerato_; do not rest the fl'ont or back
_ffthe retiigerator against the hand truck.
This could damage the refrigerator. Handle
only ti'om the sides of the retiiger;mn:
Be sure the refn)erator stays in an upright
position during moving.
/7
I
_!!ii::,,_i,_iiiii_i:il
ii_iiiii_iiii}iiii
,%_',,,,Hiiiiiii
iii!iiiiii_i_ii{ii¸
i
i
g
g
}

Replacingthelightbulbs.
Setting the controls to OFF does not remove power to the light circuit.
______ Refrigerator Compartment--Upper Light
Tabs
0
0Unplug tile refl'igerator.
Tile bulbs are located at tile top of tile
comi)artnlent, inside the light shield.
On some models, a screw at the fl'ont of
tile light shield will have u) be removed.
@To rein(we tile light shieM, on seine
models, press in on tile tabs on tile
sides of tile shield and slide fi)rward
and out. On other models,just slide
torward and ()/It.
O,Mter replacing tile bulb with an
appliance bulb of tile same or lower
wattage, replace the light shield and
scrmvs (on some models). When
replacing the light shield, make sure
that the tabs at the back of the shield
fit into tile slots at tile back of tile light
shield housing.
O Plug the reli_igerator back in.
Refrigerator Compartment--Lower Light
Thish)ht is located above the top drawer
0 Unl)iug tile refligerator
0 Relnove tile con',ertible ineat drawer
control knob b) pulling straight out.
lift the light shield up and pull it out.
O_Mter replacing tile bulb x_th an
appliance bulb of tile sanle or lower
wattage, replace the shield and
the knob.
0 Plug tile refrigerator back in.
Freezer Compartment
Unplug tile refl_igerato_:
O Relnoxe tile shelfj ust aboxe tile light
shield. (The shelf will be easier to
remoxe if it is emptied fi_t.) On some
models, a screw at the top of the light
shield will need to be remoxed.
To remoxe tile light shield, press in
on tile sides, and lift up and out.
0Replace tile bull) with an appliance
bulb of tile same ()r lower wattage,
and reinstall the light shield. When
reinstalling the light shield, make
sure tile top tabs snap secm'elv
into place. Replace the screw
(on seine inodels).
Reinstall tile shelf and plug tile
refrigerator back in.
Dispenser (onsomemodels)
0 Unl)lug tile refligerato_:
0 Tile bulb is located on tile dispenser
trader tile control panel.
Remoxe tile light bulb b) turning
it co/mterclockwise.
O Replace tile bulb with a bulb of tile
same size and wattage.
Plug tile refrigerator back in.
18

Trimkits anddecoratorpanels.
For CustomSlyM °'models
Read theseinstructionscompletely and carefully.
BeforeYouBegin
Some models are equipped with trim kits that aflow you to install door panels. You can order
pre-cut black, white, bisque or stainless steel decorator panels from GE Parts and Accessories,
800.626.2002,or you can add wood panels to match your kitchen cabinets.
Panels less than 1/4" (6 mm) thick
When installing wood panels less than l/4" (6 ram) thick, you need to create a filler panel, such as 1/8"
cardboard, that Mll fit between the ti_ce of the door and the wood panel. If you are installing the ix'e-cut
decorator panels, ix'e-cut filler panels are included in the kit. The coml)ined thickness of the decorator
or wood panel and the filler panel should be 1/4" (6 ram),
Panels1/4" thickorless
1/4" max
3/4" (19 mm) or Raised Panel
A raised I)anel desion_ screwed or ,glued to a l/4" (6 ram) thick backing, or a 3/4" (1(.)ram) _outed board
can be tlsed, The raised I)ortion of the panel m tlst be tid)ricated to i)e_nit clearances of at least 2" (5. l cm)
ti'om the handle side fin" fingertip clearance.
Panels thicker than 1/4" (6 ram), up to 3/4 (l .) ram) max, will _e(luue that the outer :)/16 (8 ram) of
panel perimeter be no thicker than 1/4" (6 ram).
Weightlimitationsfor custompanels:
FreshFood38Ibs.(17kg)max.
FreezerDoor28Ibs.(13kg)max.
Panelsthickerthan1/4"(6mrn)
1/4"(6ram)max
3/4"(19 ram/
f
2"(5.1 cm)
Clearance
HandleSide
Appearance "'"
Panel
1/4"(6ram)
kBacking
Door
19

Trimkits anddecoratorpanels.
23"Dimensions for Custom Wood Panels
The areas at the top of the panels need to be cut out (ff the panels.
Freezer Panel Freezer Panel
Without Dispenser With Dispenser FreshFoodPanel
Cutout .-.I I_.- 1/8" (3 mm)
J+ ,,
i i
.... .I
t
5/16"
(Smm)
67%Z'
(170.9 cm)
FRONT
14I%Z'
'(36.8 crn)-'
Cutout "-'I I_-1/8" (3 rnm)
,,
i i
/Smm,!/
/ 177/¢'
1(46i4cm)
m
FRONT
_L 141%2" _
1(36.8 or'n)
33%"
(85.4 cm)
#
1/8"(3 rnrn)-_,,l I-"- Cutout
" "----'J 5/16"
I_ ""i (8 ram)
67%Z'
(170.9 cm)
FRONT
1915/32"
"" (49.5 crn)'
25" CustomStyld MDimensions for Custom Wood Panels
The areas at the top oI the panels need to be cut (mr oI the panels.
Freezer Panel Freezer Panel
Without Dispenser With Dispenser FreshFoodPanel
20
Cutout "-"I I"- 1/8" (3 mm)
''
i !
.... --I
t
5/16"
(8 mm)
69"
(175.3 cm)
FRONT
1415/;2"
_'-"(36.8 cm)-"
[
Cutout "-"-I I_'- 1/8" (3 ram)
,l ''
i i
iFRONT
15 zz
14k2 ,.,
(36.8 ore)
361/4"
(92.0 cm)
1/8"(3 rnrn).-_ I I'*- Cutout
" "- - --'J' 5/16"
"---1 (8turn)
69"
(175.3cm)
FRONT
19_%2"
" (49.5cm)"
This manual suits for next models
9
Table of contents
Languages:
Other GE Refrigerator manuals

GE
GE MONOGRAM ZISB480DM Manual

GE
GE Profile PFCS1NFXSS Manual

GE
GE Monogram ZIFI240 User manual

GE
GE TBF21BA Installation instructions

GE
GE GSS25QSWSS Manual

GE
GE Monogram ZIRS360NX User manual

GE
GE GTS18ISTSS Operating instructions

GE
GE 21 Safety guide

GE
GE GDSS0KCXBRSS and User manual

GE
GE Bottom-Freezer Built-In Refrigerator User manual

GE
GE GTL12HBDBS Manual

GE
GE Monogram ZISS420NMSS User instructions

GE
GE TBX10 User manual

GE
GE BIS42CK User manual

GE
GE WMRO4GAV Original instructions

GE
GE GSC21KGRAWW and Safety guide

GE
GE GDL22KCWSS Manual

GE
GE DSF25KGTABG and Safety guide

GE
GE GSS25KGS Manual

GE
GE GSH22JFXCC - Refrigerator w/ Glass ESTAR Manual