Gecko Infento Instructions for use

CONSTRUCTION MANUAL
Length
Max weight
Time to build
GECKO
G1
YEARS
3-8
97 - 133 cm / 38 - 52 inch
37 kg / 81 lbs
1,5 hour

Before you start constructing and use our product, please carefully
read the following safety warning and download our manual from our
website. This safety warning and manual contains important informa-
tion relating to your child’s safety. It is your responsibility to review this
information with your child and make sure they are fully aware of all
the warnings before they start riding. Failure to follow instructions and
safety precautions can result in serious injury or death.
You can fi nd a digital copy of the manual at the following web address:
www.infentorides.com
WARNING - IMPORTANT NOTICE TO PARENTS
PLEASE PRINT OUT THE MANUAL AND KEEP
THE MANUAL AND THIS SAFETY WARNING IN A
SAFE LOCATION FOR FUTURE REFERENCE.

WARNING! PARENTAL SUPERVISION
AND APPROPRIATE USE
Like any moving product, rides made from
Infento parts can be dangerous if due care
and attention is not paid. To reduce the risk
of serious injury: use only under close adult
supervision. Parents must review the following
warnings and instructions with each Infento
ride that is being build. It is your responsibility
to review this information and make sure that
all riders understand all warnings, cautions,
instructions and safety topics, and assure that
young riders are able to safely and responsibly
use this product. Infento recommends that you
periodically review and reinforce the infor-
mation in this manual with younger riders, and
that you inspect and maintain your child’s
Infento rides to insure their safety.
WARNING! RIDING ON
INFENTO RIDES CAN BE A
DANGEROUS ACTIVITY
Riding on Infento rides can be a dangerous
activity. Certain conditions may cause the equip-
ment to fail without fault of the manufacturer.
Rides made from Infento parts can and are
intended to move, and it is therefore possible to
lose control, fall off and/or get into dangerous
situations that no amount of care, instruction or
expertise can eliminate. If such things occur you
can be seriously injured or die, even when using
safety equipment and other precautions. Ride at
your own risk and use common sense.
WARNING! NO LIABILITY FOR
CONSTRUCTED RIDES THAT
DIFFER FROM OUR MANUALS
The rides that you can fi nd in our manuals have
been tested by offi cial independent testing
agencies. We will not be responsible or liable,
directly or indirectly, in any way for any loss or
damage of any kind incurred as a result of your
decision to build constructions or rides that
diff er from the offi cial rides that we show in our
manuals.
ASSEMBLY – SUBSECTION
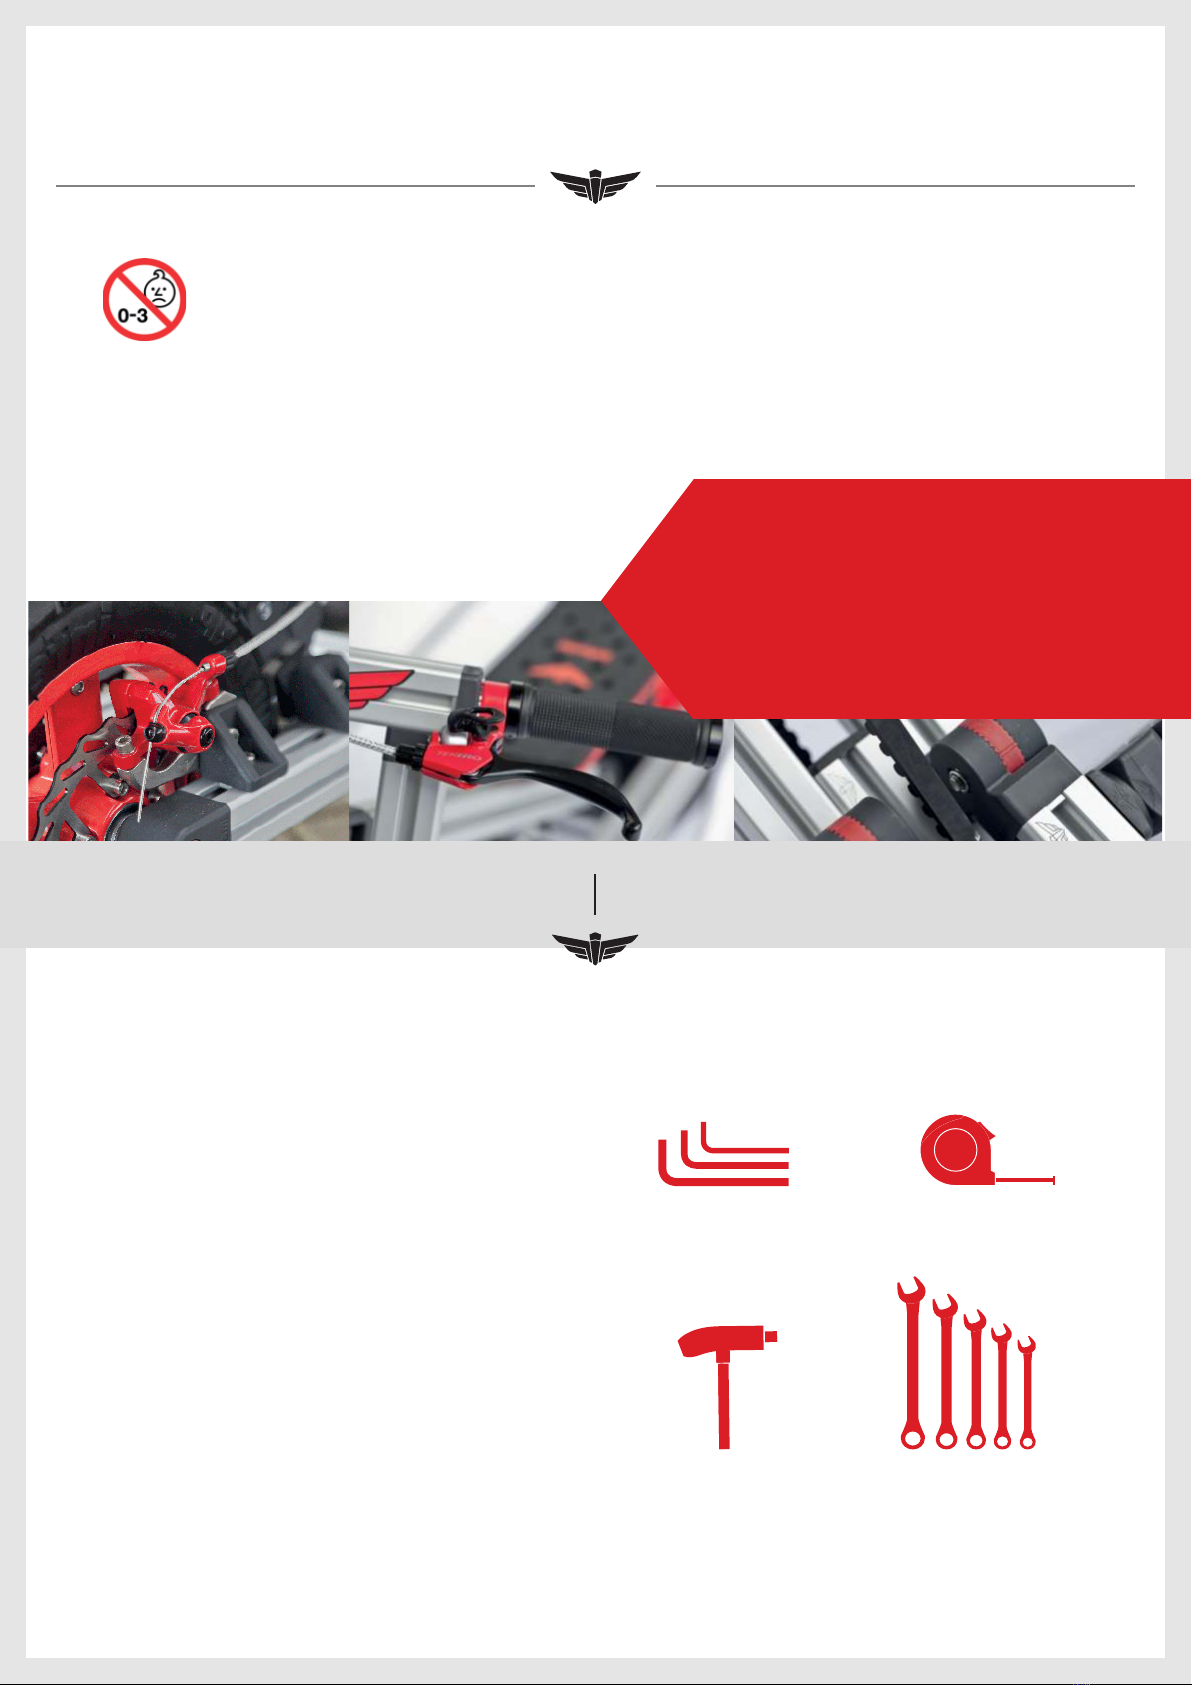
WARNING! OUR KITS
CONTAIN SMALL PARTS
This package contains small parts which, before
assembly, present a choking hazard to children
under the age of three. Care should be taken
during unpacking and assembly to insure that
all small parts and plastic bags are accounted
for and kept out of the reach of children.
WARNING! TO AVOID
SERIOUS INJURY:
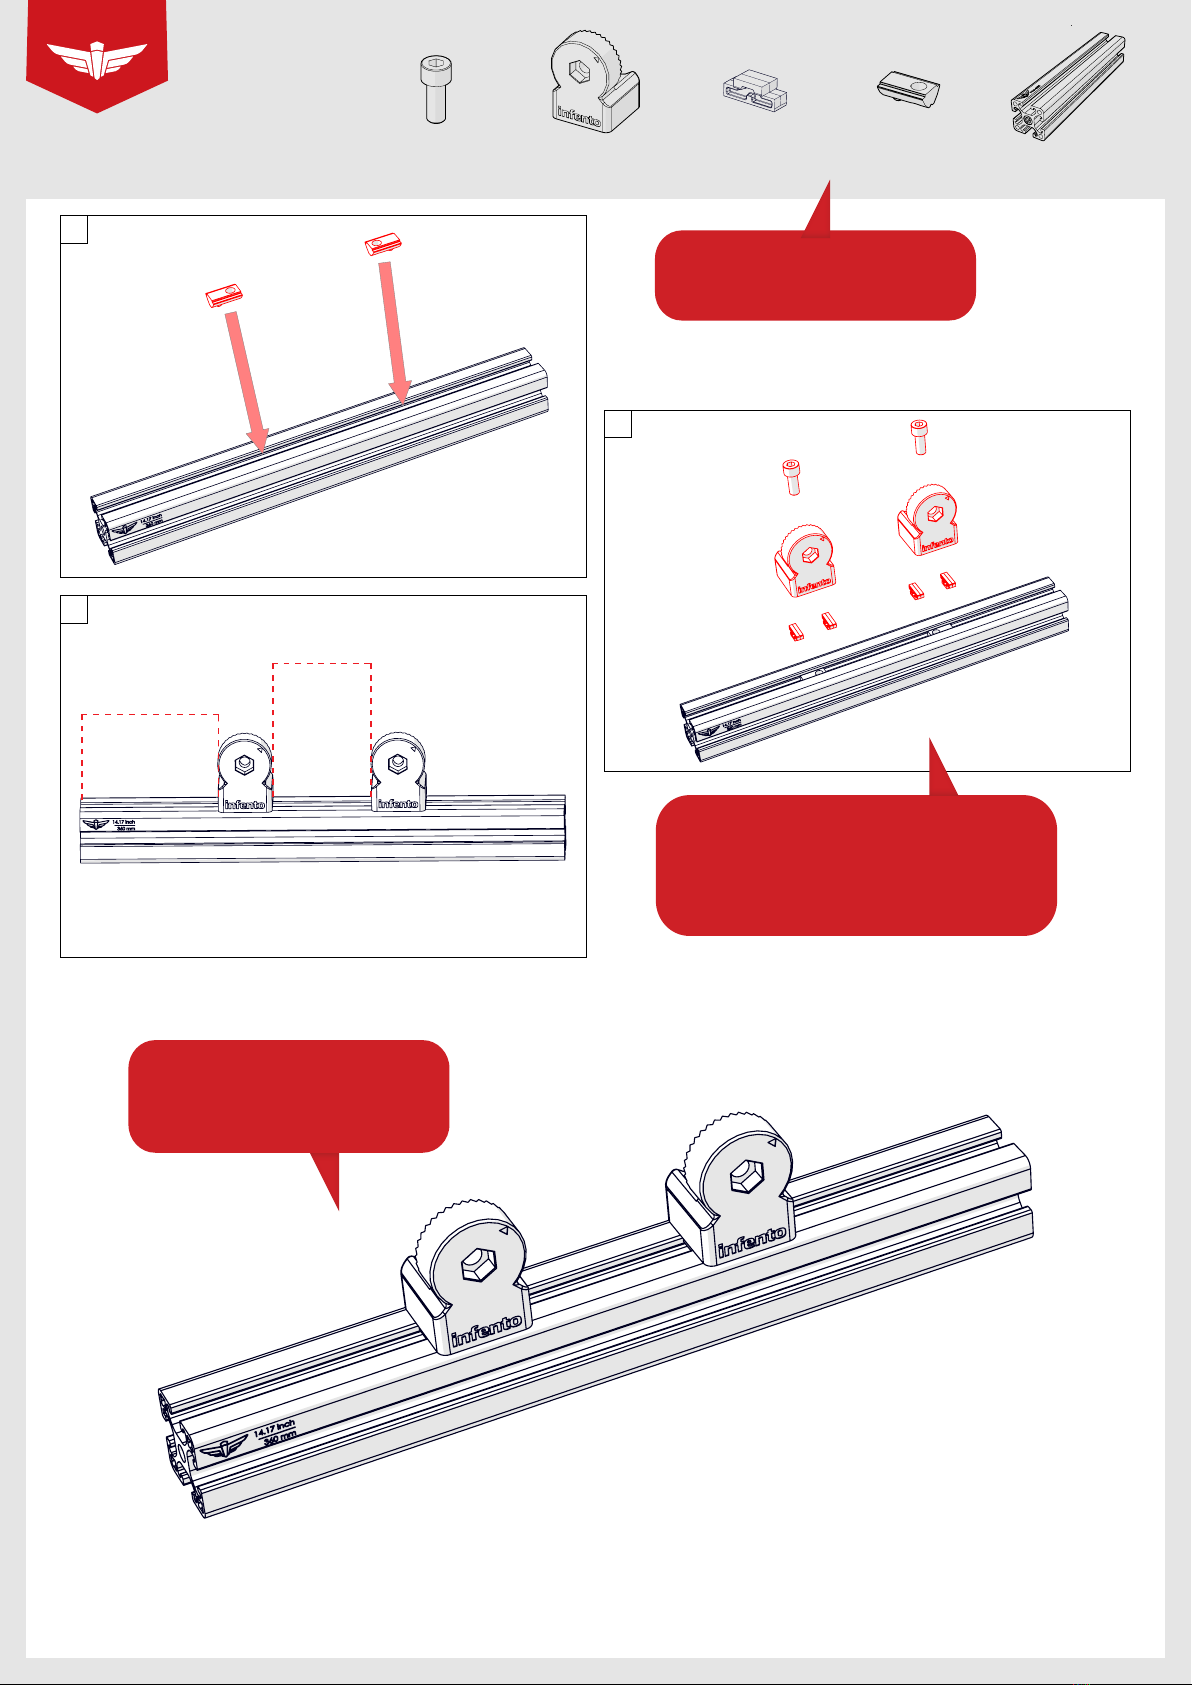
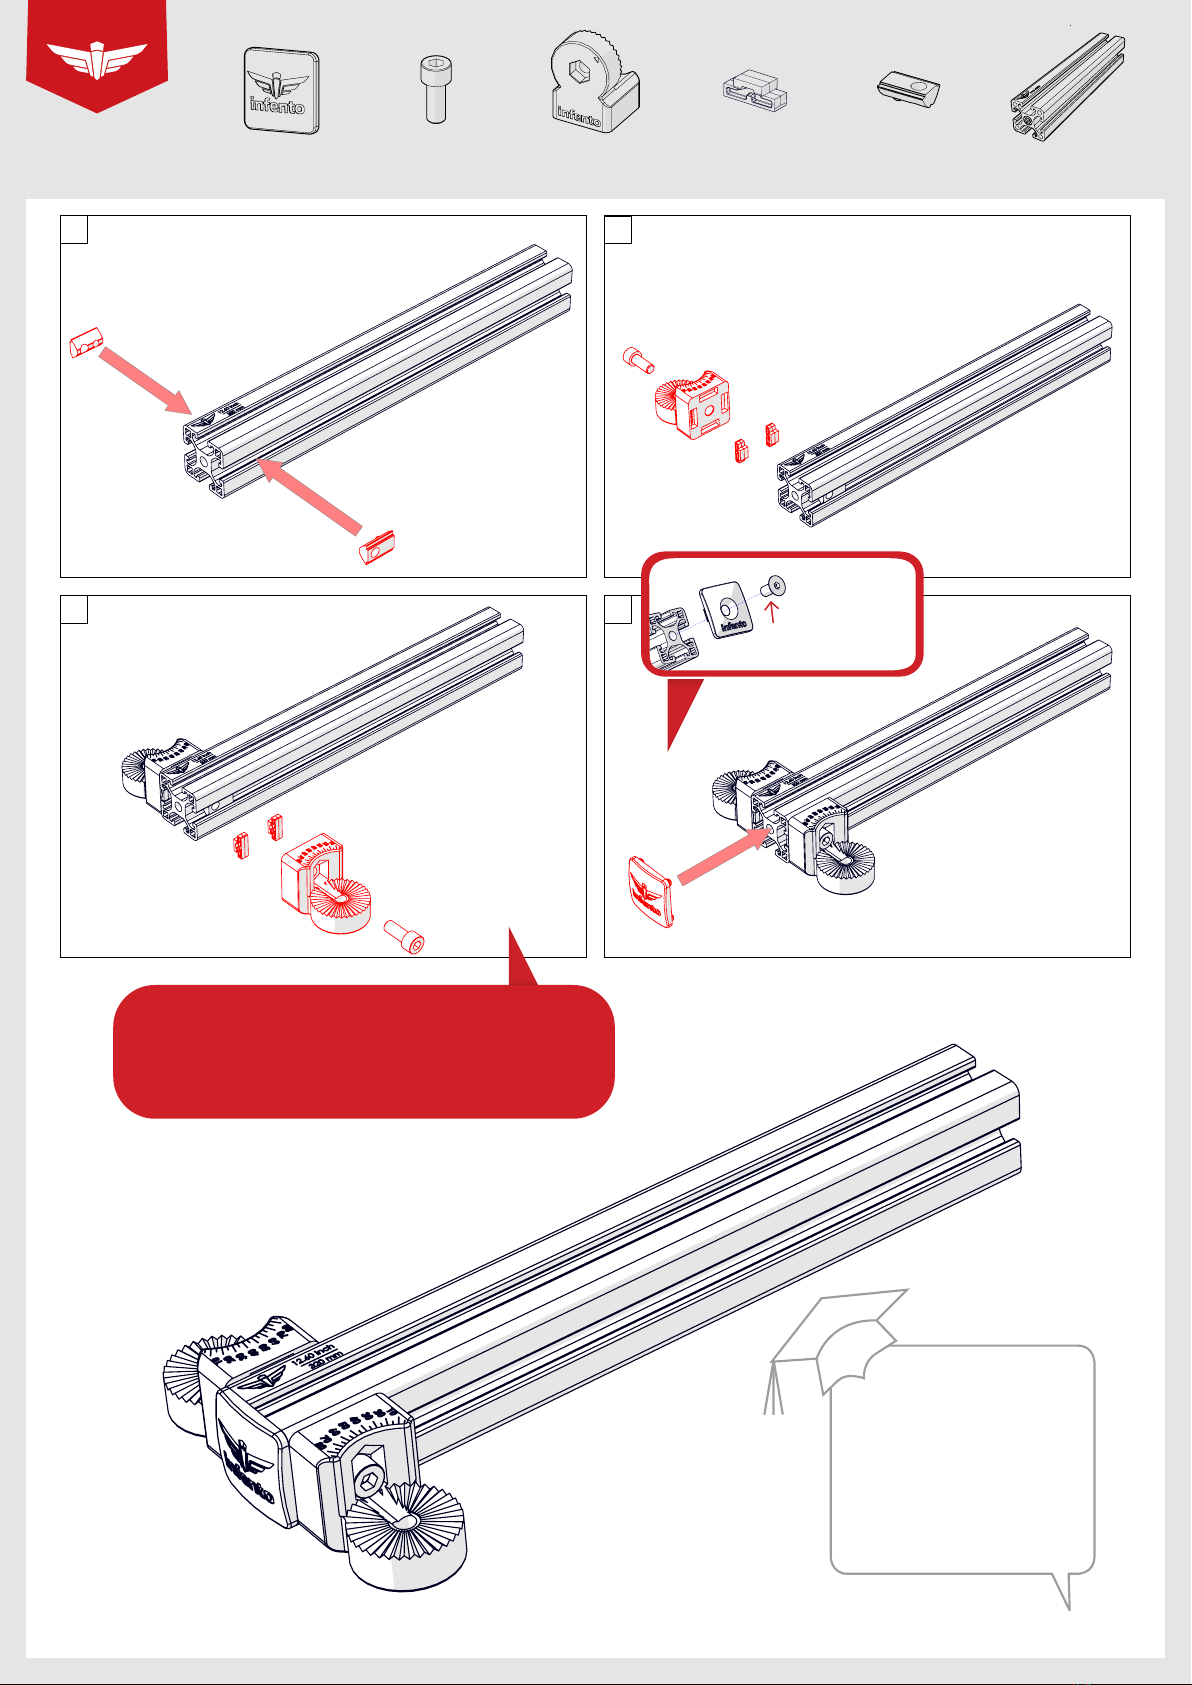
1. Toys are to be assembled by an adult using
Infento manuals.
2. All fasteners (bolts and nuts) should be
fully tightened.
3. It is the responsibility of the adult who
assembles this bicycle to properly install all
parts included in the factory sealed shipping
carton and to make the adjustments to the
functional parts such as handle bar and seat
and chain when necessary.
USE – SUBSECTION
WARNING! TO AVOID
SERIOUS INJURY:
1. Continuous adult supervision is
required.
2. Only ride constructed rides that have been
built according to the instructions given in the
offi cial Infento manual.
3. Never exceed the maximum weight. You can
fi nd the maximum weight for every specifi c ride
in our manual.
4. Always check the manual to see the minimum
and maximum age as well as the minimum and
maximum length for every specifi c ride.
5. Always wear safety equipment such as a
helmet, knee pads and elbow pads. We
recommend riders always wear a properly fi tted
helmet that complies with local or national
guidelines or laws. Keep chinstrap of helmet
securely buckled.
6. Always wear closed toed shoes (lace-up
shoes with rubber soles), never ride barefooted
or in sandals, and keep shoe laces tied and out
of the way of the wheels.
7. Avoid streets and surfaces with water, sand,
gravel, dirt, leaves, and other debris. Wet we-
ather impairs traction, braking and visibility.
8. Excessive exposure to sunlight, temperatures
below 0 degrees Celsius, water, sand, gravel,
dirt, leaves, and other debris can damage,
shrink, expand or weaken parts. Keep your ride
in a dry environment with proper heating.
9. Avoid sharp bumps, drainage grates and
sudden surface changes. Your Infento ride may
suddenly stop.
10. Ride on smooth, paved surfaces away from
motor vehicles. Wet, slick or uneven and rough
SAFETY SECTION
surfaces may impair traction and contribute to
possible accidents.
11. Never risk damaging surfaces, such as carpet
or fl ooring, by use of an Infento ride indoors.
12. Never use near motor vehicles, streets,
roadways, alleys, swimming pool areas, hills,
steps, sloped driveways, inclines and public
highways.
13. Watch out for pedestrians, skaters, skate-
boards, scooters, bikes, children or animals who
may enter your path, and respect the rights and
property of others.
14. Avoid excessive speed associated with
downhill rides.
15. Do not use at night or in periods with
reduced visibility.
16. Before every use, please make sure that
the complete ride and all joints have been
assembled tightly, as with use, joints may
wear out.
17. Before using your Infento ride, please check
that the screws are tightened securely.
18. It’s your own responsibility if you modify the
product other than manufacturer’s instructions.
19. Maintain a hold on the handlebars at all times.
20. Brake will get hot from continuous use.
Do not touch after braking.
21. Periodically check hardware and tighten
if necessary. Replace worn or broken parts
immediately.
22. Skill is required to avoid falls or collision
causing injury to the user and third parties.
23. Check operation of breaks every time
before bicycle is ridden.
24. Check local laws before you start with riding.
25. Never tow wagons, other vehicles, or
children on skates or skateboards.
26. Make certain that anyone who uses an
Infento ride has been fully instructed in its
operation.
27. Instruct your child on how to use the
breaks.
28. Do not perform stunts.
29. Never use headphones or a cell phone
when riding.
30. Only one rider at a time on an Infento ride.
31. Do not allow children to stand on the
product at any time.
FAILURE TO USE COMMON SENSE AND
HEED THE ABOVE WARNINGS INCREASES
RISK OF SERIOUS INJURY. USE WITH
APPROPRIATE CAUTION AND SERIOUS
ATTENTION TO SAFE OPERATION.

SAFETY SECTION
OUR KITS CONTAIN SMALL PARTS
This package contains small parts which,
before assembly, present a choking hazard to
children under the age of three. Care should be
taken during unpacking and assembly to insure
that all small parts and plastic bags are accounted
for and kept out of the reach of children.
QUESTIONS? HELP NEEDED?
You can email us at:
and our team will assist you as soon
as possible.
INSTRUCTIONMAINTENANCE
1.
2.
3.
4.
5.
6.
7.
8.
Oil or grease moving parts periodically.
Check nuts and bolts often and tighten
if necessary.
Any parts showing evidence or wear should
be replaced immediately.
Follow closely the assembly instructions
pertaining to the proper adjustments of parts
Periodically check the brake system for
proper function
Periodically check the steering mechanism
for proper function
Check the air pressure in the tires to be
the amount specifi ed in the manual
Periodically check the bicycle’s tooth belt to
be sure that it is not too lose which could
allow the chain to slip off the sprockets.
RECOMMENDED TOOLS
4 x Allen key
3, 4, 5, 6 mm
5 x Wrench
10, 13, 14, 15, 19 mm
1 x Tapeline
1 x T-handle
for Allen key

1
V 1.8
ride
GECKO
3-8
A
B
C
Profile nut short
2x
T-Positioning block
4x
Multi angle joint
Clamping par
holes without threa
2x
Bolt M8x20
T
2x
3.94 inch | 100 mm 4.33 inch | 110 mm
12.60 inch | 320 mm
le
14.17 inch | 360 mm
Profile
1x
First, get all required materials
stated here and then follow the
instructions.
Tighten the bolts with full force. Ensure
that you hold the long side of the Allen key
in your hand as this enables you to exert
greater force.
Double check here:
Does your result looks exactly like
the image at the bottom of the
page?
++
+
+
4.06” | 103 mm
2.91” | 74 mm

Check frequently if all
parts are still firmly
tightened and function
properly.
Constructing and
playing always under
supervision of an adult.
Tighten bolts with full
force (15Nm) to prevent
them from coming loose.
TOP 3 REQUIREMENTS MAKING A
GREAT INFENTO EXPERIENCE:
1
2
3

2
V 1.8
ride
GECKO
3-8
AB
C D
Profile nut short
2x
3.54 inch | 90 mm 3.94 inch | 100 mm
11.02 inch | 280 mm
le
12.60 inch | 320 mm
Profile
1x
T-Positioning block
4x
Multi angle joint
Clamping par
holes without threa
2x
Bolt M8x20
T
2x
Protect cap
1x
When tightening the bolt always check whether the
profile nut remains perfectly straight in the slot. If this
becomes crooked, you can push against the side of the
profile bolt with the Allen key to correct this.
Bolts tightened
(without lock nut) in a
warm envirenment can
come undone when expo-
sed to a cold envirenment.
One small droplet of lock
fl uid will prevent this.
++++
+
If your protect
cap has a hole,
use a M8x12
countersunk
bolt to fasten it

3
V 1.8
ride
GECKO
3-8
A
B
C
Knurled disc 2 stripes
13x2.75-8
holes without thread
2x
T-Positioning block
Locknut M8 2x
Knurled disc 2 stripes Bolt M8x35
13x2.75-8
d
2x
T-Positioning block
4x
Parrellel clamp joint
isc 1 stripe
Bearing block
40x40_8
1x
without bearings
Bolt M8x20 nylock
1x
There are two diff erent
knurled discs. One for each
corner ending in a 5 (5-15-25-etc.
degrees), which has one stripe
round the outside, and one for
each corner that ends in a 0 (0-
10-20-etc degrees), which has
two stripes round the outside.
+++++
There are two types of
knurled discs. Please
see education section.
Depending on your
Kit, the knurled
discs can be of
a different type,
looking like this:

4
V 1.8
ride
GECKO
3-8
A B
T-Positioning block
8x
Parrellel clamp joint L- joint
2x
4 inch wheel 7 inch wheel
Bolt M8x20 nylock
(low head)
Stabilizer rubber
70S gray
4 inch wheel house
2x
TIP!
It is best to tighten the bolt in
such a way that you can still
move the block and easily deter-
mine the right position with a
tape measure.
After that, you can then tighten
the block further and you verify
whether the size is correct.
+
+

5
V 1.8
ride
GECKO
3-8
|
Nock washer M8-16
2x
This is the 4’’ Swivel Wheelhouse.
Before being able to use this part,
you need two Nock Washers M8-16.
Press these washers into the slots.
These parts
remain mounted
permanently.
Press firmly!
If your Kit contains a white fastener
bag with 12 Nock Washers, please
follow the steps on this page. If not,
please skip to the next page of the
manual.

6
V 1.8
ride
GECKO
3-8
AB
C D
check
72 mm 7.56 inch | 192 mm
16 4 inch wheel
Swivel fork
1x
4 mm 12.95 inch | 329 mm
onnector
4 inch wheel
Swivel fork
4 inch wheel
1x
Toothed belt 154T
Bolt M8x45
1x
T-Positioning block
Locknut M8 1x
+
+
+
If your Swivel Fork
4’’ Wheel contains
a metal bearing on
top (instead of a red
plastic ring), you can
skip this step!

7
V 1.8
ride
GECKO
3-8
Multi angle joint
Positioning block
holes without threa
2x
Positioning block
Washer M8-24
1x
4 in | 2000 mm
Bolt M8x20 nylock
(low head
Metal spacer
4 inch wheel house
1x
+
+
+
.56 inch | 192 mm 9.15 inch | 232.4 mm
4 inch wheel
Connector
Swivel fork
4 inch wheel
Swivel fork
1x

8
V 1.8
ride
GECKO
3-8
If you look carefully you can
see that the sides of the profi le
slope slightly inwards. If you
tighten a bolt securely the profi le
will be pulled fl ush against the
block so the profi le is properly
tensioned. As a result the bolts
remain more tightly in place.
This is called tensile stress.
Locknut M6
Bearing block
40x40_Hexa 19
Bolt M8x60
1x
Multi angle joint
Positioning block
holes without threa
2x
+
T-Positioning block
Locknut M8 1x
+

9
V 1.8
ride
GECKO
3-8
AB
C D
72 mm 7.56 inch | 192 mm
16 4 inch wheel
Swivel fork
1x
4 mm 12.95 inch | 329 mm
onnector
4 inch wheel
Swivel fork
4 inch wheel
1x
Toothed belt 154T
Bolt M8x45
1x
T-Positioning block
Locknut M8 1x
+++
check
4 in | 2000 mm
Bolt M8x20 nylock
(low head
Metal spacer
4 inch wheel house
1x
+
If your Swivel Fork
4’’ Wheel contains
a metal bearing on
top (instead of a red
plastic ring), you can
skip this step!

10
V 1.8
ride
GECKO
3-8
Multi angle joint
Positioning block
holes without threa
2x
Positioning block
Washer M8-24
1x
++
.56 inch | 192 mm 9.15 inch | 232.4 mm
4 inch wheel
Connector
Swivel fork
4 inch wheel
Swivel fork
1x

11
V 1.8
ride
GECKO
3-8
Locknut M6
Bearing block
40x40_Hexa 19
Bolt M8x60
1x
Multi angle joint
Positioning block
holes without threa
2x
T-Positioning block
Locknut M8 1x
++

12
V 1.8
ride
GECKO
3-8
A B
T-Positioning block
7x
Parrellel clamp joint L- joint
1x
Bolt M8x20 T
Bolt M8x20
(low head)
2x
2.67 inch | 70 mm
le
3.15 inch | 80 mm
Profile
Axle clamp ring
15.75inch | 400mm
1x
Most nuts that you use
for Infento are self-locking.
This means that they cannot
vibrate loose. On the inside of
the bolt you will see a plastic
washer that ensures it cannot
turn freely, even if there is no
tension on the bolt.
+++
+
5.51 inch | 140 mm
le
6.30 inch | 160 mm
Profile
1x

13
V 1.8
ride
GECKO
3-8
AB
C D
Profile nut short
2x
Parrellel clamp joint L- joint
1x
T-Positioning block
3x
Bolt M8x20 T
Bolt M8x20
(low head)
2x
The plastic parts of Infento
are made using injection moul-
ding technology where molten
plastic is pressed under high
pressure into a mould.
A mould consists of steel
blocks in which a shape is
recessed.
+
+
+

14
V 1.8
ride
GECKO
3-8
These parts
remain mounted
permanently.
Press fi rmly!
|
Nock washer M8-16
2x
This is the U-block. Before being able
to use this part, you need two Nock
Washers M8-16. Press these washers
into the slots.
If your Kit contains a white fastener
bag with 12 Nock Washers, please
follow the steps on this page. If not,
please skip to the next page of the
manual.

15
V 1.8
ride
GECKO
3-8
A
B
C
Profile nut short
1x
T-Positioning block
2x
U-Block
13x2.75-8
1x
Bolt M8x20
T
1x
The positioning blocks are
some of the smallest Infento
parts but they are also some of
the most important. They ensure
that everything connects to each
other properly. This prevents
parts from twisting and com-
ing loose when under pressure.
Therefore, always use at least
two positioning blocks per block.
++
+
2.36” | 60 mm
Table of contents
Popular Toy manuals by other brands

LUDI
LUDI BEACH instructions

Fisher-Price
Fisher-Price GeoTrax V8490 instruction sheet

R2hobbies.com
R2hobbies.com 3Ch EP 2M Thermo Glider VGA instruction manual

Estes
Estes 2231 User's guide & instructions

LEGO
LEGO CITY 60014 Building instructions

Mattel
Mattel Hot Wheels TRACK BUILDER System Builder's guide