1
Please refer to our website: www.geemarc.com
for an up to date user guide, as there may be
important updates and changes you need to be
aware of.
CONTENTS ··············································1
GENERAL ················································3
Introduction ···············································3
Unpacking the Telephone·····························4
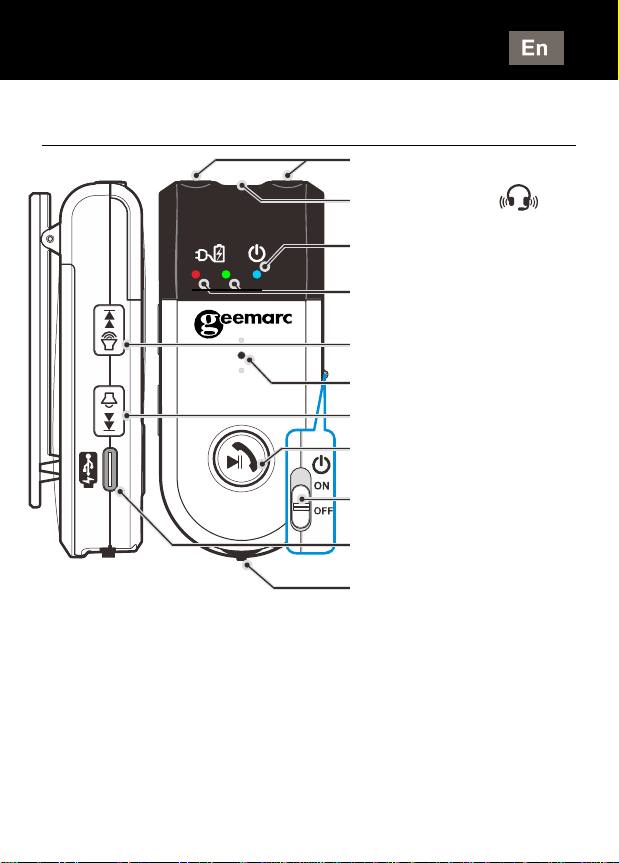
DESCRIPTION ··········································5
General Description ····································5
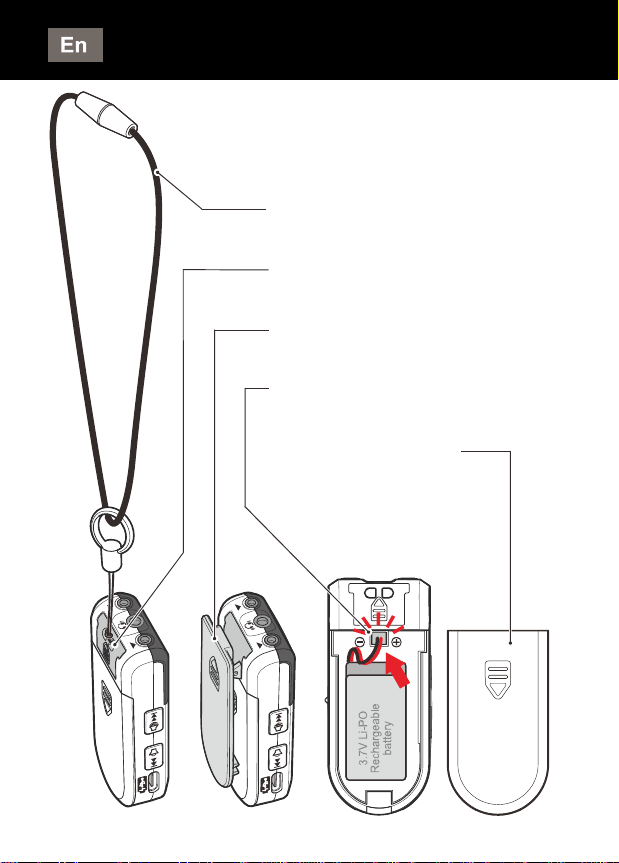
STEP 1: FIT AND CHARGE THE BATTERY····7
Fitting the Battery ·······································7
Charging the Battery ···································8
Low Battery···············································9
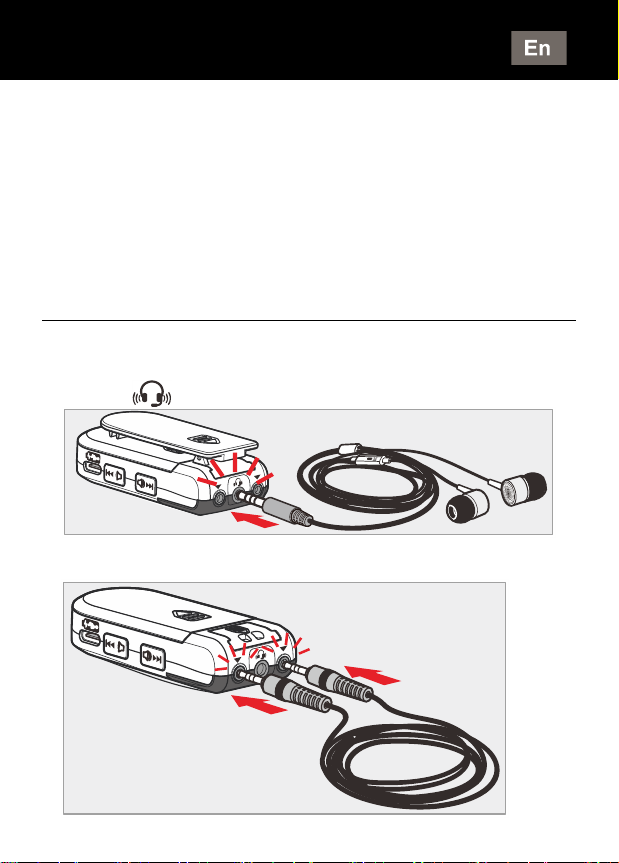
STEP 2: PLUG IN THE EARPHONE HEADSET
OR NECK LOOP········································9
Earphone Headset (non-hearing aid users) ······9
Neck Loop (iBT10 LOOP)·····························9
STEP 3: PAIRING THE iBT10····················· 11
How to pair the iBT10 to your smartphone······11
How to Pair the iBT10 to a Smart TV············· 12
How to Pair the iBT10 to a device that doesn't
have a display / menu································13
Using the iBT10 with Two Devices················13
CONTENTS