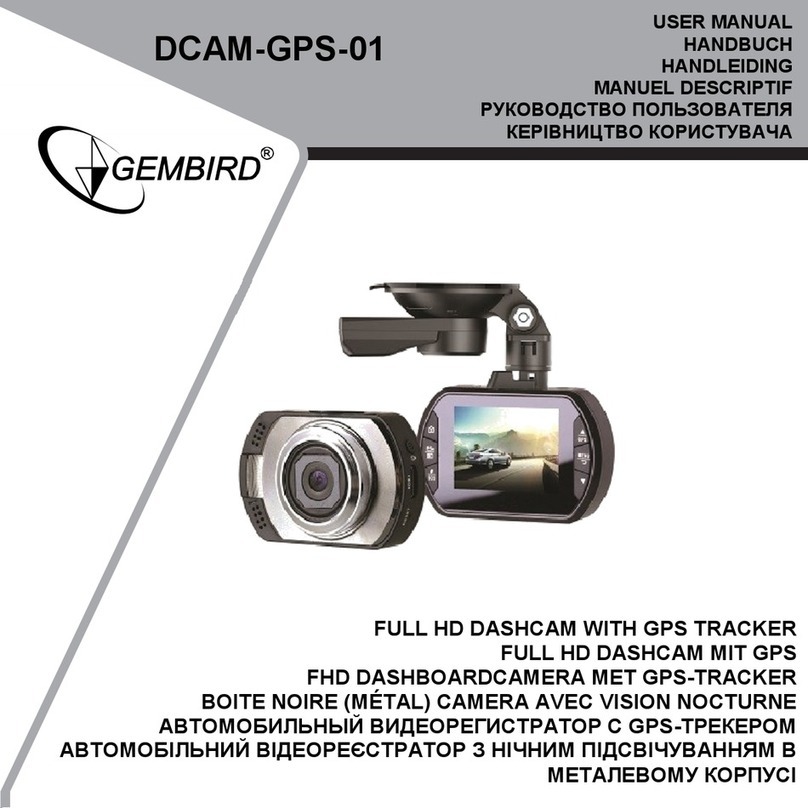
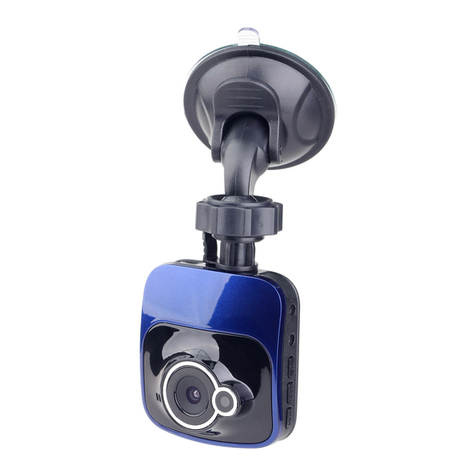
Gembird DCAM?GPS?01 User manual

USERMANUAL
DCAM‐GPS‐01
PLEASE READ THIS INSTRUCTION MANUAL CAREFULLY
BEFORE USING THIS PRODUCT.

1
INTRODUCTION
ThankyouforchoosingourdashboardcamerawithGPStracker.
Thismanualcontainsimportantsafetyandoperation
information.Pleasereadthemanualcarefullybeforethefirst
useandkeepitforfuturereference.
SAFETYINSTRUCTIONS
Donotexposethecameratowaterorotherliquids.
Keepthecameraclean.Donotstoreinhot,dirty,humid
orwetenvironment.
Pressthebuttonssoftly(donotpressthescreen).
Donotdisassemblethiscamera.Topreventtheriskof
electricshock,donotremovethecover.No
user‐serviceablepartsinside.Refertoqualifiedpersonnel
forservicing.
PleaseunplugtheUSBcablefromthecomputerwhen

2
thecameraisnotusedforalongperiodoftime.
Donotdropthecameraandpreventhardimpact.This
mayresultindamagetotheproduct.
Disconnectthecamerafromanypowersourcebefore
cleaning.Onlyuseadrysoftclothtocleanthecamera.
WHATISINBOX
DCAM‐GPS‐011piece
1. UserManual1piece
2. SuctionmountwithGPSunit1piece
3. USBCable1piece
4. CarCharger1piece

1.GETTINGTOKNOWYOURDCAM‐GPS‐01
DEVICEOVERVIEW
3

1‐Loudspeaker
2‐LEDLight
3‐Microphone
4‐Lens
5‐Photograph
13‐LCDdisplay
14‐USBPort
15‐MemoryCardSlot
16‐BracketSocket
17‐Power/LEDLightButton
6‐Record/Play/OKButton
7‐Mic.on/off/SOSButton
8‐UpButton()
9‐Menu/BackButton
10‐DownButton()
11‐WorkStatusLight(Blue)
12‐PowerIndicator(RED)
18‐HDMIPort
19‐Reset
4

5
2.USINGTHEDCAM‐GPS‐01
BATTERYOPERATION
1. Torechargetheinternalbattery,connectthecameratoa
computerviatheincludedUSBcable,orusea5V/1A
USBpoweradaptertorechargetheunit.
2. Thebatterywillbefullyrechargedafter3‐4hours.
NOTE:Oncefullycharged,therechargingicononscreenwill
disappear.
INSERTINGAMEMORYCARD
Thiscardashboardcameradoesnothaveinternalmemory.A
MicroSDmemorycardmustbeinsertedinthecamerafor
furtheroperation.Ifnomemorycardisinserted,thecamera
cannotrecordanyvideo.Toinsertamemorycard,followthe
nextsteps:

6
1:Turnoffthecamera.
2:InserttheMicroSDcardintothecardslot.
3:Turnthecameraon.Ifthememorycardisinstalledcorrectly,
youcanstartrecordingvideo.
INDICATORLIGHTS
Thecamerahastwoindicatorlights.
1:Whenrecharging,orwhenconnectedtoaPC,thered
indicatorwillbeon.
2:Whenrecordingorphoto,thebluelightwillbeblinking.
CAMERAOPERATION
START‐UP/SHUTDOWN
PressthePowerbuttontoturnthecameraon,thescreenwill
lightupandthecameraison.
PressthePowerkeyagainforabouttwosecondstoshutdown

thecamera.
Note:Thecamerawillshutdownautomaticallywhenthe
batteryislow.
MODESELECTION
Therearethreedifferentworkingmodesavailableforthis
camera,Photo,videoandplayback.
DisplayTitleDescription
PhotomodeTakestillpictures
VideomodeRecordvideos
PlaybackmodeRecordedvideosplayback
SETTINGS
Beforetakingphotosorrecordingvideos,pressthepower
buttontoswitchontheDCAM‐GPS‐01first.PresstheMenu
buttontoenterSettings.Pressup/downbuttontoselectthe
optionandpressOKbuttontoconfirmyoursetting.
7

8
MENUFUNCTION
Date/TimeThisfunctioncanbeusedtoaddadateto
yourpicturesandvideoasyoutakethem
【Setthedate】
Autopower
off
Ifthecameraisnotusedforspecifictime,it
willautomaticallyturnoff.If"off"is
selected,thecamerawillalwaysstayon.
【1min】/【3min】/【off】
BeepsoundTurnOn/Offbeepbuttonsounds:
【On】/【off】
Language Settheon‐screenlanguage:English
FrequencySetcorrespondingfrequencyaccordingto
yourregion:【50HZ】/【60HZ】

9
TVmodePlaybackvideotoaTVsetviaHDMIcable
(Notincluded).ChooseTVformataccordingto
yourregion【NTSC】/【PAL】
LCDoffSelecttoturnLCDonoroff
Format FormatyourSDcardincludingprotected
files.NOTE:removingtheSDcardduring
formattingmaydamagethecard.
【OK】/【Cancel】
Default
Setting
Factoryresettodefaultsettings:【OK】/
【Cancel】
VersionFirmwareversionnumber

10
VIDEOMODE
1. Forautomaticstart,connectthecameratothecar
charger.5secondsafterthecarengineisstarted,the
camerawillautomaticallystartrecordingvideo.When
thecarengineisshutdown,thecamerawillsavethe
lastfileandautomaticallyturnsoffafter15seconds.
2. Tostartrecordingmanually,youcanjustpressthe
Recordbutton.Pressthesamebuttonagaintostop
recording.
3. Zoomin/outbypressingUP/Downbuttons
4. Therecordingtimelengthwillbeshownonthescreen
5. PleaseuseClass10orabovememorycardforrecording
HDvideos
6. Whenlooprecordingisdisabled,thecamerawill
automaticallystoprecordingwhenthememorycardis
full.(Whenlooprecordingisenabled,thecamerawill
alwayskeeprecording,butstartsoverwritingtheoldest
videofileswhenthecardisfull.)

MUTE&SOSFUNCTION
1. Duringrecording,press button,devicewillmutethe
microphone,pressagaintoturnthemicrophonebackon.
2. Pressbuttonfor2secondstolockthecurrentvideo
segmentfrombeingoverwrittenbylooprecordings.(The
lockiconcanberemovedinplaybackmode.)
11

12
SETTINGSINVIDEOMODE
Whileinvideomode,presstheMenubuttontochangeyour
settings.
MENUFUNCTION
Resolution
Choosethevideoresolutionfrom1080FHD
1920*1080/1080P1440*1080/720P
1280*720(30fps).
Loop
recording
Whenlooprecordingisenabled,thecamera
willalwayskeeprecording,butstarts
overwritingtheoldestvideofileswhenthe
cardisfull.Youcansetthelengthofeach
videosegment:
Off/1min./2mins/3mins/5mins/10mins
Exposure
(EV)
Selecttheexposurevaluefrom
+2.0,+5/3,+4/3,+1.0,+2/3,+1/3,0.0,
‐1/3 , ‐2/3 , 1.0,‐4/3 , ‐5/3 , ‐2.0

13
Motion
Detection
When motion detection is on, the camera
will automatically start recording if any
movement is detected.【On】/【Off】
Record
Audio
Enable/disableaudiorecording
【On】/【Off】
Date
Stamp
Enable/disabletimestamponrecorded
videos/pictures:【On】/【Off】
G‐SensorSetthesensitivityofthevibrationsensorso
thatitonlygetstriggeredbyactual
impactsandcollisionsandnotwhenyou
arejustdrivingoverunlevelroads.For
example,ongraveledroadsitisbetterto
selectLOW.
【Off】/【High】/【Medium】/【Low】

WHAT’SONSCREENINVIDEOMODE
Whenrecording,followingiconswillbedisplayedonthe
camerascreen.
1. Videorecording
2. LoopRecording
3. Exposure
4. Date
5. Time
6. Remainingbatterycapacity
7. Memorycardloaded
8. Videoresolution
9. Timerecorded
10.
Daytime/Nighttime
11.MICOn/Off
14

PHOTOMODE
1. TurnonthecameraandPressthe buttontoenter
photomode.
2. Takeapicturebypressingthebutton.
3. Pressupanddownbuttonstozoominorzoomout.
4. Apreviewwillbedisplayedonthescreenforonesecond.
SETTINGSINPHOTOMODE
Whileinphotomode,entersetupmenutochangeyourphoto
settings
MENUFUNCTION
Capture
Mode
Selectsingle/multiphotoandtimeinterval:
【Single】/【2stimer】/【5stimer】/【10s
timer】
ResolutionChangetheimageresolution:
15

16
【12M】4000*3000【10M】3648*2736
【8M】3264*2448【5M】2592*1944
【3M】2048*1536【2M】HD1920*1080
【1.3M】1280*960【VGA】640*480
SequenceAutomaticallytake5photosinarow.
【Off】/【On】
Quality Selectalowerimagequalitytoreducethe
imagesizeandsavememorycapacity.There
arethreeoptionsforchoice:【Fine】/
【Normal】/【Economy】
SharpnessAdjusttheSharpness,threeoptions
available:Strong/Normal/Soft
White
balance
Adjustthewhitebalancesettingsdepending
onthesurroundingenvironmentlight
Settings:【Auto】/【Daylight】/【Cloudy】
/【Tungsten】/【Fluorescent】
ColorSetthecoloreffecttoaddacolortonetothe

17
video:
【Color】/【Black&white】/【Sepia】
ISOTheISOmenuallowsyoutosetthelevelof
sensitivitythatyourcamerahastolightin
thesurroundingenvironment.
【Auto】/【100】/【200】/【400】
ExposureSettheexposurevalue:
+2.0,+5/3,+4/3,+1.0,+2/3,+1/3,0.0,
‐1/3 , ‐2/3 , 1.0,‐4/3 , ‐5/3 , ‐2.0
Date
Stamp
Stampdateonvideosorimagesrecordedby
theunit.Therearethreeoptions:【Off】/
【Date】/【Date&Time】
WHATONSCREENINPHOTOMODE
WheninPhotomode,followingwillbeshownonscreen.

1. Photomode
2. Exposure
3. Whitebalance
4. ISO
5. Remainingcapacity
ofbattery
6. Memorycard
7. Imagequality
8. Resolution
9. Remainingstorage
space
10. Daytime/nighttime
18

PLAYBACKMODE
1:TurnontheDCAM‐GPS‐01,pressandholdtheicon
andgointomenutosetthecamerainplaybackmode.
2:Whenthecameraentersplaybackmode,thelastrecorded
filewillbedisplayed.Presstheup/downbuttontobrowsethe
storedfiles.
3:PresstheOKbuttontoplaythefiles.Meanwhile,press
up/downtoFORWARD/BACKWARD(1/2,1/4 , 1/8 ) , pressOK
buttontopause.
SETTINGSINPLAYBACKMODE
MENUFUNCTION
DeleteUsethisfunctiontodeleteasinglefileor
allfiles.【DeleteCurrent】/【DeleteAll】
Protect Usethisfunctiontoprotectthefilesfrom
beingdeletedunwanted.
19
Other manuals for DCAM?GPS?01
1
Table of contents
Other Gembird Dashcam manuals

Gembird
Gembird DCAM-005 User manual
Gembird
Gembird DCAM-006 User manual
Gembird
Gembird DCAM-004 User manual

Gembird
Gembird DCAM-005 User manual

Gembird
Gembird DCAM-003 User manual

Gembird
Gembird DCAM-007 User manual

Gembird
Gembird DCAM-002 User manual

Gembird
Gembird DCAM-002 User manual

Gembird
Gembird DCAM-006 User manual

Gembird
Gembird DCAM-002 User manual