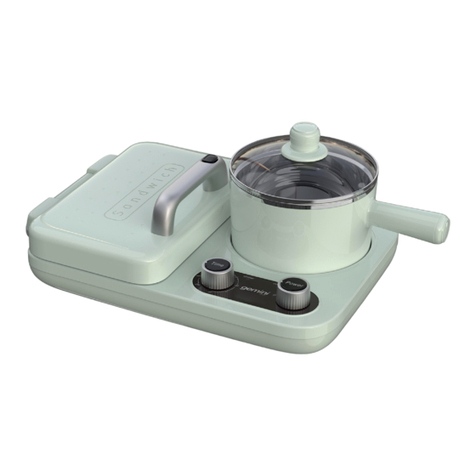
Gemini GMC15V User manual

1
MODEL NO/型號.: GMC15V
1500W
10 -iN-1 MuLti-
FuNCtiONaL COOkEr
10合1多功能煮食鍋
A GILMAN GROUP BRAND

2
• Please read these instruction carefully and retain them for future reference.
• Use this appliance solely in accordance with these instructions.
• This appliance is for household use only, not for commercial purpose.
• Remove all packaging material from the appliance before use.
• This appliance shall not be used by children of 0 to 8-year old.
• This appliance can be used by children older than 8-year old and
persons with reduced physical, sensory or mental capabilities or lack of
experience and knowledge, but only if they have been given supervision
or instruction concerning use of the appliance in safe way and understand
the hazards involved.
• Children should be supervised to ensure that they do not play with the
appliance.
• Cleaning and maintenance must not be done by children.
• Keep the appliance and the cable out of reach of children under 8-year
old.
• Have any repairs carried out solely by a qualified electrician. Never try
to repair the appliance yourself.
• Verify that the mains voltage is the same as that indicated on the rating
plate on the appliance before use.
• Make sure that you always use a grounded wall socket to connect the
appliance.
• Always remove the plug from the wall socket when the appliance is not in
use.
• Remove the plug from the wall socket by pulling the plug, not the power
cord.
• Make sure that the appliance, the power cord and plug do not make contact
with water.
• Make sure that the appliance, the power cord and plug do not make contact
with hot surface, such as a hot hob or naked ame.
• Check the appliance’s power cord regularly to make sure it is not damaged.
Do not use the appliance if the power cord is damaged. If the power cord is
damaged, it must be replaced by an electrical technician or a person with
similar qualication, in order to avoid any hazards.
• When using an extension lead always make sure that the entire cable is
unwound from the reel.

3
• Use solely approved extension leads.
• The appliance needs space to allow heat to escape, thereby preventing the
risk of re. Make sure that the appliance has sufcient space around it, and
does not come in contact with ammable material. The appliance, the air
vents must not be covered or blocked when use.
• Never use the appliance in the vicinity of ammable material.
• Certain parts of the appliance may get hot. Do not touch these parts to
prevent scalding yourself.
Do not touch the hot surfaces of the glass lid and the inner metal
pot when the appliance is in use.
Slight smoke on the rst use is a normal occurrence. It will disappear
shortly afterwards.
Due to the thermal expansion and contraction of the heating tube in
the inner pot, it may have a “Bipa” sounds during the use of the appliance, It is
safety and a normal occurrence. Please be assured use.
• Never use the appliance outdoor.
• Never use the appliance in damp rooms.
• Make sure your hands are dry before touching the appliance, power cord or
plug.
• Place the appliance on a at, stable surface where is cannot fall.
• Never allow the power cord to hang over the edge or the counter, worktop
or table.
• Do not pick up the appliance if it falls into water. Remove the plug from the
socket immediately. Do not use the appliance again.
• Never immerse the appliance, the power cord or the plug in water or any
liquid.
• Clean the appliance thoroughly after use (Please refer to “Cleaning and
Maintenance” section.
• This appliance may not be used through an external timer or by means of a
remote control.

4
1. Handle of glass lid
2. Glass lid
3. Inner metal pot
4. Handle of unit
5. Base tray
6. Control panel
7. LED display
Assembly of basket by fold up the handle in position
All accessories are not dishwasher safe

5
After frying, mount the Frying Basket by its hanger hook on the Inner Metal Pot
to drain away the extra oil.
Place the steam rack on the 4 supporting slots of the Inner Metal Pot when
steam cooking.

6
1. Assembly the handle on the glass lid.
Place the grill rack on the Inner Metal Pot when using grill function.
Time / Temp Start / Stop
Handle
Metal ring
Glass lid
Plastic pad Screw ring
Screw

7
2. Assembly the Inner metal pot
• Please remove the foam under the inner metal pot before rst use.
• Make sure the appliance is power off while assemble the inner pot.
hold the handle, then pull upwards. (Please make sure the inner pot
is cooling down enough.
make sure the connector is xed into the hole for base plate, then push
the inner pot tightly.
• Finish the assembly, the appliance is ready to use.
• Connect the appliance to the power source. A “beep” sound is heard. The LED
display will be on and shows ----- which is at standby mode now.
• Press the “Function” button to choose between the different cooking programs.
• No food and water can be exceed the maximum line inside the inner metal pot (Max.).
• Food and water should be at leaset reach the minimum line inside the inner metal
pot (Min.)
Such as in Slow Stew, Hot Pot, Rice, Porridge, Soup, Deep Fry and Steam
• After a cooking program is selected, you may also adjust the time and/or
temperature (if needed). The time and temperature range between different
cooking program are as below -
Cooking
Program
Default Program Adjustable Setting
Cooking time
(Hr:Min)
Temperature Cooking Time
(Hr:Min)
Temperature
Slow Stew 06:00 100℃ 0:01-5:59 Non-adjustable
Hot Pot 02:00 240℃ 0:01-1:59 120-240℃
Rice 00:35 150℃ Non-adjustable
Porridge 01:00 110℃ 0:01-1:30 100-140℃
Soup 01:00 110℃ 0:30-2:00 Non-adjustable
Grill 00:30 240℃ 0:01-9:59 180-240℃
Deep Fry 00:30 180℃ 0:01-9:59 180-240℃
Stir Fry 00:15 240℃ 0:01-0:30 50-240℃
Fry 00:25 200℃ 0:01-0:59 50-240℃
Steam 00:15 220℃ 0:01-1:59 100-220℃
Handle
Inner pot
Base tray
Heater
connector
Electrode
stick Power
connector
MAX
MIN

8
• Press “Time/ Temp” button to swap the time and temperature setting:
1. To adjust the Time (if needed) – press the “Time/ Temp ” button 1 time on
the control panel after selecting program, LED display will be blinking, then
press “+” or “-“ button to adjust the time needed.
2. To adjust the Temperature (if needed) –press the “Time/ Temp ” button 1
time on the control panel after selecting program, LED display will show the
unit of “C”, then press “+” or “-“ button to adjust the temperature needed.
• When a cooking time and cooking temperature are set, please press the “Start
/ Stop” button once to begin the cooking process.
• If the “Start / Stop” button is pressed during the cooking process, the appliance
will go into stand-by mode and the selected cooking program will be cancelled.
• When the appliance is in standby mode, pressing “Keep Warm” button to
activate the keep warm function.
• The keep warm indicator will be ON and the display is shown “bb”. The keep
warm function will keep warm for the appliance at approx. 60ºC - 80˚C at the
rst 6 hours.
• To cancel the Keep Warm setting, please press the “Keep Warm button” again
to disable the Keep Warm feature.
• When the selected cooking program is completed, it will switch to keep warm
function automatically, and then switch to the standby mode automatically after
2 hours.
• The appliance pre-set 10 cooking programs. Press the “Function” button to
choose between these cooking programs in a cycle: Slow Stew, Hot Pot, Rice,
Porridge, Soup, Grill, Deep Fry, Stir Fry, Fry and Steam.
• The corresponding indicator will be blinking while selecting the cooking program.
• Time and Temperature may need to adjust according to your setting
• Press “Start / Stop” button once to activate the selected cooking program. The
corresponding indicator of the program will be lit.
• Once the cooking program is selected and started, no other program can be
selected until nish the current program. But the time and temperature can be
adjusted anytime.
• The red indicator will light on once you selected the cooking program.
• The cooking program can be stopped by pressing the “Start/ Stop” button in
any time during cooking. The selected program will be cancelled.
• You may also adjust the cooking program in stand-by mode. After adjusted the
cooking program, press the “Start / Stop” button again to re-start the cooking
program.
• There is a “beep” tone to indicate the program completed and it will switch to
keep warm function automatically. After 2 hours, a “beep” sound will be generated
and then switch to the standby mode automatically, the display will show “_ _ _ _”

9
• Ensure the appliance is turned off and unplug the power cord from the wall
socket.
• The removable inner metal pot and glass lid can be washed in warm soapy
water with a soft cloth or sponge.
• Do not use an abrasive cleaner to clean all the removable parts and the
appliance.
• Do not put the removable parts in a dishwasher.
• Please note, the accessories are not dishwasher safe.
• The Main Housing of the appliance can clean with a damp cloth.
• Do not immerse the Main Housing and Base tray and power cord into water or
any other liquids.
Ensure the appliance is cooled down completely before cleaning.
Description: 10-in-1 Multi -Functional Cooker
Model number: GMC15V
Input Voltage: 220-240V
Frequency: 50Hz
Power : 1500W
Product dimension: 355(W) x 295 (H) x 350 (D)mm

10
一般安全
安全指引-電子和熱能產品
在使用本產品之前,應仔細閱讀下列事項及使用說明,閱後並請妥善保管,以供
日後參考:
- 請按照這些說明事項, 使用本產品。
- 本產品僅供家用,不作商業用途。
- 使用前,請將所有包裝材料。
- 0至8歲的兒童不應使用本產品。
- 超過8歲的兒童可使用本產品,但請勿由肢體不健全、感覺或精神上有障礙或缺
乏相關經驗和知識的人使用,除非有負責他們安全的人對他們使用本產品進行監
督或指導。
- 請務必看顧好兒童,以確保他們不玩耍本產品。
- 兒童不應清潔或維修本產品。
- 當需進行任何維修,必須由專業維修人員進行維修。永遠不要嘗試自己修理本產品。
- 使用相符的電源和電壓,以防止觸電。
- 本產品只能使用帶接地線的電源插座。
- 當本產品不使用時,請從牆上的插座中拔掉插頭。
- 從牆上插座中拔掉插頭時,應拿著插頭而不是電源線。
- 確保本產品、電源線和插頭不與水接觸。
- 確保本產品、電源線和插頭不接觸發熱表面,如明火。
- 定期檢查本產品的電源線以確保其未損壞。如果電源線損壞,請勿使用其產品,並須
由專業維修人員來更換,以避免出現任何險。
- 使用延長線時,務必確保整個電纜從捲軸上退出。
- 只使用符合標準的電源線。
-
確保本產品的周圍有足夠空間,並且不接觸易燃物料。使用時,通風口不得覆蓋或堵塞。
- 切勿在易燃材料附近使用本產品。
- 本產品的某些部分可能會發熱。不要觸摸這些部分,以防止燙傷自己。
注意 : 當使用本產品時
,
不要觸摸玻璃蓋和金屬內鍋
,
以免燙傷。
注意 : 在第一次使用本產品時
,
會有輕微的煙霧
,
均屬正常的。不久後
,
將會消失。
注意 : 內鍋的發熱管有可能在操作時
,
受到熱脹冷縮情況下
,
發出“嗶叭”聲響
,
這是
安全及正常的
,
請放心使用。
閱讀下列說明事項並請妥善保管,以供日後參考。

11
安全介紹–操作期間
- 切勿在室外使用本產品。
- 切勿在潮濕的房間使用本產品。
- 請勿用潮溼的手插拔電源插頭或按壓操作面板上的任何按鈕。
- 將本產品放在一個平坦、穩固的表面上,且不易滑落。
- 切勿讓電源線懸掛在邊緣或櫃檯, 檯面或桌面上。
- 如果本產品落入水中,立即從插槽中拔下插頭,並且不要再次使用本產品。
- 切勿將本產品、電源線或插頭浸入水中或其他液體中。
- 使用後徹底清潔本產品 (請參閱 “清潔和保養”)
- 請勿將本產品連接至外置計時器或遙機器, 以免發生危險。

12
產品結構
配件
1.玻璃蓋手柄
2.玻璃蓋
3.金屬內鍋
4.機身手柄
5.底座托盤
6.控制面板
7.LED顯示屏
注意: 配件不可放於洗碗碟機清洗.
1.炸籃x1個
裝拆炸籃圖示 –

13
油炸完成,可將炸籃後面的“掛鈎”裝在金屬內鍋上,以便把食物中多餘的油份
排去 。
裝拆蒸架圖示–蒸煮烹飪時,將蒸架放在金屬內鍋的4個支撐槽上。
2.蒸架 x 1個

14
裝拆燒烤架圖示–燒烤烹飪時,將燒烤架放在金屬內鍋上。
1. 把手柄裝上玻璃蓋,簡單步驟說明
3.燒烤架 x 1個
控制面板
裝拆方法
Time / Temp Start / Stop
慢燉
時間/溫度 開啟/停止保溫 功能
燒烤
油炸
炒
煎
蒸
煮飯
火鍋
粥
煲湯
手柄
手柄座
玻璃蓋
膠墊
螺絲
螺絲墊片
裝

15
2. 金屬內鍋裝拆方法
- 使用前請取出墊在金屬內鍋的發泡膠包裝
- 拆裝內鍋前請確認產品已斷開電源!
- 拆除 : 用手提住不粘鍋左右凹位置, 然後用力向上提起內鍋
- 裝嵌 : 將內鍋底部四支金屬導柱和三支電極棒對準托盤上的相應孔位,往下按
壓內鍋直至到底
- 完成裝配後,本產品便可使用。
- 將插頭接通本機電源。會發出“嗶-”聲。LED 顯示屏會亮起及顯示“----”,
即已進入了待機模式。
- 按下“功能”按鍵,選擇不同烹飪程式。
- 所有食材及水不得超越金屬內鍋的最高水位線 (MAX.)。
- 食材及水必需達致最低水位線 (MIN.)
如慢燉、火鍋、煮飯、粥、煲湯、油炸和蒸
- 選定烹飪程式後,預設的煮食時間及溫度會顯示在LED顯示屏上。您亦可以調
整所需時間或溫度 (如需要)。不同烹飪程式的預設時間和溫度範圍可調較範
圍如下:
使用說明
程式 預設程式 客戶自行調整的時間及溫度
烹飪時間
(小時:分鐘)
溫度 烹飪時間
(小時:分鐘)
溫度
慢燉 06:00 100℃ 0:01-5:59 不能調整
火鍋 02:00 240℃ 0:01-1:59 120-240℃
煮飯 00:35 150℃ 不能調整
粥 01:00 110℃ 0:01-1:30 100-140℃
煲湯 01:00 110℃ 0:30-2:00 不能調整
燒烤 00:30 240℃ 0:01-9:59 180-240℃
油炸 00:30 180℃ 0:01-9:59 180-240℃
炒 00:15 240℃ 0:01-0:30 50-240℃
煎 00:25 200℃ 0:01-0:59 50-240℃
蒸 00:15 220℃ 0:01-1:59 100-220℃
拆除
內鍋凹口
最高水位線 最低水位線
不粘內鍋
托盤
電源插孔
金屬導柱
電極棒
裝嵌
MAX
MIN

16
- 按“時間/溫度”按鍵切換時間和溫度設定:
選取烹煮程序後,調整烹飪時間 (如需要) - 按下控制面板上的“時間/溫度”按
鍵 1次,LED顯示屏會閃動,然後按“+”或“-”按鍵調節所需時間。
選取烹煮程序後,調整烹飪溫度(如需要) - 按下控制面板上的“時間/溫度”按
鍵1次,LED顯示屏會出現單位“C”,然後按“+”或“-”按鍵調節所需溫度。
-
當選擇適當烹飪時間和烹飪溫度後,請按“開始/停止”按鍵1次以啟動烹飪程式。
- 如果在烹飪過程中按下“開始/停止”按鍵,則設置程式會被取消,然後將進
入待機模式。
保溫功能
- 當本機處於待機模式時,按下“保溫”按鍵以啟動保溫功能。
- 保溫顯示燈將亮起,顯示為“bb”。首6小時保溫溫度可維持約60℃- 80℃。
- 要取消保溫設置,請再次按“保溫”按鍵。
- 烹
飪程式完成後,會自動切換到保溫功能,2小時後,將會自動切換到待機模式。
不同的烹飪程式
- 產品提供了10種烹飪程式。按下“功能”按鍵,選擇一個適當烹飪程式:
慢燉、火鍋、煮飯、粥、煲湯、燒烤、油炸、炒、煎和蒸
- 當您選擇了烹飪程式後,相應的指示燈將會亮起及預設時間及溫度已設定, 可
按“開啟/停止”鍵進行煮食。
- 你亦可按“時間/溫度”按鍵,根據您的烹飪程式來調整時間和溫度。
- 按“開始 /停止”按鍵 1次以啟動烹飪程式。相應的指示燈將會亮起。
- 一旦選擇並啟動了烹飪程式,在完成該烹飪程式之前,不能選擇其他烹飪程
式。但可隨時調整烹飪時間和溫度。
- 一旦你選擇了所需烹飪程序,紅色指示燈將亮起。
- 烹飪程式可以通過在烹調過程中的任何時間按下“開啟/停止”鍵來停止。選
定的程式將被取消。
- 您還可以在待機模式下調整烹飪程式。調整烹飪程式後,“開啟/停止”鍵,
再次重新啟動烹飪程式。
- 烹飪程式完成後,會發出“嗶”聲,並自動切換到保溫功能,2小時後,會發
出“嘀嘀”聲,然後自動切換到待機模式,顯示屏顯示“_ _ _ _”。

17
- 不使用時,確保產品已關閉,並從牆上插座拔下電源線。
- 可拆卸金屬內鍋和玻璃蓋,可在肥皂水中清洗及用軟布或海綿清洗。
- 在可拆卸配件上,不能使用清潔劑。
- 不可將拆卸配件放入洗碗碟機清洗。
- 請注意,配件不可使用洗碗機清洗。
- 本產品的外殼,可以用濕布抹擦。
- 本產品外殼和底座托盤,不可浸入水中或接觸到其他液體。
注意 : 確保產品在使用前冷卻
名稱 : 10合1功能煮食鍋
型號 : GMC15V
輸入電壓 : 220-240V
頻率 : 50Hz
功率 : 1500W
產品尺寸 : 355 (闊) x 295 (高) x 350 (深) 毫米
清潔和保養
產品規格

18

19

20
太平家庭電器
Table of contents
Other Gemini Kitchen Appliance manuals