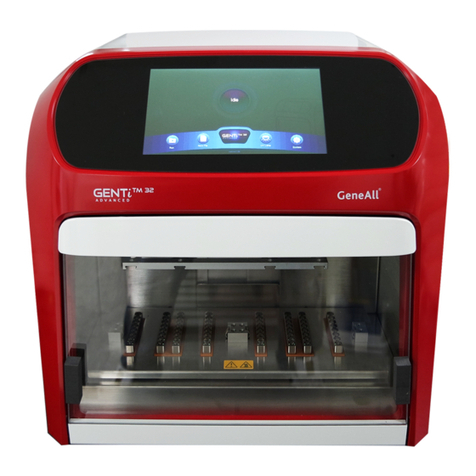
GeneAll GENTi 32 User manual

Ver. 1.0
GENTi Automatic Extraction Equipment
User Manual (Instruction for Use)
Automated Nucleic Acid Extraction System

Material no. GAD-001
GAD-001, January-2018 (Ver 1.0) Page 2/ 24
CONTENTS
Introduction ...........................................................................................................................3
1. Product intended Use.......................................................................................................3
2. Product description.......................................................................................................... 3
3. Product characteristics .....................................................................................................3
4. Product specifications .....................................................................................................4
GENTi Automated Nucleic Acid Extraction System requirements ..............................................4
Product Components............................................................................................................... 5
WEEE ....................................................................................................................................5
Precautions before using the product .......................................................................................6
Unpacking andInstalling process ............................................................................................ 7
1. How to unpack the “GENTi”...........................................................................................7
2. How to install the “GENTi”............................................................................................. 8
3. Hardware overview.......................................................................................................... 9
4. The switch mechanism of GENTi ....................................................................................... 9
User Interface .................................................................................................................... 10
1. User interface for home screen....................................................................................... 10
2. Instruction in Plate set-up .............................................................................................. 11
3. Instruction in Strip set-up............................................................................................... 12
4. Implementation of GENTi ............................................................................................... 13
5. Camera systemon GENTi ................................................................................................ 15
6. Warning code for GENTi................................................................................................. 15
7. Error code for GENTi .................................................................................................... 16
8. Regular maintenance ..................................................................................................... 17
9. More information about GENTi........................................................................................ 18
Troubleshooting ................................................................................................................... 18
Warranty ............................................................................................................................. 19
Constraint on Warranty ..................................................................................................... 20
Symbols............................................................................................................................... 20
This user manual introduces into the detail of “GENTi Automatic Extraction Equipment”and protocols through the

Material no. GAD-001
GAD-001, January-2018 (Ver 1.0) Page 3/ 24
contents. It also contains the specification of the “GENTi Automatic Extraction Equipment”for further information.
Before using the “GENTi ”, it is a recommendation of the user to read this equipment user manual carefully and
understand specifically on Safety Information.
Introduction
1. Product intended use
The “GENTi 32”is intended to be used as a combination with ”GENTi Extraction kits”that provide automated extraction
of nucleic acid from samples.
Diagnostic results would be obtained by using the nucleic acids extracted with this equipment and it must be interpreted
in conjunction with other clinical, laboratory or other experiment data.
Extracted nucleic acid through “GENTi system”can be used for various downstream application such as molecular
diagnostics, PCR, sequencing and so on.
The automated steps performed by “GENTi Automatic Extraction Equipment”include:
Sample lysis and binding of nucleic acids to magnetic beads
Washing of nucleic acids
Elution of nucleic acids
2. Product Description
The “GENTi Automatic Extraction Equipment” is automatic nucleic acid extraction equipment based on magnetic bead
separation technology with integrated magnetic rods. The equipment adapted two configurations (96-well plate and strip
tube) for maximize flexibility of sample load. The equipment extracts nucleic acid from various sample through lysis,
binding, washing and elution steps. Intuitive interface allows users simple operation by touching just one button.
3. Product Characteristics
System control or test can be implemented with the touch monitor (No PC or tablet needed)
UV lamp exists on the equipment to aid in sanitizing the equipment
Easy-to-use system (application of optimal protocols for DNA, RNA extraction)
The equipment has a preprogrammed protocol for nucleic acid purification
The equipment gives the high efficiency of nucleic acids purification to use
The user will shorten he hands-on-time by using “GENTi 32”product.
Max. 32 samples can be run in a single run

Material no. GAD-001
GAD-001, January-2018 (Ver 1.0) Page 4/ 24
4. Specifications
Average processing time: approx. 5-30 minutes (it is various depends on how many products/samples are set
on the equipment )
Number of samples: samples can be set up to 32
Standard configuration: ~200 ㎕of sample volume
Weight: 33.9 kg (74lb)
Dimensions: 365(W) x 390(D)x 435(H)mm (14.4 (W) x 15.4(D) x 17.1(H) inch)
System Requirements for “GENTi Automatic Extraction Equipment”
To use this equipment, system requirements are applied in general condition at room temperature 25 °C (77 °F).
unless there is other specific notice or indications.
When user needs to store for a long period of time, it must be packed in a vacuum.
If the equipment has not been used for a long time, it must be used after inspection.
Regulation of Voltage
Please, make sure that the range of voltage is as follow:
Input Voltage: 220 - 240V
Power requirements: 50/60㎐, 2A
Environmental requirements
Temperature
Operation
Storage
10-40°C
10-50°C
Humidity
Operation
Storage
10-80% RH, Non-condensed
Maximum altitude 2000m
The equipment should be operated indoors. For, indoor use only.

Material no. GAD-001
GAD-001, January-2018 (Ver 1.0) Page 5/ 24
Product Components
Please check and inspect the package carefully to make sure that all GENTi equipment components are included prior to
use.
GENTi Automatic Extraction Equipment
Other components
Figure 1. Components of GENTi Automatic Extraction Equipment
GENTI Autometic Extraction Equipment: 1 ea
Power cable: 1 ea
8-strip (for the test mode/calibration use only): 2 ea
96-well plate (for the test mode/calibration use only): 2 ea
WEEE
-The components below, they shall be disposed and/or replaced based on the WEEE (Waste Electrical and
Electronic Equipment Directive) standard.
-UV lamp
-LED lamp
-Power cable
-Touch monitor
-External case
-Front door

Material no. GAD-001
GAD-001, January-2018 (Ver 1.0) Page 6/ 24
Precautions before using the product
Please read the precautions for correct use of the product.
This IVD equipment complies with the EMC test requirements and described in IEC61326 and the safety
requirements of IEC 61010.
This product complies with the European Directives described in 2006/95/EC and 2004/108/EC for CE marking.
Do NOT use the GENTi Automatic Extraction Equipment with other voltages out of the range specified
(220~240V± 10%, 50/60㎐) on the equipment.
The equipment must be installed to allow easy connection of the power line to the power inlet.
DO NOT use the GENTi Automatic Extraction Equipment with a damaged power supply or loose socket.
Please KEEP the equipment on a flattened surface and provide minimum of a feet at every side of the
equipment for air circulation.
A strong impact on the equipment may causes severe damage and thus malfunction.
DO NOT connects multiple equipments into a single wall outlet. The load may cause an overload and fire.
GENTi Extraction Equipment vibrates when it is operated. DO NOT place any devices and/or supplements on
the equipment that might be damaged by vibration.
DO NOT place any devices that produce vibration or heat besides “GENTi 32”.
DO NOT install and/or store the equipment in dusty place
DO NOT install and/or store the equipment near heat sources.
DO NOT install and/or store the equipment near water or moist place before/while user use
DO NOT attempt to change or modify the equipment without GeneAll’s permission.
DO NOT try to connect the power plug with wet hands.
GNETi Automatic Extraction Equipment is closed system thus it is exclusively optimized to use in combination
with the “GENTi Extraction reagents. DO NOT attempt to use any other brand of the kit or reagents.
Please make sure that pre-filled 96- well and check the plate if it is set in correct position on the plate tray.
DO NOT disassemble the equipment. It may cause fire, electrical shock and malfunction and the warranty
shall NOT be guaranteed if disassembled.
DO NOT use this equipment with any purpose other than its intended use.
DO NOT pour any liquid on the GENTi equipment.
DO NOT place other vibration sensitive equipments near equipment.
The front door must be CLOSED during the operation of equipment.
Please DO NOT operate the equipment in the place near flammable gases or liquids.

Material no. GAD-001
GAD-001, January-2018 (Ver 1.0) Page 7/ 24
Dispose the UV bulb in accordance with country, federal, state and local regulations and laws since it contains
mercury.
Please disconnect the power before cleaning or performing routine maintenance.
There is a possibility to be exposed by UV rays due to the UV lamp of equipment. DO NOT turn on the UV
lamp unless completely close the front door.
Please make ensure that magnetic rod covers and plates have been securely inserted in their correct positions
and orientation. Failure may result in damage to the equipment.
Before using the operation system, please check the magnetic rod position to prevent the damage to the
equipment
Use the switch in order to shut off the power supply safely
DO NOT operate the system if malfunction is expected.
As the touch panel is made with LCD screen, please use the touch panel slightly and smoothly with soft
finger touch and the LCD screen will response back from user’s activation order. Instead of using Sharp tools-
such as Knife, Nail or pen, not finger; it may cause damages on the LCD screen.
This equipment is intended for use with human-derived samples. Please use appropriate personal protective
apparatus (i.e.-gloves, safety goggles, lab coat, etc.) for handling and disposing of biological-hazardous
materials safely.
Keep hands clear out from equipment platform as it moves in and out of the equipment.
Keep the surface of equipment clean once you use.
When there is any SIGN OF FIRE (smoke, burning smell etc) while operating the equipment or stand-by
mode, Please STOP the operation IMMEDIATELY, and DISCONNECT the power cable from the unit and
contact to Customer Service or Manufacturer immediately
The equipment shall be sterilized with UV lamp at all time. DO NOT look or touch UV lamp directly. It may
damage to eyes or skin.
If the equipment is stained by reagents, samples or dirts after use, please disinfect the equipment with 70%
ethanol and turn off the equipment after the stain is completely cleared out.
The Plate tray will be heated automatically during operation of the equipment. It may cause the skin burn
easily if any part of the body got touched with plate tray. DO NOT touch the plate tray directly with any part of
the body if the equipment is activated at any circumstance while using.
Please discard the plate and magnetic rod cover into the biological-hazard disposable container after use.
If any part of the body; especially when the eye is exposed to reagents, please keep the eye(s) open and flush
out with eye wash or tap water and go to the hospital immediately.
Dispose of the equipment in accordance with national, federal, state and local regulations and laws.
Unpacking and Installation
1. Unpacking the GENTi Automatic Extraction Equipment
The GENTi is operated by step motor which is movable. Therefore, the equipment and supplements are fixed and
delivered to prevent equipment damages.

Material no. GAD-001
GAD-001, January-2018 (Ver 1.0) Page 8/ 24
WARNING
Risk of personal injury and material damage
Please ensure that the fixture must be removed before connecting the power.
1) Please cut and remove all of tapes or straps around the box to open the shipping box
2) Before using, or after open the box, please check whether GENTi Automatic Extraction Equipment is intact or not. If
there is any damage on equipment or unusable supplements, please DO NOT use defected equipment and contact
Technical service team to get better/further assistance. The power supply should be switched off unless the equipment
is operating the test.
3) Please remove the fixture to use the equipment.
WARNING
Risk of personal injury and material damage
Please ensure that the main power must be switched off before release the fixture.
Figure 2. Adjust the horizontality by turning/balancing the rubber feet (Bottom view)
1. Please maintain the level by using rubber feet as shown in Figure 2.
2. How to install the GENTi
The GENTi is intended for indoor use only.
Before installing the GENTi 32, please install the equipment in a location that meets the following criteria:
Locate the equipment on a sturdy, horizon level surface or place area.
Avoid dusty areas or places that might cause damage the equipment.
Please DO NOT place the equipment near or where the surface generates heats constantly.
Try to locate away from direct sunlight and avoid the equipment away from heat sources.
Please put all vibration and electrical interference sources away from installed area to prevent safety.
DO NOT connect a large number of powers from other equipment into an outlet. It may cause the major

Material no. GAD-001
GAD-001, January-2018 (Ver 1.0) Page 9/ 24
electrical fire while using.
DO NOT leave any thing anything at front side of the equipment to not to disturb the operation.
DO NOT use the equipment near to flammable gases or liquids for safety.
Locate a distance at least minimum clearance 10cm at the sides and rear of GENTi.
3. Hardware Overview
External features
Front view
Rear view
Figure 3. External feature of GENTi Automatic Extraction Equipment
Internal features
Figure 4. Internal features of GENTi Automatic Extraction Equipment
4. Switching on the GENTi
After connecting the equipment to a power outlet, user may switch on the equipment. The power switch is located on
the Front of the equipment. (Figure. 5)

Material no. GAD-001
GAD-001, January-2018 (Ver 1.0) Page 10 / 24
Figure 5. Power switch
The LED power switch can be used during the operation of experiment in case user wants to check the extraction
process, the switch is located next to touch monitor of front side (on the upper right side).
Figure 6. LED Power switch
Magnetic Rod will automatically moves to its original position when it is initialized.
User Interface for GENTi
1. User interface for home screen
The start-up on screen page is showed up on the touch monitor and initializes the sensors after turn the equipment on.
Figure 7. The Booting image on the screen window.
If everything is completed without any problems, the main home screen will be appeared as below.

Material no. GAD-001
GAD-001, January-2018 (Ver 1.0) Page 11 / 24
Figure 8. Home screen window
2. Plate set up for equipment
The exclusive 96-well plate must be set by following the instructions.
A. Open the front door and pull out the plate tray from the equipment to set 96-well plate for test.
B. Insert the plate on the hole of plate tray.
C. Push the plate tray into the equipment for ready to operate. Please make ensure that the tray has been inserted to
the end in order to operate the equipment properly.
WARNING
Risk of injury and material damage
Be cautious not to get finger caught between the door and plate tray when pulling/pushing out the
plate tray. Excessive force applied may damage user’s finger(s) and the equipment . Open the door
slowly. Otherwise, it may damage the equipment.
WARNING
Risk of material damage
Make ensure that the 96-well plate is located into the correct position of the heating tray.

Material no. GAD-001
GAD-001, January-2018 (Ver 1.0) Page 12 / 24
Figure 9. Correct and incorrect way of inserting the plate into the plate tray
Please insert the plate into the plate tray as shown in Figure 9. Please make it sure the plate is in a right position that
diagonally cut edge of plate faces forward plate tray. If it is inserted incorrectly or upside down, it may cause an
operating error and extraction may not work.
Figure 10.Correct and incorrect way of inserting plate on plate tray
3. Strip set up
A. Please load the strip to strip bracket and to load properly, please insert the magnetic rod cover carefully to the end to
strip bracket.
B. Close the front door and ready to start.
Forward

Material no. GAD-001
GAD-001, January-2018 (Ver 1.0) Page 13 / 24
Figure 11. The way of insert/hold the Strip in the device properly.
4. Implementation of GENTi 32
If the 96-well plate and magnetic rod covers are set on correctly, please follow the next step as below.
A. Press the ‘‘Whole Blood DNA’ button on touch monitor and initial Setting to process.
Figure 12. Whole Blood DNA menu section on the touch screen
B. Select the specific button for whole blood sample extraction as Figure 13 below. Select relevant icons for extraction
of other samples depend on the applied kit.
WARNING
Risk of material damage
Please ensure that the magnetic rod cover is inserted into the end of the magnetic rod cover
bracket.
Push the magnetic rod cover until ‘Click’ sound is heard from the equipment. The magnetic rod
cover and/or magnetic rod may break and cause the malfunction of the equipment if it is not pushed
until the far end.

Material no. GAD-001
GAD-001, January-2018 (Ver 1.0) Page 14 / 24
Figure 12 The selection for whole blood extraction on the menu screen
C. To perform the extraction, please press the ‘INIT’button and the ‘Start’ button to perform extraction. After pressing
buttons, it will be started automatically and indicates the remaining time (a) on the screen (Refer to Figure 14).
After completion, it gives a beep sound and user may check the progress of step through the window of touch
monitor.
Time on the LCD screen does not run during magnetic rod positioning. There are approximately 3~4 minutes of
magnetic rod positioning during the operation.
1) The equipment can be forcibly stopped by ‘Pause’ (b) button.
2) The equipment can be forcibly canceled by ‘stop’ (c) button.
3) Opening the door during operation put it on hold and re-activated once closed.
Figure 13. Procedure on touch screen
WARNING
Risk of personal injury and material damage
Do not put a hand inside of the device when it is operational at any circumstances. Please insert and
remove the plate and magnetic rod cover only when the equipment is not in operation. Do not touch
any internal part of the device at any circumstances.
The Alarm will ring along with the ’00:00’ that display show as Figure 15. below upon completion of extraction.

Material no. GAD-001
GAD-001, January-2018 (Ver 1.0) Page 15 / 24
Figure 14 .Completion signal on the touch screen
Please open the front door and pull plate tray and remove the plate upon completion of experiment. The plate shall be
removed first since the magnetic rod cover may be contaminated withmagnetic beads . Please disinfect the plates and
magnetic rod covers with UV lamp before disposal to prevent contamination.
5. Camera of GENTi 32
Figure 15. Camera View
GENTi has camera view inside of equipment. It could be called as “show machine room”.
To use the camera view to see inside of the equipment, please press ‘CAMERA’button it could be show inside of GENTi
6. Warning Code
WARNING
Risk of injury
Be cautious not to spill or spurt reagents to any part of the body during plate removal. Special caution
is necessary with wells with samples.

Material no. GAD-001
GAD-001, January-2018 (Ver 1.0) Page 16 / 24
Figure 17. Warning code on the view location.
There are warning list that each explains and which might appear during application.
1. 71: UV lamp is out of control.
2. 80: Low temperature than target at heating module.
3. 81: Occurred over current at heating module.
4. 82: When the set temperature has not been reached after a certain period of time has elapsed.
5. 84: Over temperature than target at heating module.
6. 90: Occurred over current at strip module motor.
7. 91: Occurred over current at magnet module motor.
8. 92: Occurred over current at tray module motor
7. Error Code
There are 6 errors which might appear during application.
1. Er:13: EEPROM has problem at read/write.
2. Er:14: when the door OR tray is open
3. Er:21: when the heater has problem.
4. Er:30: Step motor-A FUSE short circuit of strip module.
5. Er:31: Step motor-B FUSE short circuit of magnet module.
6. Er:32: Step motor-C FUSE short circuit of tray module.
7. Er:33: Step motor-A OR sensor problem of strip module.
8. Er:34: Step motor-B OR sensor problem of magnet module.
9. Er:35: Step motor-C OR sensor problem of tray module.
10. Er:40: Tray moving Error.
11. Er:49: appears when the NTC thermistor has problem
* Please refer to figures below for each error.


Material no. GAD-001
GAD-001, January-2018 (Ver 1.0) Page 18 / 24
9. Other information
If power input is cut due to certain circumstances, such as black out; the entire procedure will get initialized
automatically. It is highly recommended to user to restart the test with new kit, otherwise data may be compromised.
A. Please, start fixing the equipment with fixtures 15 minutes after deactivation to avoid any skin burn from heated
heating blocks.
B. Please lift magnetic rods and rod covers brackets by holding outside of each bracket when it is needed (Ex. For
transporting). Lifting the inner part of each bracket may damage bolts that connect the device.
C. Do not tighten screw inside fixture too much as it may cause malfunction of the equipment, but bottom of the
equipment shall be tightened well.
Troubleshooting
Problem
Possible causes and comments
Equipment does not turn on.
Make sure to connect the power cable to the equipment.
Check whether the equipment is plugged at 220~240V power
outlet.
Contact your local distributors or technical service team if the
problem continues.
Equipment is leaned
Adjust Rubber and Feet to maintain level
If the motor is not working after switching on the
equipment.
Check whether fixtures (Both inside and bottom side of the
equipment are completely removed.
Confirm absence of any foreign substances on sensor.
Check that the front door has been closed.
Contact your local distributors or technical service team.
IF the touch monitor doesn’t display anything
after switching on LED power switch.
In case of motor doesn’t work,
Ensure that the power cable is plugged in.
Check the fuse connection next to the power cable.
In case of motor works,
Touch monitor could be disconnected from the power or
out of order.
Contact your local distributors or technical service team.
If LED lamp doesn’t switch on
Make sure to connect the power cable to the equipment and
turn on the equipment.
Check whether the equipment is plugged at 220~240V power
outlet.
Contact your local distributors or technical service team if
problem continues.

Material no. GAD-001
GAD-001, January-2018 (Ver 1.0) Page 19 / 24
Not available to locate the Plate and Magnetic
Rod Cover at the right position
Check whether the plate and magnetic rod cover are inserted
at the right position.
Confirm absence of any foreign substances on plate tray and
magnetic rod cover bracket.
Check whether the plate and magnetic rod cover are
deformed or bent.
Deformed or bent plate and magnetic rod cover may
cause malfunction of the equipment.
Contact your local distributors or technical service team if
problem continues.
Front door is not closed
Check whether the plate tray is inserted till the end.
Confirm absence of any foreign substances behind of the
front door.
Contact your local distributors or technical service team if
problem continues.
UV lamp doesn’t switch on
The lifespan of UV lamp is about 6,000 hours and it should be
changed.
The UV lamp could be disconnected from the power or out of
order.
Contact your local distributors or technical service team if
problem continues.
The equipment stops during operation
Check whether the power cable is connected properly.
Contact local distributors or technical service team if problem
continues but LCD screen is turned on.
Equipment is not working properly
Check whether the ‘Whole blood DNA’ button in home screen
is pressed. Improper extraction result may derive if processed
by ‘Test Mode’.
Check whether the plate and magnetic rod cover are properly
placed.
Make sure fixtures are completely removed.
Contact your local distributors or technical service team if
problem continues.
Heating blocks are not heated
Make sure the plate tray is inserted until the end.
Contact local distributors or technical service team if problem
continues.
Extraction without the Magnetic Rod Cover
If extraction is preceded without the magnetic rod cover, the
beads will adhere on magnetic rods, hence affects further
tests. It is highly recommended to replace magnetic rods.
Contact your local distributors or technical service team for
the replacement of magnetic rods.
Unfavorable extraction result
Review manuals for procedures and trouble shooting.
Contact your local distributors or technical service team if
problem continues.
Warranty
GeneAll Co., Ltd. offers one (1) year warranty for GENTi 32 Automatic Extraction Equipment
GeneAll Co., Ltd. guarantees five (5) years of supply of spare parts from the date of last manufacture.

Material no. GAD-001
GAD-001, January-2018 (Ver 1.0) Page 20 / 24
Limitations of Warranty
This warranty is subject to the following exceptions and limitations.
1. GeneAll Co.,Ltd. shall not be required to replace any units at any circumstances which are damaged or malfunctioned
by abuse, accidents, alteration, neglect, misuse, maintenance by someone than GeneAllCo.,Ltd. or failure to operate, in
accordance with the equipment.
2. GeneAll Co.,Ltd. shall not be required to provide the warranty for the equipment that are dismantled without
authorization.
3. GeneAll Co.,Ltd. shall not be required to provide the warranty for malfunction of the equipment by forced majeure.
4. GeneAll Co.,Ltd. reserves the right to make changes in design without obligation to incorporate such changes into
previously manufactured equipments.
Refer to Trouble Shooting Guide when problem occurs. Contact your customer service and/or local distributor for
warranty service if problem is consistent.
128 GeneAll Bldg., Ogum-dong, Songpa-gu, Seoul, 138-859, Korea
TEL. +82-2-407-0096 / FAX. +82-2-407-0779 / Website: http://www.geneall.com
Symbols
Serial number
Catalogue number
Consult Instruction For Use
Caution
Temperature limitation
Expiry date
Manufacturer
Do not reuse
The risk of electrical shock
Hot surface
Waste Electrical and Electronic Equipment Directive
UV lamp caution
Date of manufacture
Table of contents
Other GeneAll Laboratory Equipment manuals
Popular Laboratory Equipment manuals by other brands

Pasco Scientific
Pasco Scientific ME-6825 Instruction manual and experiment guide

Sirona
Sirona DAC PROFESSIONAL Service manual

Atlas
Atlas XENOTEST BETA LM operating manual

BROWIN
BROWIN 405525 Operation manual

Koehler
Koehler KV3000 Operation and instruction manual

Thermo Scientific
Thermo Scientific Centra-W Cell Washer Service manual

Hakko Electronics
Hakko Electronics FR-860 instruction manual

NanoEnTek
NanoEnTek ADAM-rWBC instruction manual

Lauda
Lauda VF 20040 C operating instructions

biodex
biodex 850-000 Instructions for use

Agilent Technologies
Agilent Technologies 1260 Infinity quick start guide

Piezotronics
Piezotronics IMI Sensors 699B06 Installation and operating manual