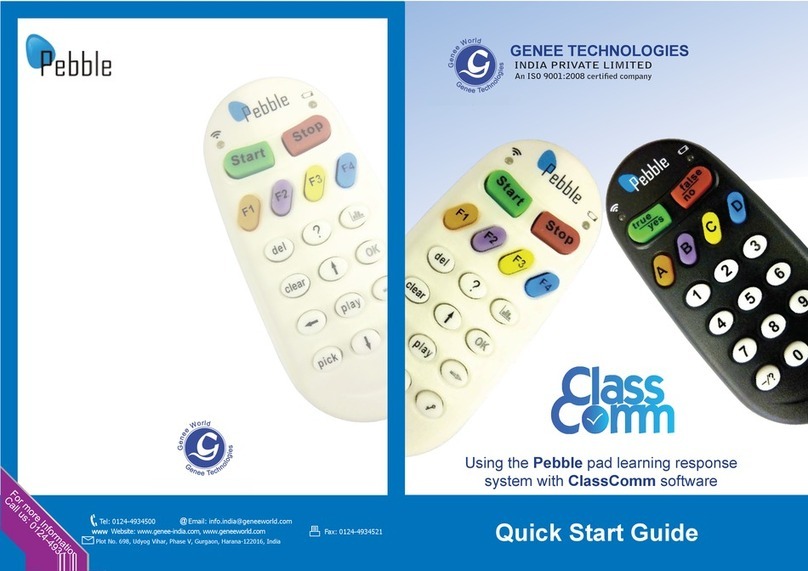
Genee World Pebble User manual

Using the Pebble pad
learning response system
with ClassComm software
Quick set up guide
Leaders in learning technology

Minimum system requirements:
• Processor:PentiumIII450MHzprocessor(1gigahertz(GHz)Pentiumprocessorrecommended)
• Memory:256MB(512MBoraboverecommended)
• Display:800x600,256colours(Recommended:1024x768highcolour,32-bit)
• CDROMDrive:4xorfaster
• HDD:300MBfreeharddrivespaceforbasicinstallation–500MBharddrivespacerequiredfor
curriculumsamplecontent
• Microsoft.NetFramework2.0(includedininstaller)
• Microsoft®PowerPoint2003orabove
• AdobeFlashplayerversion9(includedininstaller)
• OperatingSystem:WindowsXP,WindowsVistaandWindows7Compatible
Quick set up guide for
Pebble pad learning
response systems using
ClassComm software

SoftwareCDwith
QuickSetUpGuide
What’sinthecase
PebblepadLearning
ResponseSystem
Studenthandsets
Theseareusedbystudents
to send responses
Teacherhandset
Usedbytheteacher
tocontrolthe
presentation
ReceiverUSBcable
Step 1
Batteries

PebblepadsuseAAbatteries(seeimage2).
Preparethehandsets
1. Pebble pad battery cover being removed
3. Battery cover being screwed on2. Batteries being inserted
Step 2

PleaseensurethatthereceiverisdisconnectedbeforeyouinserttheClassCommInstallationCD.
• IftheCDdoesnotauto-run,youwillneedtomanuallyrun“ClassComm.exe”byexploringtheCD
contents(Fig1)
Fig. 1 – ClassComm CD Contents
TheClassCommInstallationMenuScreenwillopenasshownbelow.
• SelectClassCommInstallationfromtheoptions.
• Followtheonscreenwizardinstructionstoinstallthesoftware.
• Duringinstallationthefollowingscreenwillappear(overthepage).
ClassComm
Installation
Menu Screen
Preparethehandsets ClassCommsoftwareinstallation
Step 3

ClassCommcanbeinstalledinEDUCATIONALmodeorCORPORATEmode.Thecoredierence
betweenthetwomodesofinstallationistheterminologyusedthroughouttheapplication.
EducationalmodeusesSTUDENT,TEACHER,CLASSandTEST.CorporatemodeusesPARTICIPANT,
PRESENTER,GROUPandEVENT.Themodeselectedfromthisscreencanbechangedlaterfrom
withintheClassCommsoftware.
Also,ClassCommhasanInterfaceEditorthatcanbeusedtofurthercustomisetheClassComm
softwarewithyourorganisationspreferredterminology–SeeClassCommHelp > Advanced
Functionalities > Interface Editorfordetails.ForthepurposeofthisQuickSetupGuide,
educationalmodeterminologywillbeused.
ThemainClassCommsoftwareinstallationisnowcomplete.
Note–Donotlaunchthesoftwareatthisstage.Followthroughthis
guidetocompletion.
ClassCommsoftwareinstallation(continued)

• ThereissomeoptionalsamplecontentthatcanbeinstalledforusewiththeClassCommsystem.
Thisstepwilladdcomplete,mappededucationalcontentforusewiththeClassCommsystem.
• FromtheClassCommInstallationMenuScreen,selecttheSample Contentbutton.
• Followtheon-screenwizardinstructionstoinstalltherequiredsamplecontent.
• WhenthemainClassCommsoftwareislaunched,thesamplecontentwillbeinstalledintothe
Resourcesarea.
Samplecontentinstallation(optional)
Step 4

InstallthePowerpointplug-in(slidemapper)
Note–YouwillneedMicrosoft®Powerpoint®2003oraboveinstalledon
yourPCbeforeyouinstalltheplug-in
• ThePowerPointPlug-inorSlideMapper
isautilitythatisaddeddirectlyintoyour
Microsoft®PowerPoint®application.Itallows
for the mapping of your presentations within
PowerPoint.Themappingprocessassigns
questiondatatoyourslides(Example:True/
False,MultipleChoice,Numericandsoon)
• FromClassCommInstallationMenuScreen,
selectthePower Point Plug-inbutton.
• Followtheon-screeninstructionstoinstall
thePowerPointPlug-in(SlideMapper)
module.
• TheSlideMapperwillappearasshown
belowwithinMicrosoftPowerPoint®
Slide Mapper
within PowerPoint
Step 5

ConnecttheClassComm
receivertoanavailableUSB
portonthePC.AredLEDwill
lightupinthereceiver.
• Atthisstage,thePCwillautomaticallydetectthereceiverandcongurethedriversaccordingly.
NOTE–ThereceiverdriversareinstalledduringtheClassCommsoftwareinstallationdescribed
inSTEP3–CLASSCOMMSOFTWAREINSTALLATIONofthisguide.Itisimportanttoinstall
ClassCommsoftwarebeforeattachingthereceiver.
• LaunchtheClassCommsoftwareby
clickingtheiconfromthedesktoporfrom
Start > All Programs > ClassComm.
• Amessageinthebottom-leftarea
oftheClassCommSoftwarewill
appearstatingthatthereceiver
hasconnectedsuccessfully.
Connectthereceiverandtesthandset
communicationwithinClassComm
Step 6

• ClickontheCommunicationtabwithinClassComm.Thiswilldisplaythecommunicationgridas
shown.IfpressinganykeysonthePebblePadhandsetsshowaredLED,thenthathandsetisnot
MAPPEDtothereceiverandwillnotcommunicate.
PressanykeysonthehandsetsandacellwilllightupintheCommunicationgrid.
Thesoftwareisnowinstalledandthehardwareisconguredcorrectly
andhasbeentestedinthecommunicationareaofClassComm.
Connectthereceiverandtesthandset
communicationwithinClassComm(continued)
Press and hold the -/? key within
5-10cm of the connected receiver.
The communication LED will blink
GREEN 3 times when mapping is
complete.
A non-mapped handset will show a
red light when any key is pressed.

• OpenablankPowerPointPresentationandaddaquestionwith4choicesasshowninthe
examplebelow
• SelectthefollowingoptionsfromtheSlideMappertomatchtheinformationontheslide
• SlideType:MultipleChoice
• ResponseType:Text
• Answer:Selectthecorrectanswerchoice
• AnswerColour:Green
• Question:Cutandpastethequestiontextfromtheslidehere
• TextAnswers:Fromtheslide,highlightthecorrectanswerandclicktheAddbutton.
Say“Yes”totheconrmationmessagethatappears.
That’sit!Thebasicslidefunctionalityhasbeensetasmultiplechoicewith4textlabelchoices(A-D)
andthecorrectanswertobehighlightedingreenwhentheteacherrevealstheanswerduringa
presentation.Repeattheabovestepsasnecessaryandsavethepresentation.
FormoreinformationonthedierentquestiontypesandSlide
Mapper,consulttheClassComm User Guide(Seesectionon
AddingandmappingaPowerPointPresentation)
Creatingapresentation
Step 7

AddthepresentationintoClassCommresources
• FromwithintheClassCommRESOURCESarea,gotoFile > New > New Activity > New
PowerPoint Activity.
• FromtheNewActivitywindow,clicktheBrowsebuttontonavigatetothepresentationcreatedin
STEP7andclickOK.
• ThepresentationwillnowappearintheRESOURCEStreestructurewiththumbnailviewsofallthe
question slides
Step 8

Atthispoint,ClassCommwillminimiseandthePowerPointactivitywillopenreadyforresponses.
UsetheTeacherhandsetorPresentationToolbartocontrolthepresentation.TheResponsebar
showstheQuestiontype,numberandnumberofresponses.Navigatethroughthepresentationand
whencompleted,theslideshowwillautomaticallyendandtheresultssaved.
Runthepresentation
1. EnterthePRESENTATIONareaofClassComm
2. ChecktheExisting Class Presentation option
3. ChecktheRecord Assessment option
4. ChecktheAnonymous login option
5. EnteraClass Name(otherdetailsareoptional)
6. PresstheSavebutton
7. AskstudentstoswitchONthehandsets.TheHandsetareawillshowa
countofActiveHandsets.
8. Clickonceontheresourcetopresentwith
9. ClickonPresent Activity.
1
2
3
4
5
6
7
8
9
Step 9

Replayquestion
Increaseresponsebaropacity
Decreaseresponsebar
opacity
Resetopacity
Previousquestion
Nextquestion
Playgame
Pickstudent
Noattachedfunctionality
Formoreinformationonrunningapresentation,consultthe
ClassComm User Guide(SeesectiononRunningaPresentation)
Runthepresentation(continued)
Startrecordingofhandset
responses
Stoprecordingofhandset
responses
Endpresentation
Show/hideanswer
Showresultscharts
Hide/showpresentation
toolbar
Hide/showresponsebar
Gotoslideinreviewmode
Toggleinstantcharts

Onceapresentationhasbeenfullycompletedandstopped,theClassCommsystemallowsyouto
viewreportsandchartsforassessmentpurposes.
Reports
1. ClickontheREPORTS
button
2. Selectthetypeof
presentation that you
wishtoviewreports
for(Inthiscaseitis
“Anonymous”)
3. SelecttheReport Type
fromtheavailable
options
4. EntertheReport
Settings from the
drop-downoptionsthat
matchtheclassand
presentation that you
presentedandsaved.
5. ClicktheGenerate
Reportbutton(enables
when report settings
havebeencorrectly
entered)todisplaythe
selectedreportinthe
right-pane.
1
2
3
4
5
Step 10

Responsesystemset-upexample1:
Conference settings
‘Wehavethreeprofessionalconferencescomingupwith40delegatesateach.IhaveasetofGenee
PebblePadsandashortseriesofpre-prepared,mainlymultiple-choice,questionsfromwhichIwant
togatherdatatoanalysefeedback.Whatisthebestwaytosetup?’
1. CheckthatClassCommisin‘Corporate’modebygoing
to Settings > Application mode(youwillhavetorestart
ClassCommtoactivatethissetting).
2. Afteryouhavechosenyourresourceslides,gotothe
Presentation window
3. SelectRecord Assessmenttokeepresultsandpublishdata
4. SelectAnonymous Logintogatheroverallresponses
withoutidentifyingindividualhandsets
5. EnteraGroup Name andclickonSave
6. SavetheseasyourDefault Setting ready for the repeat
conferences
7. ClickonPresent Activity to start the presentation
1
2
3
4
5
67

‘WearecarryingoutHealth&Safetytrainingwithgroupsofouremployees.Itisimportantthatwe
haverecordsofindividualattainmentsothatweknowwhowillbecompetentinparticularwork
situations.Whatisthebestwaytosetup?’
Responsesystemset-upexample2:
Company group training programme
1
2
3
4
5
9
10 11
1. CheckthatClassCommisinCorporatemodebygoing
to Settings > Application mode(youwillhavetorestart
ClassCommtoactivatethissetting).
2. EntertothePresentationwindowandselecttheresource
thatyouwillbepresenting.
3. SelectRecord Assessmenttokeepresultsandpublishdata.
4. SelectAd Hoc Presentation.
5. ClicktheRegister Groupbuttontobuildthegroup
participantlist.
6. TypeintheParticipantnamesandclickStart Mapping from
the Register AdHoc Groupwindow.
7. ParticipantsmustnowpresstheMapping Keynexttotheir
namefollowedbythekeysymbolbutton.TheLoginstatus
columnwillchangefromacrosstoatickwhenaparticipant
hassuccessfullymappedtheirhandsettotheirname.
8. Afterallparticipantshavesuccessfullymappedtheirhandset
totheirname,clickStop MappingfollowedbyOK.
9. EnteraGroup NameandclickonSave.(Ifthisgroupstays
thesame,youcanrecallitforfurtherassessmentstobe
addedtotheparticipants’data).
10.Savetheseasyour‘Default Setting’readyforrepeatsessions.
11.Clickon‘Present Activity’tostartthepresentation.
TypeParticipant
names here and
press Enter on
yourkeyboard.
AMappingKey
willautomatically
beassociatedwith
eachparticipant.
Continueuntilall
nameshavebeen
entered.
6
7
8

1How do I reset the handsets?
Useasharp,pointedobjecttopressthesmallbuttonlocatedonthebackofthehandset.Use
thiswhenhandsetwillnotmapcorrectly,freezesorwithchargingproblems.
2How do I map handsets to dierent receivers?
EachreceiverhasauniqueID.Allhandsetsarelockedintocommunicatingwiththereceiver
whenyoureceiveanewset.Ifyouwanttolockormapahandsettoworkwithadierent/new
receiveryoumustpressandholddownthe“-/?”keyuntilthecommunicationLEDblinksgreen
3times.Ifitblinksred,pleaserepeattheprocessuntilthegreenlightblinks3times.Please
notethatwhenmappinghandsets,thedistancebetweenhandsetandreceivershouldonlybe
afewinches.
3What technology does the response system use and what is
the range?
ThesystemusesRFwithoperatingfrequencybands2405MHzto2485MHz(2.4GHz).The
maximumtransmissionrangeis40mforPebblePads.
4How many handsets can be used per receiver?
Currently253perreceiver.
5How do I transfer a mapped presentation between
computers without re-mapping?
WhenyoumapaPowerPointPresentationandsaveit,anassociatedXMLlewillalsobe
createdandsavedtothesamelocationastheoriginalPowerPointle.TheXMLlecontainsall
themappingdata.Whentransferringmappedpresentations,boththePowerPointleandthe
XMLmustbetransferredtogethertoretainmappingdata.
Aquickwaytotransfermapped,PowerPointactivitiesistouseClassComm’sbuiltinImport/
ExportFeature.WithintheresourcesareaofClassComm,selectthepresentation/soryellow
folderyouwishtoexportandgotoImport/Exportfromthetopmenubar.Selectthe
presentationtoexportfromthenewwindowthatopensandchoosethelocationtosave
theexportedleto.Thelewillexportinazippedleformat.Thiszippedlecanthenbe
importedintoClassCommonothercomputers.
FAQ

6Can I install and run ClassComm from a Server across a
network?
Currently,ClassCommisadesktopapplicationdesignedtobeinstalledandrunfromaTeacher/
presenterPC.Itcannotberuncentrallyfromaserver.AnMSIversionofClassCommisavailable
foreasydeploymentacrossanetwork.Pleasecontact[email protected]forfurther
details.
7The handsets are not talking to the receiver. What do I do?
• EnsurethatthereceiverisconnectedviaUSBcabletoanavailableUSBportandhasared
LEDshowing.
• OpentheClassCommsoftwareandensurethatitstates“5greceiverconnected”inthe
bottom-leftoftheapplication
• Ensurethatthehandsetshavethebatteriesinsertedthecorrectway-
• PressinganykeyshouldshowagreencommunicationLED.Ifitisredthenre-maptothe
receiverbypressingandholdingthe-/?Keyuntilitblinksgreen.
• Resetthehandsetfromtheresetswitchonthebackandre-maptothereceiver.
Pleasecontact[email protected]iftheproblempersists.
FAQ
Support
Free technical helpline
Tel:08703861900EXT4
Website: www.geneeworld.com
3yearswarranty

Genee World
PO Box 3256
Wolverhampton
WV3 0LA
Sales Tel: 0870 386 1900
Fax: 0870 405 0188
Email: enquiries@geneeworld.com
Web: www.geneeworld.com
Leaders in learning technology
Other manuals for Pebble
1
Table of contents
Other Genee World Toy manuals
Popular Toy manuals by other brands

Hobbico
Hobbico Hobbistar 60 MK III Assembly instructions

Carrera
Carrera 30158 GT ACTION Assembly and operating instructions

Mega Bloks
Mega Bloks PIRATES OF THE CARRIBEAN DEAD MAN'S CHEST Water Wheel... manual

Trix
Trix BR 112 manual

Eduard
Eduard F-16I SUFA quick start guide

Rolly Toys
Rolly Toys rollyTrac manual