17.
Mount the retractor vertically in relation to the strap or rope with a
grommet. Lower the shutter, then the strap or rope should be cut
for a length of 25 cm below the mounting location of the retractor.
Pass the strap or rope through the hole in the retractor housing.If
strap used cut a slit and attach to the hook. Holding the spring
housing firmly, turn and release the retractor lock by pushing. If
rope is used, after pushing through the retractor entry hole, light
the tip with a lighter, this prevents the line from unraveling. Close
the retractor and secure it to wall.(see assembly instructions for the
retractor or cable).
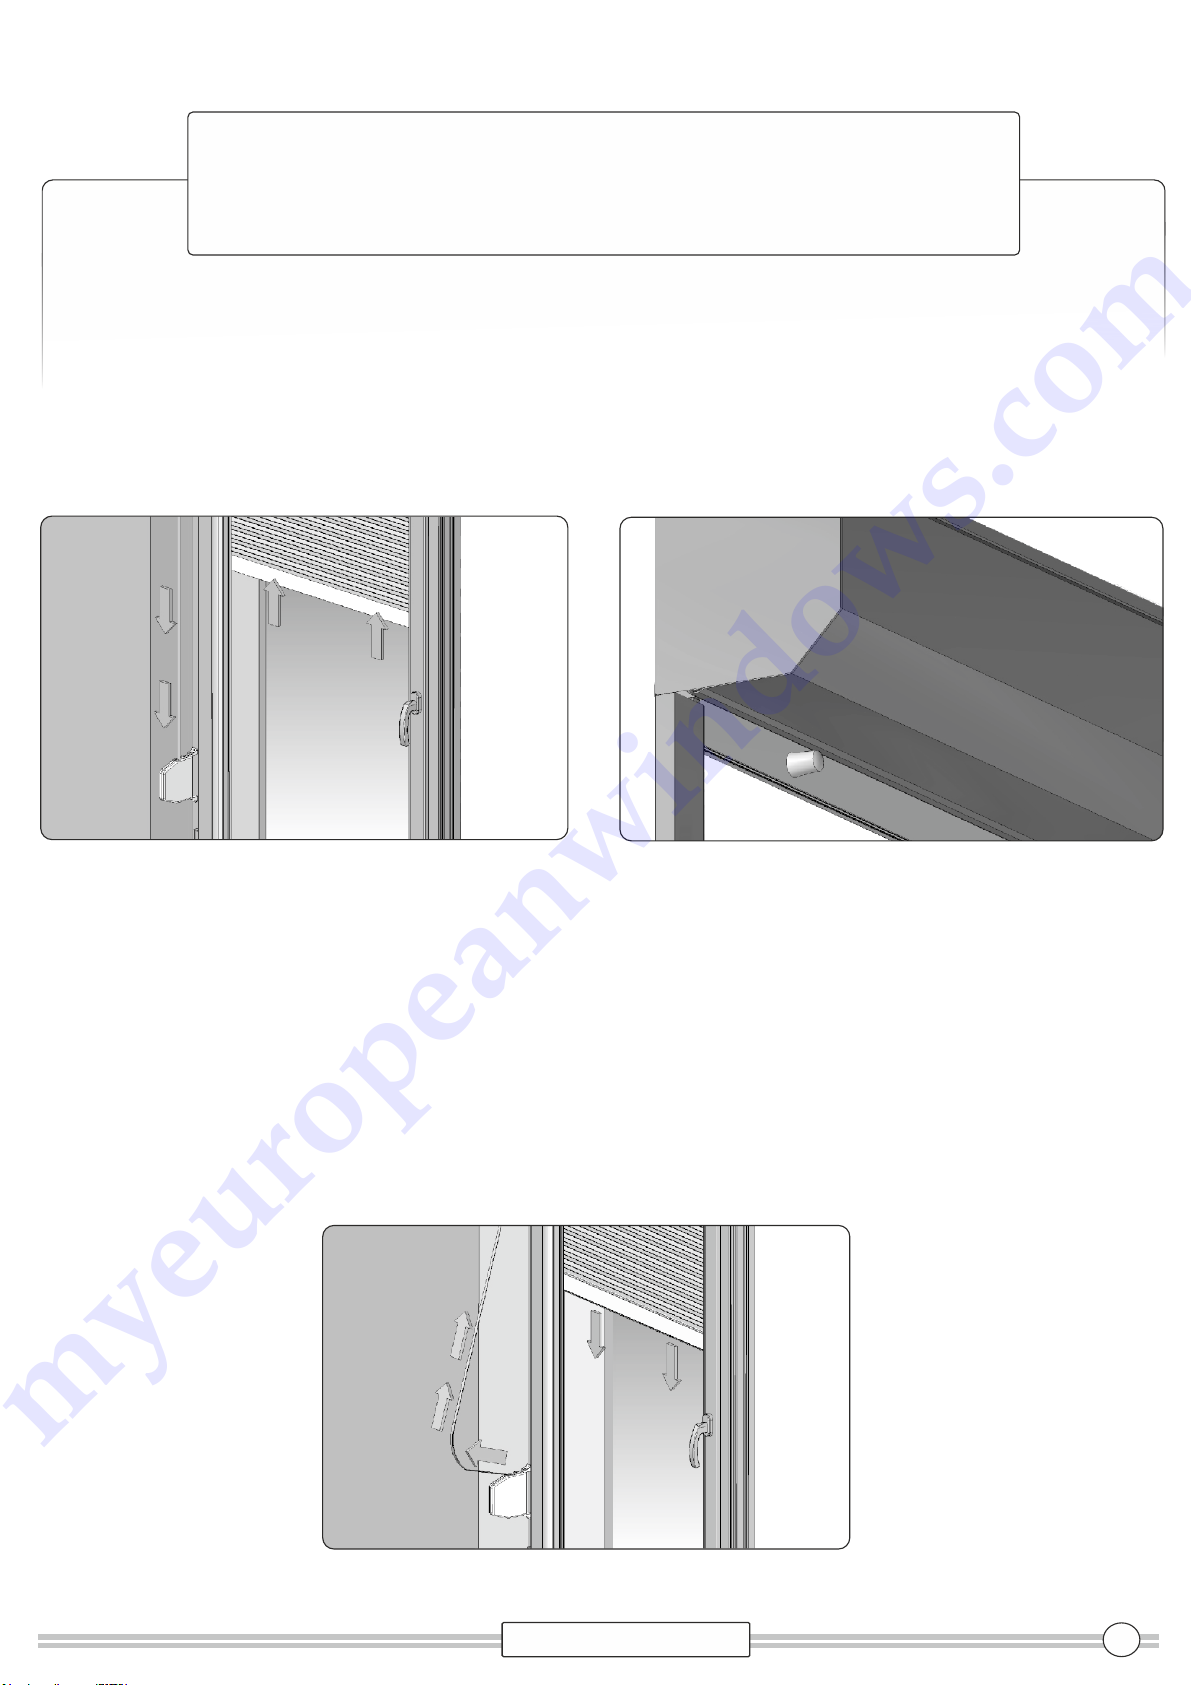
16.
Make sure that the blind is properly attached (horizontally and
vertically). Tighten the screws in the guides, then insert the caps.
If necessary mount the bottom plugs of the guides. check proper
functioning of the blind. Check correctness operation of
automatic bolts, bolts or lock, to make adjustments.
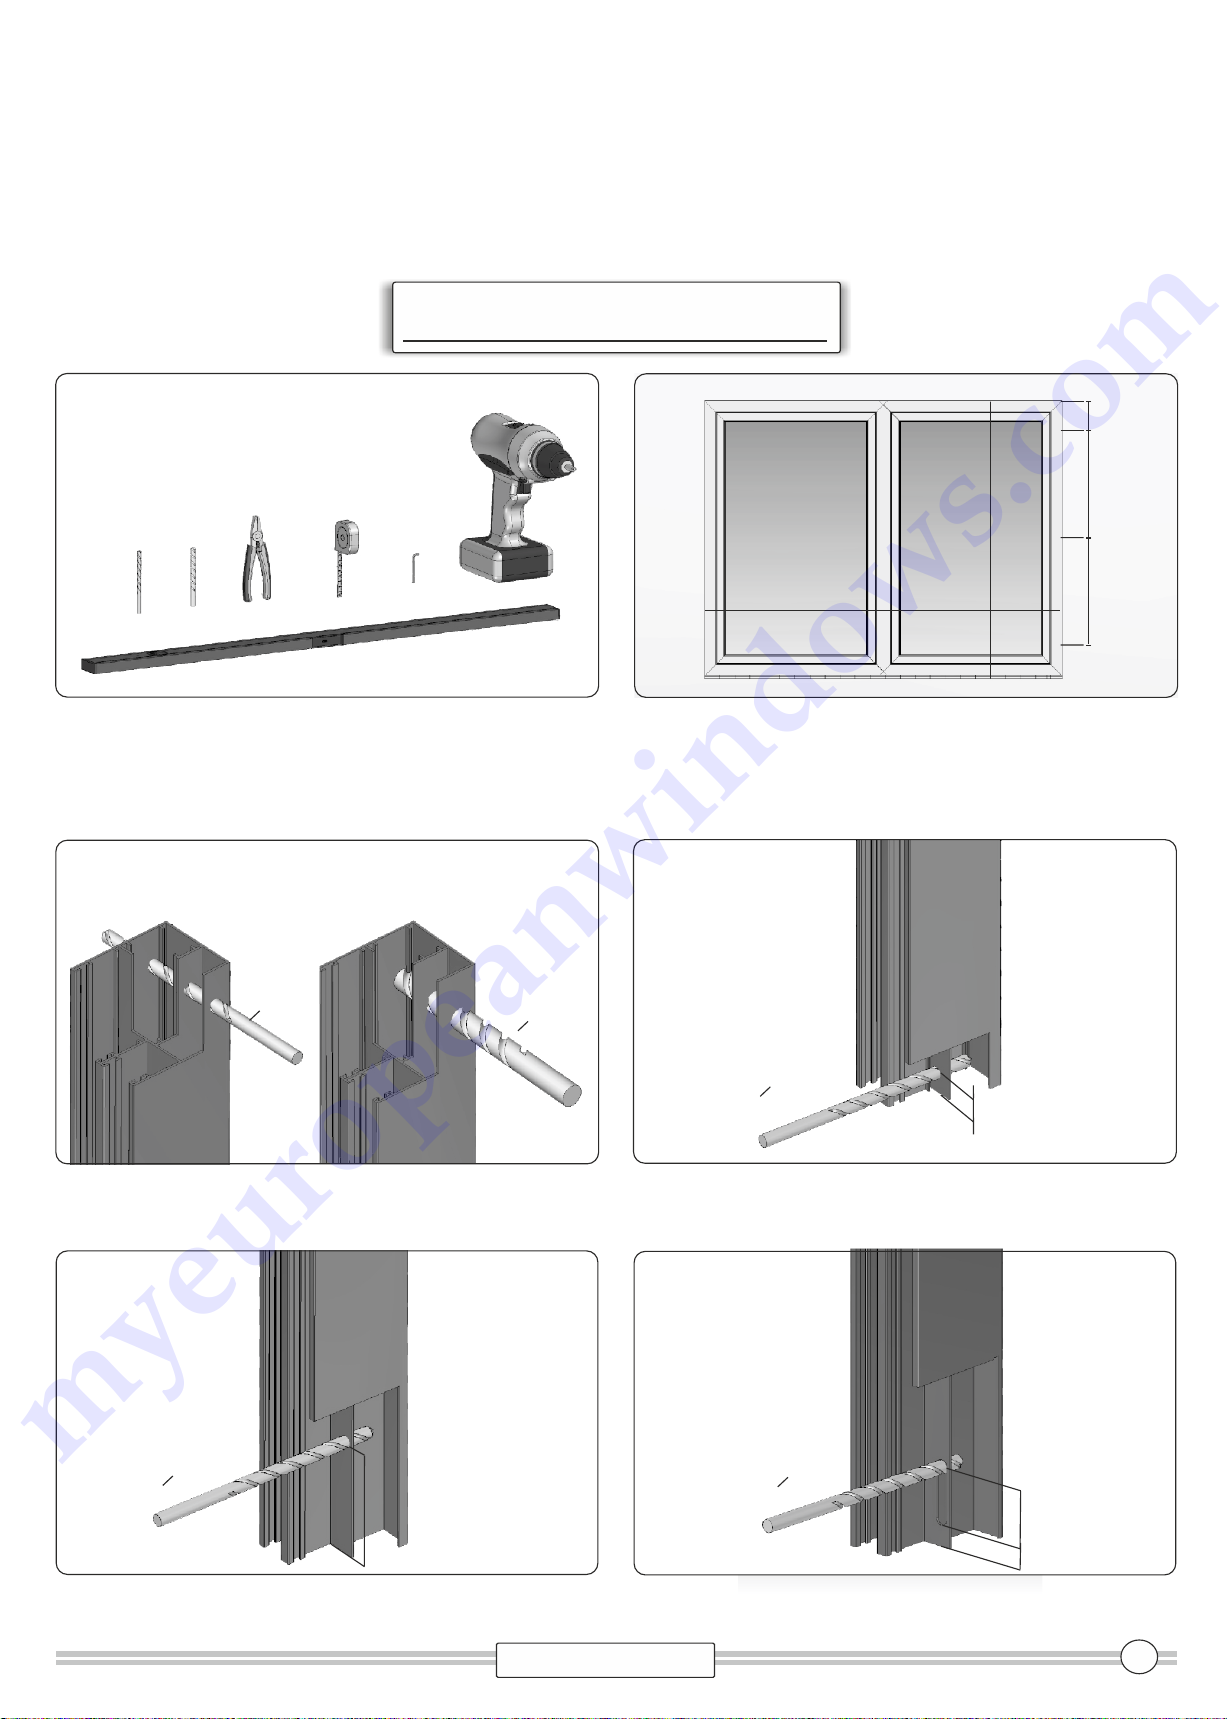
13.
Pass the tape (cable or cord) through the hole into building.
19.
The closing height of the mosquito net can be adjusted by
sliding hooks closing the mosquito net, which are located at the
bottom of the guides ...
18. In roller blinds with a mosquito net, check the correctness of
functioning mosquito nets.
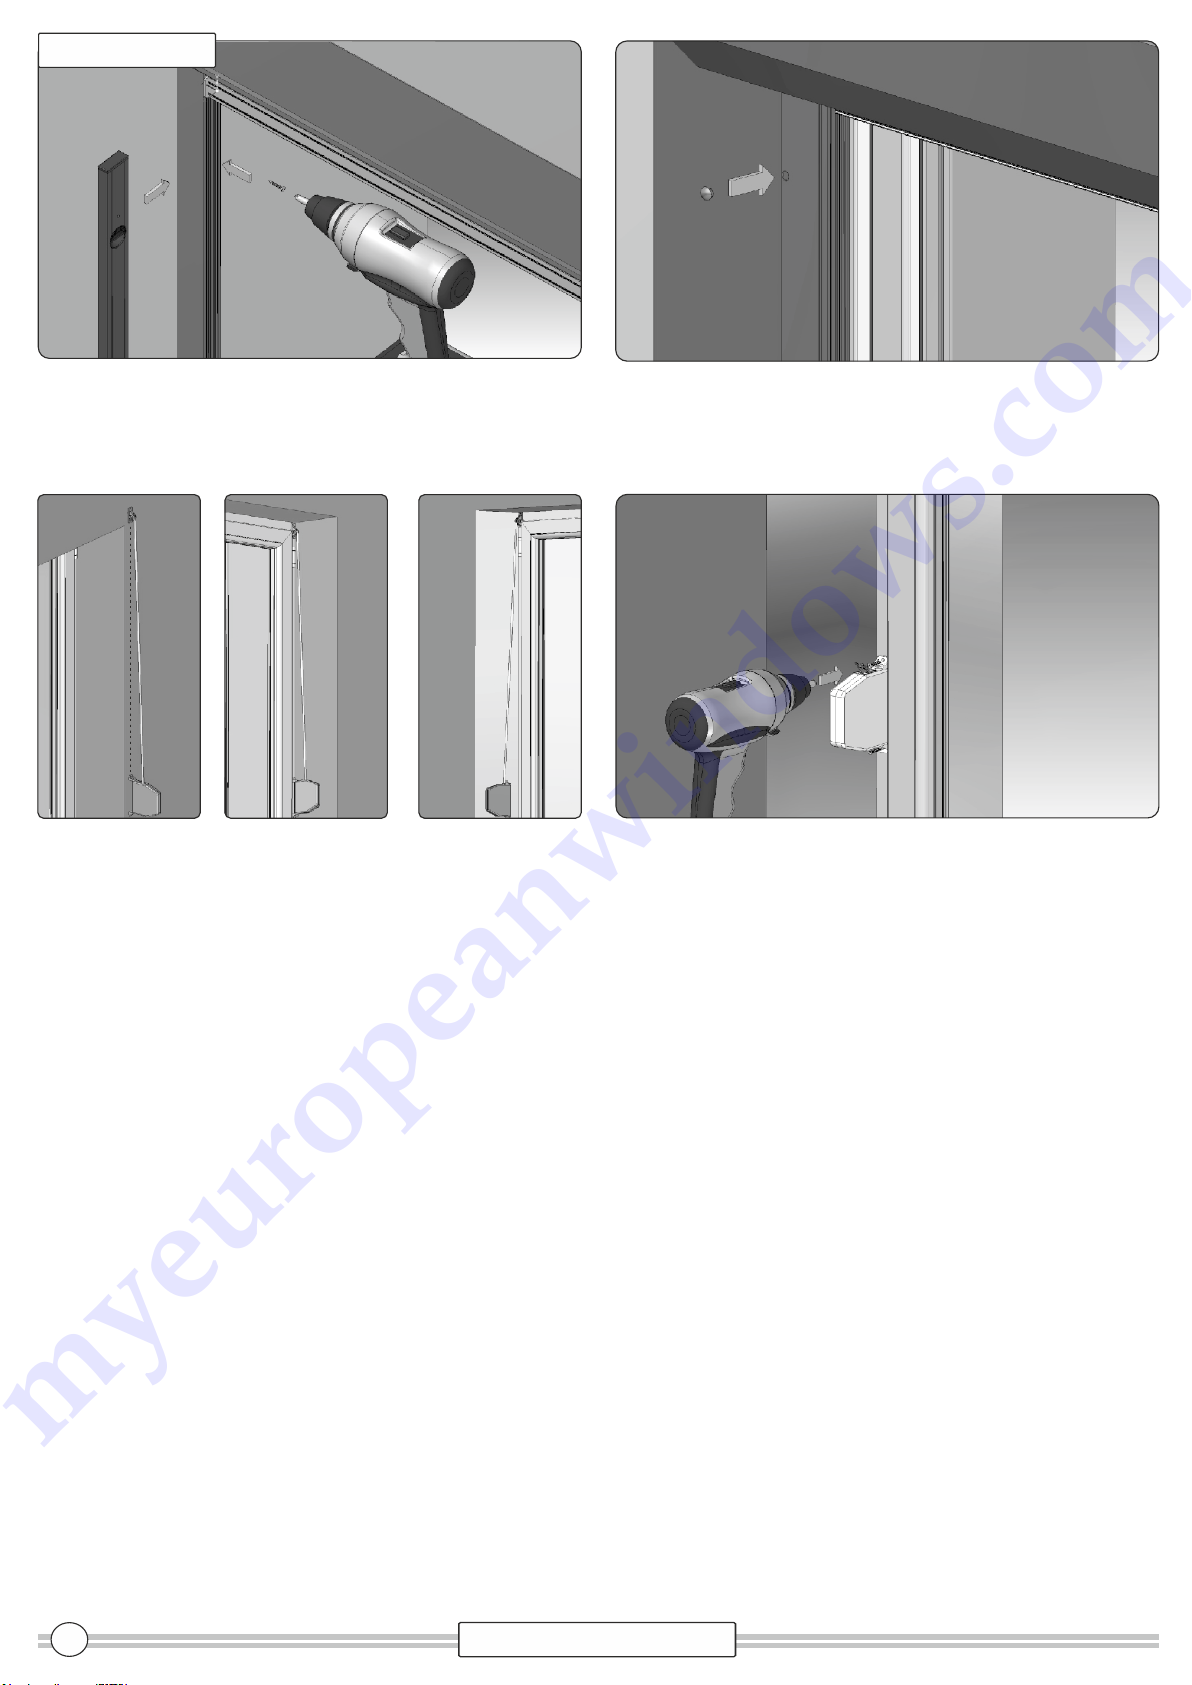
14.
Carefully slide the box onto the guide by introducing the profile
slider into the upper part of the guides. Blinds with a mosquito net,
carefully insert the bottom rail so to not
damage the net.
15. Pass the tape or cable through the grommet, then use the
anchor or screw to attach the grommet to wall.
STRING INSTALLATION STRAP INSTALLATION
5
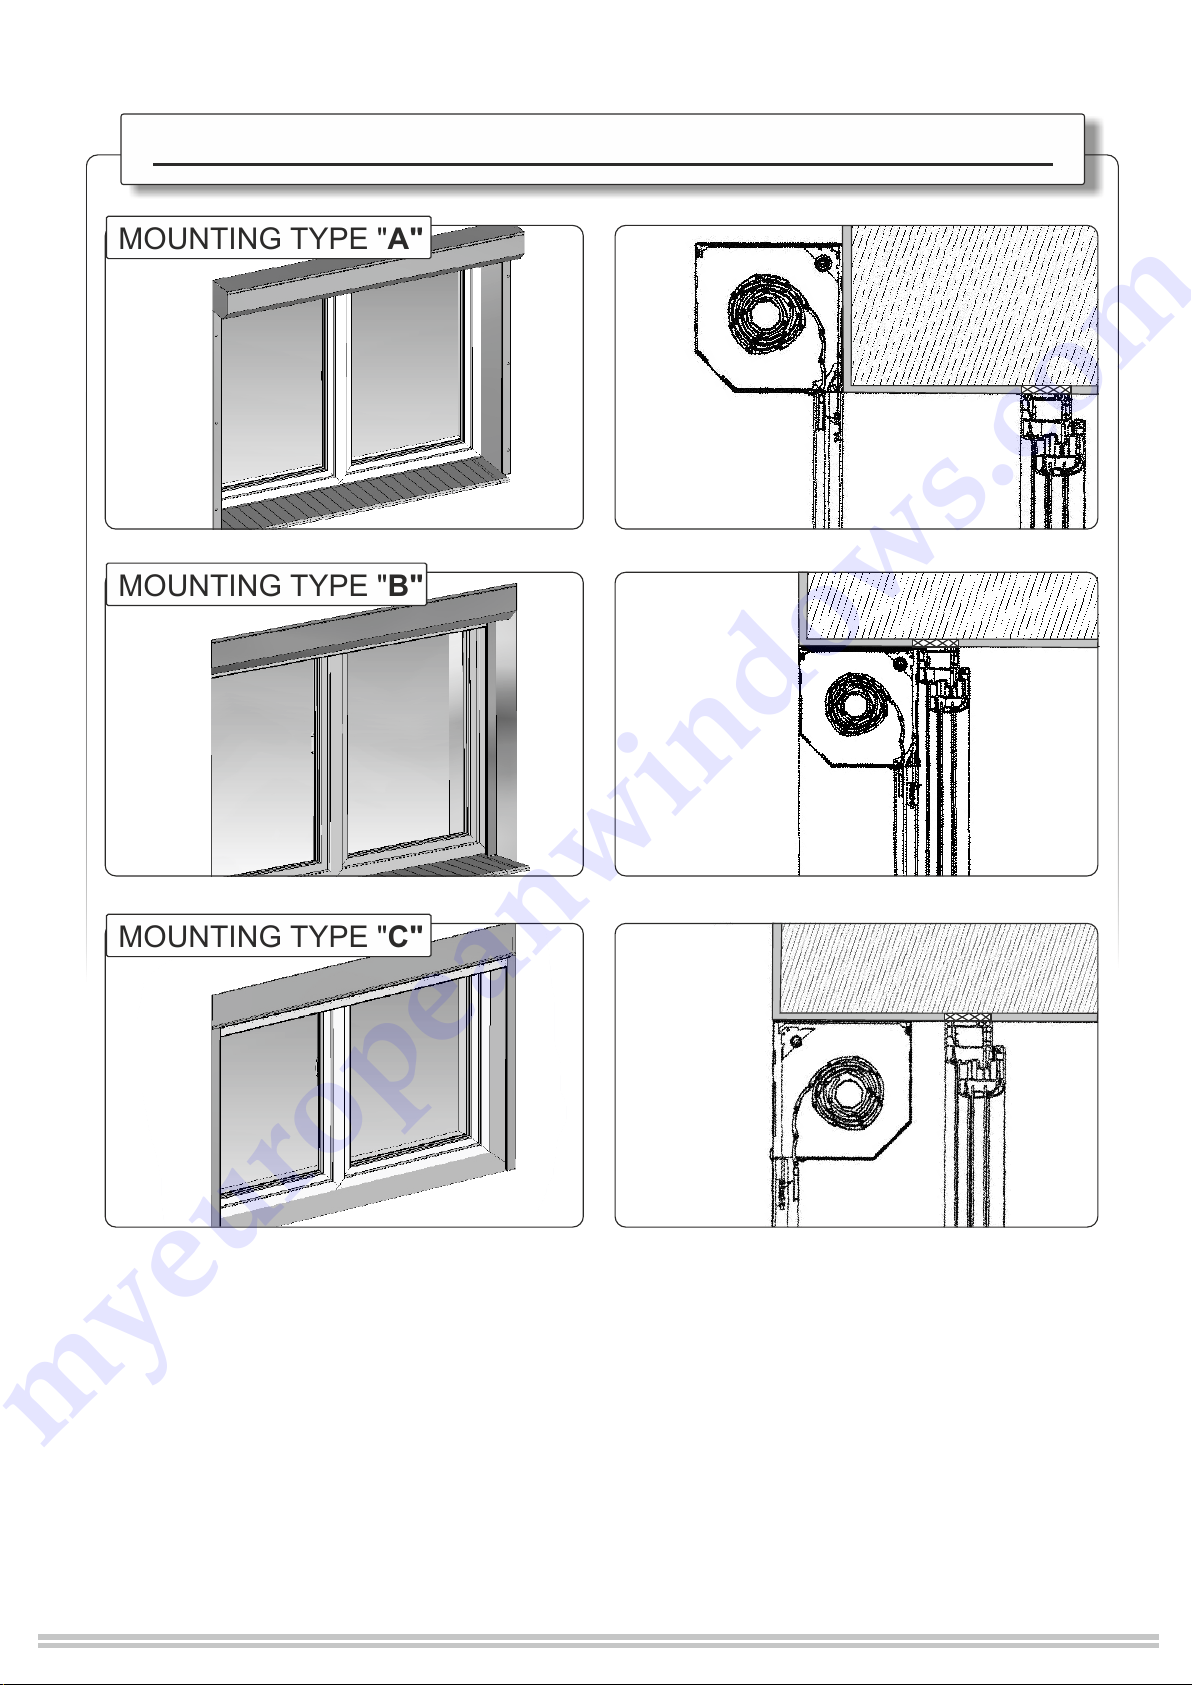
MOUNTING TYPE "A"
STRAP INSTALLATION
STRING INSTALLATION