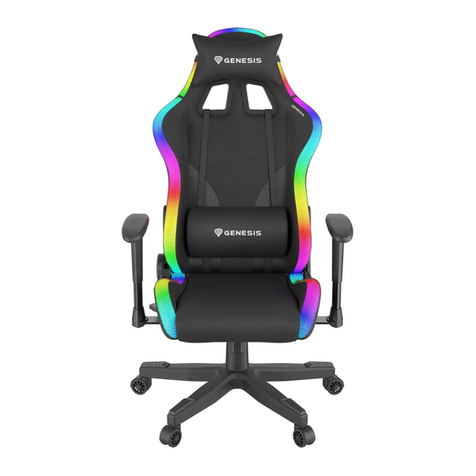
Genesis GBP-ST2000 User manual

GBP-ST2000
Without Mosquito Screen
EXTERNAL ROLLER SHUTTER
INSTALLATION INSTRUCTION
myeuropeanwindows.com

Mounting types
Type "A"
Type "B"
Type "C"
myeuropeanwindows.com

2.
Prior to mounting, the blind should be unpacked and check that all the elements
necessary for its installation are present.
H
S
min. 70mm
max. 90mm
500mm
500mm
o6o10
WIERCENIE POD RYGLE
3. Drill the holes in the guides. Drill with a diameter of 6mm make a hole
through the two guide chambers and a drill with a diameter 10mm increase
the opening in the first chamber only from the side outer guide.
o10
oo 8
15 mm
4.When installing the roller shutter with automatic bolts, drill the central part
of the guide with a drill bit 8 mm in diameter, 15 mm from the bottom edge.
oo 8
50 mm
5. When installing a blind with bolts, drill the central part of the guide with
a drill bit 8 mm in diameter 50 mm from the bottom edge.
oo 6
35 mm
8 mm
6.In the case of installing a blind with a cam lock, mill the central part of the
guide with a 6 mm drill bit at a distance of 8 mm from the bottom edge. The
hole should have a length of 35 mm.
MOUNTING TYPE "A" 3
Dimensioning: H - height of recess S - width of the recess
Measure and mark the place where the holes are made on the
guides for assembly screws. Drill the first hole under the guides
in distance of max. 90mm from the upper edge of the building
opening, further max. every 500mm.
1.Tools needed for installing the blind.
MOUNTING TYPE "A"
myeuropeanwindows.com

X1
10. Mark the holes for the dowels in the marked places on the
wall. Length and type adapt to the type of substrate. Insert the
dowels into the drilled holes.
12.
Measure the X1 and X2 dimension of the guide at the bottom and top, and both diagonals D1 and D2 - the discrepancy between
the dimensions X1 and X2, and D1 and D2 should not exceed 2mm.
8. Mark the place of drilling under the strap cable or wire on the wall.
Then drill 1.5 cm holes above the top of the guide in the center of
the box inserting the foot of the box.
- for the strap first with a drill with a diameter of 12mm, then 20mm
- for a cable drill with a diameter of 12mm
- for the power cord to the motor - a drill with a diameter of 10mm
15mm
9. After making the opening for the tape, insert a PVC pipe with a
diameter of 20 mm into the hole and cut it flush with the
external wall (Genesis Building Products does not provide this
element in the set). From the inside, the tube must be shorter
by 2 cm from the wall plane due to the construction of the
ribbon grommet.
X2
D1
D2
7. Put the drilled guides to the wall and mark the holes for the
mounting pins.
MOUNTING TYPE "A"
4
11. Screw the guides to surface using a level guide
myeuropeanwindows.com

17.
Mount the retractor vertically in relation to the string or strap outlet
from the grommet. The retractor should be located at a height of 0.9
m to 1.3 m from the ground. Lower the shutter armor, then the cable
or tape should be cut to a length of 25 cm below the mounting
location of the retractor. Pass the tape through the hole in the
housing of the retractor, cut the tape and attach it to the hook.
Holding the spring housing firmly, turn and release the retractor lock
by pushing. In the case of a cable reel, after passing the cable
through the reel opening, light the tip with a lighter, this prevents the
cable from unraveling. Close the retractor and attach it to the wall.
(see assembly instructions for the retractor or cable).
16.
Make sure that the blind is properly fixed (horizontal and vertical).
Tighten the screws in the guides, then insert the blanking plugs and, if
necessary, mount the bottom plugs of the guides. In the case of PA-52
armor, PP-66 guides are used in which the bottom plugs should be
additionally screwed with 3x20 screws (fig.1) . Check the correct
functioning of the blind. Check the correct operation of automatic bolts,
bolts or locks, if necessary, make adjustments.
13.
Pass the strap, cable or power cord through the opening into
the building.
MOUNTING TYPE "A"
15. Pass the cable or strap through the grommet, then fasten the
grommet with the screws.
18.
We recommend, after installing the blind, to fill the top and side gaps
between the wall and the silicone roller shutter for additional sealing and
protection against water. In roller blinds with a width of more than 200
cm, it is recommended to screw the roller shutter box to the header
using flat head screws every 100 cm.
5
1.
14. Carefully slide the box onto the guides, carefully inserting the
shank pins into the upper part of the guides, check the correctness
of the slide mounts.
myeuropeanwindows.com

MOUNTING TYPE "B" & "C"
o6o10
o10 o6o10
MOUNTING TYPE "C"
MOUNTING TYPE "B"
MOUNTING TYPE "B"
1.
Drill the holes in the guides. Using a 6mm drill bit, make a hole through the two guide chambers and drill a 10mm drill bit to increase the opening in
the first chamber only from the outer side of the guide (TYPE C - increase the hole in the middle wall of the guide).
3.
Drill the drilled guides to the wall and mark the holes for the
screws on the window frame.
2. Drill the holes in the guides with a drill bit 8mm in diameter.
o8
4.
Put the pre-drilled guides to the wall and mark the holes for
the mounting pins in the interior.
5.Mark the holes for the screws in the marked places on the
window frame. Length and type adapt to the type of substrate ...
6
MOUNTING TYPE "B" & "C"
DRILLING ANGLE GUIDE
MOUNTING TYPE "B"
MOUNTING TYPE "C"
myeuropeanwindows.com

8.
Carefully slide the box with the standard or angle guides into the
window opening.
25 mm
7. With a type of cavity mounting as a manual drive, GBP recommends
a cable retractor. On the window frame, mark the location of the
drilling for the cable or cable. Then drill the hole
2.5 cm under the upper part of the recess.
- a cable - a drill with a diameter of 12mm
- from the power cord to the motor - a drill with a diameter of 10mm
9.
Guide the cable through the grommet, then fasten the
grommet using a wall plug to the wall.
MOUNTING TYPE B,C
MOUNTING TYPE B
10. Screw and align the guides on the surface to be mounted using a spirit level.
7
MOUNTING TYPE "C"
5. With MOUNTING TYPE "C" - drill holes in the marked places
on the wall
6. Carefully insert the end cap pins into the upper part of the
guides, check the correctness of the profile blade slider
MOUNTING TYPE B
myeuropeanwindows.com

MOUNTING TYPE B,C
11.
Make sure that the blind is properly fixed (horizontally and vertically).
Tighten the screws in the guides and then insert the blanking plugs.
Check the correct functioning of the blind. Check the correct operation
of automatic bolts, bolts or locks, if necessary, make adjustments.
13.
Lower the shutter armor, then the cable should be cut to a length
of 25 cm below the mounting location of the retractor. After
putting the cable through the reel opening, light the tip with a
lighter, this prevents the ribbon from unraveling. Close the
retractor and attach it to the wall. (see assembly instructions for
the cable retractor).
12. Mount the retractor vertically in relation to the cable or tape
outlet from the grommet. The retractor should be located at
a height not exceeding 1.8 m from the ground.
8
myeuropeanwindows.com

ROLLER SHUTTER
1. Raising the blind
Grab the strap and pull it down. During this time, the loose part of the tape will be rolled up to the retractor and the roller shutter's armor
will rise to a certain height. Repeat the procedure several times until the armor stops by the limiters mounted in the bottom bar and the
blind is completely open. The last movement of the tape should be made slowly so that the stops do not hit the roller shutter box too much.
2. Lowering the blind
Grab the strap just above the retractor and pull it towards you at an angle of about 20 degrees to release the retractor lock. Then, holding
the strap, it should be moved gently towards the window, so that the falling shutter blind will pull the strap inside. Repeat the procedure
several times until the blind is completely closed. When lowering the shutter, make sure that the bottom slat does not hit the ground too
much.
When lifting and lowering the blind, it can be stopped anywhere, leaving the room partially shaded. When lifting and lowering the blind, make
sure that the movement of the tape is perpendicular to the exit of the strap from the box. Strap deviations can cause it to bend and jam.
ROLLER SHUTTER
OPERATING INSTRUCTION
9
myeuropeanwindows.com

ROLLER SHUTTER 11
Emergency situations:
1. It should be noted that in the winter during strong frosts, when opening the window, do not leave
the blind ajar. The temperature difference causes the water vapor to settle on the blind and as a result its subsequent freezing.
Therefore, before opening the window, the roller shutter blind should be fully raised.
2. In the winter, ice may form and freeze the blind to the ground. Attempt to opening the blinds in
such a situation may lead to tearing of the blind {especially at electric drive). In the period of snow or heavy frosts before the blind
is started check if there is ice or snow on the window sill or guide rails. In case of the window icing, gently crush the ice or wait for
it to melt.
3. During the expected snowfalls or strong frosts, it is recommended to turn off the automation
and using the switch, controlling their opening and closing.
Maintenance:
The roller shutter maintenance consists of periodically cleaning the roller shutter from dust, which can cause damage to the
paintwork. The roller blind should be cleaned with a soft cloth using generally available mild cleaners or
cleaning agents. Do not use abrasive or caustic agents. Make sure that no objects are left in the guide channel or the box to cause the
roller shutter curtain to jam. The brush seals in the guides should be soft without dust and elements that impede the movement of the
blind.
Safety rules:
1. Do not allow the blind to be completely pulled into the roller shutter box.
2. Do not allow the blind to be rewound on the roller shutter tube when lowering.
3. Do not stand inside the shutter during opening and closing.
4. It should be noted that when lowering the blind, it did not encounter any obstacle.
5. When using the blind, attention should be paid to the condition of the strap and the retractor.
Damage may cause the blind to fall and damage the shutter elements.
6. If any part of the blind is found to be damaged or its function is incorrect,
stop using it and fix it. Using an inoperative or damaged blind can cause a threat to the health and life of the user.
7. Noise emission through a roller blind is not considered a significant hazard and is a matter of
comfort. Level the emission of sound pressure is less than or equal to 70 dB (A).
348 County Road 3521
Bullard, TX. 75757 USA
Genesis Building Products LLC
Email: [email protected]
Phone: 1 (903) 600-5040
myeuropeanwindows.com
Other manuals for GBP-ST2000
1
Table of contents
Other Genesis Indoor Furnishing manuals
Popular Indoor Furnishing manuals by other brands

Forte
Forte TRAV621R Assembling Instruction

American Home
American Home 6984013COM manual

Oypla
Oypla 3732 user manual

SAFAVIEH COUTURE
SAFAVIEH COUTURE SFV8709A quick start guide

Euronda
Euronda CDS 300 Instruction manual and maintenance

Sanus Systems
Sanus Systems Sanus Euro Furniture EFAV EFAV-II EFAV-II Assembly instructions