Geniatech XPI-S905X2 User manual

Raspberry PI Developer Board
Model: XPI-S905X2
User’s Guide
Thank you for purchasing this Geniatech product.
.Before using it, be sure to read the precautions contained in this User’s Guide.
.Keep the User’s Guide in a safe place for future reference.
.For the most up-to-date information about this product, visit official website at
http://www.geniatech.com
1

Contents
1. Safety Information...................................................................................................3
1.1 Warning.............................................................................................................3
1.2 Precautions........................................................................................................3
1.3 Handling Cautions ............................................................................................4
2. Introduction..............................................................................................................5
2.1 Package Contents..............................................................................................5
2.2 Product Features................................................................................................5
2.3 Panel Introduction.............................................................................................6
2.4 Power Up ...........................................................................
错误
!
未定义书签。
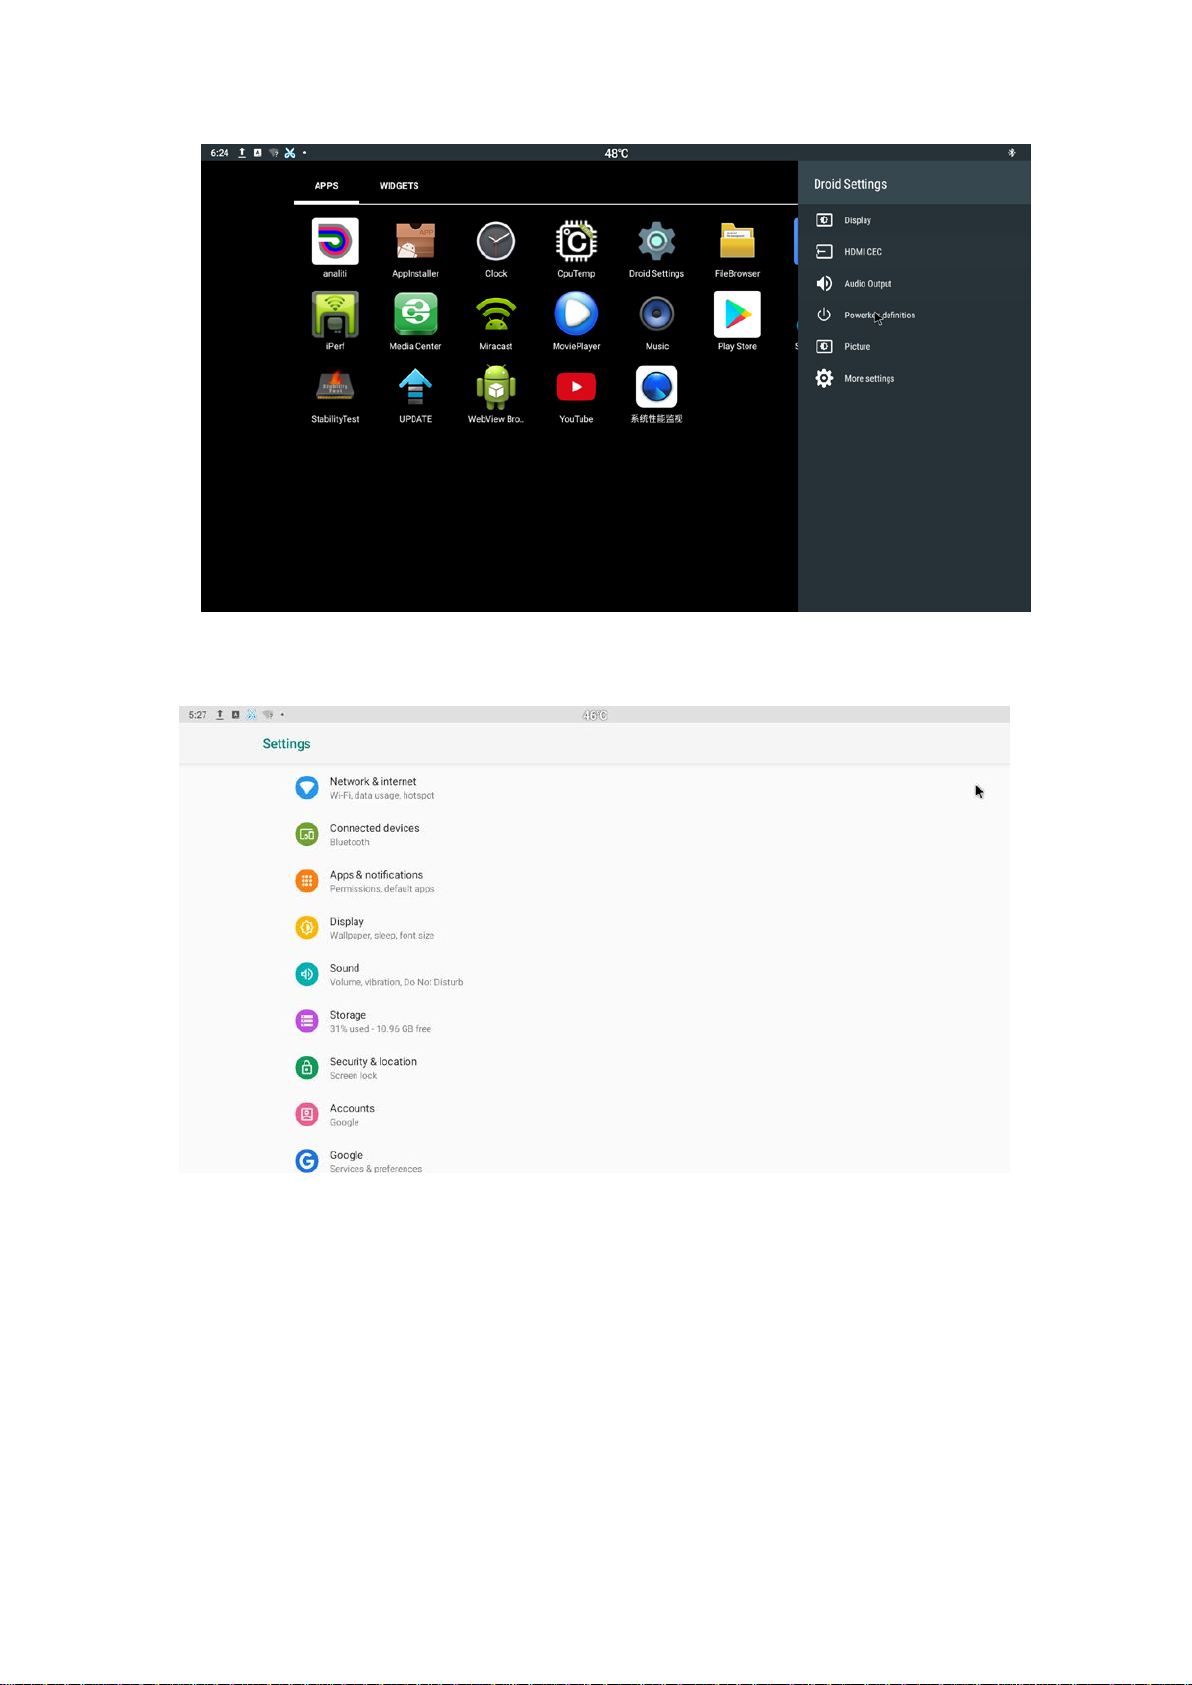
3. Settings......................................................................................................................7
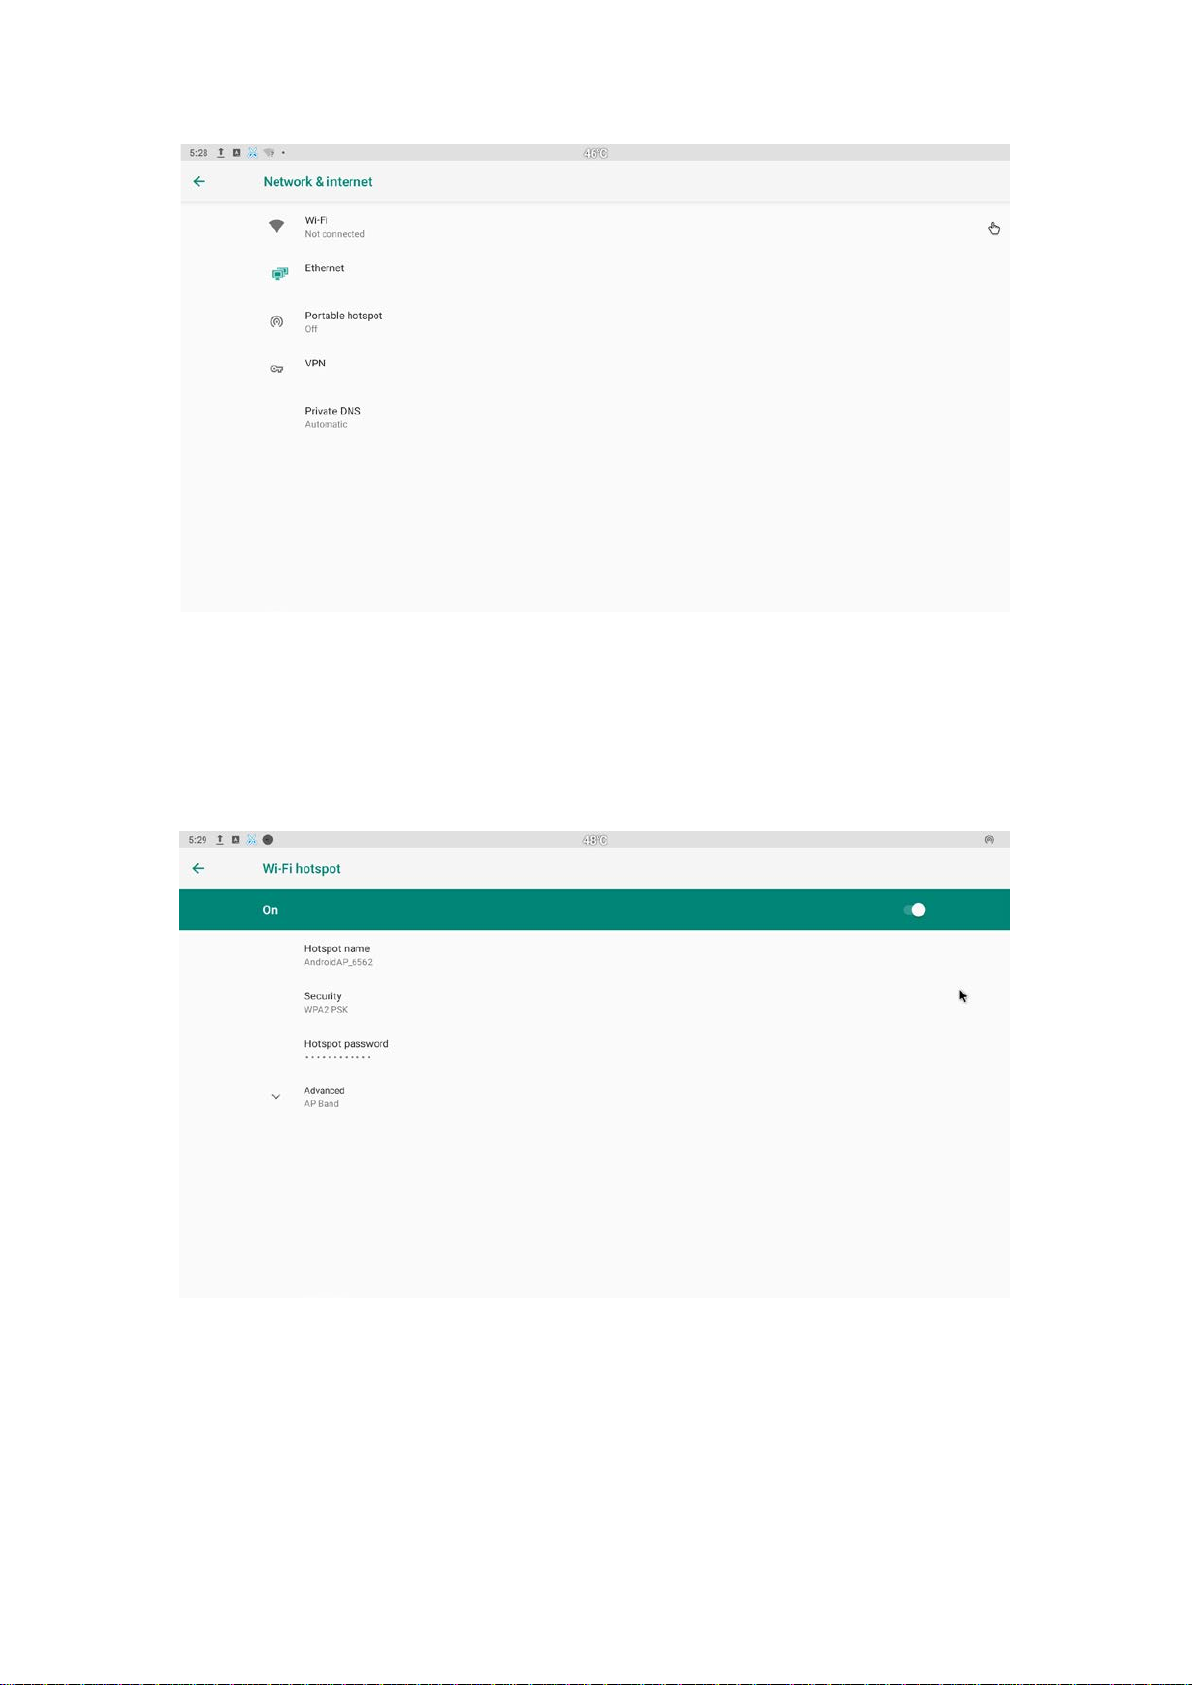
3.1 WiFi...................................................................................................................8
3.2 Bluetooth.........................................................................................................10
3.3 Ethernet...........................................................................................................10
3.4 Sound ..............................................................................................................11
3.5 Display............................................................................................................11
3.6 Screen saver ....................................................................................................12
3.7 Storage ............................................................................................................13
3.8 Apps ................................................................................................................14
3.9 Google.............................................................................................................14
3.10 Apps & Notifications ....................................................................................15
3.11 Location ........................................................................................................15
3.12 Security.........................................................................................................16
3.13 Language & input .........................................................................................16
3.14 Reset..............................................................................................................17
3.15 Sleep..............................................................................................................17
3.16 Add an account..............................................................................................18
3.17 Date & time...................................................................................................19
3.18 Wallpaper ....................................................................................................19
3.19 About device. ................................................................................................20
3.20 Display Setting..............................................................................................20
3.21 HDMI CEC...................................................................................................21
3.22 Audio Output.................................................................................................21
3.23 Powerker definition.......................................................................................22
3.24 Picture...........................................................................................................22
4.Apps Install & Uninstall........................................................................................23
5. Firmware Update...................................................................................................23
6. Trouble Shooting/FAQ...........................................................................................23
7. Repairs....................................................................................................................23
8.Specification.............................................................................................................25
9.Trademark Notice...................................................................................................25
2

1. Safety Information
Read and understand all instructions before using this product. If damage is caused
by failure to follow the instructions, the warranty does not apply.
1.1 Warning
To reduce the risk of electric shock, DO NOT remove the cover (or back).
DO NOT attempt to repair the product, this could lead to the risk of injury, damage
to the product .
To reduce the risk of fire or electric shock, keep this product away from exposed
direct sunlight, naked flames or heat, large amounts of moisture, dust, and sand.
FCC Note (for U.S.A)
This equipment has been tested and found to comply with the limits for a Class B
digital device, pursuant to Part 15 of the FCC rules. These limits are designed to
provide reasonable protection against harmful interference in a residential
installation. This equipment generates, uses and can radiate radio frequency energy
and, if not installed and used in accordance with the instructions, may cause
harmful interference to radio or television reception, which can be determined by
turning the equipment off and on.
The user is encouraged to try to correct the interference by one or more of the
following measures.
- Reorient or relocate the receiving antenna.
- Increase the separation between the equipment and receiver.
- Consult the dealer or an experienced radio/TV technician for help.
- This class B digital product meets all requirements of the Canadian Interference -
Causing Equipment Regulations.
1.2 Precautions
Important Safety Instructions
Read these operating instructions carefully before using the unit. Follow all the
safety instructions listed below.
Keep these operating instructions handy for future reference.
1.2.1 Read these instructions.
1.2.2 Keep these instructions.
1.2.3 Heed all warnings.
1.2.4 Follow all instructions.
1.2.5 DO NOT use this apparatus near water.
1.2.6 DO NOT clean with any chemical detergent. Clean only with a dry cloth.
1.2.7 DO NOT block any ventilation openings. Install in accordance with the
manufacturer’s instructions.
1.2.8 DO NOT install near any heat sources such as radiators, heat registers, stoves,
or other apparatus that produce heat.
3

1.2.9 Protect the power cord from being walked on or pinched particularly at plugs,
convenience receptacles, and the point where it exits the apparatus.
1.2.10 Only use attachments/accessories specified by the manufacturer.
1.2.11 Use only with the cart, stand, tripod, bracket, or table specified by the
manufacturer, or sold with the apparatus. When a cart is used , use caution when
moving the cart/apparatus combination to avoid injury from tip-over.
1.2.12 Unplug this apparatus during lightning storms or when unused for long
period of time.
1.2.13 Refer all servicing to qualified service personnel. Servicing is required when
the apparatus has been damaged in any way, such as when the power-supply cord or
plug is damaged, liquid has been spilled or objects have fallen into the apparatus,
the apparatus has been exposed to rain or moisture, does not operate normally, or
has been dropped.
1.3 Handling Cautions
1.3.1 DO NOT expose this apparatus to dripping or splashing. Do not put objects
filled with liquids, such as vases on the apparatus.
1.3.2 To turn this apparatus off completely, you must pull the power plug out of the
wall socket. Consequently, the power plug must be easily and readily accessible at
all times.
1.3.3 DO NOT plug multiple electric devices into the same wall socket.
Overloading a socket can cause it to overheat, resulting in a fire.
1.3.4 Before connecting other components to this player, be sure to turn them off.
1.3.5 If the product makes an abnormal noise or produces a burning smell or smoke,
turn off the power switch immediately and disconnect the power plug from the wall
outlet. Then, contact the nearest customer service center for technical assistance. Do
not use the product. Using the product as it is may cause a fire or an electric shock.
4

2. Introduction
2.1 Package Contents
Amlogic S905X2 Developer board - XPI-S905X2
User’s Guide
HDMI Cable
Optional Remote Controller
2.4G wireless Remote Controller
USB wire/wireless Mouse & Keyboard
Power Adapter, Input: AC100 ~ 240V, 50/60Hz, Output: 5V/2A
2.2 Product Features
•Android 9.0 OS
•Quad Core ARM Cortex-A53 CPU, G31 MP2 GPU
•RAM is 2G, built in 8G EMMC.
•Support 4k2k video local media playback from Micro SD card or USB HDD
•Built in IEEE 802.11ac/n/a/g/b WI-FI module , Wi-Fi frequency range is
2.4G&5.8G
•RJ45:Integrated IEEE 802.3 10/100/1000M Ethernet MAC controller with
RGMII interface
•HDMI video output, connect to HDTV for HD video playback
•3*USB2.0, 1*USB3.0,1*HDMI Out, 1*Micro USB, 1*UART, 1* Extension
GPIO interface
•Support USB mouse and keyboard operation
•Support simple BT remote control with mouse function
•Support external USB Tuner Dongle
5

2.3 Interface Introduction
6

2.4 Power Up
2.4.1 After power up, the TV will first show Android logo,Then four circles
loading. When finished, it will go to Home screen.
2.4.2 Home Screen display.
3. Settings
Select icon,you can choose the button ‘Display’,‘HDMI CEC’,‘Audio
Output’,‘Powerker definition’,‘Picture’ as your needs.
7

If not,then press ‘More settings’ key to setting.Shown as bellow.
3.1 WiFi
3.1.1 It will automatically scan ambient WiFi networks when select “ON”.
Connect an available WiFi network. If connect a secured WiFi network,
corresponding password will be input firstly. Or fail to connect and need reset
password. Once build up the connection with a certain WiFi network successfully,
XPI-S905X2 will connect this WiFi network automatically when restart.
Note: If factory reset, the password of WiFi network have to be reset.
8

3.1.2 WiFi Hotspot
If you want to share WIFI with your friends, you can set the Portable hotspot here, set
the wi-fi password, and turn on the hostpot switch for transmission.
9

3.2 Bluetooth
Connected devices--Bluetooth setting
3.3 Ethernet
Network&internet---Ethernet---Setting Interface(shown picture)
10

3.4 Sound
Select icon,then press ‘More settings’ ,and find the sound button
3.4.1 Media Volumes and Alarm volume
Increase or decrease sound volumes
3.4.2 Touch Sounds
If enable Touch sound, sound will be heard while move remote controller.
3.4.3 Default notification sound and Default alarm sound
The type of the sound can be setting in this part.
3.5 Display
Select icon,then press ‘More settings’,and find the Display button
3.5.1 Display size
make the items on your screen smaller or larger. Some apps on your screen may
change position.
11

3.5.2 Font size
Change the font size of OSD.,Make the text on screen smaller or larger
3.6 Screen saver
Select icon,then press ‘More settings’---‘Display’---‘Screen saver’.
Interface Settings:can set the clock, color, theme, page photos.
12

3.7 Storage
Shows the storage used of the OS and SD card.
13

3.8 Apps
List all apps installed.
You can choose an application and force to shut down the app, uninstall the app,
clear user data, move to SD card and clear cache data.
3.9 Google
Select icon,then press ‘More settings’ ,and find the Google button.
14

3.10 Apps & Notifications
Select icon,then press ‘More settings’ ,and find the ‘Apps & Notifications
‘button.
3.11 Location
Select icon,then press ‘More settings’ ,Security & Location ---Location .
15

3.12 Security
Select icon,then press ‘More settings’ ,find the ‘Security & Location’ button and
the security setting interface will shown.
3.13 Language & input
Select icon,then press ‘More settings’ , ‘System’ --- ‘Languages&input’---
bellow is the shown interface .
Change OSD language and input method.
16

The default input method is android standard keyboard.
3.14 Reset
Select icon,then press ‘More settings’ , ‘System’ --- ‘Reset options’--- bellow is
the shown interface .
Factory data rest:
You can reset all the settings and apps to factory default.
Note: You might want to backup important data before resetting the box. Once you
choose to rest to factory default, all data/apps will be deleted.
3.15 Sleep
‘Display’ --- ‘Sleep’. You can select the Sleep time of the product. There are 8
options for sleep time. The shortest is' Never 'and the longest is 30 minutes.
17

3.16 Account
Select icon,then press ‘More settings’ ,find the Accounts button.
18

3.17 Date & time
Select icon,then press ‘More settings’ , ‘System’ --- ‘Date&time’--- bellow is the
shown interface .
3.18 Wallpaper
‘Display’---‘Wallpaper’. “Users can choose wallpaper photos from albums and
historical wallpapers according to their preferences.
19

3.19 About device.
Select icon,then press ‘More settings’---‘System’ --- ‘About device’
3.20 Display Setting
Select icon,you can choose the button ‘Display’. User can set the screen position,
display resolution,HDR to SDR,SDR to HDR in this part.
20
Table of contents
Other Geniatech Motherboard manuals

Geniatech
Geniatech RS-G2L100&RS-V2L100 Installation manual

Geniatech
Geniatech XPI-3288 User manual

Geniatech
Geniatech DeveloperBoard4-IoT User manual

Geniatech
Geniatech RK3399 User manual

Geniatech
Geniatech XPI-S905X3 User manual

Geniatech
Geniatech DB202 User manual

Geniatech
Geniatech Dragon Board3 User manual

Geniatech
Geniatech XPI-3128 User manual

Geniatech
Geniatech DB-G2L-V2 User manual

Geniatech
Geniatech DB8 User manual