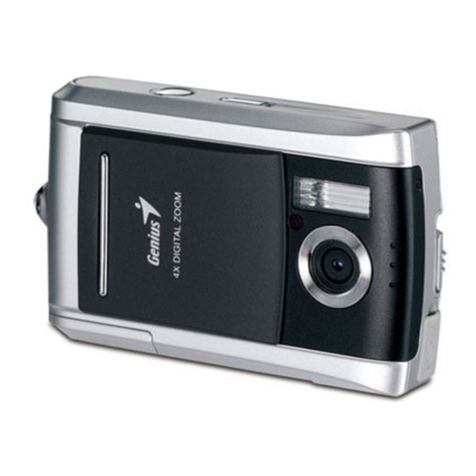
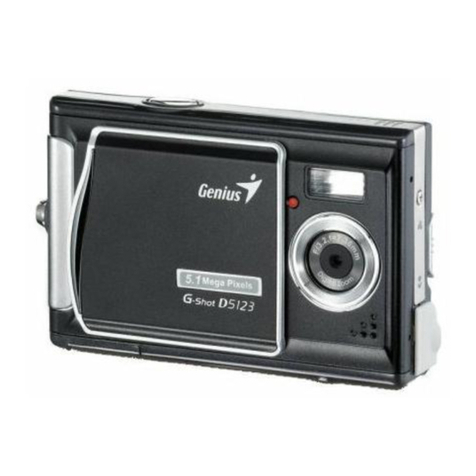
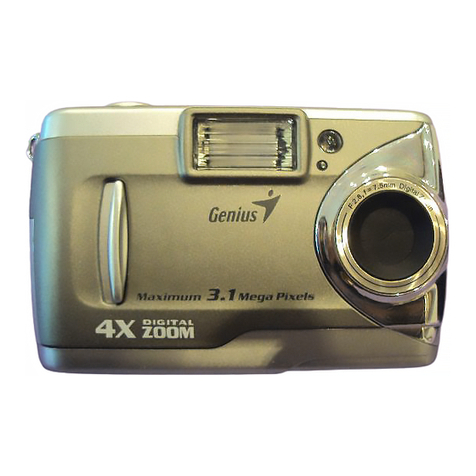
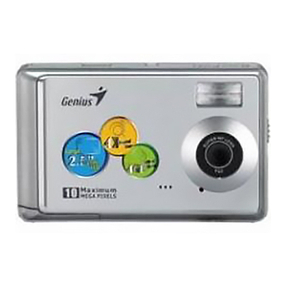
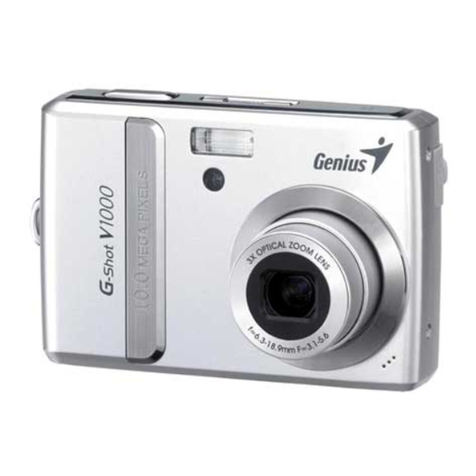
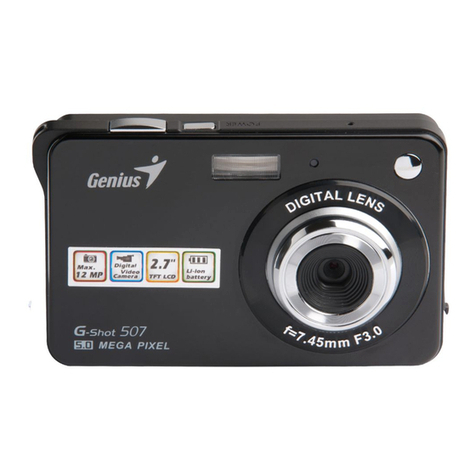
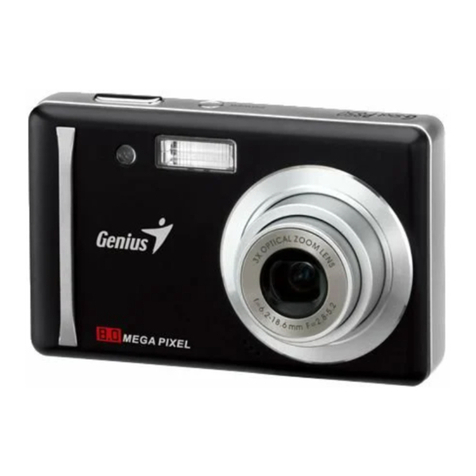
Genius NAVIGATOR 900 User manual

- i - - ii -
English English

- iii - - iv -
English English

12
1.0 Table of Contents
1.1 Total pages
2.0 Cautions
3.0 Overall Introduction
3.1 Accessories
3.2 External View
3.3 Display Information
4.0 Getting Ready
4.1 Turn on/off Camera
4.2 Loading the batteries
4.3 Insert / Remove Memory Card
4.4 Attaching Wrist Strap
5.0 Buttons & Function
5.1 Power
5.2 Shutter
5.3 Tele / Wide
5.4 Playback
5.5 Mode
5.6 Menu / OK
5.11 Focus Switch
5.10 Left/Self-Timer
5.9.1 EV (+/-)
5.8 Right/Flash
5.9 Down/Delete & +/-
5.9.2 Night Scene Long Time Shutter (LT)
6.0 Still Image Mode
6.1 Shooting
6.2 Menu Mode
6.2.1 Size
6.2.2 Quality
6.2.3 Sharpness
6.2.4 Saturation
6.2.5 Effect
6.2.6 W.Balance
6.2.7 Scene Mode
6.2.8 Shooting & Continuous
2.0 Cautions
Do not try to d isassemb le the camer a by yoursel f, which may d amage the camera or cause
electri c shock.
Do not fire t he flash in a cl ose distan ce (less than 1 meter); it may hurt your eyes.
Keep the ca mera away fr om the reach o f children or animals to prevent them from swallowing the
batteri es or small ac cessorie s.
Stop usin g the camera i f any kind of li quid or foreign object enters the camera. If it happens, power
off the camera and contact your dealer for help.
Do not oper ate this cam era with wet h ands; it may c ause elect ric shock.
The camer a may be damag ed in an environment of high temperature.
To avoid elec tricity le akage, please remove the battery if the camera i s expected n ot to be in use
for a long pe riod.
It is norma l that the tem perature o f the camera b ody rises if the camera works for a long time.
Small Tip to Save You Big Headache
A digita l camera is in a w ay very simi lar to a compu ter. If the digital
camera ha ngs itself d uring operation, please follow the procedures
below and m ost likely t he camera can be re-activated.
1. Remove t he battery.
2. Reload t he battery.
3. Switch o n the camera .
3.0 Overall Introduction
3.1 Accessories
Digital C amera Camera Dr iver & User Manu al USB Cable
Softwar e CD
Wrist Strap Camera Po uch 2xAA Ba tteries
User Manual
7.0 Movie Clip Mode
8.0 Voice Recording Mode
9.0 Playback Mode
10.0 Set Up Mode
11.0 PictBridge Mode
7.1 Movie Recording
7.2 Movie Size
9.1 Playback of Still lmage
9.2 Playback of Movie Clip
9.3 Thumbnail Display
9.4 Exploring an image
9.5 Slide
9.6 Protect
9.7 Delete
9.8 Copy To Card
9.9 DPOF
10.1 Auto Off
10.2 Language
10.3 Format
10.4 Date Input
10.5 Imprint
10.6 Beep
10.7 Light Frequency
10.8 Quick View
10.9 System Reset
10.10 USB
10.10.1 PC Cam
10.10.2 Disk Drive
10.10.3 Printer
---------------
-----------------------
----------------------
-----------------
--------------------
------------------
----------------
-----------
----------------
-------------------
---------------------------
--------------------------
------------------------
-------------------------
---------------------------
------------------------
-----------
-----------------------
------------------
------------------------
-----
--------------------
---------------------
- - - - - - - - - - - - - - - - - -
-------------------------
-----------------------
--------------------------
------------------------
----------------------
----------------------
-------------------------
----------------------
- - - - - - - - - - - - - - - - - - - -
-------------
--------------------------
------------------------
-------------------------
------------------------------
----------------------
------------------
------------------
---------------------
--------------------
-------------------------------
-----------------------------
------------------------------
-------------------------
------------------------------
------------------------
---------------------------
--------------------------
----------------------------
--------------------------
----------------------------
------------------------------
----------------------
--------------------------
-----------------------
-----------------------------
-------------------------
------------------------
--------------------------
------------------
4
4
4
4
4
1
1
2
2
2
3
3
4
4
4
4
5
5
5
5
5
6
6
6
6
6
6
6
6
6
6
7
7
7
7
7
7
7
7
7
7
7
8
8
8
8
9
9
9
10
10
10
11
11
11
11
11
12
12
12
12
12
12
12
12
12
13
13
-----------------------
--------------
--------------------
------------------------------
14
14
14
1.0 Table of Contents
11.1 Connecting the Camera to
a PictBridge-supported Printer
11.2 Select pictures to print
11.3 Custom Set
12.0 Software Application
12.1 ArcSoft Medialmpression
12.2 Easy Link with YouTube by Arcsoft
13.0 Appendix
-------------------
------------------
----------
------------------------------
13
13
15
-------------------
--------------------------
---------------------------
14.0 Specification 16
--------------------------
5.7 Up/Play & Pause/Voice Memo
6.2.9 ISO

34
3.2 External View
3.0 Overall Introduction 4.0 Getting Ready
3.3 Display
Information
4.1 Turn on/off Camera
4.2 Loading the batteries
4.3 Insert/Remove Memory Card
4.4 Attaching Wrist Strap
1. Power off the camera.
2. Slide ou t the batter y cover to ope n it.
3. Follow t he polarit y indicati ons and l oad the batt eries.
4. Close th e Battery Co ver.
The batte ry may not wor k normally u nder 0 C or over
40 C.
o
o
The indic ation of the battery status.
( ): Battery power is full.
( ): Battery power is half drained.
( ): Battery power is drained. Replace wit h new
batteri es.
The batte ries may run o ut if the batt eries are ke pt inside
the camer a for a long tim e without us ing. Please remove
the batte ries when th e camera is no t in use.
5.1 Power
5.2 Shutter
5.3 Tele/Wide
By pressi ng the Power B utton can tu rn on the camera.
By pressi ng again the P ower Butto n can turn off the
camera.
If there is n o operatio n during the s pecified time,
the camer a will power o ff automaticall y.
Press the Tele Button, the Zoom Bar Indicator
appeari ng on the top si de of the LCD Monitor will
show the cu rrent zoom s tatus.
Press the W ide Button , the Zoom Bar I ndicator
will go bac k to the Wide vi ew.
The camer a allows max imum 8.0x di gital zoom.
Press the S hutter But ton to captu re an image.
5.0 Buttons & Function
21
X1.1
Maximum ( 8.0X)
Battery Status
( )Battery Full
( )Battery Half Drained
( )Battery Drained
Working& Scene Mode
( )Image Mode
( )Playback Mode
Shooting
( )Movie Clip Mode
( )Voice Recording Mode
( ) Auto Mode
( ) Sport Mode
( ) Night Mode
( ) Portrait Mode
( ) Landscape Mode
( ) Backlight Mode
1
2
( )Auto Flash
( )Fill-in Flash
( )Flash Off
Flash Mode
4
Self-timer
( )10 Seconds
( ) 2 Seconds
2S
5
33
( ) Voice Memo
Focus Range
( ) Macro
6
7
W. Balance
( )Auto
( )Daylight
( )Cloudy
( )Tungsten
( )Fluorescent
16
15
17
12
14
11
13
Exposure +
-2( )
Memory Card Inserted( )
Available Shots(100)
Zoom Status Indicator
( ) 8.0X Digital Zoom
( ) WARNING:
Holding Camera Stable
Size
(16M) (Via interpolation)
(9M)
(5M)
(3M)
(VGA)
Sharpness
( )Soft
( )Normal
( )Vivid
Quality
( )S. Fine
( )Fine
( )Normal
9
Shooting
Continuous
Single
( )
8
10
ISO Value
( )Auto
( )100 ( ) 400
( )200 ( ) 800
9M
+
-
100
200
400
1. Power off the camera.
2. Open the B attery Cov er.
3. Insert t he memory ca rd into the ca rd slot and pr ess
it down unt il a click sou nd happens.
4. Please press the memory card again to get i t out
once a clic k sound happ ens.
5. Close th e Battery Co ver.
By pressi ng the Power B utton can tu rn on the camera.
By pressi ng again the P ower Butto n can turn off the came ra.
800
Power
Shutter
Side
Top
Front
Back
Fl a sh
LC D M on t ior
Ke y F un c tio n
Bu t to n
LE D
Wi de/ Te le
Bu t to n
Sh u tt e r Bu tto n
Mo d e Bu t ton
Po w er B u tt on
US B
Connector
Tr ip o d
So c ke t
Le n s
Pl a yb a ck Bu tto n
Fo c us
Sw i tc h
LE D i nd i cat or
St r ap
Ey e le t
St r ap E yel et
Ba t te ry Ch ar m be r/
Me m or y Car d/
Me m or y
Ca r d Sl ot
Ba t te ry
Ch a mb er
Key Function Button
Pl ay / Pa us e /
Up B utt on
Fl ash / R ig ht
Bu tt on
Voi ce Me mo /
Up B utt on
Se lf- t im er /
Le ft Bu tt on
OK / M enu
Bu tt on
Do wn /Ex po su re /
De let e Bu tt on
100
1
2
4
5
6
9M
3
11
12
13
7
X 8.0
9
10
14
15
16
8
100
17
16
-+
AUTO
+
Positive
-Negative

56
56
Select th e Playback M ode by press ing the
Playbac k Button ( ).
Playbac k Mode will sh ow still images and movie
clips .
Select an i mage by Pres s Left and Rig ht Button.
5.4 Playback
5.5 Mode
5.6 Menu/OK
Press Men u/OK Butto n to go to the men u selectio n.
When the me nu is displa yed on the LCD monitor, the Menu/OK Button is
used for sh ifting the c ursor to the s ub menu or for c onfirming data.
5.7 Up/Play & Pause/Voice Memo
5.8 Right/Flash
5.9 Down/Delete & +/-
Press the U p Button ( ) to move up th e submenu cu rsor.
When the me nu is not disp layed on the LCD monitor, the Up Button( )
operate s as voice mem o function .
There are t wo ways you ca n add your voice over to a stored still image.
The Up Butt on also oper ates as Play & P ause function to play
movie cli p file in Play back Mode.
Press the R ight Butto n ( ) to mov e the cursor t o the right ta b.
The Right B utton ( ) also opera tes as Flash f unction.
Press the D own Button ( ) to move the c ursor to the d own tab.
& +/-
In Shooti ng Mode, you c an press Del ete Button ( ) to adjust t he EV and
Night Sce ne Long Time Sh utter.
In Playba ck Mode, you c an press Del ete Button t o delete the S till Image ,
Movie Cli ps or Voice Cli ps.
1. Shooti ng Mode
i. Press Voi ce Memo Butt on and the ico n ( ) will s how on LCD Mon itor.
ii. Press S hutter But ton to take a pi cture.
iii. You can ma ke a voice memo (10 sec.) right after the image is taken.
2. Playba ck Mode
i. Select a S till Image F ile and pres s Voice Memo Button.
ii. Press t he shutter b utton to sta rt the voice m emo.
iii. 10 sec onds of voic e memo will be recorded.
Press the L eft Button t o move the cur sor to the lef t tab.
Image wil l be taken aft er
10 second s once the shu tter is rele ased.
The image w ill be taken
after 2 sec onds once th e shutter is r eleased.
With t he 10 sec. Self-timer
With t he 2 sec. Self -timer
( ):
( ):
Still Ima ge Movie Cli p Voice Record ing
Press Lef t/Right Bu tton to set th e Exposure Value.
You can adj ust from -2. 0EV to +2.0E V (at 0.3EV in crement) .
After the p referred v alue is chos en press Menu/OK Button to confirm.
The highe r the EV value , the bright er the image will be.
5.9.1 EV (+/-)
2S
5.10 Left/Self-Timer
5.9.2 Night Scene Long Time Shutter (LT)
5.0 Buttons & Function5.0 Buttons & Function
Taking a Pict ures
1. Press PO WER Button t o power on the c amera.
2. Press Sh utter Butt on fully to ca pture.
Using the D igital Zoo m
Press the z oom lever ( ) toward T or W
You are rec ommended t o shoot with t he camera at tached
with the tr ipod or othe r device if th e Hand Shaking( )appears.
6.0 Still Image Mode
6.1 Shooting
6.2.1 Size (Default:9M)
This feat ure is for you t o select the i mage resol ution.
(16M) 460 8 x 3456 (by int erpolation)
( 9M ) 3488 x 261 6 ( 5M ) 2560 x 192 0
( 3M ) 2048 x 153 6 (VGA) 640 x 4 80
6.2.2 Quality (Default: Fine)
This feat ure is for you t o select the i mage quality.
( ) S. Fine (S uper Fine)
( ) Fine
( ) Normal
6.2 Menu Mode
00:28:51
STA N D B Y
STAR T : SH
00 : 00 : 06
21
9M
21
9M
00 : 0 0 : 00
ST AR T :S H
00:00:23
VG A
100-0001
0.0EV
21
9M
21
9M
LT
AUTO
Shutter
When you ta ke a shot of a ver y close-up o f object
within th e distance o f 20 cm, please push the
Focus Swi tch up to begi n the Macro Fu nction.
The Macro i con ( ) will ap pear on the LC D Monitor.
5.11 Focus Switch
Auto Flas h
Fill-in F la sh
Flash Off
The f lash f ires a uto mati call y as re quir ed und er sho oti ng mod e.
Sug gest ion fo r get ting a g ood ex posu re pi ctur e when u sin g
Fla sh: Th e came ra sho uld ke ep 1. 5~2 me ters f orm t he obj ect
you 're re ady to c apt ure.
Thi s m
ircumstances.
The mode will disable the flash to fire in any circumstances.
ode w ill en able t he fl ash to f ire in a ny
c
21
9M
Press the D own Button , and then sel ect Left/ Li ght Button t o
adjust th e value of the L ong Time Shutter.
The Long Tim e Shutter ra nged from Auto,1/8,1/4,1/2,1,2,3,4.
Press Men u/OK Butto n to confirm t he value you s elect.

8
7
6.2.7 Scene Mode (Default: Auto Mode)
This feat ure is for you t o select the s cene of
the image f rom the foll ow options :
6.2.6 W. Balance (Default: Auto)
6.2.3 Sharpness (Default: Normal)
6.2.4 Saturation(Default: Normal)
6.2.5 Effect (Default: Normal)
No specia l effect is adde d to
the pictu re.
Turn the image in to black
and white .
Turn the image in to yellowi sh
brown.
Turn the image in to negativ e
film effect .
This effect can turn the edge of the
captured image look smoother, which
is suitable for image editing on PC.
This effect can turn the edge of the
captured image look sharp, which is
suitable for printing out.
This effect can turn the edges of
The captured image look sharper but
may result in more image noise.
SOFT
NORMAL
VIVI D
High
Normal
Low
6.2.8 Shooting&Continuous(Default:Single)
1. Single : Single Ima ge Shooting.
2. Contin uous Shoot ing ( ): P ress Shutt er Button
to start th e Continuo us Shootin g function and on
hold and en ding by letting go of Shutter Button.
The Conti nuous Shoo ting function
will not be c ancelled u ntil “ Single” is chosen.
Note:
7.0 Movie Clip Mode
8.0 Voice Recording Mode
1. Press Mo de Button an d select Voic e Recording Mode ( ).
2. Press Sh utter Butt on to start th e recordin g and press Sh utter Butt on to stop the recording.
3. Press Pl ay/Pause B utton ( )
during re cording ca n put
the recor ding on hold a nd
press the P lay/Paus e Button
again to co ntinue the r ecording.
00:28:51
ST AND BY
STA RT : SH
00 : 0 0 : 00
7.2 Movie Size
1.VGA : 640 x 480
2.QVGA: 320 x 240
The video s ize option s are
provide d as follows :
Menu
Back Execute : OK
Size
W.Balance
Setup
VGA
Auto
Next Menu
1.Press P OWER Butto n to power on th e camera
2.Press M ODE Button t o convert to M ovie Clip Mo de
3.Press S hutter But ton to start m ovie recor ding
4.Press S hutter But ton again to s top record ing
Menu
Back Execute : OK
Size
W.Balance
Setup
VGA
Auto
Next Menu
VGA
QVGA
00:00:14
VGA
STAR T:SH
00:00:00
00:28:27
RE C OR D ING
STO P : SH
00 : 0 0 : 24
00:28:27
PA U SE
STO P : SH
00 : 0 0 : 24
6.0 Still Image Mode
( ) Aut o Mode
( ) Spo rt Mode
( ) Nig ht Mode
( ) Por trait Mode
( ) Lan dscape
( ) Bac klight
7.1 Movie Recording
Recordi ng
9.0 Playback Mode
Please pr ess Playba ck Button to v iew the
images ta ken.
Press the R ight or Left B utton to go to o r
back to the n ext or last im age.
The icon ( ) shows up when
viewing s till image c omes with a voi ce
memo.
Note:
9.1 Playback of Still Image
9.2 Playback of Movie Clip
Press Pla yback Butt on to play the M ovie
Clips.
Press the U p Button to pl ay or pause th e
movie cli p.
When play t he Movie Cli ps, press th e
Menu Butt on and selec t 2X, 4X, 8X to
adjust th e Fast Forwa rd speed.
When play t he Movie Cli ps, press th e
Left/Se lf-Time r Button to pl ay backwar d
and press t he Menu Butt on to select t he
2X, 4X and 8X B ackward sp eed.
9.3 Thumbnail Display(Small Images)
NORMAL
NEGATIVE
SEPIA
B & W
Note:Th e icon ( ) on the top left of the LCD Monitor represents a Movie clip, not a still image.
6.2.9 ISO (Default: Auto)
Auto 100 200 400 8 00
Auto Adju sting the whi te balanc e automatic ally
Dayl ight U nder the stro ng light en vi ronment
Fluo rescent Und er the fluo re scent lig ht enviro nm ent
Tun gsten Unde r the tungste n light env ir onment
Clou dy Under the clo udy light e nvironmen t
100-0021
Oper ation Steps
1. Playb ac k Bu tt on
2. or
Oper at ion Steps
1. Playb ac k Bu tt on
2. or
100-0021 100-0002
Thumbnail Display is a convenient tool for you to find the image you took from
the list. You can press WIDE Button to have Thumbnail Display.
100-0021
PLAY: 00:00: 21
00:00:0 0
1 2 3
4 5

910
1. This option enables you to view your photos
with slide show.
2. There are 3 interval options available.
(a) 3 sec.
(b) 5 sec.
(c) 10 sec.
9.5 Slide
9.0 Playback Mode
This func tion can onl y be used when a memory card
is insert ed.
This opti on allows yo u to put the pri nt quantity
(MAX.30 p cs) on your me mory card.
- specifi es the numbe r of copies fo r a
selecte d
- specifi es the numbe r of copies fo r all
pict
You canno t see the "PRI NT" functi on on the
LCD Monit or if a memory c ard is not ins erted.
[SINGLE ]
[ALL ]
Note:
image.
ures apar t from movie c lips and voi ce
recordi ng files.
9.9 DPOF
Set Selec ted Image( s) With Protection
Set All Im ages Wi th Protect ion
1.Press th e OK/Menu Bu tton and sel ect
"PROTEC T".
2.Press OK /Menu Butt on.
3.Select o ne image and p ress OK/Me nu Button.
4.( ) w ill show on th e LCD Monito r when the
protect ion is set.
5.Press OK /Menu Butt on to confir m the reques t for
the prote ction of the s elected im age(s).
6.To cancel th e protecti on, press OK /Menu Butt on.
1 Press the O K/Menu But ton and sele ct
"PROTEC T".
2. Select " ALL" & “Execu te”and pres s OK/Menu
Button to c onfirm the r equest.
.
100-0066
9.6 Protect
9.7 Delete
Delete Si ngle Image
Delete Al l Image(s)
Delete Se lected Ima ge
1.Selec t the image yo u'd like to de lete and
press the D elete Butt on ( ).
2.Press O K/Menu But ton to proce ed or press
left butt on to cancel t he request .
1.Selec t “ALL" & “Execu te”and press the OK/Menu
Button.
2.Press OK /Menu Butt on to confir m the reques t
or press le ft button to c ancel the re quest.
1.Choos e "Select" a nd press OK/ Menu Butto n.
2.Select t he image you 'd like to del ete and press
OK/Menu B utton.
9.8 Copy To Card
This func tion allow s you to copy th e images
stored in t he interna l flash memo ry into the
memory ca rd.
DPOF
Back Execute : OK
SINGLE
ALL
Single
Back Execute : OK
Print Nun
Print
Print Enable
Back Execute : OK
Cancel
Execute
Opera tion
Steps
1. ME NU
2. or
3.
4.O K
Opera tion
Steps
1. or
2.O K
0
9.4 Exploring an Image
1. Press th e TELE Button and you can see the enlargement o f the image.
2. Use the TELE/WIDE Button to zoom in or to zoom out.
3. Use the UP /DOWN/LE FT/RIGHT Button to locate the position you would like t o
review.
4. Press do wn the WIDE Bu tton to retu rn to the orig inal Playback Mode.
9.0 Playback Mode
Menu
Back Execute : OK
Slide
Protect
Delete
Copy to Card
DPOF
3 sec.
Next Menu
Next Menu
Opera ti on
Steps
1.OK
2. or
3. or OK
Opera ti on
Steps
1.OK
2. or
3. or OK
Menu
Back Execute : OK
Slide
Protect
Delete
Copy to Card
DPOF
3 sec.
Next Menu
Next Menu
Menu
Back Execute : OK
Slide
Protect
Delete
Copy to Card
DPOF
3 sec.
Next Menu
Next Menu
Delete
Back Execute : OK
Single
ALL
Select
Opera ti on
Steps
1.OK
2. or
3. or OK
Opera tion
Steps
1. or
2.O K
Menu
Back Execute : OK
Slide
Protect
Delete
Copy to Card
DPOF
3 sec.
Next Menu
Next Menu
Opera ti on
Steps
1.Men u
2. or
3.OK
3 sec.
5 sec.
10 sec.
Protect
Back Execute : OK
Single
ALL
Select
Opera tion
Steps
1. ME NU
2. or
3. OK
4.
OK
or
5.
100-0066
123
456
100-0066
123
456
100-0021 100-0021 100-0021
X 1.6 X 1.6

11 12
Operation
Steps
1. MENU
2. or
3. OK
4.
OK
6. Or
7.OK
or
5.
Setup
Back Execute : OK
Auto Off 3.Min.
Language English
Format Net Menu
Date Input Net Menu
Imprint off
1 Min.
3 Min.
5 Min.
Off
Operation
Steps
1. MENU
2. or
3.OK
4.
OK
or
5.
Setup
Back Execute : OK
Auto Off 3.Min.
Language English
Format Net Menu
Date Input Net Menu
Imprint off
Cancel
Execute
Operation
Steps
1. MENU
2. or
3.OK
4.
OK
or
5.
Setup
Back Execute : OK
Auto Off 3.Min.
Language English
Format Net Menu
Date Input Net Menu
Imprint off
Off
Execute
10.5 Imprint
This func tion allow s you to print the date
or date & tim e on the captu red image.
10.6 Beep
This func tion allow s you to switc h on/off
button so und.
10.7 Light Freq.
The Light F requency s etting is fo r Anti-flicker.
50Hz: UK, G ermany, Italy, Spain, F rance,
Netherl ands, Chin a, Japan, Portugal.
60Hz: U.S .A., Taiwan, Korea, Japan.
Operation
Steps
Operation
Steps
1. MENU
2. or
3.OK
4.
OK
or
5.
1. MENU
2. or
3.OK
4.
OK
or
5.
Setup
Back Execute : OK
Auto Off 3.Min.
Language English
Format Net Menu
Date Input Net Menu
Imprint off
Off
Date Only
Date & Time
Operation
Steps
1. MENU
2. or
3.OK
4.
OK
or
5.
Setup
Back Execute : OK
Beep On
Light Freq. 50Hz
Q.View On
Sys. Reset Net Menu
USB Disk Drive
Setup
Back Execute : OK
Beep On
Light Freq. 50Hz
Q.View On
Sys. Reset Net Menu
USB Disk Drive
On
Off
6OHz
50Hz
10.0 SETUP Mode
Note: The horizontal flicke r in
artificial light source env ironment
occurred if select the wrong
frequency.
You can enter SETUP Mode by press the OK/Menu Button and select SETUP.
Operation
Steps
1. MENU
2. or
3.
4.
OK
or
5.
Setup
Back Set : OK
Auto 3.Min.
Language English
Format Net Menu
Date Input Net Menu
Imprint off
Operation
Steps
1. MENU
2. or
3.
4.
OK
or
5.
Setup
Back Set : OK
Auto 3.Min.
Language English
Format Net Menu
Date Input Net Menu
Imprint off
Operation
Steps
1. MENU
2. or
3.
4.
OK
or
5.
Setup
Back Set : OK
Auto 3.Min.
Language English
Format Net Menu
Date Input Net Menu
Imprint off
Operation
Steps
1. MENU
2. or
3. OK
4.
OK
or
5.
Setup
Back Execute : OK
Auto Off 3.Min.
Language English
Format Net Menu
Date Input Net Menu
Imprint off
Operation
Steps
1. MENU
2. or
3.
4.
OK
or
5.
Setup
Back Set : OK
Auto 3.Min.
Language English
Format Net Menu
Date Input Net Menu
Imprint off
Operation
Steps
1. or
2.OK
Language
Back Execute : OK
English
Deutsch
Italiono
Espanol
Francais
10.0 SETUP Mode
1. YYYY/MM /D D
2. DD/MM/Y YY Y
3. MM/DD/Y YY Y
10.9 Sys. Reset
This func tion is to rec all all defa ult values
except th e Date, Time an d Language.
a. Instal l the PC Cam Dri ver on your
compute r.
b. Select U SB setting a s PC Cam.
c. You can star t PC Cam funct ion after yo u
set up the MS N messenge r or AMCAP.
When Disk D rive is sele cted, the ca mera
will auto maticall y go to the connected Disk
Drive and t urn off LCD Monitor. You can
have a new mo vable disk t o download
images to y our comput er.
Connect w ith printe r and select Printer via
PictBrd ge functio n, you can sel ect the
detaile d options of p rinter.
10.10.1 PC Cam:
10.10.2 Disk Drive:
10.10.3 Printer:
Operation
Steps
Operation
Steps
1. MENU
2. or
3.OK
4.
OK
or
5.
1. MENU
2. or
3.OK
4.
OK
or
5.
Setup
Back Execute : OK
Beep On
Light Freq. 50Hz
Q.View On
Sys. Reset Net Menu
USB Disk Drive
Setup
Back Execute: OK
Beep On
Light Freq. 50Hz
Q.View On
Sys. Reset Net Menu
USB Disk Drive
Cancel
Execute
PC Cam
Disk Drive
Printer
10.8 Q. View
If you sele ct Q. View “On”, you can view the
capture d image on the L CD Monitor.
Q. View is possible only with still image.
Operation
Steps
1. MENU
2. or
3.OK
4.
OK
or
5.
Setup
Back Execute : OK
Beep On
Light Freq. 50Hz
Q.View On
Sys. Reset Net Menu
USB Disk Drive
On
Off
10.1 Auto Off
Note:
To set up the pow er saving ti me.
1. Press OK /Menu Butt on and selec t "SETUP".
2. Select " AUTO".
3. Select t he time you pr efer and pre ss
OK/Menu B utton to con firm the set ting.
4. You can sele ct "OFF" to ca ncel.
If set "OFF ", the camer a will not tur n off automatically.
The batte ry may get dra ined if the ca mera is power on for
a long time .
10.2 Language
There are 1 2 language s available to select:
7.Trad itional Ch inese
1.Engli sh
2.Frenc h
3.Germa n
4.Itali an
5.Spani sh
6.Portu guese
8.Simpl ified Chin ese
9.Japan ese
10.Thai
11.Turkis h
12. Russi an
This func tion allow s you to forma t the
memory ca rd or the buil t-in flash m emory.
10.3 Format 10.4 Date Input
This func tion allow s you to set up th e type of
date & time .
10.10 USB
You can sel ect an exter nal device t o
which you w ant to conne ct the camer a
by using US B Cable.
Note:
1.Auto Off
2.Language
3.Format
4.Date Input
5.Imprint
6.Beep
7.Light Freq.
8.Q. View
9.Sys. Reset
10.USB
Opera ti on
Steps
1. MENU
2. or
3. OK
4.
OK
or
5.
Setup
Back Execute : OK
Beep On
Light Freq. 60Hz
Q.View On
Sys. Reset Net Menu
USB Printer
Setup
Back Execute : OK
Auto 3.Min.
Language English
Format Net Menu
Date Input Net Menu
Imprint off

13 14
12.0 Software Application
11.0 PictBridge Mode
11.1 Connecting the Camera to a PictBridge-supported Printer
11.2 Select Pictures to Print
Ope ra tio n
Ste ps
1. or
2.OK
PictBridge
Execute : OK
Images Next Menu
Size Default
Layout Default
Print
Images
Back Execute : OK
Select Next Menu
All Next Menu
Select
Execute : OK
Print Num 00
11.3 Custom Set
You can select the Paper Size and Layout before print out the images.
Opera tion
Steps
1. or
2.O K
PictBridge
Execute : OK
Images Next Menu
Size Default
Layout Default
Print
PictBridge
Execute : OK
Images Next Menu
Size Default
Layout Default
Print
Default
2L Format
4 X 6
Default
Index
Borderless
SIZE
LAYOUT
Setting t he size of the p rinting pa per. The s ize format s will depen ds on the prin ter
support ed functio n.
Setting t he number of p ictures to b e printed on a sheet of paper.
[SELECT ]: The PictBridge function will be applie d only to the pi cture curr ently
display ed on LCD Monitor.
[ALL ] : The PictBr idge funct ion will be ap plied to all pictures
1.Selec t [SELECT] o r [ALL] wher e you can set th e number of co pies to print.
2.Press t he Up/Down B utton to sel ect the numb er of print out copies. Maximum 30 prints.
3.Use the L eft/Righ t Button to se lect image s and select the number of prints for another picture.
4.Press O K Button to sa ve.
5.Go back t o PictBrid ge main menu a nd select PRINT to start printi ng.
Setting t he Number of C opies to Pri nt
.
All
Execute : OK
Print Num 00
Opera tio n
Steps
1. or
2.OK
3.OK
PictBridge
Execute : OK
Images Next Menu
Size Default
Layout Default
Print
A4
1. Power On b oth the came ra and the pri nter.
2. Press th e MENU Butto n to go to SETUP Mode.
3. Go to USB an d select PRI NTER for pri nter
connect ion.
4. Use the su pplied USB C able to connect the camera
to the PictB ridge-su pported pr inter as sho wn above
to print ou t the stored i mages.
12.1 ArcSoft MediaImpression™
Click “ ”Extra
12.2 Easy Link With YouTube by Arcsoft
Be a Movie Maker by login & upload with Legal and Safety Software.
Browse & Upload in YouTube with ArcSoft MediaImpression by follow the steps
below:
!
!
1. Select “YouTube Account Setup”.
2. Select “Step 1”to login YouTube account.
3. Select “YouTube Account”or “Google Account”to login.
4. Select “Step2”to get authorization.
5. Click “Allow”to get permission.
6. User will see “User Name”after login.
7. Select the file you want to upload and click “Upload to YouTube”
!
!
!
!
!For more information click to http://www.arcsoft.com/ .
ArcSoft MediaImpression™manages your media for you, and gives you
tons of fun and exciting ways to create and share projects featuring your
photo, video, and music files. Edit, enhance and add creative effects to
your photos.
Create your own movies or photo slide shows,complete with soundtrack.
Upload your files easily to YouTube™!
Or share them through simple email attachments or popular photo printing.

15 16
14.0 Specification
“Spec ificati on s and produ ct design a re subject to c hange wit hout any noti ce for furt her impro ve ment”
Image Type
Sensor Effecti ve Pixels
Lens Lens Type
F No.
Digital Zoom
LCD Display
Focusing Type
Range
Shutter Type
Speed
Exposure Control
ISO Equivalent
Flash Modes
Effect
Sharpness
White Balance
Voice record ing
Date Imprinting
Still Mode
Image Image Size
Image Quality
Self-Timer
Scene mode
Movie Movie Size
Clip Frame Rate
Zoom
Media
File Still Image
Format Movie Clip
Audio
PictBridge (Direct Printing)
Image Play Type
Interface
Power Source
Dimensions (WxHxD)
Weight
Software Camera Driver
Application
1/2.3″9M CMOS Se nsor
Approx. 9.12 Me ga Pixels (3,48 8 x 2,616)
Fixed Focus
F3.25
Still Image mod e: 1.0X ~ 8.0X
Play mode: 1.0X ~ 8 .0X
2.4" Color TFT LCD
MF (manual focu s)
Normal: 1.2M ~ in finity Macro: 20cm
Electronic Sh utter
Normal: 1/4 sec . - 1/4000 sec., Night Scene: 4 sec. - 1/8 sec.
Program A E
Auto, 100, 200, 4 00, 800
Auto, Fill-in F lash, Flash Off
Normal, Sepia , Negative, B&W
Soft, Normal, Vivid
Auto, Dayligh t, Cloudy, Fluorescent, Tungsten
Voice Recor ding (depends o n capacity)
Voice Memo in S till Image (max . 10 sec.)
Date, Date & Time, Off (user selectable)
Single Image, C ontinuous Shooting
Super Fine, Fin e, Normal
10 sec. , 2 sec.
Auto, Sport, Ni ght, Portrait, Landscape, Backlight
QVGA (320 x240),VGA (6 40x480 )
QVGA (25~ 30fps),VGA ( 15~20f ps)
Digital Zoom: 1 .0X ~ 8.0X
Internal memo ry: 16MB Nand Flash
External memo ry: supportin g SDHC card (up to 8GB)
JPEG (DCF), EXI F 2.2, DPOF 1.1, Pi ctBridge 1.0
MJPEG, 320x24 0 (QVGA), 640x480(VGA), with audio
Audio for Voi ce Recording an d Memo: WAV
Yes
Single Image, Thumbnails, Slide Sh ow, Movie Cli p
Digital outpu t connector: USB 1.1, TV output: N/A
Other interfa ce: MIC-in, Buz zer Out (No Speaker)
2 pc s of AA alkali ne, Ni-MH Batte ry
87.8 x 60.8 X 30.4 mm
Approx.85g (w ithout batter y and card)
Storage Drive r (2000, ME, XP, Vista32/64 ) & (Mac OS:10.0 or l ater)
PC Cam Driver (20 00, ME, XP, Vista32)
Arcsoft Media Impression( Windows: 2000/XP/Vista)
(VGA , 3M, 5M , 9M with 3 shots )
[16M ]: 4608 X 3456 pixels (by interpolation), [ 9M] : 34 88 X 261 6 pixels
[5M] : 2560 X 1920 pixels, [3M]: 2048 X 1536 pixel s, [VG A]: 64 0 X 480 pi xels
Shooting
Storage
PC with processor better than MMX Pentium 233MHz
(XP: Pentium II 300MHz)
Windows 2000 Professional (SP4)/Windows ME/
Windows XP (SP2)/Window V is ta
Minimum 64MB RAM (XP: 128MB)
140MB of available hard-disk space
USB port (1.1 or 2.0 standard interface)
CD-ROM drive
800×600 pixels, 16-bit color display compatible monitor
(24-bit color display recommended)
For Windo ws
For Macinto sh
System Requir em en ts
CARD F UL L
MEMO RY FULL
CARD L OC KE D
(ICO N BL IN KING)
LOCK
NO IMA GE
FILE ERR OR
MEMO RY ERROR
CARD E RR OR
LOW BATTE RY !
(ICO N BL IN KING)
Ther e is i ns uffi ci ent card memory c ap ac ity
for st or in g an image.
Ther e is i ns uffi ci ent internal me mo ry
capa ci ty f or storing an ima ge .
The me mo ry c ard is under prot ec ti on.
The Im ag e ca n not be deleted un de r
prot ec ti on.
Ther e is n o im age stored in the m em or y
card buil t- in f lash memory.or
File f or ma t error.
Memo ry i s da maged or fails.
Card i s da ma ged or fails.
Batt er y po wer is drained.
Messages Caus es
The environment is too dark in Flash off or
"Night Scene''.
The environment is too dark in Flash off or
"Night Scene''.
LOW LIGH T!
HAND SHAKE ICON
NO PAPER!
Pape r run out.has
Came ra H angs
Error Message Table
Dele te t he s tored image(s ) in t he m emory card or
inse rt a n ew m emory card.
Dele te t he s tored image(s ) in t he f lash memory.
Set th e ca rd p rotection swi tc h at n on-protection
posi ti on .
Unlo ck t he p rotected imag e.
Inse rt a n ew m emory card or for ma t th e built-in
flas h me mo ry.
Form at t he m emory card or bui lt -i n flash memory.
Inse rt a n ew m emory card.
Inse rt a n ew b attery.
Set the flash mode at Auto Flash or Fill-in Flash.
Avoid shake.Set the flash mode at Auto Flash or Fill -in
Flash.
Plea se p ut m ore paper in the pa pe r tr ay of the Printer.
1. Rem ov e th e battery.2. Reload the ba tt er y.
3. Swi tc h on t he camera.
Solutions
13.0 Appendix
Power Ma c G3 o r la te r
Mac OS 10. 0 or l at er
Minimu m 64 MB R AM
110MB of available ha rd -d is k space
USB port ,
CD-ROM D ri ve
QuickTime 6.0 or Later for MPEG4 M ov ie C li p
Other manuals for NAVIGATOR 900
1
Table of contents
Other Genius Digital Camera manuals

Genius
Genius 501 User manual

Genius
Genius G-Shot P210 User manual

Genius
Genius P313 Instruction sheet

Genius
Genius DSC13M SMART User manual

Genius
Genius V3 User manual

Genius
Genius DSC13M SMART User manual

Genius
Genius DSC-1.3M Smart User manual

Genius
Genius P433 User manual

Genius
Genius G-Shot P210 User manual

Genius
Genius P433 User manual

Genius
Genius D613-R1 User manual

Genius
Genius P850 User manual

Genius
Genius P635 User manual

Genius
Genius DSC-1.3MTFT User manual

Genius
Genius G-Shot P436 User manual

Genius
Genius Life Shot FHD300 User manual

Genius
Genius 502 User manual

Genius
Genius G-Shot D1211 User manual

Genius
Genius P535 User manual

Genius
Genius DSC 13M User manual