Genki KBR-JK370A User manual

1
MOTORIZED TREADMILL
INSTRUCTION
Thank you very much for purchasing our product.
Please read this instruction carefully before use it and keep the instruction at proper place.

2
1. CAUTION
To avoid any hurts, please read this manual carefully before using.
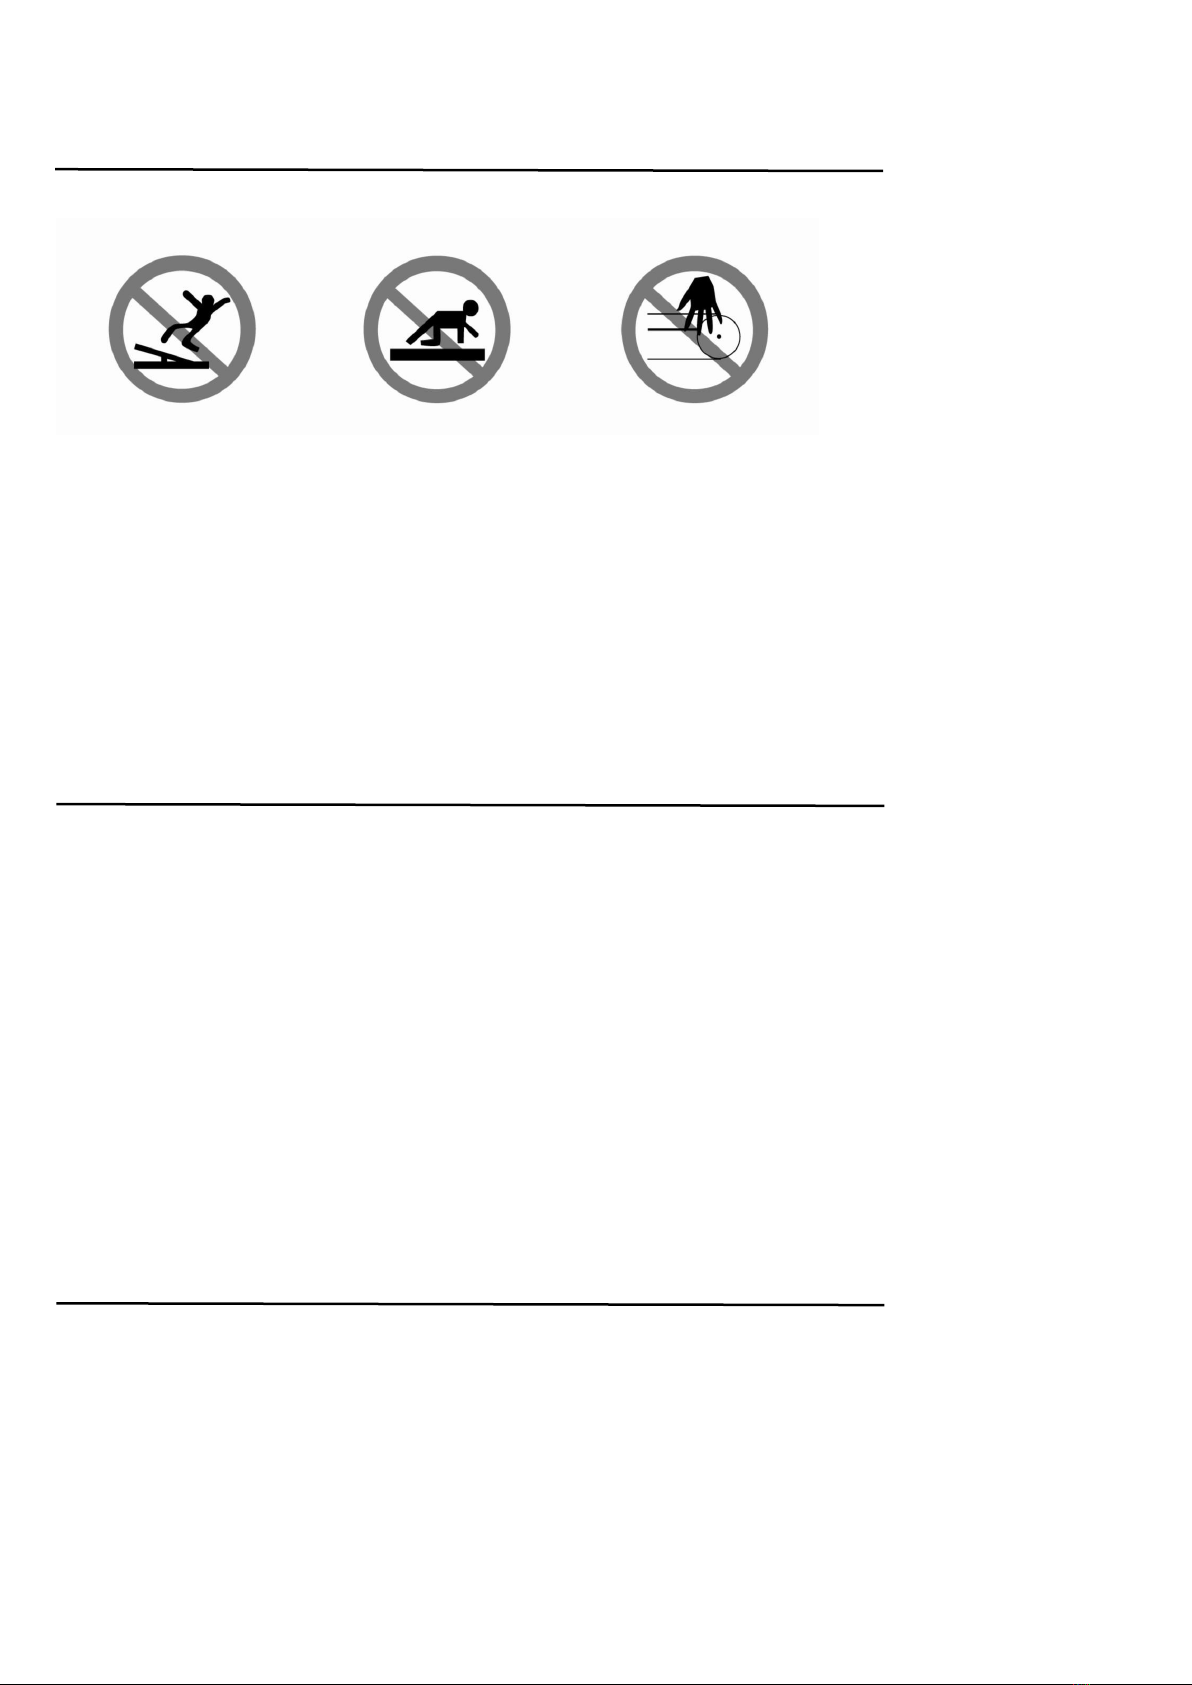
◼For safety purpose do not stand on running belt while start.
◼Please stop immediately for any feeling of vomit、jerky during using.
◼Please increase speed slowly if needed.
◼Adjustment of belt is prohibited during using.
◼It is suggested to wear sports shoes when using the machine.
◼Children、elder、pregnant women、patients are prohibited to use the machine.
◼Please clip the safety key on your clothing during using.
◼Please firmly hold the hard bars during using.
2. SAFETY NOTICE
◼Please put the machine on flat ground. It is unsuitable to put the machine at following places:
①Outdoors.(The machine is specially designed for indoor use only)
②Slant ground or slant places on balcony.
③Sunlight area or near heater.
④Big noisy places.
◼Error may be appeared if the power is not stable. Please do not use the same socket together with
computer、air conditioner etc.
◼It is suggested to wear sports shoes and gym suit when use the machine.
◼Please increase or decrease speed slowly.
◼Be careful of children or other objects while fold and unfold the machine.
◼Do not put the machine near to wet object. Error maybe caused by waterdrop.
3. CAUTION DURING USE
◼If you do not feel well before using, please consult with your doctor or coach.
◼It is not our company’s responsibility for any improper use by user to cause body injured.
◼Please pull up plug after using.
◼Please pull out plug for any movement or change parts for the machine.
◼Children、elder and pregnant women are prohibited to use the machine. Patients need doctor’s
consultant before using.
◼Please place the machine on flat places. Do not locate any objects 2M behind the machine.

3
◼Do not start the machine when it is folded.
◼Waterdrop is prohibited to run into the machine , especially to motor, power line and plug.
◼Danger may cause if wearing long dress or other unsuitable dresses during use.
◼Encloser spaces, air uncirculated places and with flammability places are prohibited to use the
machine.
◼Do not put any objects on the machine.
◼Put away the plug from heated place or fire seat.
◼Please switch off all functions and pull out plug after using.
◼Please do not stand directly on the belt while starting the machine.
◼Do not disassemble the machine without conduct of professional person.
◼Please make sure the running belt is fastened before using.
4. TECHNICAL SPECIFICATION
Product Name
Treadmill
Motor Power
1.2HP
Voltage
220-240V
Frequency
50Hz
Speed Range
1-12km/h
Maximum User Weight
120KG
5. ASSEMBLE INSTRUCTION
1. Open the package and two person take out the treadmill and the spare parts. Make sure there
are no missing parts. Then lift up the left and right frame. Please pay attention to safety.
Serial NO.
Part Name
Spec
qty

4
50
Safety Key
1
7/8
Short screw and 8arc pad
M8*16
2
15
Long screw and 8arc pad
M8*70
2
A
Silicone oil
1
B
Wrench
1
C
Cup holder
1
D
Fasten bar
1
2. Take out 2 long screws and pads, fix the left and right frame with base frame by that screws
and pads. Please do not fasten the screws.
3. Take out the screws on the left and right frame, then fix the panel with the left and right frame
by that screws and pads. Please also do not fasten the screws.
4. Take out 2 short screws and pads, then fix the bar frame on the left and right frame by that
screws and pads. Please fasten all screws include 4 screws which do not fasten before.
5. Put the red safety key on the yellow circle area of the panel. And the left and right cups are
stuck in the panel.
6. Finish assembling.

5
6. CONTROL PANEL
1. Place the emergency stop safety key on the yellow circle area of the panel. Clip the other end
of the safety key onto your clothes and stand on the running belt.
2. Press “START” key, the machine will start by 1.0KM/H after 3 seconds.
3. Press "+" key for speed up and "-" key for speed down. The fastest speed is 12KM/H and
lowest is 1.0KM/H.
4. Press “3, 6, 9, 12”shortcut keys for select the speed quickly.
5. Before start the machine, press "mode" key, you can adjust the Speed, Time, Distance, Calorie
for running.
6. Insert have 9 programs from PROG. When the machine stand by, press “PROG” can set the

6
programs then press “START” to start the machine.
7. During the machine worked and use auto program the “+ -”key can not available. If need select
auto program please select it first when the machine stand by.
8. Two hands touch the pulse sensor, the screen will show the heart rate frequency.
9. Left handrail has “START/STOP”key. Right handrail has speed key “+ -”to adjust the speed.
10.Press "STOP" key for stop the machine after using.
11.For emergency stop, please pull out safety key. The machine will stop very slowly.
If any error codes appear on the screen, then please check below:
Err Without safety key - Please make sure the safety key is put on.
If the safety key is already on, but there ERR still shows or there is no function, then change the
computer screen/display monitor.
E2 Error for the motherboard, please change it.
E4 Error for the motherboard, please change it
E5 Overcurrent protection. Change motherboard.
E6 Motor error-Please make sure the motor line
have connected, if all the line connected, please
change the motherboard if nessessary.
E7 Communication interruption-Please make sure all of
the connection lines have been connected correctly.
E8 Over load error- User may have exceeded max weight.

7
7. FOLDING UP AND SETTING DOWN
NOTE: Ensure the Power Switch is in the 'OFF' position and the power cord is unplugged from the
electrical outlet.
FOLDING UP:
⚫Holding the rear end of deck directly by one hand, then lift the deck up until the Cylinder(A)
'pops' down into the locked position.
Note: Please check the Cylinder (A) 'pops' down into the locked position before moving the treadmill.
To prevent any injury, please make sure you have a firm hold when lifting up or setting down the deck.
SETTING DOWN:
⚫Holding the rear end of deck by one hand, then use your foot to push the Cylinder(A) to set down
the deck of the treadmill.
Note: Do no stand under the deck when setting down the treadmill
8. USAGE OF SILICONE OIL
Pull up tightly of the running belt. Then put the silicone oil to
running board. Then start the machine to running 3 minutes
without loading. It is better to maintain like this every 30 hours
working of the machine. This can save lifetime of parts
properly.

8
9. RUNNING BELT ADJUSTMENT
(1) Running belt deviate to left
Start the machine by speed at 2-3Km/h without loading, use die nut to make the screw go 1/4
circle(see fig1). Then make the machine running without loading 1-2 minutes. Please adjust like this to
make the belt till to mid place.
(2) Running belt deviate to right
Start the machine by speed at 2-3Km/h without loading, use die nut to make the screw go 1/4
circle(see fig2). Then make the machine running without loading 1-2 minutes. Please adjust like this to
make the belt till to mid place.
(3) Running belt logjam
If the running belt is in dead condition, use die nut to make the screw 1/2 circle both left and right
till this logjam solved.
10. DAILY MAINTAINANCE
1. Please disconnect power before checking the machine or cleaning.
2. Clear belt and dial plate after use, at least once a week.
3. Check and tighten screws and spines at fixing point.
4. Do not hang clothes or other objects on the machine.

9
11. Overview Drawing
12. PARTS LIST
Serial
No.
Part Name
Spec
qty
unit
1
Computer Cover
ABS
1
PCS
2
Computer Board
1
PCS
3
Upper Handrail Bar
Q235
1
SET
4
Cross Large Flat Head Tapping Screw
ST4*25
4
PCS
5
Cover
2
PCS
6
Self-Locking Nut
M6
2
PCS
7
Middle Handrail Pipe
Q235
1
PCS
8
Arc Gasket
φ8
2
PCS
9
Half Round Head Hexagonal Screw
M8*16
2
PCS
10
Pad
φ8
2
PCS
11
Half Round Head Hexagonal Screw
M8*45
2
PCS

10
12
Power Line
1
PCS
13
On/Off Switch
1
PCS
14
Left & Right Support Frame
Q235
1
SET
15
Half Round Head Hexagonal Screw
M8*70
2
PCS
16
Pad
φ12
2
PCS
17
Outer Hexagonal Screw
M12*70
2
PCS
18
Bottom Motor Cover
ABS
1
SET
19
Square Pipe Plug
30*40-PP
2
PCS
20
Bottom Frame
Q235
1
PCS
21
Square Foot Pad
4
PCS
22
Cross Large Flat Head Self-Drilling Screw
ST4.2*16
20
PCS
23
Outer Hexagonal Screw
M8*30
1
PCS
24
Half Round Head Hexagonal Screw
M6*35
2
PCS
25
Wheel
ABS
2
PCS
26
Self-Locking Nut
M6
2
PCS
27
Outer Hexagonal Screw
M8*45
1
PCS
28
Self-Locking Nut
M8
2
PCS
29
Half Round Head Hexagonal Screw
M8*40
2
PCS
30
Latch
2
PCS
31
Adjustment
ABS
2
PCS
32
Flange nut
M8
6
PCS
33
Left End Cap
Nylon
1
PCS
34
Cylinder Head Hexagonal Screw
M6*35
3
PCS
35
Rear Roller
1
PCS
36
Right End Cap
Nylon
1
PCS
37
Frame
Q235
1
PCS
38
Belt
1
PCS
39
Motor
1
PCS
40
Front Roller
1
PCS
41
Mother Board
1
PCS
42
Running Board
MDF
1
PCS
43
Countersunk Head Hexagonal Screw
M8*40
6
PCS
44
Running Belt
1
PCS
45
Edgings
2
PCS
46
Upper Motro Cover
ABS
1
PCS
47
Flat pipe plug
PP
2
PCS
48
Half Round Head Hexagonal Screw
M6*25
2
PCS
49
Heart Rate Key
ABS
2
PCS
50
Safety Key
ABS
1
PCS

11
Table of contents
Other Genki Treadmill manuals