Genki KBR-JK8808 User manual

MOTORIZED TREADMILL
USER MANUAL
Please ensure you read the User Manual and Safety Instructions carefully before operating this machine.

1. CAUTION
2. SAFETY NOTICE
3. CAUTION DURING USE
4. TECHNICAL SPECIFICATION
5. ASSEMBLY INSTRUCTIONS & BOX CONTENTS
6. CONTROL PANEL & OPERATING INSTRUCTIONS
7. FOLDING UP AND SETTING DOWN
8. LUBRICATING THE BELT WITH SILICONE OIL
9. RUNNING BELT ADJUSTMENT
10. DAILY MAINTAINANCE
11.OVERIEW DRAWING
12.PARTS LIST
12.
CONTENTS
TION

To avoid injury please read this manual carefully before operating this machine.
◼NEVER attempt to mount the treadmill while the running belt is moving.
◼NEVER step off the treadmill while the running belt is moving.
◼NEVER operate the treadmill if it is damaged or is not working as it should be.
◼DO NOT overexert yourself or work to exhaustion. If you feel any pain or abnormal symptoms, stop
your workout immediately and consult your doctor.
◼DO NOT start the treadmill when it is in its folded position.
◼DO NOT operate the treadmill in or around water / sources of heat & avoid placing the treadmill on
thick carpet.
◼DO NOT use outdoors. This product is to be used inside ONLY.
◼DO NOT place any objects on the running belt or the treadmill itself.
◼NEVER connect a live power cable to the treadmill. Please turn off the power supply and the On/Off
switch on the back of this machine before connecting the power cable to the machine. Once safely
connected you can switch on the power supply followed by the on/off switch on the back of the
machine. Connecting a live cable directly into the back of the machine can damage the electrical
components.
◼Storing the treadmill in a cold damp room i.e. garage (with non consistent temperature) will increase
the risk of damage to electrical components. We recommend that you store the machine in a dry
room with constant temperature.
1. CAUTION
TION

◼This machine is not suitable for children under 14 years of age.
◼Use the treadmill only for its intended use as described in this manual.
◼Children, elderly users and pregnant women are advised NOT to use the treadmill.
◼Assemble and operate the treadmill on a solid, level surface. Locate the treadmill a few feet from
walls or furniture. Check the unit before each use and verify that all fasteners are secure. Always
maintain the treadmill in good working condition.
◼An error may occur due to unstable power. DO NOT share a power socket with other high-powered
items such as computers or air conditioning units.
◼It is suggested to wear suitable sports trainers and sensible gym clothing when using the treadmill.
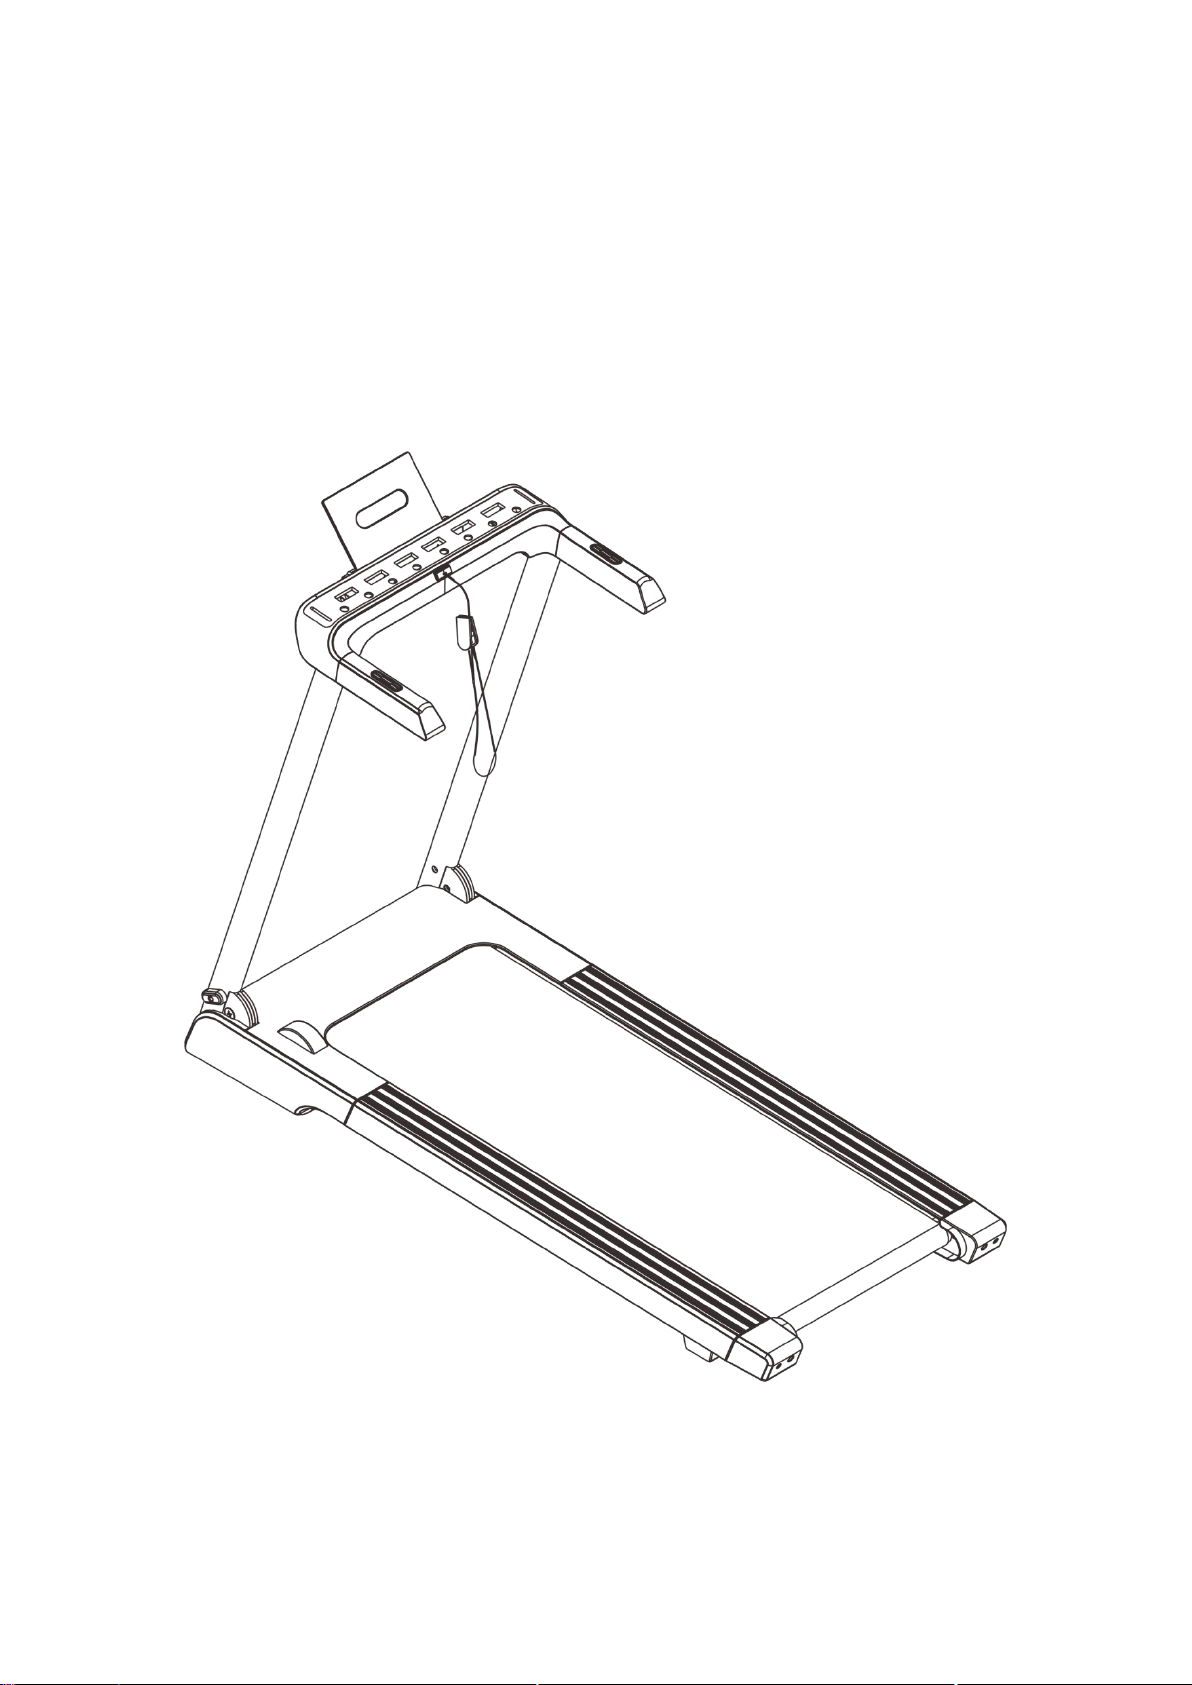
◼Take care when folding and unfolding the treadmill before and after use.
◼DO NOT attempt to service the treadmill yourself except for the maintenance tasks which are
described in this manual. The treadmill does not contain any user-serviceable parts so disassembling
it yourself will not only void your warranty but could result in serious injury.
Keep both the machine and power cord away from heated surfaces.
◼Make sure you are wearing proper exercise clothing and shoes during a workout—no loose clothing.
Tie back long hair. Keep all loose towels away from the running surface. The running belt will not stop
immediately if an object becomes caught in the belt or rollers.
◼If you begin to feel unwell during use, stop immediately and consult your doctor or personal trainer
before continuing.
◼Take care when adjusting the speed setting and increase or decrease steadily.
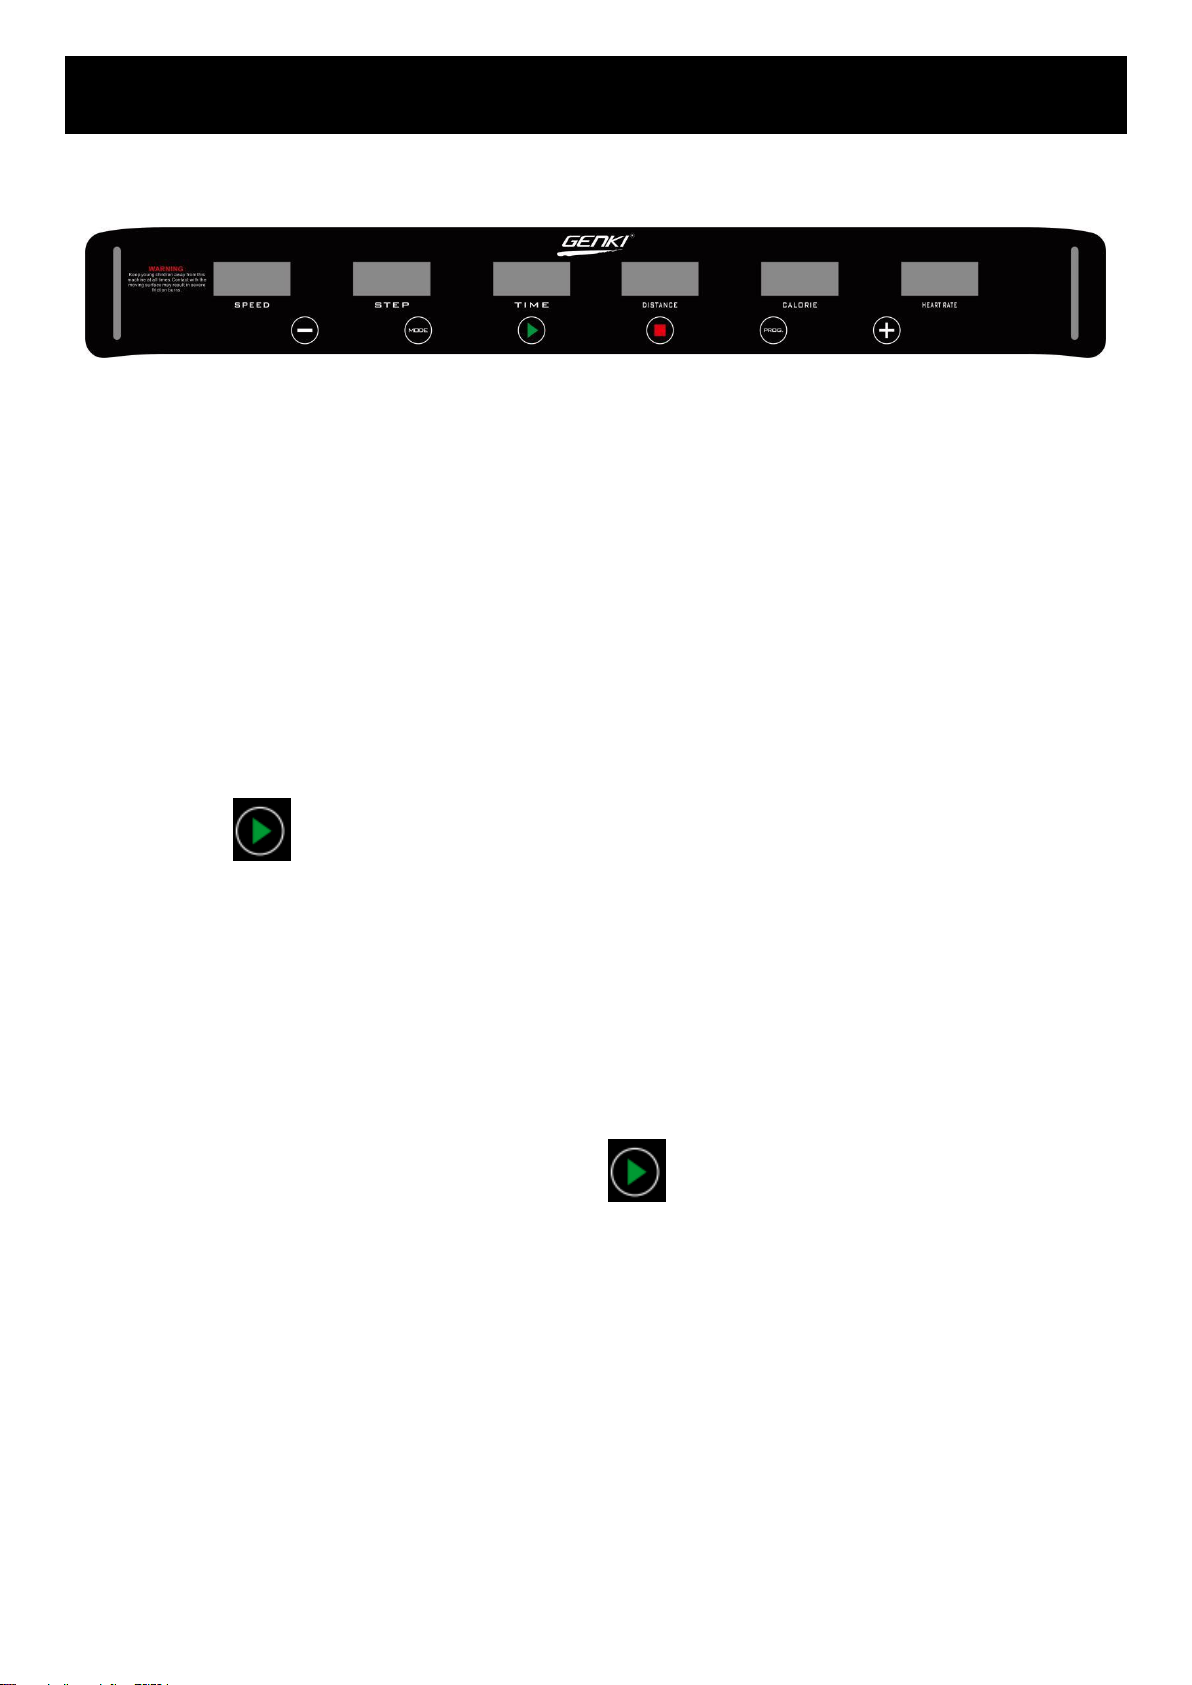
◼The safety tether cord clip must be attached at waist level prior to starting a workout. The safety cord
connects the security clip to the yellow button on the console. If you encounter any type of difficulty
while using the treadmill, a strong tug on the safety key cord or a quick tap on the red ON/OFF button
will stop the running belt.
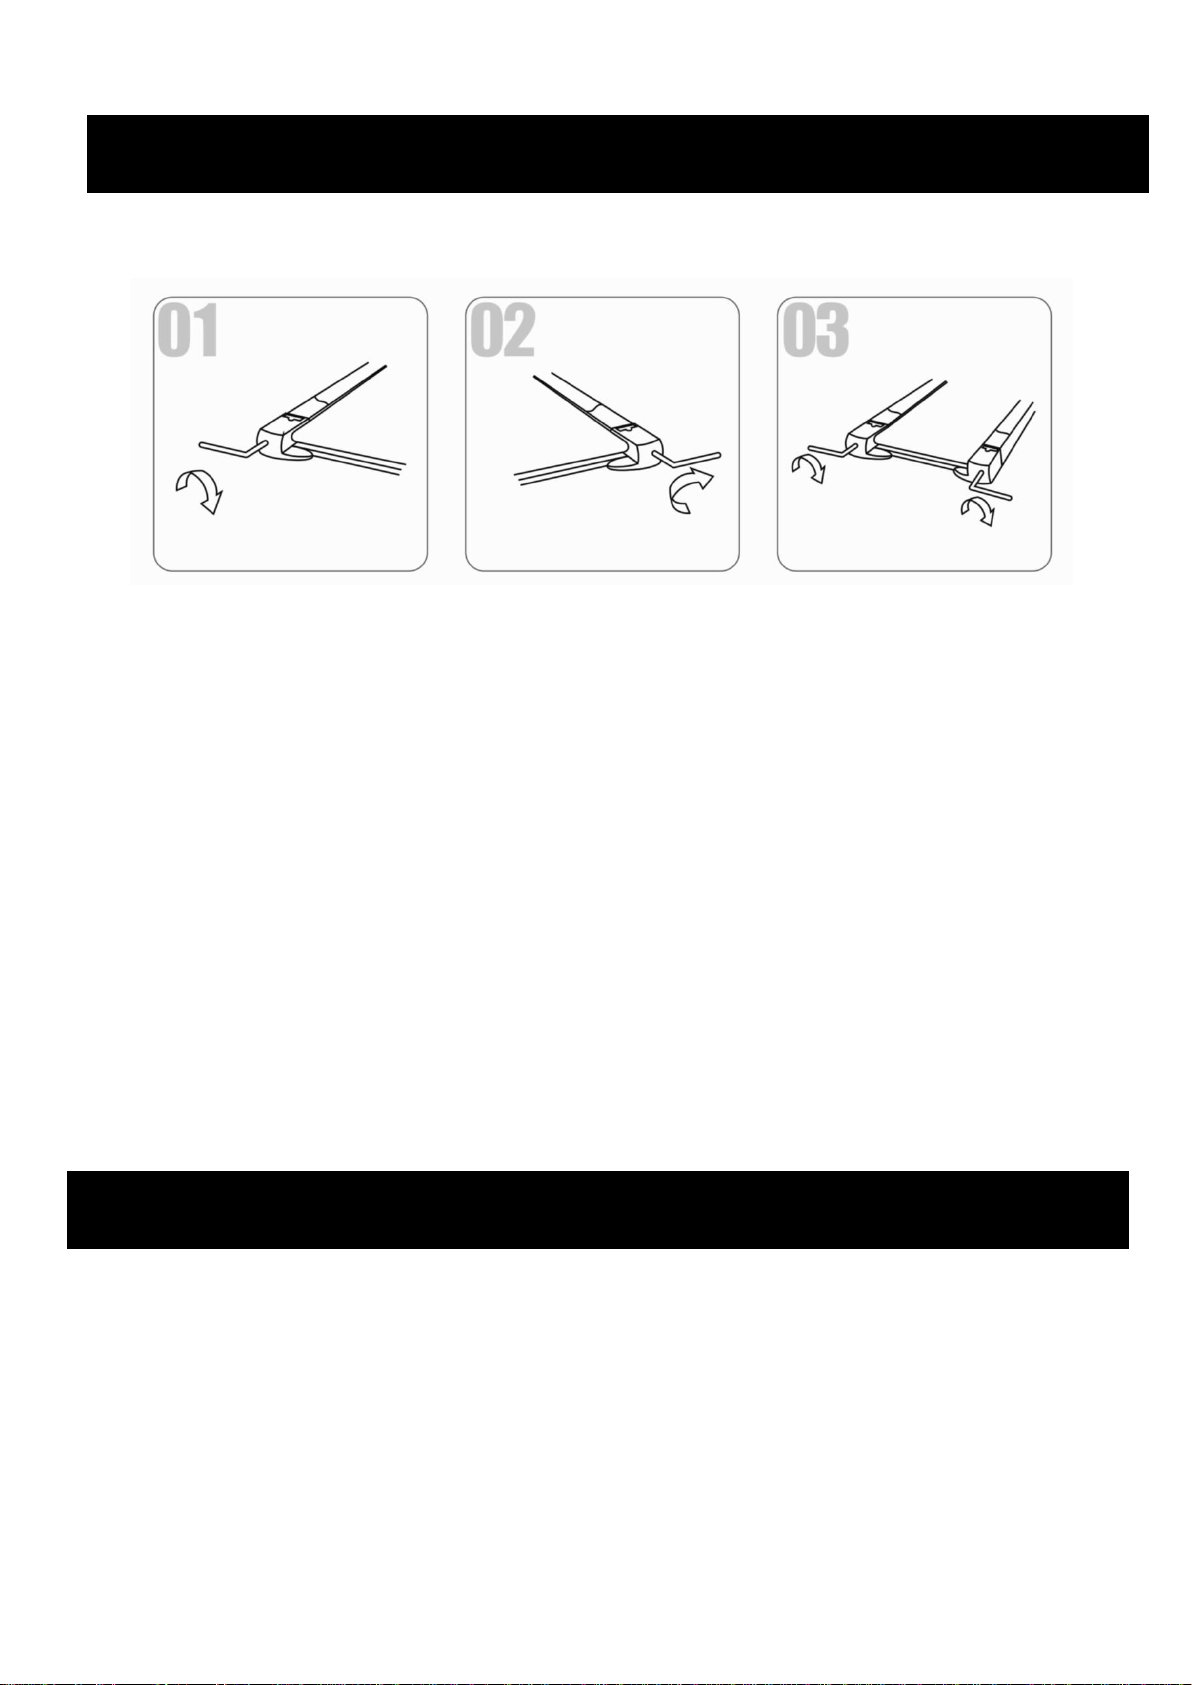
◼Please make sure the running belt is fastened before using.
◼DO NOT adjust the belt while machine is turned on or being used.
◼Please switch off all functions and disconnect from mains power supply after use.
2. SAFETY NOTICE
TION
3. CAUTION DURING USE
TION

Product Name
Treadmill
Motor Power
2.0HP
Voltage
220-240V
Frequency
50Hz
Speed Range
1-12km/h
Maximum User Weight
120KG
Assembly Instructions :
4. TECHNICAL SPECIFICATION
TION
5. ASSEMBLY INSTRUCTIONS & BOX CONTENTS
TION

Please check that all contents are present before assembling this machine:
1. Two person take out the machine from carton,pull up the support frames and
use the 2 knob(in accessory bag)fix the support frame with the base.
2. Make the computer handrail bar in horizontal direction,and insert the bolt into
the support frame hole.
3. Turn over the IPAD holder with arrow direction like left attached.Pull out the bolt
like right attached if need down IPAD holder.
4. Put safety key on yellow background.Finished assemble.

1. Plug the power line and turn on the red power switch at the back of the
machine.
2. Place the emergency stop safety key on the front of the console. Clip
the other end of the safety key onto your clothes and stand on the
running belt facing the console.
3.Press " " key, the machine will start at 1km after 3 seconds.
4.Touch the heart sensors, the screen will show heart rate frequency.
5.Press "MODE" key, can switch from Distance to Time and Calorie.
6.12 programs range from P1-P12. When in stand by PROG, press “PROG”
key to set the programs then press “ ” to start the machine.
PRE-SET PROGRAMS x 12
The speed and time of the pre-set programs are fixed and cannot
be changed.
The default time for the pre-set programs is 30 minutes.
6. CONTROL PANEL & OPERATING INSTRUCTIONS
TION

7.In case of emergency, please pull out safety key. The machine will stop
very slowly.
8.To stop the machine you can also press the " "..
⚫Take off the bolt on the computer to fold the computer.
⚫Take off the knob at both left and right side of the base frame,and Use the 2pcs
knob to fixed left and right support frame.
⚫Pull out the bolt of the Ipad holder and stand up the machine against the
wall.Please note don’t let children touch it,avoid fall down.
7. FOLDING UP AND SETTING DOWN
TION

Lift up the running belt. Then put silicone oil straight on to the running board. Now start the machine and
run for 3 minutes without any load on the belt (i.e.do not stand on the
machine). We recommend that you oil the belt every 30 working
hours.
Regular maintenance will prolong the life of your treadmill and prevent injury!
We strongly recommend that you do the following:
1. Switch Off and remove the power cable from the wall after every use, especially if children are present.
2. Clean your treadmill after use.
3. Use a dry cloth to clean the control panel and areas around the power switch. Use
a soft clean cloth and cleanser to remove stubborn stains and dirt off the running belt.
4. Tighten the running belt once a month.
5. Keep your treadmill in a safe dry place away from heat and water.
8. LUBRICATING THE BELT WITH SILICONE OIL
TION

(1) Running belt deviates to left - Start the machine, set speed at 2-3Km/h without a load on the belt,
use Allen key to turn the screw 1/4 turn(see fig1). Then allow the machine to run without a load for 1-2
minutes. Repeat process until the belt becomes central.
(2) Running belt deviate to right - Start the machine, set speed at 2-3Km/h without a load on the belt,
use Allen key to turn the screw 1/4 turn(see fig2). Then allow the machine to run without a load for 1-2
minutes. Repeat process until the belt becomes central.
(3) Running belt jam - If the running belt is in dead condition, use the Allen key to turn the screw 1/2 a
turn both left and right until the jam solved (see fig3).
1. Please disconnect power before checking the machine or cleaning.
2. Clear belt and dial plate after use, at least once a week.
3. Check and tighten screws and spines at fixing point.
4. Do not hang clothes or other objects on the machine.
9. RUNNING BELT ADJUSTMENT
TION
10. DAILY MAINTAINANCE

Serial
No.
Part Name
Spec
qty
unit
1
Computer board
ABS
1
PCS
2
Upper computer cover
ABS
1
PCS
3
Bottom computer cover
ABS
1
PCS
4
Upper handrail bar
Q235
1
PCS
5
Compression spring
304
2
PCS
6
Pin pull ring
2
PCS
11. OVERIEW DRAWING
12. PARTS LIST

7
Support frame
Q235
2
PCS
8
Right motor cover
ABS
1
9
Power line
1
PCS
10
Switch
ABS
1
11
Overload protector
1
12
Cross head tapping screw
ST4*12
14
PCS
13
Front motor cover
ABS
1
14
knob
M12
2
PCS
15
Countersunk cross screw
M12*20
2
PCS
16
self-locking nut
M5
2
17
Wheel
ABS
2
PCS
18
Cylinder head hexagonal screw
M5
2
PCS
19
Foot pad
2
PCS
20
Cross belt pad self-drilling screw
ST4.2*16
14
PCS
21
Left motor cover
ABS
1
PCS
22
Motor
1
PCS
23
Quintuplet belt
1
PCS
24
Bottom motor cover
ABS
1
PCS
25
Front roller
1
PCS
26
Motherboard
1
PCS
27
Edge bar clip
4
PCS
28
Flange nut
M8
6
PCS
29
Frame
Q235
1
PCS
30
Foot pad
2
PCS
31
Rear roller
1
PCS
32
Cross head screw
M4*12
9
PCS
33
Left end cap
1
PCS
34
Cross disc head with cushion screw
M4*12
7
PCS

35
Cylinder head hexagonal screw
M6*55
3
PCS
36
Right end cap
1
PCS
37
Running board
MDF
1
PCS
38
Countersunk head hexagonal screw
M8*40
6
PCS
39
Side strip
2
PCS
40
Edgings
2
PCS
41
Running belt
1
PCS
42
Upper motor cover
ABS
1
PCS
43
Cover
2
PCS
44
Heartbeat key
ABS
2
PCS
45
Safety key
1
PCS
46
IPAD holder
ABS
1
PCS
Table of contents
Other Genki Treadmill manuals
Popular Treadmill manuals by other brands

Progressive
Progressive RUN2000 Owner's manual and safety instructions

NordicTrack
NordicTrack 4200r Treadmill user manual

Gold's Gym
Gold's Gym GGTL78609.0 user manual

NordicTrack
NordicTrack T16.0 Treadmill Manual Del Usuario

NordicTrack
NordicTrack T 14.0 Treadmill manual

AbodeFit
AbodeFit WalkSlim 810 user manual