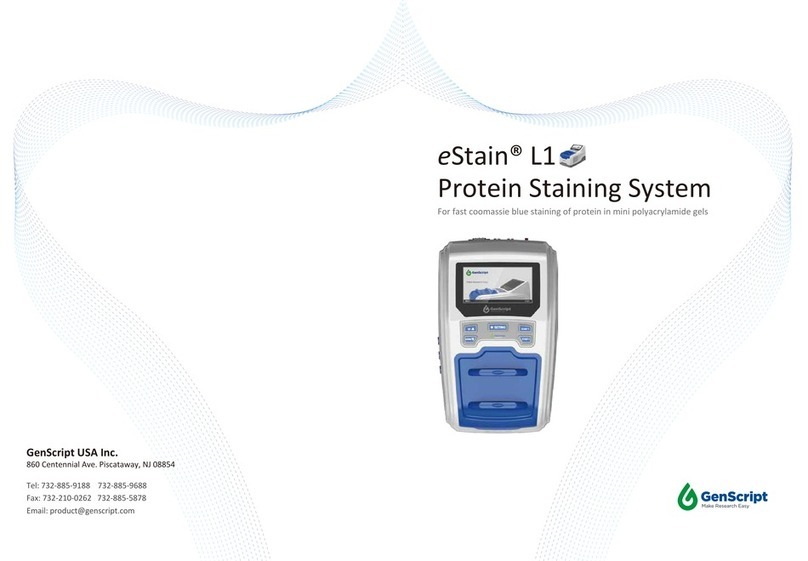
GenScript eStain L1 User manual

For fast coomassie blue staining of protein in mini polyacrylamide gels
Version 09302022
eStainTM
L1
Protein Staining System


Table of Contents
3
3
4
5
6
7
7
10
Important Notice
Warranty
1. Overview
1.1 Instrument Overview
1.2 Instrument Specifications
1.3 Ordering Information
1.4 Maintenance
2. Instructions
1
2
2.1 Instrument display and feature locations
2.2 General guidelines and Buffer preparation
2.3 Using the Pre-programmed Staining method
2.4 Advanced Instruction
2.4.1 Working Interface
2.4.2 Method Interface
2.4.3 Parameters Interface
2.4.4 Engineering Interface
3. Troubleshooting
4. Technical Support
11
14
15
16
16
17
17
20

Caution: Please empty the pipeline by pressing UP and SETTING at the same time before
moving or relocating the instrument
For best performance,
please assemble the
instrument following the
instruction listed in the
Table
eStain Gel holder (Installed inside the device)
Power Cord
Forceps
Shovel (for cutting gels)
Stainless steel Tray
eStain Small Two Pass Screw Cap
(Fit 5 L and 10 L container)
Liquid container (5 L)
Component
eStain L1C Protein Staining Kit
Cat. NO.
L00753
Cat. NO.
L00657
L00658
-
-
-
-
L00663
L00661-5
Quantity
Quantity
1
2
1
1
1
1
1
3
Step Description
Please verify that all parts listed below are included within your package
- 1 -
Important Notice
Check that the Power Cord supplied with the unit is compatible with local
socket format (see instrument specifications).
Keep the area around the device clear, especially at the back of the
instrument, to ensure adequate ventilation.
Ensure that the AC power switch at the back of the instrument is in the Off
position.
Connect the inlets and outlet pipes from the instrument with the
color-matched liquid container as instructed below:
1
2
3
4
5
6
Staining reagent container
Destaining reagent container
Waste container
Blue
Green
white or colorless
-
Turn on the power switch forthe
eStain®L1. The machine will
start a self-test, after which the
screen will display the working
interface (right). The machine is
ready for use.
eStainTM
L1 Protein
Staining Device and
accessories
Component
eStainTM
L1 Protein Staining Device
Orderable reagents for
eStainTM
L1 system
Place
eStainTM
L1 on a leveled laboratory bench.

- 2 -
For consultation and maintenance services, please contact GenScript customer
service and provide the following information. If sending the instrument to GenScript
for repair (with GenScript’s consent), please ensure proper packaging to avoid
unnecessary damage during transportation.
Instrument model:
Instrument serial number:
Order number:
Date of delivery:
Warranty
GenScript warrants that
eStainTM
L1 Protein Staining Device will be free from
defects in material and workmanship for a period of one year from the date of
purchase or an accumulative working time of 10,000 minutes (Channel A+B),
whichever comes first. If any defects occur during this warranty period, GenScript
will, at its option, repair or replace the product at no charge to you.
Notice:Damage caused by improper transportation, or any of the following actions are
excluded:
• Improper operation.
• Repair or modification done by any other party than GenScript or an
authorized agent
• Use of fittings or other spare parts supplied by any other party than
GenScript.
• Damages caused by disasters.
• Corrosion due to the use of improper solvent or sample.

- 3 -
1. Overview
1.1 Instrument
Overview
Important note
eStainTM
L1 is a highly efficient protein PAGE gel staining system, which uses
Coomassie Brilliant Blue and a patented protein staining technology developedby
Genscript.
eStainTM
L1 staining system integrates the traditional three steps of
fixing- staining-destaining into one step and can stain/destain two protein PAGE
gels simultaneously in 10 minutes or less.
eStainTM
L1 protein PAGE gel staining system consists of two parts, one is the
eStainTM
L1 protein staining instrument, and the other is the
eStainTM
L1 protein
staining kit which includes the consumables required for the staining/destaining.
After electrophoresis, transfer the PAGE gel onto the gel holder following the
instruction and insert the gel holder into the staining chamber. Simply press the
start button to start the staining process. The instrument automatically pumps
in/out the staining/destaining buffers and no additional reagents or operations are
needed.
eStainTM
L1 works with all types of precast as well as homemade mini
PAGE gels. Compared with the conventional staining methods, gels stained by
eStainTM
L1 have crisp blue bands with minimum or no background.
eStainTM
L1
also offers superior sensitivity compared to conventional methods and can detect
as low as 12.5 ng of protein.
eStain protein staining kit is a one-time-usage consumable for protein PAGE gel
staining. One
eStain kit can stain about 40 gels.
Important features of the
eStainTM
L1 Protein Staining System include:
•
Stain/destain PAGE gel (s) in 10 minutes or less with Coomassie Brilliant
Blue
•
Easy to use, convenient
•
Staining/destaining buffers are pumped in/out automatically and no other
reagents are needed
•
Much more efficient than the traditional staining method
•
Compatible with different types of mini PAGE gels

- 4 -
1.2 Instrument
Specifications
eStain Gel Holder
Weight:
Dimensions:
Electrical Parameters:
Built-in Features:
Compatibility:
Materials:
Operating Temperature:
Forceps:
Shovel:
Tray:
7.58 Kg
410 mm (L) × 270 mm (W) × 260 mm (H)
110-120 V, 220-240 V, 50/60 Hz, 10 A
Digital display, alarm, press key, light LED
Suitable for fast Coomassie blue staining of proteins in mini
polyacrylamide gels
ABS, PP, Titanium, Plasticized silicone, Stainless steel
15-40 ℃
Stainless steel
Polycarbonate
Stainless steel
Dimensions:
Compatible membrane Dimension:
Weight:
Materials:
110 mm (L) × 130 mm (W) × 14 mm (H)
100 mm x 100 mm
60 g
ABS
Avoid acetone, dimethyl sulfoxide, and acetic acid, these reagents can erode or damage the device.
eStainTM
L1 Protein Staining Device

1. Overview
- 5 -
1.3 Ordering Information
Consumables
eStain L1C Staining Kit
(Cat No. L00753)
Component
eStain L1C Staining Kit
Package
1 kit
Cat. NO.
L00753
M00706
M00707
L00660
2 L
2 L
50 pk
1
1
1
Component Size Cat. NO.Quantity
Component
Liquid Container
eStain
Small Two Pass Screw Cap (Fit 5 L and 10 L container)
eStain Gel Holder
Tube
Instrument Cover
Size
5 L
10 L
3 pk
2 pk
10 m
20 m
-
Cat. NO.
L00661-5
L00663
L00658
L00667
Instrument
Consumables List
Some reagents may crystallize at low temperature, equilibrate and ensure the reagent is fully dissolved
before use
Concentrated Staining Solution
Concentrated Destaining Solution
eStain Filter Paper
M00706 and M00707 cannot be purchased separately
L00661-10
L00662-10
L00662-20

- 6 -
1.4 Maintenance
To ensure the quality of
gel staining, we
recommend regular
maintenance of the
instrument
Component Maintenance description
Gel Holder
Channel and pipeline
Notices
1. Per 50 times use, immerse the gel holder in 75% alcohol (or
per 900 ml 75% ethanol and 100 ml concentrated cleaning
solution) for 4 hours. After that rinse the gel holder with
distilled water and dry. User can also immerse the gel holder
in 75% ethanol
after each use and rinse with distilled water
before the next use.
2. If there are brown spots on the fabric, immerse the gel holder
in 1 M NaOH for 6-12 hours and then clean with a soft brush.
After that, continue with process 1.
Per 100 gels use, it is recommended to clean the channel and
pipeline with the following procedures:
1. Press the UP and SETTING keys at the same time until the
unit beeps. The Instrument will begin to empty the pipeline.
2. Prepare 2 L cleaning solution (instructed below). *
3. Set program. Method 4 is set as a cleaning program (user
can also customize a program by setting the staining cycles
to 4, each cycles times to 5 min, and equilibrium cycle and
destain cycle to 0).
4. Insert the staining solution inlet pipe into the cleaning
solution.
5. Run the cleaning program at Channel A and Channel B.
6. After the end of cleaning program, press the UP and
SETTING at the same time until the instrument beeps. Then
instrument will begin to empty the pipeline.
7. Connect the staining solution inlet pipe back to staining
solution container and set the program to the one that is
normally used. Now the channel and pipeline cleaning is
finished.
If the instrument will be left unused over a week,
Please run the emptying program 2 times before disconnecting
the power supply. (as described in the Channel and pipline
cleaning section above). Change the covers of the staining
solution and destaining solution to sealed screw caps to
prevent the solutions from evaporating.
Relocate the instrument:
Please ensure that the pipelines are empty before moving or
relocating the instrument. Ensure that the instrument remains
level during the moving process to prevent leakage of the
solutions

- 7 -
Note: The display will change depending on the selection you have made. It will display a Working
Interface, Method Interface, Parameters Interface or Engineering Interface which can each be used to
customize settings and programs (please see details: Advanced Instruction)
Channel A lnforma
Channel B lnforma
The present
state of channel
The remainder of
the current program
Channel A Program
Channel B Program
Channel A and Gel Holder
Keypad
Channel B and Gel Holder
Display
Staining Solution inlet
Dastaining Solution inlet
Waste Outlet
Fuse
Power Input
Power Switch
2. Instruction contents
2.1 Instrument display and feature locations
eStainTM
L1 Protein Staining Device
TOP View
eStainTM
L1 Protein Staining
Device BACK View
eStainTM
L1 Protein Staining
Device Display

- 8 -
Keypad function Operation key FunctionInterface
UP Key
DOWN Key
Channel A START Key
Channel B START Key
Working Interface
Method Interface
Parameters Interface
Engineering Interface
Working Interface
Method Interface
Parameters Interface
Engineering Interface
Working Interface
Method Interface
Parameters Interface
Engineering Interface
Working Interface
Working Interface
UP
UP
Increase cycle number / Increase reaction
time
Increase initial liquid inlet time / Increase
the pipeline emptying time
DOWN
DOWN
Reduce cycle number / Reduce reaction
time
Reduce initial liquid inlet time / Reduce the
pipeline emptying time
Long press to enter Method Interface
Short press to select the highlighted
program, and return to Working Interface
Long press to enter the current
Parameters interface
Short press to move and highlight the next
variable
Long press save, exit and use the selected
program
short press to move and highlight the next
variable
Short press, Channel A starts to run
program
Long press, Channel A stops and is forced
to empty
Short press, Channel B starts to run
program
Long press, Channel B stops and is forced
to empty
eStainTM
L1 Protein
Staining Device Keypad
eStainTM
L1 Protein Staining Device Keypad as shown in the following
SETTING Key

Keypad function Operation key FunctionInterface
- 9 -
2. Instruction contents
2.1 Instrument display and feature locations
Working Interface
Working Interface
Working Interface
Working Interface
Working Interface
Working Interface
Press all together until beeps, Channel A
starts to run Destain Program
Press all together until beeps, Channel B
starts to run Destain Program
Press all together until beeps, Channel A
starts to run Equilibrium Program
Press all together until beeps, Channel B
starts to run Equilibrium Program
Press all together until beeps, display
Engineering Interface
Press all together until beeps, instrument
starts emptying pipeline

- 10 -
Preparation for eStain
L1C Staining Kit
(L00753)
eStain L1C Protein Staining Solution (Cat. No. L00753) has to be diluted before use
as instructed below.
Staining Solution
Please dilute the concentrated staining solution as below. Mix well before use.
* Isopropanol must be ACS reagent, ≥99.5%.
Destaining Solution
Please dilute the concentrated destaining solution as below. Mix well before use.
Step Total VolumeVolume
Prepare a clean 5L empty bottle.
Add 2L M00706 Concentrated Staining Solution into 5L bottle.
Add 1L Isopropanol* into step 2 bottle and mix well.
Add 2L ddH2O into step 3 bottle and mix well.
0
2L
3L
5L
1
2
3
4
Step Total VolumeVolume
Prepare a clean 5L empty bottle.
Add 1L M00707 Concentrated Destaining Solution into 5L bottle.
Add 4L ddH2O into step 2 bottle and mix well.
0
1L
5L
1
2
3
2.2 General guidelines and Buffer Preparation
Use the following recommendations for best results:
• Wear gloves at all times during the entire staining procedures to prevent
contamination of filter papers and gels.
• Always use the kits before the specified expiration date printed on the
package.
• Some solutions may crystallize at low temperatures. Please equilibrate and
ensure the reagent is fully dissolved before use.
eStainTM
L1
protein staining device related consumables can be found at 1.3

- 11 -
Staining procedure
5. Pre-wet a piece of filter paper (provided) with
distilled water and place it on top of the gel.
6. Close the gel holder.
7. Choose a Channel and insert the gel holder
into the channel as show on the right.
Note: Please ensure the fabric side of the gel hold is
facing the user before inserting it into the Channel.
2. Instruction contents
1. Add distilled water into the tray provided
2. After electrophoresis, carefully remove the pre-run gel from the gel cassette and briefly
rinse the gel with distilled water for 1 min.
Notice: If you’re using precast gels from Life Technology, please remove the upper thicker part of
the gel beneath the comb before staining to ensure the gel is in close contact with the filter paper.
3. Open the gel holder and place it on the table with the fabric side down
4. Carefully place the gel on the fabric side of the
gel holder. Ensure that the upper part of the
gel (with comb) points to the axis of the gel
holder and is as close to the axis as possible
(as shown in the picture).
The axis of
the gel holder
The part of the
gel (with comb)
2.3 Using the Pre-programmed Staining method

- 12 -
Examples
Uniformity Test
9. The instrument beeps as the program
countdown to 0.
8. Press the corresponding channel to start the
program. The timer of the corresponding
channel starts to countdown.
10. The channel stops flashing and the screen
returns to normal.
Gel: ExpressPlus PAGE Gel, 4-12%, 10 wells (Genscript, M41210)
Samples: PAGE-MASTER Protein Standard Plus, 5 μl (GenScript, MM1397-500)
Program: Pre-programmed Stain
Time: 9 min 30 s

- 13 -
Sensitivity Test Gel: ExpressPlus PAGE Gel, 4-12%, 10 wells (Genscript, M41210)
Program: Pre-programmed Stain
Time: 9 min 30 s
1. E.coli cell lysis
2. PAGE-MASTER Protein Standard Plus, 5 μl (GenScript, MM1397-500)
3. PAGE-MASTER Protein Standard Plus, 2.5 μl (GenScript, MM1397-500)
5. BSA 100 ng4. BSA 200 ng
7. BSA 25 ng6. BSA 50 ng
9. BSA 6.25 ng8. BSA 12.5 ng
10. E.coli cell lysis
2. Instruction contents
1 2 3 4 5 6 7 8 9 10
2.3 Using the Pre-programmed Staining method

Present state
of channel
The remainder
of current program
The program of
Channel A
The program of
Channel B
Information of
Channel A
Information of
Channel B
- 14 -
The instrument has four interfaces: Working interface, Method Interface,
Parameters Interface, and Engineering Interface
After turning on the power, the instrument enters the Working Interface
as illustrated below:
The meanings of
state icon
Icons DescriptionMeanings
Working
Stops
Waiting
Finished
Channel
Emptying
Waiting for
Channel to
empty the
pipeline
insufficient
Solution
and
Waiting
Pipeline
Emptying
The channel program is running
The channel program stops
The channel is waiting
The channel program finished
The channel is emptying its pipeline
The channel is waiting for another channel to
empty the pipeline
Press START after replacing the solution to
empty the channel and to continue
Emptying the solution in the pipeline
Flashing
Two alternate display
Two channel alternate
display
2.4 Advanced Instruction
2.4.1 Working
Interface

- 15 -
1. Press UP or DOWN to select the channel to highlight
2. Press SETTING until beeps to enter the program interface
3. Select the method to use or switch by pressing UP or DOWN
4. When finished, press SETTING and return to the Working Interface
To modify, press SETTING until beeps to enter the Parameters Interface
Program Function DescriptionFast Operation
Stain
Destain
Equilibrium
Method 1-4
Staining
Destaining
Equilibrium
Custom methods
Applicable to most gels
Press all together until beeps,
Channel A runs Destain Program
Press all together until beeps,
Channel B runs Destain Program
Press all together until beeps,
Channel A runs Equilibrium Program
Press all together until beeps,
Channel B runs Equilibrium Program
The setting can be stored
The List of
Programs
Current Program
Choosed Channel
eStainTM
L1 has 7 methods: Stain, Destain, Equilibrium and 4 custom
methods.
Followthe instruction below to enter the Method Interface.
2. Instruction contents
2.4 Advanced Instruction
2.4.2 Method
Interface

- 16 -
Note: Channel, pump and valves have certain lifetime. The instrument will show a reminder when the
set value is reached (see chart). Please contact the Engineer for replacement for safety
Equilibrium cycle number
Equilibrium duration
Staining cycles
Staining duration
Destaining cycles
Destaining duration
Program
channel, accumulated usage
time of the pump
accumulated usage time of the valves
solution inlet time and pipeline
emptying time.
Channel A
Channel B
Main pump
valve1
Valve2
Valve3
10000 min
10000 min
10000 min
100000 times
100000 times
100000 times
2.4.3 Parameters
Interface
The workflow of
eStainTM
L1 contains equilibrium cycles, staining cycles and
destaining cycles. In this interface, you can set the number of cycles for the
equilibrium, staining and destaining program, and the duration for each cycle
Note:
Cycle number can be set to 0-4 range and each cycle time can be set to 0-5 minutes.
1. When cycles number is highlighted, press UP or DOWN to change the number
of cycles
2. Press SETTING to highlight or switch between different variables
3. Press UP or DOWN to increase or decrease the highlighted cycle time
4. When all parameters are set, press SETTING until beeps to save the setting and
return to the Working Interface. The channel will use the program just saved
In this interface, users can check the accumulated usage time for the pump and
valves. Users can also set the solution inlet time and pipeline emptying time.
2.4.4 Engineering
Interface

Not enough equilibrium/destaining
solution in channel A. Causes and
Solutions
1. Not enough solution or the
opening of the tube is above
the solution. Please add more
corresponding solution.
2. There are twists in the tubes
which blocks solutions from
being pumped in. Please
untwist the tubes.
3. The ends of the tubes form a
seal with the bottom of the
container. Please shorten the
tube or make a slope cut at the
end of the tube.
4. Automatic adjustment due to
pressure changes. No special
actions required.
Press any key to return to the
main menu. Take the steps as
instructed.
Press to continue the
process.
If the red part in the display panel
is Channel B, press to
continue the process.
- 17 -
Problems SolutionDescription of the problem
Q1
Q2
Q3
starting up
(Q1~Q2)
During
Operation
Q3~Q6
The instrument detected there is
an incomplete program from the
latest working session. The
channels were forced to empty
for safety purposes.
Please wait for the instrument to
complete the self-check and
return to the Working Interface.
The accessory highlighted in the
blue part maybe Valve (1), Valve
(2), Valve(3), Channel A, or
Channel B
The lifetime of the part
highlighted in blue has reached
its recommended maximum
value.
Users are advised to contact
GenScript to replace the
corresponding components, so
as to avoid unnecessary losses
Return to working interface by
press any button.
3. Troubleshooting
Other manuals for eStain L1
1
Table of contents
Other GenScript Laboratory Equipment manuals
Popular Laboratory Equipment manuals by other brands

Interacoustics
Interacoustics Sera Instructions for use

Beckman Couler
Beckman Couler ALLEGRA X-12/R Service manual

VERDER
VERDER Carbolite Gero HTMA 5/28 Installation, operation and maintenance instructions

Branson
Branson Sonifier 250 user manual

OfiTE
OfiTE 175-25 instruction manual

Julabo
Julabo CORIO CD Original operating manual

WLD-TEC
WLD-TEC Fuego instruction manual

Sartorius Stedim Biotech
Sartorius Stedim Biotech Flexel Series user manual

Snibe
Snibe Maglumi 2000 manual

Bullard
Bullard Powerhouse installation manual

Qiagen
Qiagen Hybrid Capture System Multi-Specimen Tube Vortexer... user manual

Axygen
Axygen AXYPET Series instruction manual