- 8 -
Accessory Products Introduction
eBlotTM Protein Transfer System www.genscript.com
Precast Gels and Premade
Buffers
ONE-HOUR WesternTM
Detection Kits
- 7 -
eBlotTM Protein Transfer System www.genscript.com
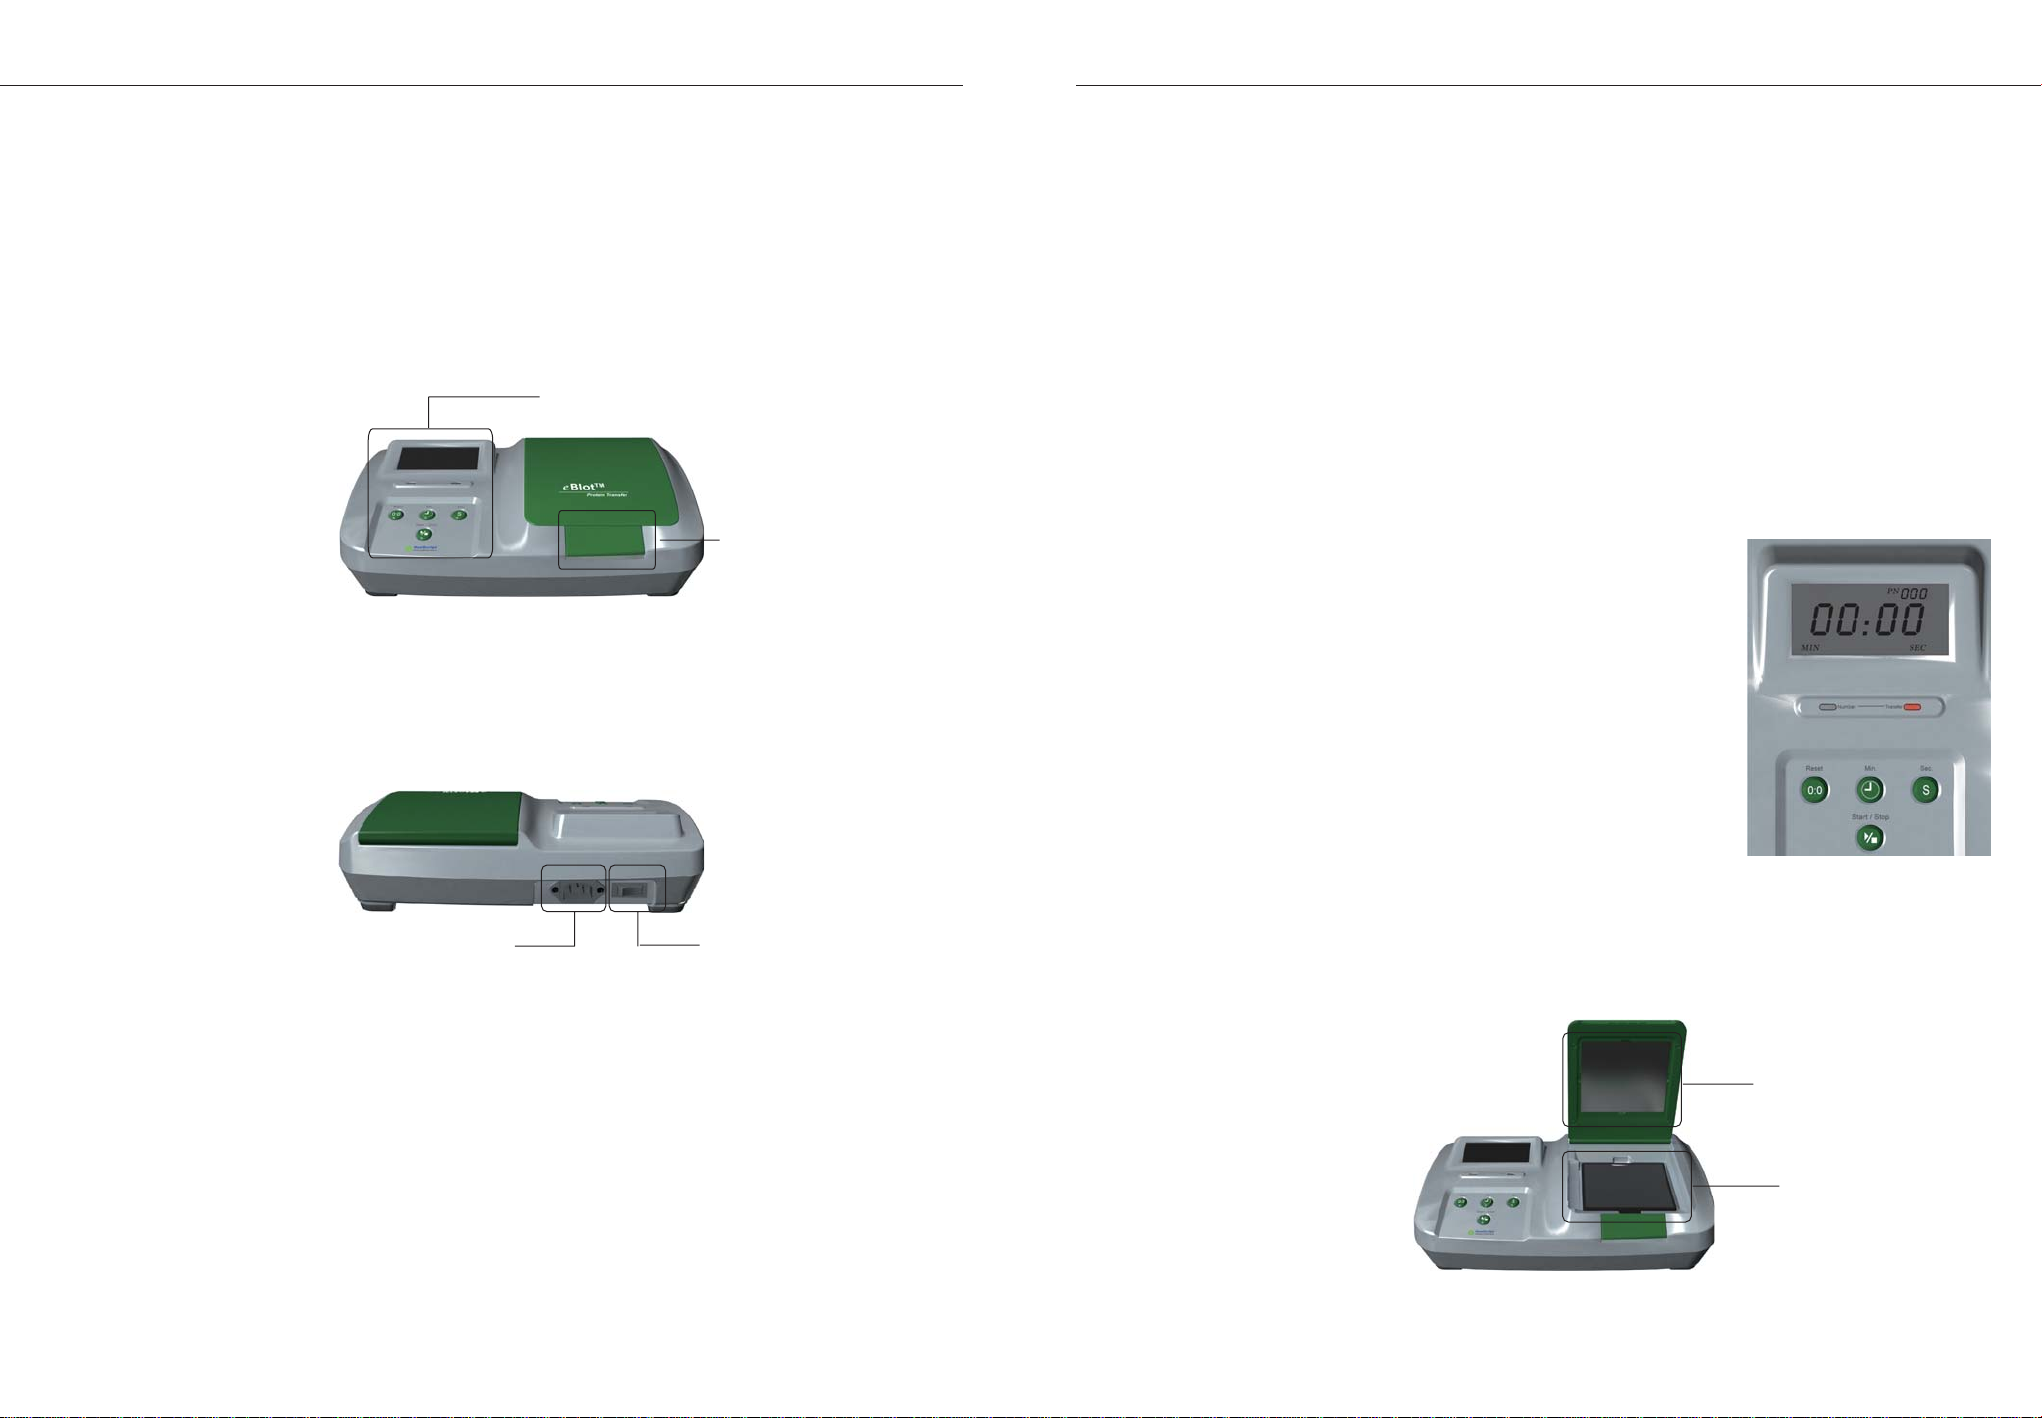
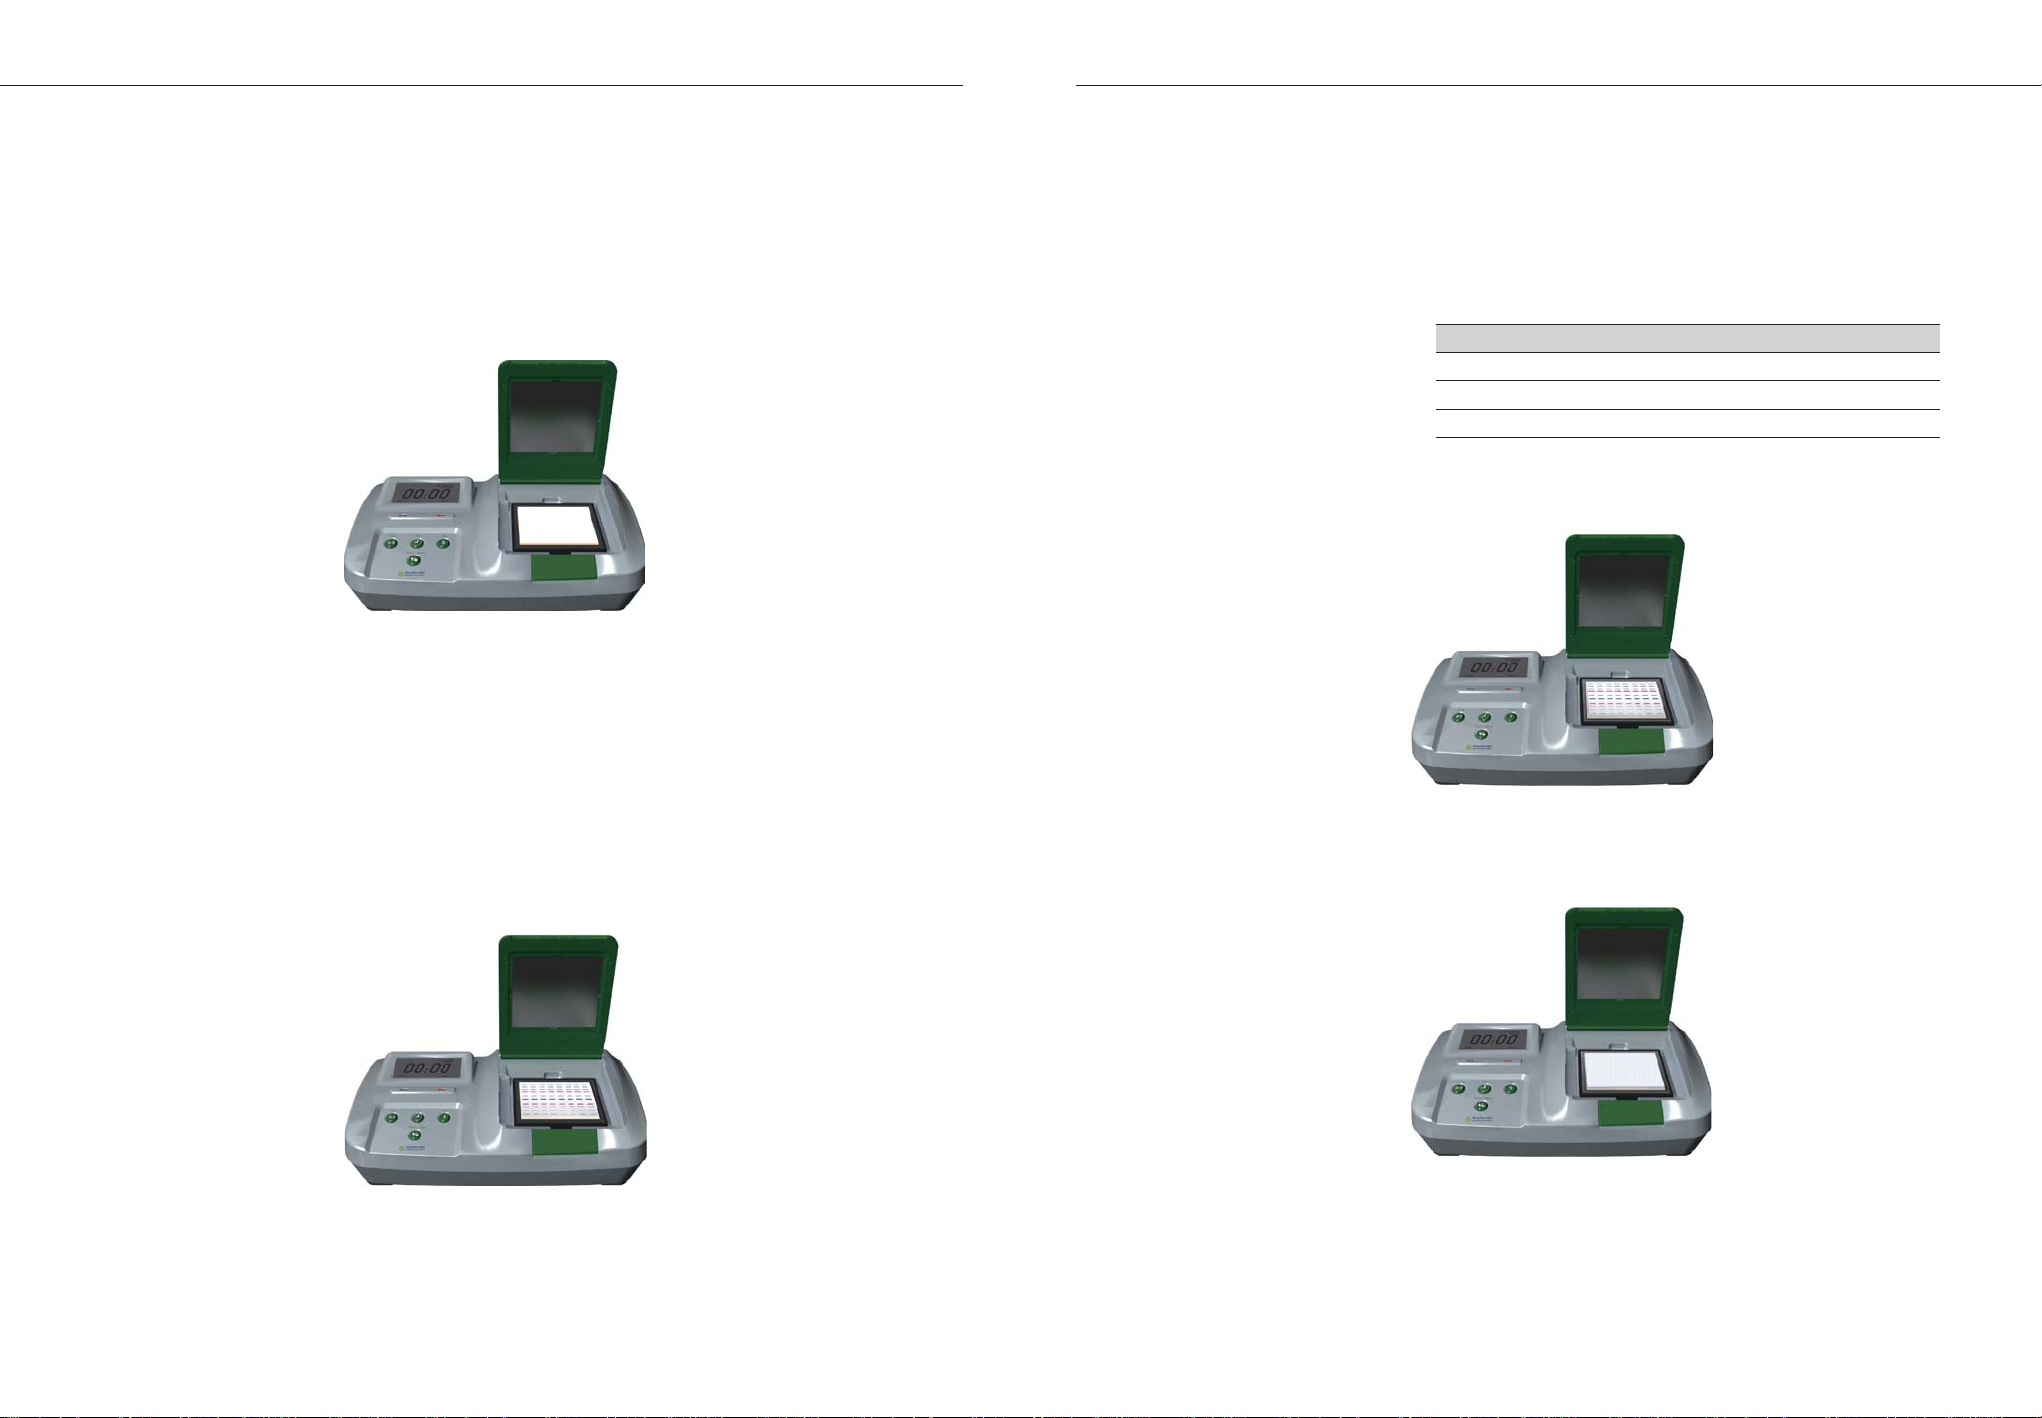
System Overview
System Components
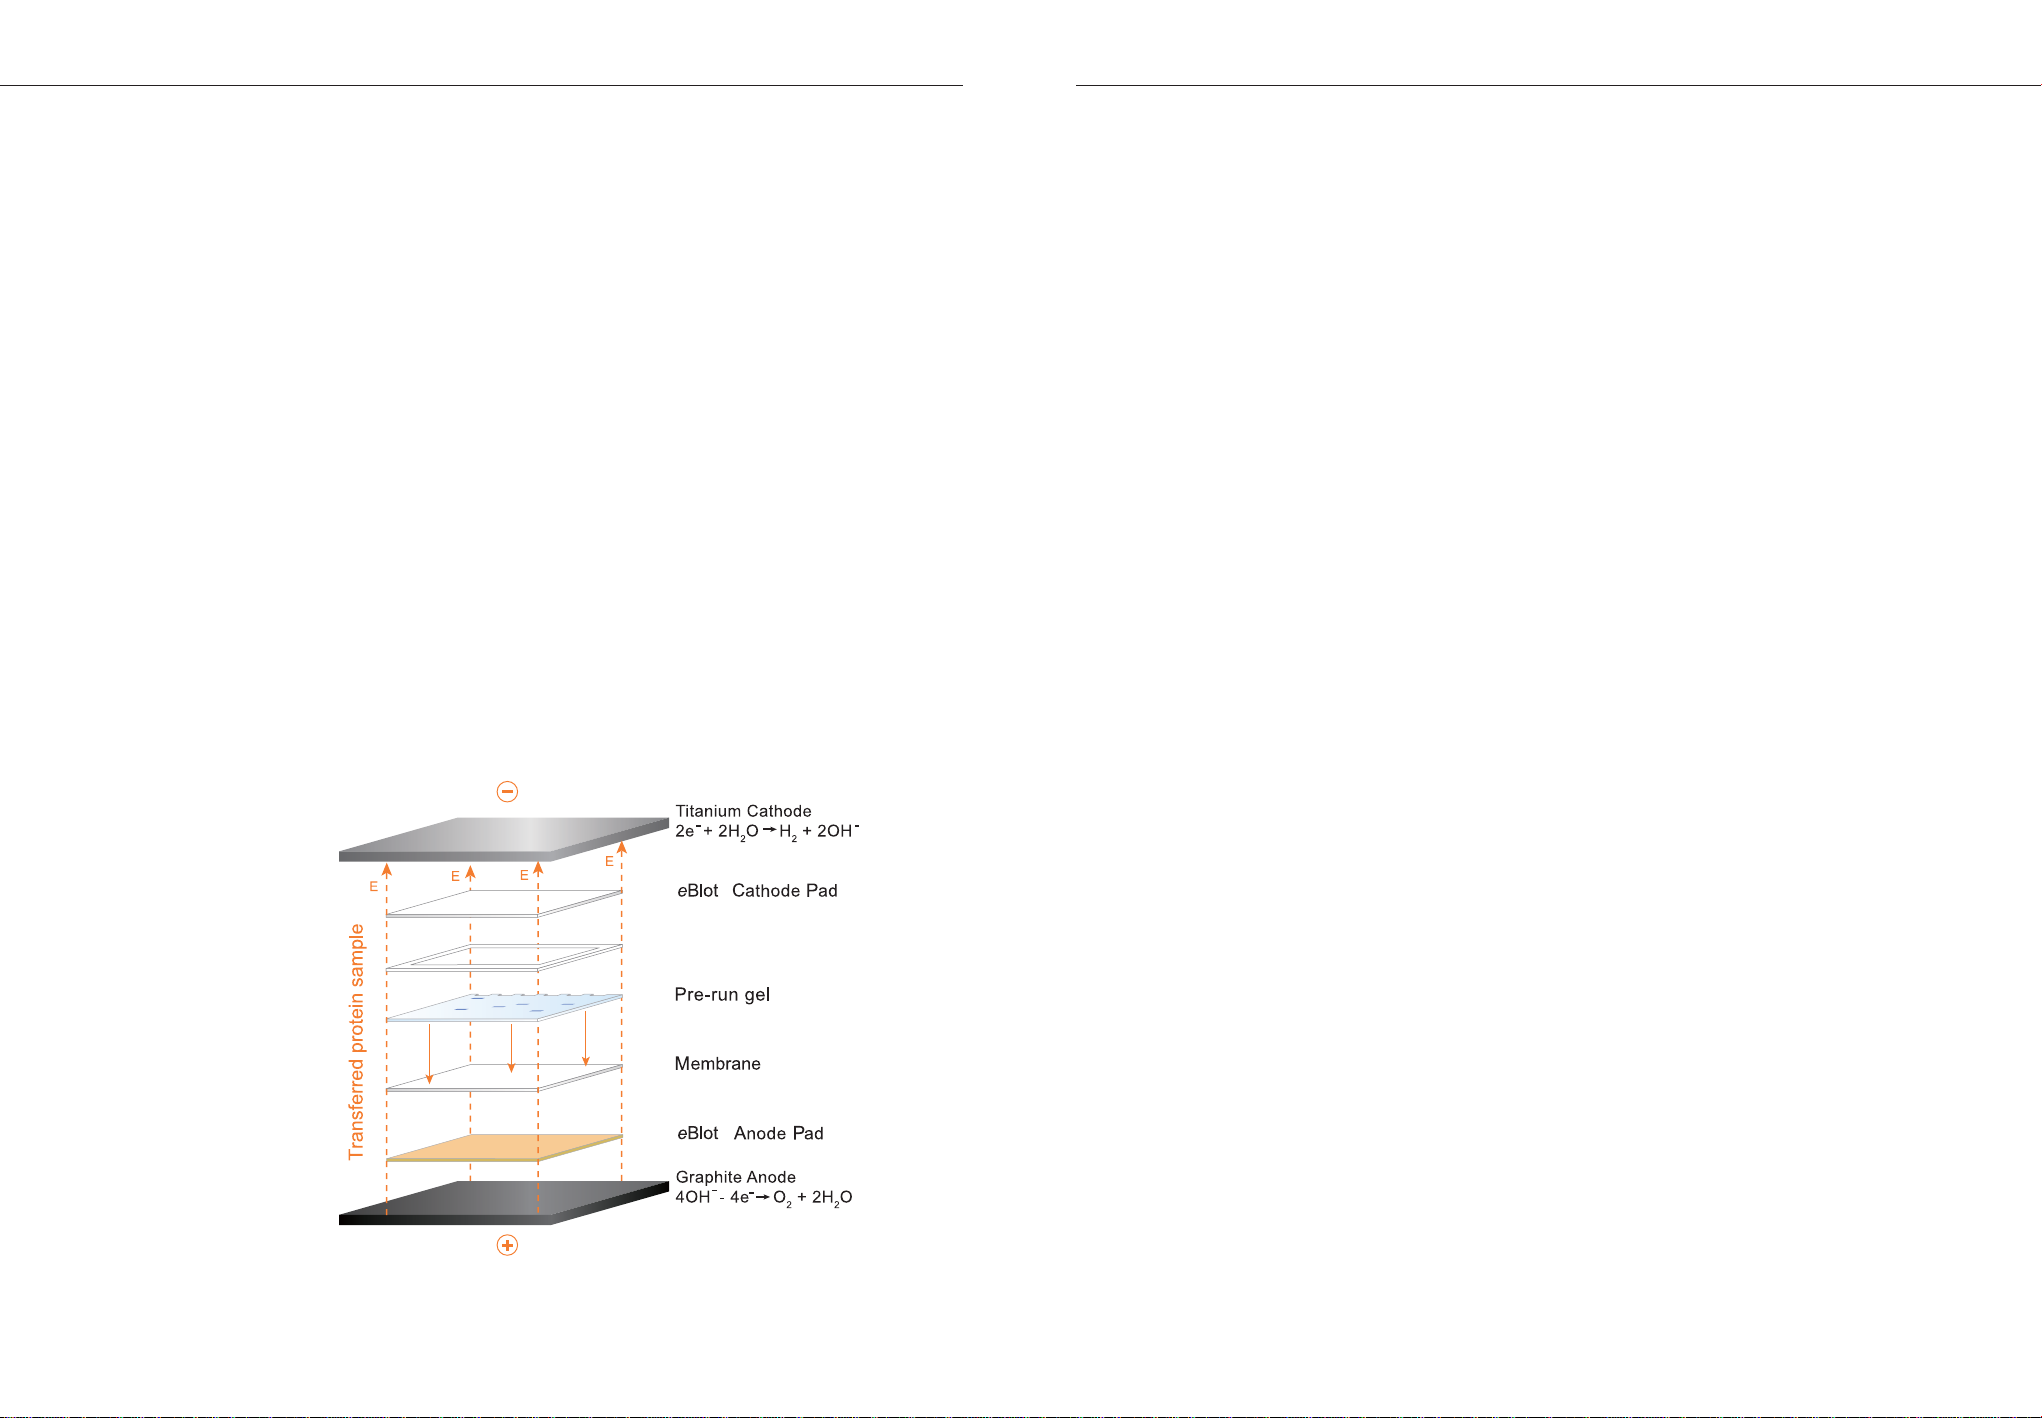
Semi-dry Western blotting is a common technique applied in protein research.
Conventional semi-dry blotting is a cumbersome process, requiring time
-consuming reagent preparation and setup, followed by an electrophoretic
transfer that could take one hour or more. GenScript’s eBlotTM Protein Transfer
System accelerates the semi-dry blotting process without sacrificing performance.
The eBlotTM Protein Transfer System, consisting of the eBlotTM Protein Transfer
Device and eBlotTM Protein Transfer Pads, enables researchers to quickly,
reliably perform electrophoretic transfer of proteins from various types of mini
polyacrylamide gels to membranes in 7 to 10 minutes without the need to
prepare additional buffers.The proteins transferred using the eBlotTM Protein
Transfer System exhibit high detection sensitivity as to proteins transferred
using other existing blotting methods.
The eBlotTM Protein Transfer System consists of:
eBlotTM Protein Transfer Device
The eBlotTM Protein Transfer Device is a self-contained electroblotting unit
with a power supply built-in that allows for fast transfer of proteins.
eBlotTM Protein Transfer Pads
As the consumable part of eBlotTM Protein Transfer System, the eBlotTM
Protein Transfer Pads are the mixed assortment of eBlotTM Protein Transfer
Pad, nitrocellulose or PVDF membranes, Equilibration Buffer and Gel
Window. Each pack of eBlotTM Protein Transfer Pad contains an 1×eBlotTM
Cathode Pad and an 1×eBlotTM Anode Pad presoaked with proprietary
cathode buffer and anode buffer respectively, allowing for rapid, convenient
and reliable protein blotting without the need to prepare additional buffers.
The ONE-HOUR WesternTM Detection Kits used for Western blotting analysis
are available from GenScript. Ordering information is provided below. For
more information, visit www.genscript.com or call Technical Support.
The precast ExpressTM PAGE Gels as well as premade buffers and buffer
powders are available from GenScript. For details, contact Technical
Support or visit www.genscript.com.
Product
ONE-HOUR Western
TM
Basic Kit (Rabbit)
ONE-HOUR Western
TM
Basic Kit (Mouse)
ONE-HOUR Western
TM
Basic Kit (Goat)
ONE-HOUR Western
TM
Standard Kit (Rabbit)
ONE-HOUR Western
TM
Standard Kit (Mouse)
ONE-HOUR Western
TM
Standard Kit (Goat)
ONE-HOUR Western
TM
Standard Kit with TMB (Rabbit)
ONE-HOUR Western
TM
Standard Kit with TMB (Mouse)
ONE-HOUR Western
TM
Standard Kit with TMB (Goat)
ONE-HOUR Western
TM
Advanced Kit (Rabbit)
ONE-HOUR Western
TM
AdvancedKit (Mouse)
ONE-HOUR Western
TM
Advanced Kit (Goat)
ONE-HOUR IP-Western Kit (Rabbit)
ONE-HOUR IP-Western Kit (Mouse)
ONE-HOUR IP-Western Kit (Goat)
ONE-HOUR Western
TM
Fluorescent Kit
ONE-HOUR Western
TM
Multiplex Fluorescent Kit
Cat. No.
L00204
L00205
L00399
L00204C
L00205C
L00228
L00204T
L00205T
L00228T
L00241
L00242
L00243
L00231
L00232
L00233
L00397
L00398
Quantity
1 Kit (5 Assays)
1 Kit (5 Assays)
1 Kit (5 Assays)
1 Kit (5 Assays)
1 Kit (5 Assays)
1 Kit (5 Assays)
1 Kit (5 Assays)
1 Kit (5 Assays)
1 Kit (5 Assays)
1 Kit (5 Assays)
1 Kit (5 Assays)
1 Kit (5 Assays)
1 Kit (5 Assays)
1 Kit (5 Assays)
1 kit (5 Assays)
1 Kit (10 Assays)
1 Kit (10 Assays)