GENUINE E221 V1 370F User manual

Genuine Scuff Plate
Instruction manual
Accessory number: E221 V1 370F
Applicable car model : MAZDA CX-7
To mounting shops:
After mounting, give this manual to the customer.
To customers:
Keep this manual after mounting because it is needed in
case of other products mounted.
When this product is given to others, give this manual too.
3-1 Sinchi, Fuchu-cho Aki-gun Hiroshima Japan KME0080380
Thank you for buying genuine products.
Before mounting, read this instruction manual.
Read this instruction manual , understand the contents and mount correctly to
use products with safe and best condition.
Warning and Caution marks in this manual are safety precautions for mounting
and handling. Observe strictly.
Warning : Observe warning or it will cause a risk of life and serious injuries.
Caution : Observe caution or it will cause accidents, injuries and car damage.
Do not do the ways of mounting and using which are not written in this manual.
Do not mount remodeling this product.
Mounting, removing, and disposing should be done at MAZDA dealers to keep safety of
work and trust.
In case of having unclear points about mounting and handling of this product, Ask for the
dealer where the product is sold.
If there is something wrong because of not observing the precautions in this manual,
MAZDA motor corporation / MAZDA dealers take no responsibility.
Be careful not to lose or damage removed parts and be careful to prevent foreign material
such as grease.
Prepare for a protector or a mat not to damage or stain the car.

−2−
Scuff plate rearScuff plate front
№
①
①
1Scuff plate front RH
②
②
③④
1Scuff plate front LH
③
⑤
1Scuff plate rear RH
部品名 数量 部品番号
④ 1Scuff plate rear LH
⑤ 1Instruction manual
1.Completion drawing
2.Components
・Check for all components properly.Check for stain, flaw and damage.
Caution

−3−
3.Check points before mounting
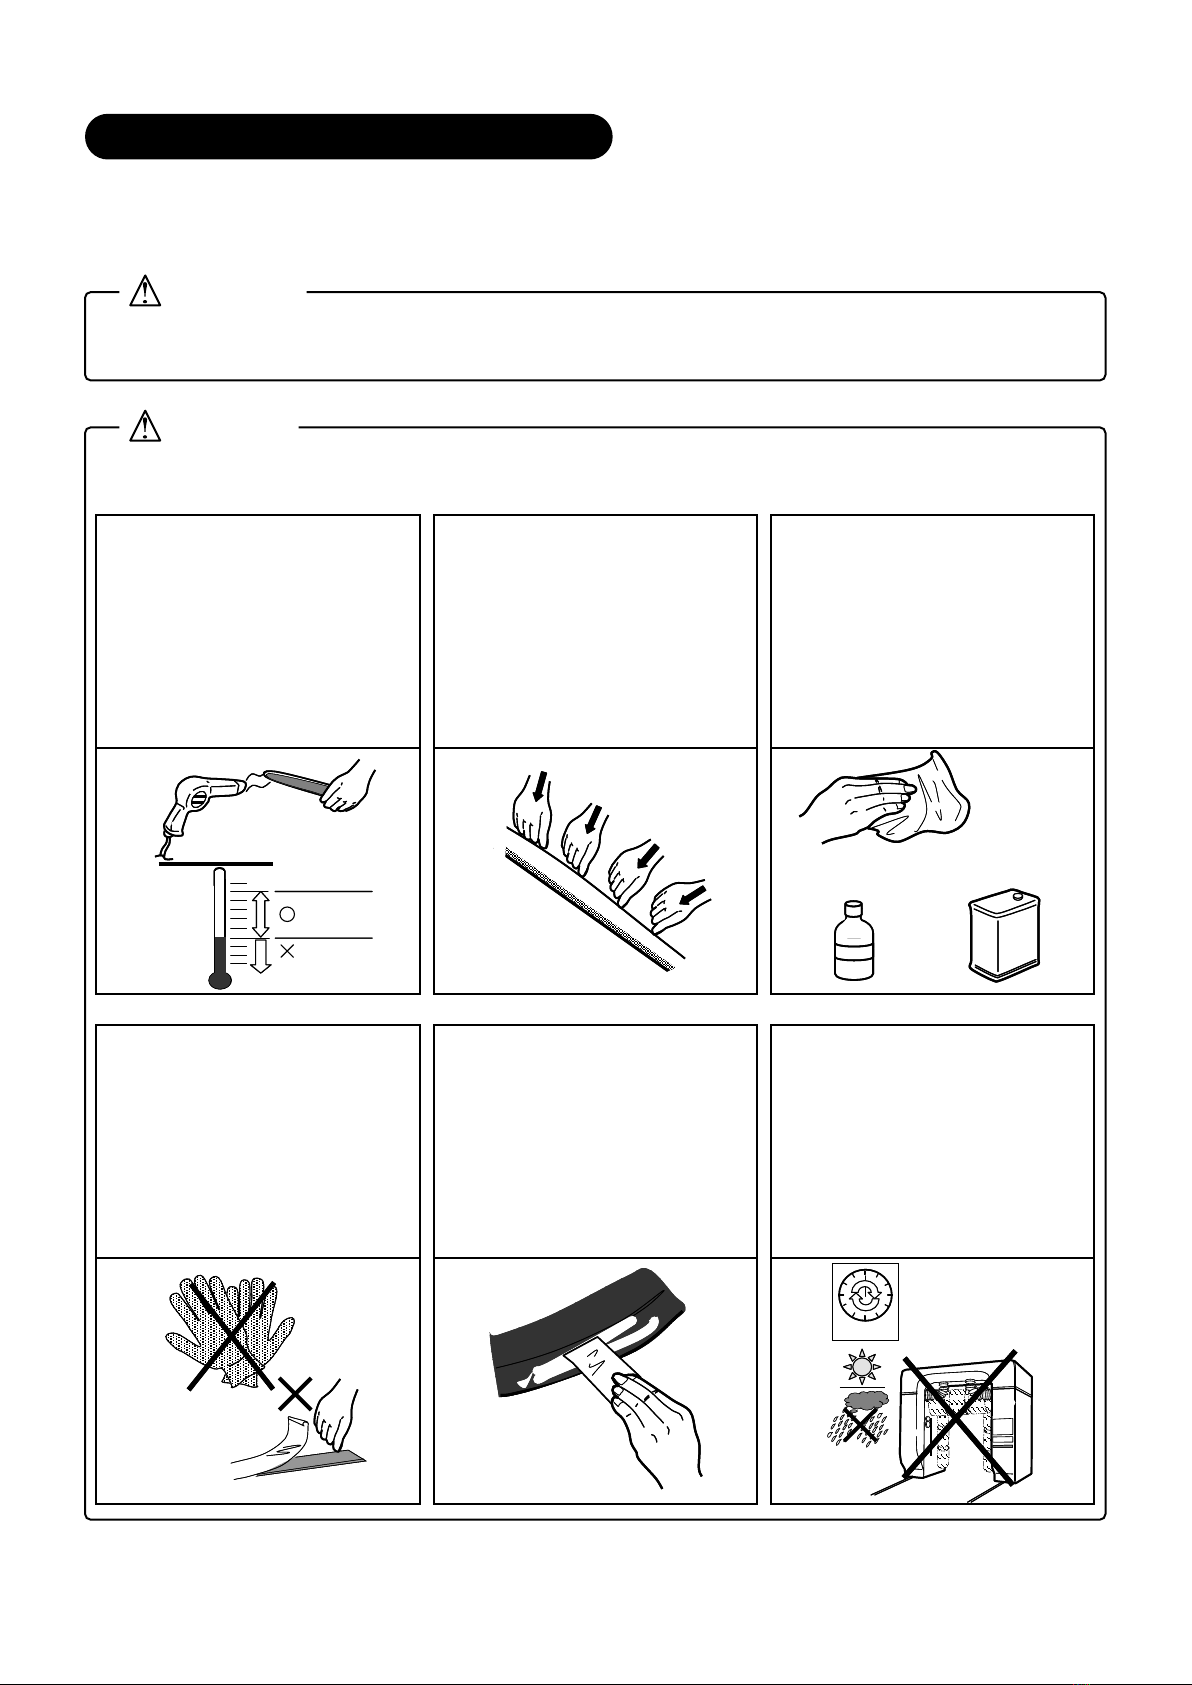
How to deal with a double‑stick tape
Used tools ☆Waste cloth ☆Masking tape ☆Primer☆Dryer or Infrared lamp
☆Cleaner [IPA (Isopropyl alcohol) or White gasoline or Hexane]
1. Atmosphere temperature 2.Stick firmly 3.Cleaning the adherend
4. Keep the tape away off
the stain. 6. Treatment after sticking
35℃(95°F)
15℃(59°F)
IPA
(Isopropyl alcohol) White gasoline
24 Hours
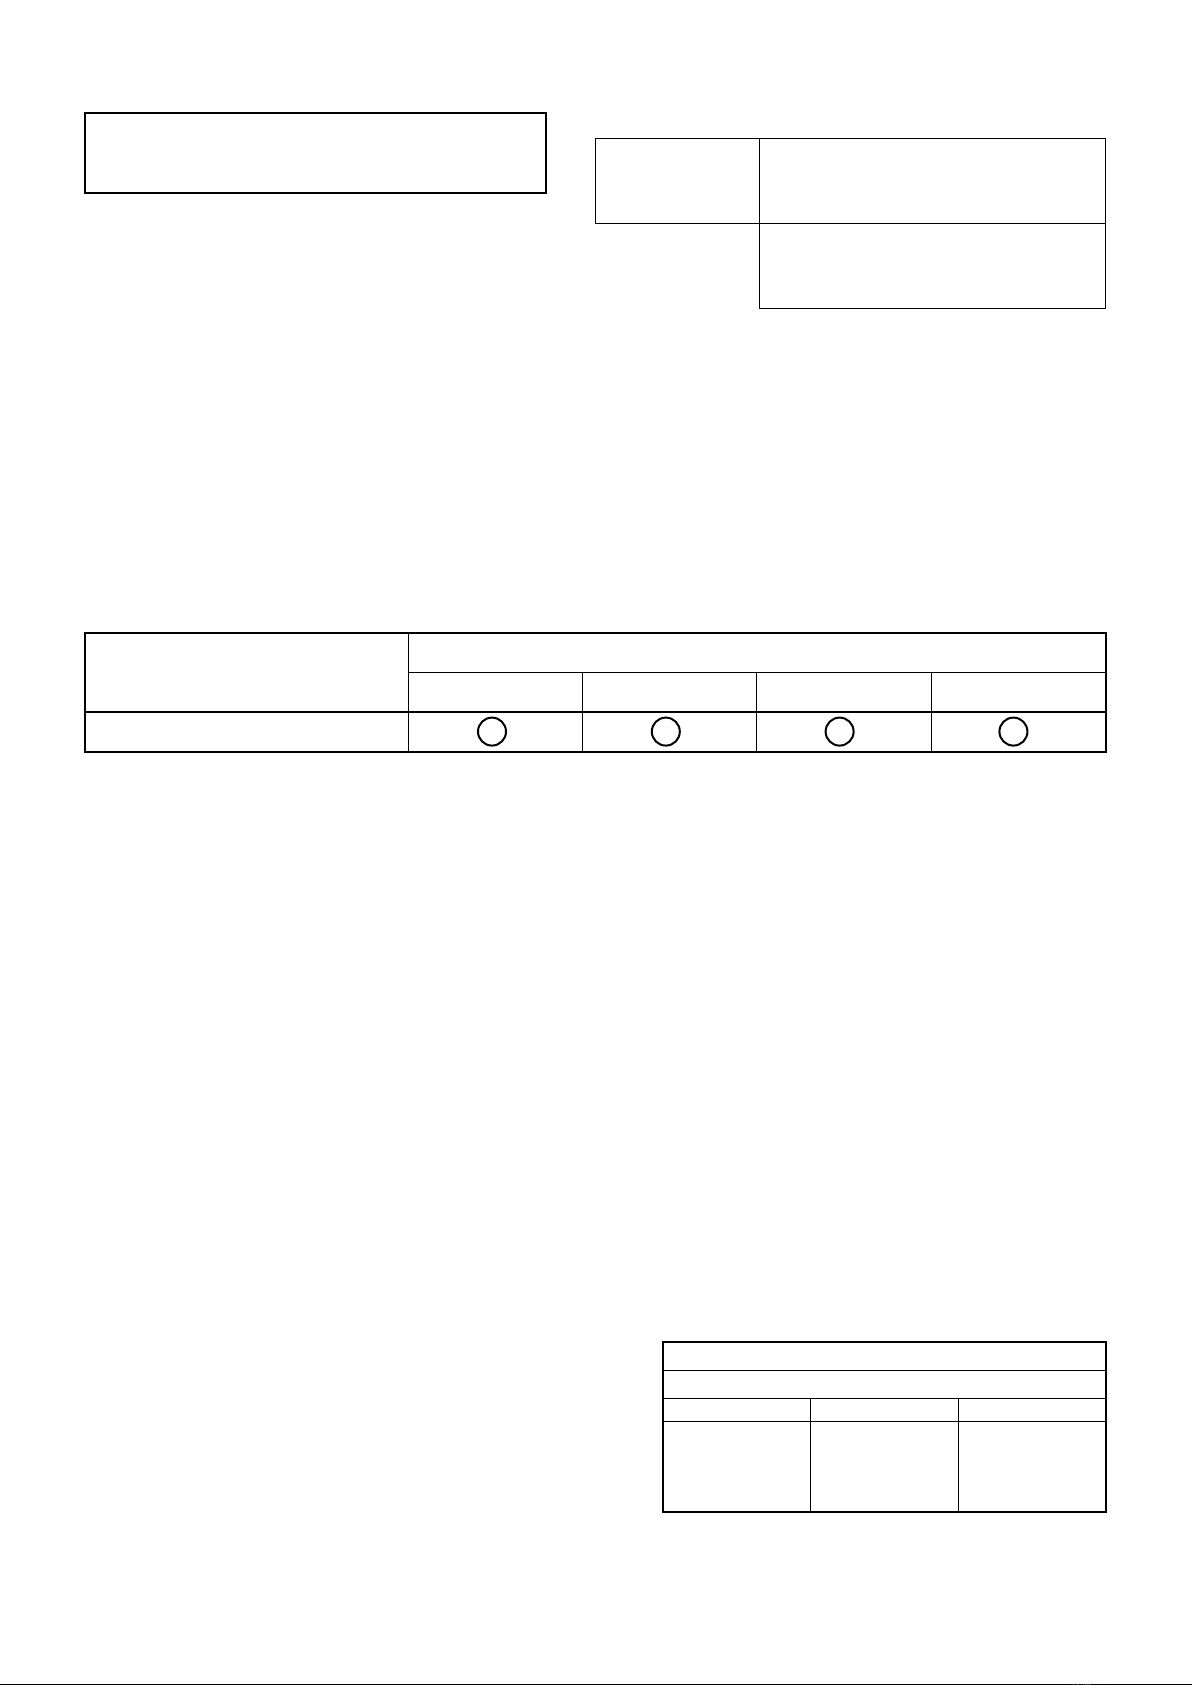
*An adherent indicates a door or a bumper,
parts are supplies materials.
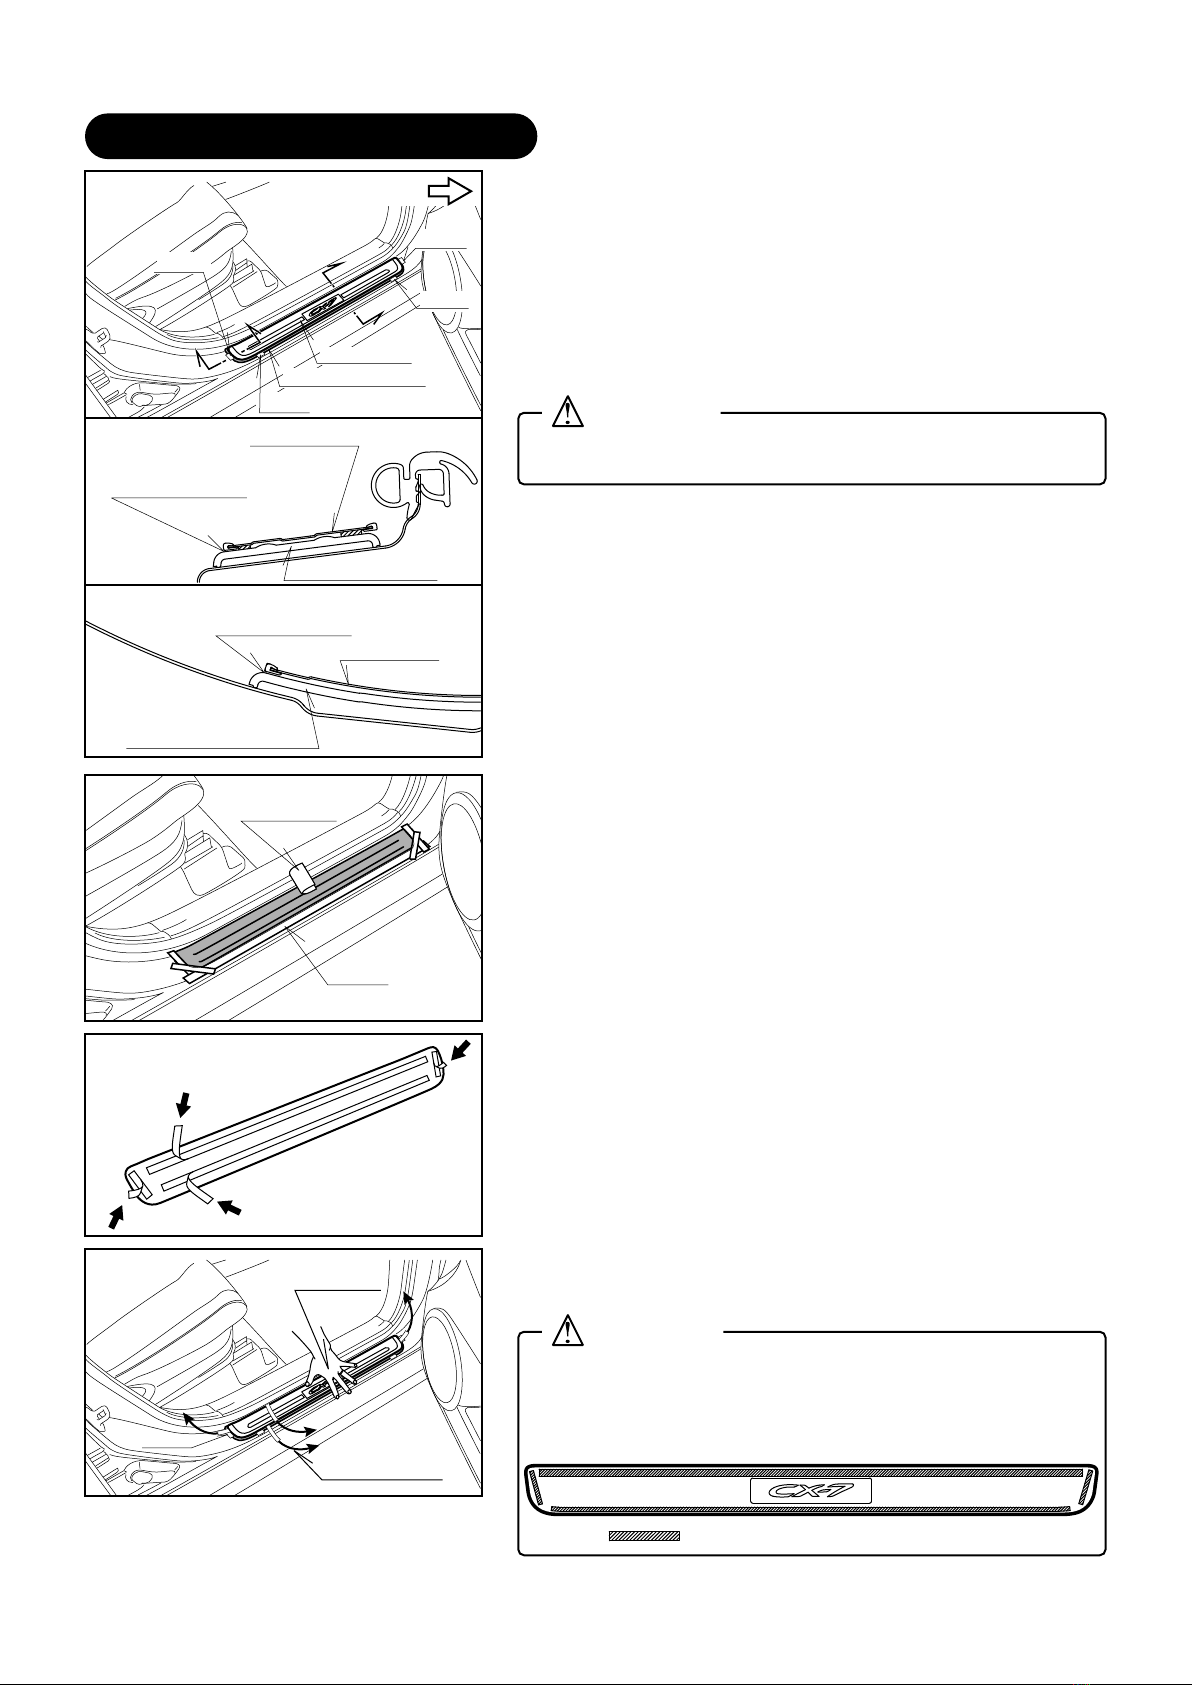
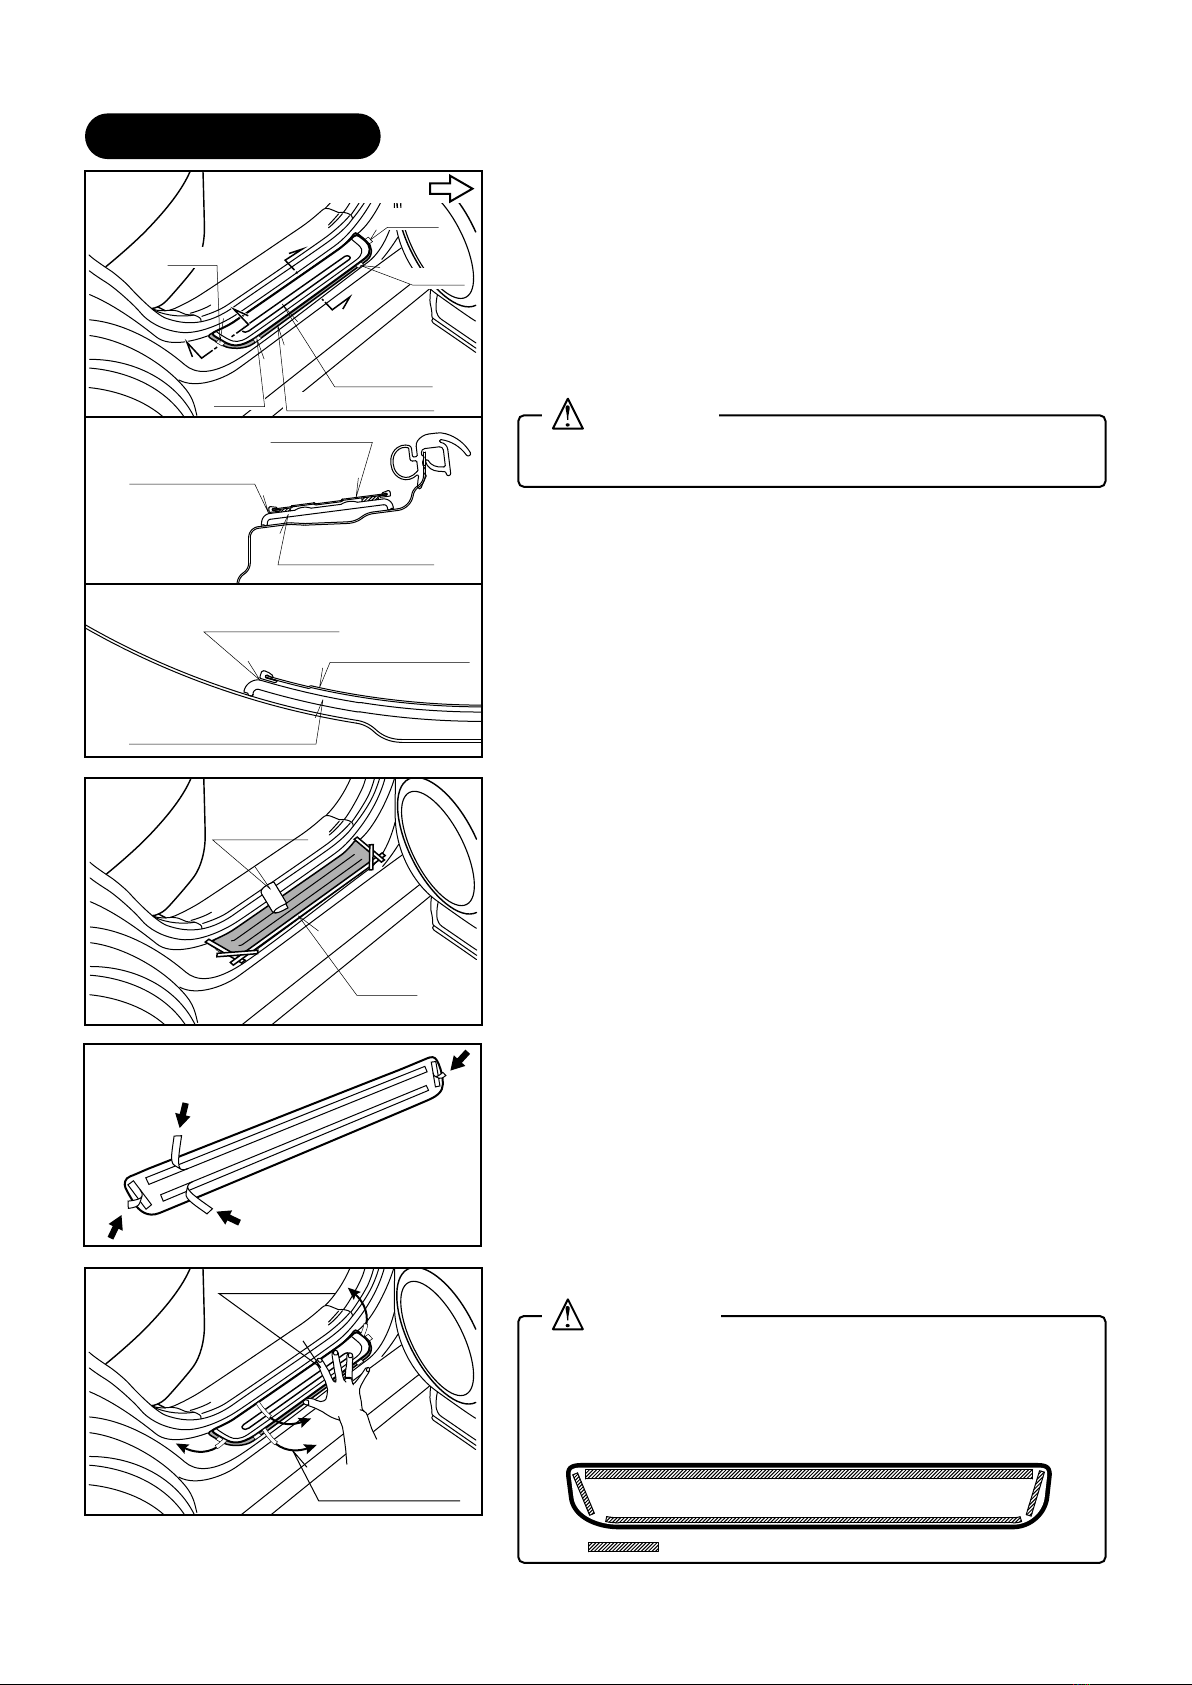
・Park the car on a flat place, pull the handbrake well, set the stopper and start mounting.
If the car moves, it causes injuries.
Warning
Caution
Stickiness of an adhesive which keeps
off under 15℃is influenced by a resin
softness.Low temperature (under 15
℃) decrease firm stickiness and
lowers the sticking power.
When mounting it under the
atmosphere temperature, 15℃, warm
the a adherend and parts with a dryer
or an infrared lamp firmly.
Do not touch the adherend surface by
hand while working, or oil of grimy
hands sticks on the adherend.That
may cause lower the sticking power of
the double-stick tape.
In addition, do not stick any hair or
stain of the work gloves while working
with work gloves on.
To keep the adhered surface of the
double-stick tape fully, press the
adhered surface to the adherend
evenly.
Bond and press firmly the curved
edge of the double-stick tape or the
curbed adherend.
The sticking power is unstable within
24 hours after sticking.
Do not drive and wash the car within
24 hours and do not leave the car in
the rain.
Be sure not to stick again after
bonding and pressing the product.
That may cause lower the sticking
power extremely.
As for resin (material, uncoated)
adherend or glass, the surface treatment
with a primer is necessary to gain
adhesive power to be well attached onto
adherend surfaces. For a primer
treatment, perform a masking process no
to grease any other adherend surface of
the double-stick tape.
A stain, dust, or oil is subject to stick
on the double-side tape.That may
cause lower the sticking power of the
double-side tape.
Before sticking the tape, be sure to
clean the adherend surface with IPA
(isopropyl alcohol) or a white gasoline.
5. Surface treatment
with a primer

−4−
Set the scuff plate to the marking position.
After checking the mounting position, pull out the end of
the release paper removed at 3 and bond it. Bond and press
the scuff plate not to be damaged.
4.
Bond and
press
Pull out the
release paper
Attach the tape at the R end of the resin scuff plate as
the figure shows.
Grease the primer inside of the tape.
Remove the attached tape at R end. Be careful not to fall
off the mark stuck at 1.
2.
Remove the double‑stick tape on the backside of the scuff
plate.
Do not remove the whole release paper. Remain a little bit
of the end of the release paper.
3.
(Attaching procedure of the double‑stick tape
See the cautions as above)
Remove and remain a little bit
of the end of the release paper
Grease a
primer
Tape
Lastly remove the masking tape and then the work is finished.
Attaching position of the double‑stick tape
Caution
・
If putting pressure on other position which is not
attached the double‑stick tape, deformation of the product
may cause.Bond and press the position that the double‑stick
tape is attached as the figure shows.
4.Mounting Procedures (Front)
Open the front door. Clean the resin scuff plate (at the
set position of the scuff plate) with IPA or a white
gasoline, and dry it.
Mark the scuff plate set potion.
Setup the scuff plate on the resin scuff plate.
Set it to the position subject to examples of the A‑A
cross‑section for horizontal direction against the car,
the B‑B cross‑section for cross direction.
When the position is set, mark it with a tape.
Mount the scuff plate at the front.
The figure shows for RH. Perform LH in the same way.
1.
Front side
Tape Tape
Tape
Tape
Set the edge to
the R end.
Set the edge
to the R end.
BB
A
BB
A
Resin scuff plate
Scuff plate
A‑A cross‑section
B‑B cross‑section
Caution
・Failure to do so, the product may cross over the door.
Set it to the right position as the figure shows.
Resin scuff plate
Scuff plate
Resin scuff plate
Scuff plate

−5−
Set the scuff plate to the marking position.
After checking the mounting position, pull out the end of
the release paper removed at 3 and bond it. Bond and press
the scuff plate not to be damaged.
When the position is set, mark it with a tape.
4.
Attach the tape at the R end of the resin scuff plate as
the figure shows.
Grease the primer inside of the masking tape. Do not stick
out the primer from the tape.
Remove the masking tape. Be careful not to fall off the
mark stuck at 1.
2.
Remove the double‑stick tape on the backside of the scuff
plate.
Do not remove the whole release paper at the outer circle
at this point.
Remain a little bit of the end of the release paper as the
figure shows.
3.
(Attaching procedure of the double‑stick tape
See the cautions at P.3)
Bond and press
Pull out the
release paper
Grease
a primer
Tape
Remove and remain a little bit
of the end of the release paper
Attaching position of the double‑stick tape
Caution
・If putting pressure on other position which is not
attached the double‑stick tape, deformation of the
product may cause.
Bond and press the position that the double‑stick tape
is attached as the figure shows.
5.取付要領(リア)
Open the rear door. Clean the resin scuff plate (at the
set position of the scuff plate) with IPA or a white
gasoline, and dry it.
Mark the scuff plate set potion.
Setup the scuff plate on the resin scuff plate.
Set it to the position subject to examples of the C‑C
cross‑section for horizontal direction against the car,
the D‑D cross‑section for cross direction.
Mount the scuff plate at the rear.
The figure shows for RH. Perform LH in the same way.
1.
Front side
Resin scuff plate
Resin scuff plate
Resin scuff plate
Scuff plate
Scuff plate
Scuff plate
Tape
Tape
Tape
Tape
When the position is set, mark it with a tape.
Set the edge
to the R end.
Set the edge
to the R end.
DD
DD
C‑C cross‑section
D‑D cross‑section
Caution
・Failure to do so, the product may cross over the door.
Set it to the right position as the figure shows.
CC
CC

Built on checking sheet MAZDA CX‑7 Scuff plate
E221 V1 370F
Checking points after work.
・Check mounted parts as following points.
Checking parts
Scuff plate
Checking matters ( ○ mark)
Gap Condition Flaw Stain Remaining tape
Mounting Tightening
Joint
Scuff plate built on checking
Date
Car No.
Preservation period of built on checking sheet : 12 months
Responsible person Chief Person in charge
Table of contents
Other GENUINE Automobile Accessories manuals
Popular Automobile Accessories manuals by other brands

Yakima
Yakima StickUp installation instructions

dirna Bergstrom
dirna Bergstrom bycool DINAMIC 1.2 Mounting instructions

Acrosser Technology
Acrosser Technology AIV-HM76V1FLCi3 user manual

Xpresskit
Xpresskit OptimaX series installation guide

Boyo
Boyo VTW73M user manual

Verus Engineering
Verus Engineering Dive Plane Install manual