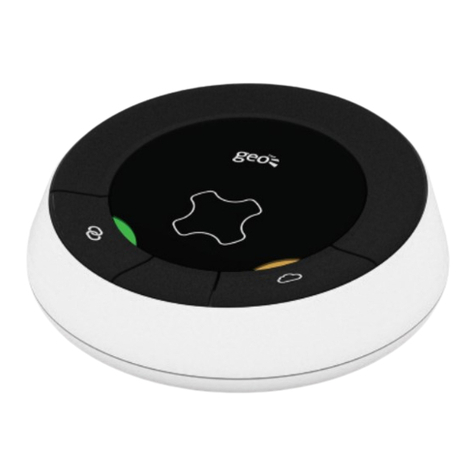
Geo Cosy User manual

Hot Water Switch
installation instructions
Please pass to your installer

2
Important safety notice
jThe following safety regulations must be observed at all times.
Failure to observe precautions could result in severe injury or death.
This product must only be installed by a competent person.
hIt is important to observe some simple safety precautions when installing and using this
product. Read this important information before continuing. Safe operation of the unit is
impaired if not used or installed in a manner specied by the manufacturer.
rIsolate mains supply before removing the switch cover. When connected to a live mains
supply, all internal parts are at mains potential. No user serviceable parts inside.
jFor use in dry, indoor environments only.
nThis product is double insulated.
lAt the end of its life please recycle at a suitable recycling facility. Do not place in general
waste.
mThese units have been tested and conform to all relevant European safety and regulatory
standards where applicable but not limited to the following: EN 60730-2-9:2010 with EN
60730-1:2000 + A1:2004 + A12:2003 + A13:2004 + A14:2005 + A15:2007 + A16:2007 +
A2:2008 (Excluding clauses: H.23, H.26 and Annex ZF); EN 60950-1:2005 (Second edition),
Am 1:2009; EN 300-220-1; EN 301-489-1.

3
Compatibility
Cosy is a mains powered wireless controlled thermostat that controls the heating and hot water.
This guide refers to the installation of the switch that is used to control the hot water.
Compatibility with hot water systems:
•Cosy only controls hot water on systems with a hot water tank. (i.e. not a combi boiler)
•This version of Cosy can be used with a Y plan hot water system which uses a three-way valve
or an S plan system using individual valves. (see diagrams)
MID-POSITION
VALVE
PUMP
FLOW
Y-PLAN SYSTEM
RETURN
BOILER
ZONE
VALVE ZONE
VALVE
PUMP
FLOW
S-PLAN SYSTEM
RETURN
BOILER

4
Step 1 – congure a switch for hot water
The Cosy switch can be used to control hot water. Using the jumpers inside the switch, it should be
congured as below.
S-Plan Hot Water
This is the default setting.
T1A
T1B
T1C
T2A
T2B
T2C
Y-Plan Hot Water
Remove T2C jumper.
T1A
T1B
T1C
T2A
T2B
T2C

5
The hot water switch can be used to control the hot water in either a Y-Plan or S-Plan conguration.
The switch must be installed into the existing system in series with the hot water demand. In the
case of Y-plan the switch should be congured as shown (page 4) as a changeover switch to ensure
the three way valve operates correctly.
T1 and T2 are both normally open switches. When the unit is congured as a Y-Plan switch, the
system will recognise this and make T2 a normally closed switch.
Y-Plan Conguration
HTG ON
12:34
T2 T1
Boiler Existing controls
H/W on
Cosy switch
Existing hot
water valves
and tank
thermostat
H/W on
Constant live
H/W off
Constant live
250Vac supply
hCAUTION!
MAINS VOLTAGE
T1A
T1B
T1C
T2A
T2B
T2C
T1
T2
MAINS L
N
Step 2 – install the switch for hot water

6
S-Plan Conguration
HTG ON
12:34
T1
Boiler Existing controls Cosy switch
Existing hot
water valves
and tank
thermostat
hCAUTION!
MAINS VOLTAGE
T1A
T1B
T1C
T2A
T2B
T2C
T1
T2
MAINS L
N
H/W to
existing
System
H/W from
existing
System
250Vac supply
Step 2 – install the switch for hot water continued

7
Step 3 – testing & handover
Please tick each box to show it has been carried out successfully
Testing Hot Water
Set the existing hot water controls to always on
Whilst the central heating is in Slumber, switch the hot water on from the Cosy app
Turn up the system hot water temp setting (normally on tank thermostat) - check boiler res
On the Cosy display switch hot water o - check boiler stops
Return the system hot water setting to the original temperature

8
Cosy hot water is now installed and live
Installer:
I have completed the install and tested the
system as detailed in these instructions.
Signature:
Name: .................................................................
Company:...........................................................
Contact details:.................................................
Customer:
I am happy that the installer has completed
the task as requested.
Signature:
Name:.................................................................
Date:....../....../......

9
Troubleshooting
Is Cosy compatible with this hot water system?
Cosy support hot water in either Y-Plan or S-Plan congurations where a hot water tank is
present.
The LED on the switch is red - what is the problem?
The LED on the switch is red when:
• The rmware on the switch is being updated by the hub. This is normally the case when the
switch is rst installed.
• The switch has lost pairing with the hub. The switch comes pre-paired, which can occur if
the middle button has been held for many seconds. Try and turn the switch power o and
then on.
How do I re-pair the system?
The Cosy system comes pre-paired. To re-pair the system:
• On the display, press and hold the bottom button (O) and then press the reset button on
the base of the unit. Keep holding the Obutton until the display shows UNPAIRED DISPLAY.
• Press and hold the link button (f) on the hub for 3 seconds - LED will be ashing amber.
• On the display, press the top button (d) - the display will show the temperature (or
SWITCH ERROR if the switch is also unpaired).
• Press and hold middle button on the switch for 5 seconds - link LED (f) will ash red.
• Press and hold the link button (f) on the hub again for 3 seconds - LED will be amber.
• Once all the systems have properly paired, all link LEDs should be green and the display will
be showing the current temperature.

10
Troubleshooting continued
The display shows LINK ERROR
This happens when the switch or the display cannot communicate with the hub. This message
might be shown when the system is rst installed or during updates and will disappear once all
components have been updated.
• Move the display closer to the hub.
• Check that there is nothing that could interfere with the wireless signal, such as large metal
objects (e.g. atscreen TV) or another wireless device.
The link icons (f) on the hub and switch are amber
This means that the wireless connection between the hub and the switch or the hub and the
display has been lost. Try moving the display closer to the hub, moving the hub closer to the
switch or rotate the hub to try and improve the signal to both the switch and the display.

11
Manufacturer
This product was designed and manufactured by:
Green Energy Options Ltd.,
3 St. Mary’s Court,
Hardwick,
Cambridge,
CB23 7QS,
UK
Technical support
For technical queries relating to the installation, please call 0845 643 5118.
Lines are open (UK hours):
•8.30am to 6.00pm, Monday to Friday, excluding public holidays
•8:30am to 12:30pm on Saturday mornings
$Further advice can be found on the knowledge base:
http://www.comehometocosy.com/support

comehometocosy.com
Cosy
COSY-Z-INS-101_1
Other manuals for Cosy
3
Table of contents
Other Geo Switch manuals
Popular Switch manuals by other brands

Pakedge Device & Software
Pakedge Device & Software SW16-8PB user manual

Ubiquiti
Ubiquiti UniFi USW-Pro-24-POE quick start guide

Dometic
Dometic MT NU 3600 Installation and operating manual

Subject Link
Subject Link RPT-2018G-2F-X4 Series user manual

Cisco
Cisco SFS 3504 Hardware installation guide

Viessmann
Viessmann 5550 Operation manual

Parker
Parker 118368-01 installation guide

Sensio
Sensio Link-S SE781990 quick start guide

Siemens
Siemens pointek CLS 100 Compact operating instructions

HotBrick
HotBrick Firewall VPN SoHo 401 VPN Quick install guide

Extron electronics
Extron electronics RGB 580xi AAP Series Specifications

Raritan
Raritan PARAGON II Series quick guide