manuals.online logo
Brands
  1. Home
  2. •
  3. Brands
  4. •
  5. German pool
  6. •
  7. Cooktop
  8. •
  9. German pool GID-RS32T User manual

German pool GID-RS32T User manual

2-in-1 Free Standing Steam Oven GPU-6SSL
GPNB-6SSL
Please read these instructions and warranty information carefully
before use and keep them handy for future reference.
Online Warranty Registration
USER MANUAL
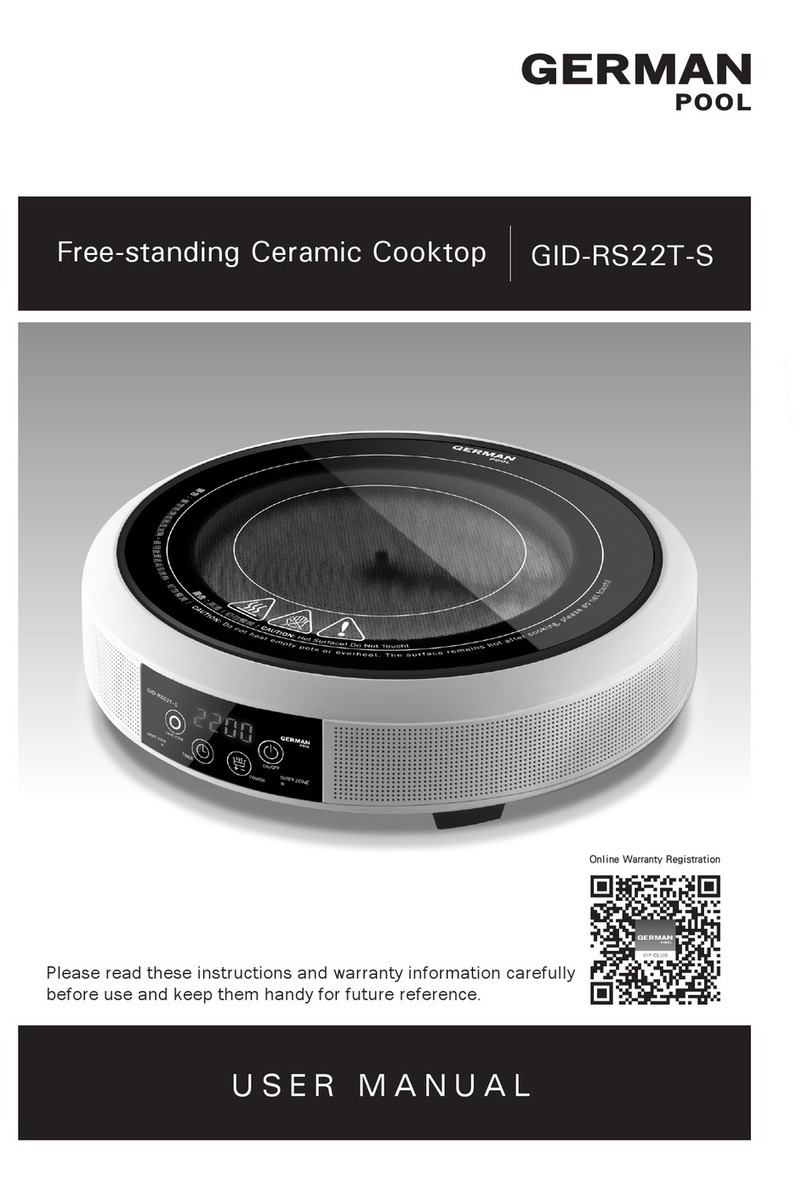
GID-RS32TFree-standing Ceramic Cooktop
P.2 P.3
Contents
Safety Instructions 4
Product Structure 6
Operating Instructions 7
Cleaning & Maintenance 11
Error Code 12
Technical Specication 13
Warranty Terms & Conditions 23
請即進行保用登記﹗
有關保用條款細則,請看本說明書最後一頁。
Please register your warranty information now!
For Warranty Terms & Conditions,
please refer to the last page of this user manual.
P.4 P.5
Safety Instructions
1. Before use, please remove the plastic bag, poly foam, leaflet, etc.
to ensure that the body is clean, the bottom vent is not blocked,
and the power cord or plug is not damaged. If the furnace surface
is damaged, please contact our Customer Service & Repair Center
for replacement to avoid danger.
2. When using the product, it is necessary to use sockets with vari-
ous technical indicators meeting the standards.
3. Please use a pot of suitable size. The diameter of the pot shall not
exceed 225mm and the pot shall be placed at the center of the
furnace surface to avoid touching the silicon rubber ring.
4. Please make sure the furnace and bottom of pot are dry and
clean before heating. Do not heat an empty or dry pan. During
cooking, do not leave for a long time.
5. The product must be used in a place that children cannot touch.
6. The product shall be placed on the level bench, avoid being used
on the blanket, tablecloth or film to prevent the bottom vent from
being blocked.
7. The product will heat up quickly after opening. Please do not
touch or move the product during the working process of the
product and during " " flashing. The furnace surface is still
hot during heating and after shutdown. Please keep away from
combustibles such as paper, rags, curtains or cleaners to avoid
fire!
8. Do not heat paper, film, plastic and other inflammables on the fur-
nace surface to avoid fire!
Safety Instructions
9. Do not directly heat food on the furnace surface, especially the
food with much oil and grease is easy to cause fire when heated!
10. After shutdown, the fan is in normal operation when it is working
for heat dissipation. Please do not pull out the plug immediately.
Please do not touch or clean the furnace surface during the dis-
play screen flashing " " .
P.6 P.7
HEAT ZONETIMER
GID-RS32T
警告:高溫!切勿觸摸!
WARNING:Hot Sur face! Do NotTouch!
警
告
:
嚴
禁
乾
燒
。
使
用
後
面
板
尚
有
餘
熱
,
切
勿
觸
摸
!
W
A
R
N
I
N
G
:
N
o
d
r
y
b
u
r
n
i
n
g
.
T
h
e
s
u
r
f
a
c
e
r
e
m
a
i
n
s
h
o
t
a
f
t
e
r
c
o
o
k
i
n
g
,
p
l
e
a
s
e
d
o
n
o
t
t
o
u
c
h
!
2
3
4
1
3
2
4
1
HEAT ZONETIMER
GID-RS32T
警告:高溫!切勿觸摸!
WARNING:Hot Sur face! Do NotTouch!
警
告
:
嚴
禁
乾
燒
。
使
用
後
面
板
尚
有
餘
熱
,
切
勿
觸
摸
!
W
A
R
N
I
N
G
:
N
o
d
r
y
b
u
r
n
i
n
g
.
T
h
e
s
u
r
f
a
c
e
r
e
m
a
i
n
s
h
o
t
a
f
t
e
r
c
o
o
k
i
n
g
,
p
l
e
a
s
e
d
o
n
o
t
t
o
u
c
h
!
2
3
4
1
3
2
4
1
Body
Control Panel
1. Ceramic Glass Panel
2. Control Panel
3. Power Cord
4. Silicon rubber ring
1. Turn Knob
2. TIMER
3. ON/OFF + LED Display
4. HEAT ZONE
Product Structure
Utensil Selection
1. There are not too many restrictions on the selection of pots and pans. All pots and
pans made of high temperature resistant materials can be used.
2. It is recommended to use smooth flat-bottomed pots and pans with size not more
than 225mm in diameter, and placed in the center of the furnace surface for
heating, to avoid touching the silicon rubber ring.
3. Before heating, please make sure that the bottom of the pot is dry and clean, and
there is no residue to avoid affecting the effectiveness of the product.
Quick Start Guide
Operating Instructions
STANDBY MODE
After plugging in the power source, buzzer will beep once, LED Display will show “- -“,
and the product will enter into STANDBY MODE.
to enter into COOKING MODE
In STANDBY MODE, press LED Display and then press , product will enter
into DEFAULT COOKING MODE of DOUBLE RING, and LED Display will show “P9”
(2,200W).
BUTTON FUNCTION
TIMER Set COUNTDOWN TIMER
HEAT ZONE Select DOUBLE RING, INNER RING ONLY
or OUTER RING ONLY Mode
ON/OFF + LED
Display
Control ON/OFF and display selected
mode
Turn Knob Adjust power level
P.8 P.9
Operating Instructions Operating Instructions
Select HEAT ZONE
When product is in COOKING MODE, press to select among DOUBLE RING,
INNER RING ONLY and OUTER RING ONLY modes.
HEAT ZONE DEFAULT POWER LEVEL INDICATOR LIGHT
DISPLAY
DOUBLE RING P9 Light On
INNER RING ONLY A6 Light Off
OUTER RING ONLY F6 Light On
Adjust POWER LEVEL
When product is in COOKING MODE, rotate TURN KNOB to adjust desired
POWER OUTPUT.
HEAT ZONE POWER OUTPUT LEVEL CORRESPONDING
POWER
DOUBLE RING P1-P2-P3-P4-P5-P6-P7-
P8-P9
300W, 600W, 900W,
1200W, 1400W, 1600W,
1800W, 2000W, 2200W
INNER RING ONLY A1-A2-A3-A4-A5-A6 100W, 300W, 500W,
700W, 900W, 1100W
OUTER RING ONLY F1-F2-F3-F4-F5-F6 100W, 300W, 500W,
700W, 900W, 1100W
P.10 P.11
Operating Instructions
Set TIMER COUNTDOWN
When product is in COOKING MODE, press to set TIMER COUNTDOWN. Rotate
TURN KNOB clockwise one click to add 1 minute to Timer (maximum 99
min., minimum 1 min.) 3 seconds after Timer is set, product will automatically start
countdown, Timer and Powel Level will display in alternation. To cancel Timer, press
for 3 seconds.
WARNING:
• When product is in use, DO NOT allow children near
product to avoid danger!
• When product is in use, DO NOT touch or move product to
avoid getting burnt!
• DO NOT unplug the product immediately after use,
because the built-in fan system is still dissipating residual
heat!
• Even after product is turned off, the product is still hot to
the touch. DO NOT touch the product for at least 1 hour,
to allow product to cool down completely. DO NOT touch,
move or clean the product until it has completely cooled
down!
• UNDER NO CIRCUMSTANCES should food be cooked
directly on the cooktop surface. This product should be
used with appropriate cookware at all times!
• DO NOT place any ammable items on top or around the
vicinity of the product, such as paper, lm, plastic, cloth,
curtain etc. to avoid re hazard!
Cleaning & Maintenance
1. Before cleaning and maintenance, make sure product has been unplugged and
the furnace surface has cooled to normal temperature!
2. Do not wash product directly with water or immerse product in water.
3. If there is cooking residue on the furnace surface, gently scrape off with a
ceramic hob scraper at a 45 degree angle, and then wipe clean with a soft wet
cloth. It can also be wiped with neutral detergent. Do not use corrosive liquid or
steel scrubber for cleaning to avoid damaging the surface of the ceramic glass
panel.
P.12 P.13
ERROR
CODE ANALYSIS SOLUTION
E1 Voltage lower than 90V
Check power supply rst; if
problem remains, contact
Customer Service and
Repair Centre
E2 Voltage higher than 280V
Check power supply rst; if
problem remains, contact
Customer Service and
Repair Centre
E3 Sensor detects temperature higher than
750°F
Contact Customer Service
and Repair Centre
E4
1. Temperature sensor is short circuited
or open circuited during operation
2. Heating plate is burnt out and product
cannot heat up
3. Fuse is cut
4. PCB power board malfunction
Contact Customer Service
and Repair Centre
E5 PCB power board overheated
Restart the product; if
problem remains, contact
Customer Service and
Repair Centre
E6 Sensor detects short circuit or open circuit Contact Customer Service
and Repair Centre
E7 Fan malfunction Contact Customer Service
and Repair Centre
ATTENTION:
If problem remains unsolved, please contact Customer Service and Repair Centre.
Disassembly and repair of this product must only be conducted by qualied
professionals.
Error Code
• All information in this manual is for reference only. If there are any errors or
omissions, the specications produced by the factory shall prevail. Specication is
subjected to change without prior notice.
• If there is any inconsistency or ambiguity between the English version and the
Chinese version of this manual, the Chinese version shall prevail.
• Refer to www.germanpool.com for the most up-to-date version of the Operating
Instructions.
Model GID-RS32T
Rated Voltage/Frequency 220V / 50Hz - 60Hz
Rated Power 2,200W
No. of hob 1
Product Dimensions (H)80 (Φ)280 mm
Net Weight Approx. 1.9kg
Gross Weight Approx. 2.2kg
Power Range 100W - 2,200W
Technical Specication
P.14 P.15
目錄
安全注意事項 15
產品結構 16
使用說明 17
清潔及維護 20
故障檢修 21
技術規格 22
保用條款 23
1. 使用前請把膠袋、發泡膠、宣傳單等易燃物移開,確保機身乾
淨,底部通風口沒有堵塞,電源線或插頭沒有破損。如發現爐面
破損請聯繫客戶服務及維修中心更換,以免造成危險。
2. 使用產品時,必須使用各項技術指標符合標準的插座。
3. 請使用合適尺寸的鍋具。鍋具的直徑不能超過225mm,並把鍋具
置於爐面圓心處進行加熱,避免觸及矽膠圈。
4. 加熱之前請確保鍋底和爐面乾淨。切勿空鍋或者乾鍋進行加熱。
烹飪期間需有人看管,請勿長時間離開。
5. 產品必須放在小孩不能觸碰的地方使用。
6. 產品應放置在水平工作枱使用,避免在地攤、枱布、薄膜上使
用,以防底部通風口被堵塞。
7. 產品開啟後會快速升溫。在產品工作過程中以及關機後閃爍
「」期間,請勿觸碰或移動產品!加熱期間和關機之後爐面
依然高溫,請遠離易燃物,如紙張、抹布、窗簾或清潔劑,以免
發生火災!
8. 請勿在爐面上加熱紙張、薄膜、塑膠等易燃物,以免發生火災!
9. 請勿在爐面直接加熱食物,尤其是多油、多油脂的食物受熱容易
引起火災!
10. 停機之後,內置風扇仍在工作散熱屬正常操作,請勿馬上拔出插
頭。顯示屏閃爍「 」期間請勿觸碰或清潔爐面。
安全注意事項
P.16 P.17
機身
控制面板
1. 黑晶面板
2. 控制面板
3. 電源插頭
4. 矽膠圈
1. 旋鈕
2. 定時鍵
3. LED顯示屏 + 開關鍵
4. 加熱區域轉換鍵
產品結構
HEAT ZONETIMER
GID-RS32T
警告:高溫!切勿觸摸!
WARNING:Hot Sur face! Do NotTouch!
警
告
:
嚴
禁
乾
燒
。
使
用
後
面
板
尚
有
餘
熱
,
切
勿
觸
摸
!
W
A
R
N
I
N
G
:
N
o
d
r
y
b
u
r
n
i
n
g
.
T
h
e
s
u
r
f
a
c
e
r
e
m
a
i
n
s
h
o
t
a
f
t
e
r
c
o
o
k
i
n
g
,
p
l
e
a
s
e
d
o
n
o
t
t
o
u
c
h
!
2
3
4
1
3
2
4
1
HEAT ZONETIMER
GID-RS32T
警告:高溫!切勿觸摸!
WARNING:Hot Sur face! Do NotTouch!
警
告
:
嚴
禁
乾
燒
。
使
用
後
面
板
尚
有
餘
熱
,
切
勿
觸
摸
!
W
A
R
N
I
N
G
:
N
o
d
r
y
b
u
r
n
i
n
g
.
T
h
e
s
u
r
f
a
c
e
r
e
m
a
i
n
s
h
o
t
a
f
t
e
r
c
o
o
k
i
n
g
,
p
l
e
a
s
e
d
o
n
o
t
t
o
u
c
h
!
2
3
4
1
3
2
4
1
鍋具選擇
1. 對於鍋具的選擇沒有過多限制,採用耐高溫材料的鍋具都可使用。
2. 建議使用平底且底部光滑的鍋具,直徑不可超過225mm並置於爐面圓心進行加
熱,避免觸及矽膠圈。
3. 加熱前請確保鍋具底部乾淨,沒有殘留物以免影響使用。
按鍵說明
接通電源
插上電源後,蜂鳴器發出聲響一聲,LED顯示屏顯示「- -」,產品進入
「待機狀態」。
進入烹調狀態
待機狀態下按LED顯示屏 再按 ,進入「烹調狀態」,預設雙環加熱
模式,LED顯示屏顯示「P9」(2,200W)。
使用說明
按鍵 功能
定時鍵 設定定時關機
加熱模式轉換鍵 調整雙環、單內環、單外環加熱模式
LED顯示屏 + 開
關鍵 開機/關機
旋鈕 調整加熱檔位
P.18 P.19
選擇加熱模式
「烹調狀態」下按 可轉換雙環、單內環及單外環加熱模式。
選擇加熱檔位
「烹調狀態」下旋轉旋鈕 可調整加熱檔位。
使用說明
加熱模式 預設加熱檔位 指示燈
雙環模式 P9 常亮
單內環模式 A6 熄滅
單外環模式 F6 常亮
加熱模式 加熱檔位 對應功率
雙環模式 P1-P2-P3-P4-P5-P6-P7-
P8-P9
300W, 600W, 900W,
1200W, 1400W, 1600W,
1800W, 2000W, 2200W
單內環模式 A1-A2-A3-A4-A5-A6 100W, 300W, 500W,
700W, 900W, 1100W
單外環模式 F1-F2-F3-F4-F5-F6 100W, 300W, 500W,
700W, 900W, 1100W
使用說明
設定定時關機
「烹調狀態」下按 設定定時關機,順時鐘方向旋轉旋鈕 一下增加1分
鐘(最長可設定99分鐘,最短1分鐘)。設定完成3秒後進入時間倒數,時間和加熱
檔位替換顯示。時間倒數期間,按 3秒可取消定時。
警告:
• 使用本產品時,嚴禁小孩走近,免生危險!
• 使用本產品時,嚴禁任何人士觸碰或移動產品以避免燙傷!
• 關機後請勿馬上拔出插頭,內置風扇在工作散熱!
• 關機後爐面仍然高溫,嚴禁任何人士觸碰或移動產品以避免
燙傷!必須靜置至少1小時以上,待爐面徹底冷卻後方可移
動或進行清潔!
• 任何情況下切勿在爐面直接加熱食物,必須配合鍋具進行
烹調!
• 切勿在爐面或爐邊四周擺放任何易燃物,如紙張、薄膜、
塑膠、洗碗布、窗簾布等,以免發生火災!
P.20 P.21
清潔及維護
1. 清潔和保養產品時,必須拔出插頭,並待爐面降至常溫下進行!
2. 請勿把產品直接用水沖洗,或在水中浸泡。
3. 當爐面有結焦物時,可用電陶爐專用刮刀呈45度進行剷除,再用柔軟濕抹布擦
拭。也可用中性清潔劑進行擦拭。請勿使用腐蝕性液體或者鋼絲球進行清潔,
以免損壞黑晶面板表面。
故障檢修
注意:
如無法順利排除故障,請與客戶服務及維修中心聯絡,嚴禁非專業人員對本機
拆卸。
代碼 原因分析 處理方法
E1 電壓低於90V 先檢查電源;如無法處理,
聯絡客戶服務及維修中心
E2 電壓高於280V 先檢查電源;如無法處理,
聯絡客戶服務及維修中心
E3 溫度感測器高於華氏750度 聯絡客戶服務及維修中心
E4
1. 在加熱情況下,溫度感測器短路或
者開路
2. 發熱盤燒壞,無法加熱
3. 保險管燒斷
4. 電源主機板損壞
聯絡客戶服務及維修中心
E5 電源主機板溫度過高 關機後重啟;如無法處理,
聯絡客戶服務及維修中心
E6 溫度感測器短路或開路 聯絡客戶服務及維修中心
E7 風扇失靈 聯絡客戶服務及維修中心
P.22 P.23
• 所有資料僅供參考,如有錯漏以廠方生產的規格為準。產品規格及設計如有變
更,恕不另行通知。
• 中英文版本如有出入,一概以中文版為準。
• 本產品使用說明書以www.germanpool.com網上版為最新版本。
型號 GID-RS32T
電壓/頻率 220V / 50Hz - 60Hz
額定總功率 2,200W
爐頭數目 1
機身尺寸 (H)80 (Φ)280 mm
淨重 約1.9kg
總重 約2.2kg
功率調校範圍 100W - 2,200W
技術規格
保用條款
此保用提供德國寶產品之機件在正常使用下壹年保用
(自購買日起計算)。
Warranty Terms & Conditions
Under normal operations, the product will gurantee a 1-year full
warranty provided by German Pool (effective from the date of
purchase).
1. Customer who fails to present original purchase invoice will
not be eligible for free warrantyservice.
2. Customer shouldalways follow the operating
instructions. Thiswarranty does not apply to:
- labourcosts for on-site installation, check-up, repair,
replacement of parts and other transportation costs;
- damages caused by accidents of anykind (including
material transfer and others);
- operating failures resulting from applying incorrect voltage,
improper usage, and unauthorized installations
or repairs.
3. This warranty is invalid if:
- the purchase invoice is modified by an unauthorized party;
- the product is used for any commercial orindustrial purposes;
- the product is repairedor modified by unauthorized
personnel, or unauthorized parts are installed;
- the serial number is modified, damaged or removed from
the product.
4. German Pool will, at its discretion, repair or replaceany
defective part.
5. This warranty will be void if there is anytransfer of
ownership from the original purchaser.
1. 未能出示購買發票正本者,將不獲免費維修服務。
2. 用戶應依照說明書的指示操作。本保用並不包括﹕
- 上門安裝、檢驗、維修或更換零件之人工以及
一切運輸費用﹔
- 因天然與人為意外造成的損壞 (包括運輸及其他)﹔
- 電源接合不當、不依說明書而錯誤或疏忽使用本
機所引致之損壞。
3. 於下列情況下,用戶之保用資格將被取消﹕
- 購買發票有任何非認可之刪改;
- 產品被用作商業或工業用途;
- 產品經非認可之技術人員改裝或加裝任何配件;
- 機身編號被擅自塗改、破壞或刪除。
4. 總代理有權選擇維修或更換配件或其損壞部份。
5. 產品一經被轉讓,其保用即被視作無效。
機身號碼 Serial No. :
購買商號 Purchased From :
發票號碼 Invoice No. :
購買日期 Purchase Date :
型號 Model No. :
另請填妥以下表格並與正本發票一併保存,以便維修時核對資料。用戶提供之所有資料必須正確無誤,否則免費保用將會無效。
Please fill out the form below. Thisinformation andthe original purchase invoice will be required forany repairs. Warranty will be
invalidated if information providedis found tobe inaccurate.
此保用只適用於香港及澳門 This warranty is valid only in Hong Kong and Macau
客戶服務及維修中心 Customer Service & Repair Centre
Hong Kong
10/F, Kowloon Godown
1-3 Kai Hing Road, Kowloon Bay,
Kowloon, Hong Kong
Tel : +852 2333 6249
Fax : +852 2356 9798
Email : repairs@germanpool.com
Macau
3/F, Edificio Industrial Pou Fung,
145 Rua de Francisco Xavier Pereira,
Macau
Tel : +853 2875 2699
Fax : +853 2875 2661
香港
九龍灣啟興道1-3號
九龍貨倉10樓
電話:+852 2333 6249
傳真:+852 2356 9798
電郵:repairs@germanpool.com
澳門
澳門俾利喇街145號
寶豐工業大廈3樓
電話:+853 2875 2699
傳真:+853 2875 2661
*
貴戶須在購機十天內,以下列其中一種方式向本公司
登記資料,保用手續方正式生效﹕
1)
填妥本公司網頁內之
保用登記表格
www.germanpool.com/
warranty
2)
填妥保用登記卡,
郵寄至本公司。
* This warranty is not valid until customer registration information
is received by our Service Centre within10 days of purchase
via oneof the following means:
1) Visit our website and register
online:
www.germanpool.com/
warranty
2)
Complete all the fields on the
attached Warranty Card and
mail it back to our Customer
Service Centre.
GID-RS32T
GID-RS32T-M-20(1)
www.germanpool.com
G e rman Pool (Hong Kong) Limi t e d
Hong Kong
Room 113, Newport Centre Phase II, 116 Ma Tau
Kok Road, Tokwawan, Kowloon, Hong Kong
Tel: +852 2773 2888
Fax:+852 2765 8215
China
Tel:+86 757 2980 8308
Fax:+86 757 2980 8318
8th, Xinxiang Road, Wusha Industrial Park,
Daliang, Shunde, Foshan, Guangdong
3/F, Edificio Industrial Pou Fung,
145 Rua de Francisco Xavier Pereira, Macau
Tel:+853 2875 2699
Fax:+853 2875 2661
Macau
© All rights reserved. Copying, reproducing or using the contents of this manual is not allowed without prior authorization from German Pool, violators will be prosecuted.
香港名牌十年成就獎
香港卓越品牌 香港服務名牌

Other German pool Cooktop manuals

German pool GIC-AS30D(A) User manual

German pool

German pool GIC-AS30D(A) User manual

German pool GID-RS22T-S User manual

German pool

German pool GID-RS22T-S User manual

German pool GIC-HD28T User manual

German pool

German pool GIC-HD28T User manual

German pool GIC-CD28B User manual

German pool

German pool GIC-CD28B User manual

German pool GIC-DF20BB User manual

German pool

German pool GIC-DF20BB User manual

German pool GIC-CS28B User manual

German pool

German pool GIC-CS28B User manual

German pool GID-RS22T User manual

German pool

German pool GID-RS22T User manual

German pool GIC-DS20P User manual

German pool

German pool GIC-DS20P User manual

Popular Cooktop manuals by other brands

Ovente BGS102 Series manual

Ovente

Ovente BGS102 Series manual

AEG CGA 90 WOK user manual

AEG

AEG CGA 90 WOK user manual

Frigidaire FFGC3025LSA use & care

Frigidaire

Frigidaire FFGC3025LSA use & care

Bosch NGM8057UC use and care manual

Bosch

Bosch NGM8057UC use and care manual

GE Monogram ZGU384N installation instructions

GE

GE Monogram ZGU384N installation instructions

Bosch NEM 74.. installation instructions

Bosch

Bosch NEM 74.. installation instructions

Blomberg CTE 30400 installation instructions

Blomberg

Blomberg CTE 30400 installation instructions

Thermador Masterpiece CEM305TB installation guide

Thermador

Thermador Masterpiece CEM305TB installation guide

Max Burton ProChef-3000 operating instructions

Max Burton

Max Burton ProChef-3000 operating instructions

Jenn-Air JIC4430XS Use and care guide

Jenn-Air

Jenn-Air JIC4430XS Use and care guide

DeLonghi DE 302 IB-1 Installation and service instructions use and care instructions

DeLonghi

DeLonghi DE 302 IB-1 Installation and service instructions use and care instructions

DCS CPV2 SERIES installation instructions

DCS

DCS CPV2 SERIES installation instructions

Teka EWF 60 4G AI AL CI instruction manual

Teka

Teka EWF 60 4G AI AL CI instruction manual

Kenmore 93521 Use Use, care, safety manual

Kenmore

Kenmore 93521 Use Use, care, safety manual

GE CP350 installation instructions

GE

GE CP350 installation instructions

K&H C10208 instruction manual

K&H

K&H C10208 instruction manual

Frigidaire FGES3045KFC use & care

Frigidaire

Frigidaire FGES3045KFC use & care

Rosewill RHAI-15001 Recipe booklet

Rosewill

Rosewill RHAI-15001 Recipe booklet

manuals.online logo
manuals.online logoBrands
  • About & Mission
  • Contact us
  • Privacy Policy
  • Terms and Conditions

Copyright 2025 Manuals.Online. All Rights Reserved.