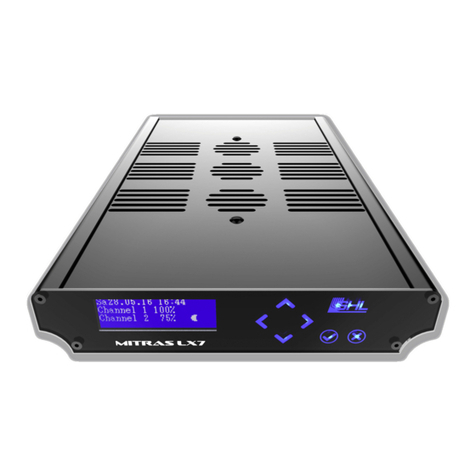
GHL Mitras LX7 Operating instructions

Mitras LX7
Programming Guide
Valid from firmware-version 1.00
As of 2016-11-21

Programming Guide Mitras LX7
EN 2016-11-21 2
Table of Contents
PREFACE.................................................................................................................................................................... 4
GET THE MOST OUT OF YOUR GHL PRODUCT ..........................................................................................................................4
ABOUT THIS PROGRAMMING GUIDE.......................................................................................................................................4
SAFETY INSTRUCTIONS .........................................................................................................................................................5
INTENDED USE ...................................................................................................................................................................5
1CLOCK................................................................................................................................................................ 6
1.1 TIME &DATE ........................................................................................................................................................6
1.2 LOCATION.............................................................................................................................................................6
2ILLUMINATION .................................................................................................................................................. 6
2.1 ADJUSTING AN ILLUMINATION RUN ON THE LUMINAIRE .................................................................................................7
2.1.1 Settings for the Slave Light ........................................................................................................................7
2.1.2 Settings for Master and Stand Alone Lights ..............................................................................................7
2.2 MANUAL ILLUMINATION..........................................................................................................................................8
2.3 CLOUDS................................................................................................................................................................9
2.3.1 Settings for the Slave Light ........................................................................................................................9
2.3.2 Settings for Master and Stand Alone Light................................................................................................9
2.4 MOON .................................................................................................................................................................9
2.5 RAINY DAYS ........................................................................................................................................................11
2.6 THUNDERSTORMS ................................................................................................................................................11
2.7 LIGHT DEMO .......................................................................................................................................................12
2.8 ACCLIMATION......................................................................................................................................................12
3EXTRAS ............................................................................................................................................................ 13
3.1 INFO &SUPPORT .................................................................................................................................................13
3.2 LANGUAGE..........................................................................................................................................................13
3.3 DISPLAY..............................................................................................................................................................13
3.4 MAINTENANCE ....................................................................................................................................................14
4SYSTEM ........................................................................................................................................................... 14
4.1 FACTORY SETTINGS ...............................................................................................................................................14
4.2 PIN ...................................................................................................................................................................14
4.3 ENERGY OPTIONS .................................................................................................................................................14
4.4 WIRELESS ...........................................................................................................................................................15

Programming Guide Mitras LX7
EN 2016-11-21 3
Here is the menu structure of the Mitras LX7. These are the options available to you when
you operate the LX7 through the device’s Control Pad. (This structure is also similar to the
layout seen in the PC-Software, GCC.
Clock
Time & Date
Location
Illumination
Illumination run
Manual
illumination
Clouds
Moon
Rainy days
Storms
Light demo
Acclimation
Extras
Info & Support
Language
Display
Maintenance
System
Factory settings
PIN
Energy options
Wireless

Programming Guide Mitras LX7
EN 2016-11-21 4
Preface
This manual is a supplement to the Mitras® LX7 Instruction manual. This Programming
Guide is based on these operating instructions and cannot replace them in any
circumstances.
Get the Most out of your GHL Product
GHL products are well-equipped with simple and intuitive features. In order to get the most
out of our products, we recommend you read our Programming Guide and Instruction
Manual together. Doing so will provide you with the most profound details for using our
product. These documents can be downloaded from our website’s download area (Support-
>Downloads). Visit our homepage at www.aquariumcomputer.com , our Support forum or
visit us on Facebook to become a GHL-Product expert and fully utilize the full range of
functions offered from your device!
About this Programming Guide
The information provided by this guide is primarily based on setup and configuration via the
Mitras LX7 control panel. When you configure the LX7 via GHL Control Center, setup will slightly
differ from the descriptions shown in this guide. Individual settings are however, identically
displayed on the device and GHL Control Center.
Please read these instructions carefully before operating the Mitras LX7.
GHL products are built with maximum security and safety in mind. However, product safety
for this device can only be guaranteed if you follow these guidelines.
Anyone who uses this device must become familiar with the following safety instructions and
the operation of the device.
Failure to follow these instructions will void any warranty claims.
In this manual, the following symbols are used:
TIP
General note, tip or advice.
WARNING
Important note for operation, to avoid damage to the equipment, and for
your safety.

Programming Guide Mitras LX7
EN 2016-11-21 5
Safety Instructions
WARNING
This equipment must not be used:
By small children and vulnerable persons with limited physical,
sensory or mental capabilities.
By people who are unfamiliar with the functions of this product.
Intended Use
The Mitras LX7 is intended exclusively for use in the domestic area. Mitras LX7 may only be
operated with GHL accessories.
Make sure to place the device away from splashing water, moisture or other liquids.
The luminaire is to be used exclusively for illuminating open aquariums in dry indoor areas.
For your own safety, please look at the hazard prevention and safety instructions in the
chapters that follow and in the Mitras LX7 Instruction Manual.
DANGER
Warning that non-compliance can result in injury or damage to the device.
DANGER
Never leave your aquarium unsupervised for an extended amount of
time.
Always remember that technologies can fail and therefore,
malfunctions can never be ruled out!
Power failures, incorrect settings, damage (For example, by water or
overvoltage) or simply an unexpected operating situation can lead to
fatal damage.
The manufacturer disclaims any liability for (consequential) damages
or losses which might arise in connection with the use of the ProfiLux
System extent legally permissible.

Programming Guide Mitras LX7
EN 2016-11-21 6
1Clock
Use the clock feature to make changes to all time-related settings. Mitras LX7 uses the
astronomical hour count which divides the day into 24 h.
1.1 Time & Date
This option allows you to optimize the speed of the internal clock by entering a correction per
day ranging from -59s to 59s (Optional).
At 0s (default setting), the clock runs without correction. At any other correction, the adjusted
second number is added (or subtracted) once per day.
After changing these settings, you can then set the date and time manually.
TIP
If you have several Mitras® LX7 in-use, you can conveniently adjust your
settings from one luminaire. Once settings are saved, the settings are
automatically transmitted to the other luminaires.
Assign one luminaire as a master (Menu: System-> Wireless) and the others
as slaves. Each luminaire should also be assigned a different address (No.1-
31).
The settings of the master are then transmitted via radio to the other
luminaires.
1.2 Location
The coordinates (Longitude and Latitude) of your location can be entered here. This
information will be used for further simulations in the future.
From the factory, this is 49.4 ° N and 7.8 ° E - the coordinates of Kaiserslautern in Germany -
the production location of your Mitras LX7.
2Illumination
This menu contains all lighting-related settings and functions.
TIP
Master and Slave modes are ideal for running simulations across all
luminaires. These simulations can be performed across one or more

Programming Guide Mitras LX7
EN 2016-11-21 7
luminaire:
Gliding cloud simulation
Sunrise and sunset with east-west simulation
Thunderstorm
Simulations and Illumination runs can only be assigned to a master or stand-alone luminaire.
Slave luminaires receive these settings via radio transmission from the Master.
TIP
To create/edit your Illumination run, we recommend using GCC Light
Composer. Light Composer provides the quickest solution for creating your
own lighting schedule.
The Light Composer calculates the individual lighting channels by means of
the desired brightness and color sequence over the day.
Find detailed information, please refer to the Mitras LX7 instruction manual,
ready for download on our homepage (Support->Downloads)
www.aquariumcomputer.com.
2.1 Adjusting an Illumination Run on the Luminaire
2.1.1 Settings for the Slave Light
With a slave light, only the time difference to the master can be set in the range of -60 to +60
minutes. Slave lights follow the simulations of the master light, with a negative time
difference.
Negative time difference means, the slave lights illumination processes starts earlier or later
as the master lights. This setting can be used to simulate a sunrise over the aquarium.
For example, the sunrise is set to move across 3 lights within 10 minutes.
Light Left: Slave with time difference -5 minutes
Light Center: Master
Light Right: Slave with time difference +5 minutes
2.1.2 Settings for Master and Stand Alone Lights
First select the illumination channel to be edited.
The channels to choose from are: Blue, Royal blue, Cool white, Blue white, True green, Hyper red,
Sky white, Ultraviolet and Hyperviolet.

Programming Guide Mitras LX7
EN 2016-11-21 8
First you have to specify whether the luminaires should run in Automatic Mode or not. If not,
this illumination channel is in Manual mode and not dimmed automatically.
In the next step the illumination run is to be determined.
Enter the number of dim-points for which you want to adjust the brightness (up to 24).
For each dim-point, set the following:
Time - At this time, the lighting channel should have the following brightness
Brightness (0% - 100%) - Brightness of the illumination channel at this time
TIP
The brightness curve between the individual dim-points is calculated
automatically.
If you would like to have the moon phase simulation affect this illumination channel, tick the
Moon checkbox.
2.2 Manual Illumination
The setting of the manual brightness is only available for master and stand-alone luminaires.
If the luminaire is a master, the corresponding slave lamps are synchronously controlled.
This menu is mainly used for test and diagnostic purposes. With the arrow keys on the left
and the arrow on the right, you can select the lighting channel whose brightness you want to
adjust, 4 channels are displayed simultaneously. Use the up/down arrows to make the
selected channel brighter or darker.
The symbols displayed to the left and right of the selected channel have the following
meanings:
Symbol
Meaning
Dimmable only upwards (at 0%)
Dimmable only downwards (at 100%)
Dimmable in both directions

Programming Guide Mitras LX7
EN 2016-11-21 9
Save your settings and exit the manual brightness setting by selecting Esc.
2.3 Clouds
Mitras LX7 can simulate passing clouds by using a random generator. When a cloud passes,
all of the involved luminaires temporarily become darker as the simulation goes through its
effect. With Mitras LX7, you can also create a gliding clouds simulation over several
luminaires.
2.3.1 Settings for the Slave Light
With a slave light, only the time difference to the master can be set with a range of -45s +45s.
Slave lights follow the simulations of the master light, with a negative time difference.
This means the cloud (simulation) from the slave light starts earlier or later than the cloud
(simulation) from the master light.
With this function, over the aquarium gliding clouds can be simulated.
For example, within 30 seconds, a cloud should glide across 3 lights.
Left light: Slave with time difference -15 seconds
Light center: Master
Light Right: Slave with time difference +15 seconds
2.3.2 Settings for Master and Stand Alone Light
The maximum Waiting time (0s - 100s) determines how long the time intervals between clouds
should be (with 0s, the cloud simulation is disabled). The random number generator waits
between 1s and the maximum Waiting time until a new cloud is generated.
Furthermore, the minimum and maximum cloud duration as well as the maximum darkening
(10% - 95%) are to be set. The random generator generates new clouds taking these values
into account.
The cloud simulation can also be tied-in with other simulations.
2.4 Moon
This function is only available for master and stand-alone luminaires. Slave lights follow the
simulations of the master light.
Mitras LX7 simulates the moon phases depending on the date.
In reality, the lunar cycle is a very complex matter:

Programming Guide Mitras LX7
EN 2016-11-21 10
Thus the distances vary from new moon to new moon. On average it is about 29.5
days.
Likewise, the moonrise time as well as the distance to the earth differ respectively.
It is not the fact that at half-moon the moon has 50% of its brightness. We consider on
average about 25%.
Our lunar phase simulation does not aim to replicate these complex sequences in every
detail. For us, it was important to produce a repeating moonlight sequence which would
illuminate the aquarium somewhat differently day-to-day. We’ve implemented such features
to provide a certain rhythm which would largely be in harmony with nature.
Lunar phases in the Mitras LX7 are based on the calendar date so that full moon and new
moon phases always correspond to the actual (real) lunar phase with a deviation of one day
or less.
You can set the time when the lunar phase simulation is active. In order for the lunar phase
simulation to function, it must first be activated in the desired lighting channels.
For the selected lighting channels, the following happens within the set time: The brightness
(given by the set illumination run) is multiplied by the calculated moon phase brightness. The
illumination run is therefore still taken into account.
The result is for example, at half-moon (= 50% lunar phase, 25% lunar brightness) and a
brightness of 30% (given by the illumination run). A luminaire brightness of 25% * 30% =
7.5%.
Illumination channels, without activated moon phase are not affected and follow their
lighting curves as normal.
Outside of the set simulation time, no illumination is influenced by the lunar phase
simulation.
With this method, it is possible to normally operate a lighting channel during the day (outside
the set simulation time/no influence of the lunar phase) and in the evening with the moon
phase (within the set simulation time).
The start and end-time of the lunar phase simulation should be created so that the night
illumination interval of the assigning lighting is included.
If the illumination of a luminaire, e.g. Is programmed to illuminate as moonlight from 19:00
7:00pm) to 7:00 (am), moon phase simulations should also be set from 19:00 (7:00pm) to
7:00(am).
The lunar phase simulation can also be tied-in with other simulations.

Programming Guide Mitras LX7
EN 2016-11-21 11
2.5 Rainy Days
This function is only available for master and standalone lights. Slave lights follow the
simulations of the master light.
Mitras LX7 allows the programming of "Rainy days". On a rainy day, the lighting intensity is
reduced by an adjustable value.
With this feature, you have the option to set the weekdays for which Rainy Days should be
enabled. Once the days have been selected, the darkening of the day has to be set (0% -
100%).
The Rainy days simulation also takes other simulations into account.
2.6 Thunderstorms
This function is only available for master and standalone lights. Slave lights follow the
simulations of the master light.
Mitras LX7 can simulate an authentic thunderstorm.
When a thunderstorm simulation is in-effect, a slow reduction of all LED channels will occur.
As these channels become darker, the number of flashes will increase. After the
thunderstorm has reached its climax, the lighting is slowly brought back to normal strength,
the flashes become less frequent until finally the thunderstorm is over.
A thunderstorm can be started manually any number of times or automatically up to 4 times
per day. There is also an option to start a thunderstorm at random.
Set the thunderstorm parameters in the Storm menu:
Darkening (0% - 100%) during a thunderstorm
Intensity (1 –20) of the thunderstorm –Higher numbers, the more flashes are generated
Flash brightness (10% - 100%) –Determines the LED output power during a flash
Thunderstorm/Day –Number of automatically generated thunderstorms in a day (max. 4)
Weekdays –Only on these weekdays there is a thunderstorm
Start 1...4 –A thunderstorm begins at this time
Duration 1...4 –Duration of a thunderstorm (1 to 60 minutes)
Random thunderstorm duration –If you want random thunderstorms, enter a duration (max.
60 minutes) for the random thunderstorm (If you enter 0, randomly generated
thunderstorms are disabled).

Programming Guide Mitras LX7
EN 2016-11-21 12
Waiting time minimal and maximal –the random generator determines a waiting time within
these limits (maximum 240 hours) until the next random storm is started.
In the Thunderstorm menu, a thunderstorm could be manually started by selecting Manual
Start. The duration (1 to 60 minutes) must then be entered here. When a manual
thunderstorm is triggered, the stored thunderstorm intensity and darkening Settings are
used.
2.7 Light Demo
Light demo is useful for demonstration purposes. After activation, the LEDs are alternately
dimmed upwards and downwards.
With the key of the control panel the light demo can be varied:
Arrows up and down - Color change faster or slower
Arrows left and right - Change the color pattern
Return - Freeze the current color pattern, press Return again restarts the automatic
sequence
2.8 Acclimation
The acclimation function provides a simple and comfortable way to automatically change the
brightness of the light over a span of several days. We recommend using this simulation for
acclimating corals/plants to a new lighting program or when corals have been newly brought
in.
After activating, the following settings can be made:
Start date –The acclimation period begins on this day
Start percent- With this value, all dimmable lights are multiplied at the beginning of the
acclimation
End date - The acclimation period ends on this day
End percent - With this value, all dimmable lights are multiplied at the beginning of the
acclimation
During acclimatization, a dimming factor is calculated daily. The individual illumination runs
are converted according to this factor.
Example: Start on 01.12.2016 (12-01-2016) with 50%, end on 03.12.2016 (12-03-2016) with
100%

Programming Guide Mitras LX7
EN 2016-11-21 13
Then the lighting channels are operated with 50% of the normally set brightness on the
01.12.2016 (and also before), on the second day with 75%, and on the last day with 100%
(and also thereafter).
Starting and ending percentages can be adjusted as needed; thus an increase as well as a
lowering over a certain period of time is possible.
TIP
The acclimation function currently cannot be set on the device itself. Please
use GHL Control Center for this purpose.
3Extras
Special functions and settings are summarized here. The following submenus are viewable:
3.1 Info & Support
After selecting this menu item, information about the firmware version, model and our
homepage is displayed one after the other (automatically after a certain time or after
pushing a button).
3.2 Language
The language in which Mitras LX7 displays texts can be set here.
3.3 Display
The brightness of the display and control panel lighting can be adjusted here.
Display bright (0% - 100%) determines the display brightness during the day
Display dark (0% - 100%) determines the brightness of the display at night
Display dark Start and End determine the time in which the display is to be dimmed.
TIP
If Mitras LX7 is set to German, this menu appears under Extras-> Sprache.
Select this option to change the language.

Programming Guide Mitras LX7
EN 2016-11-21 14
3.4 Maintenance
During maintenance and care of the aquarium, it is possible to reduce the brightness of
luminaires. For example, to 80%.
Mitras LX7 offers 4 separately adjustable maintenance programs. The settings must be set via
the GCC.
4System
All system functions and system settings, e.g. the hardware configuration are pooled here.
The following submenus can be called.
4.1 Factory Settings
After selecting this function, you are asked if you want to restore factory settings. If this is
confirmed, all settings are reset to the delivery state.
4.2 PIN
A personal identification number (PIN) is used to protect the device against unauthorized
changes. Factory default is set to 0000. If the PIN is set to 0000, all changes can be made
without entering a PIN. As soon as the PIN is unequal to 0000, this PIN must be entered
before each setting. This also applies to the PIN change.
4.3 Energy Options
Select between following modes:
All LEDs off - Disables all channels
High Efficiency - High light output with good efficiency - preferred setting
TIP
If you forgot your PIN
Switch off the device (disconnect the voltage supply), switch it on again (plug
in the voltage supply again). Immediately, while the status and greetings
screen is displayed, press the left arrow.
You will be asked: Are you going to delete the PIN?
After confirmation with Yes, the PIN is reset to factory default (0000 -
deactivated).

Programming Guide Mitras LX7
EN 2016-11-21 15
High Output - Maximum light output with slightly lower efficiency
Furthermore, the maximum Output power (10% - 100%) of all channels can be set.
With this, it is possible to dim down all channels equally without having to change the
individual illumination runs.
The maximum Temperature (55 °C - 65 °C) determines from which heat sink temperature the
power is reduced to prevent a further temperature increase.
The maximum Fan speed (60% - 100%) determines how fast the fans are allowed to run at
most. The setting depends on whether a low noise level or a maximum light output should
have priority.
4.4 Wireless
Luminaires can communicate with one another, e.g. to synchronize lighting processes via the
integrated radio module.
The following modes can be selected:
Standalone - This lamp works alone, the radio module is not used.
Master - This lamp controls slave lights of the same group.
Slave - This light is controlled by a master in the same group (many settings are then not
required because they are carried out by the master).
Wireless address –All wireless devices of a group (a group consists of a Master and at least
one Slave) must have different wireless addresses (Example: Master = 1, first Slave = 2,
second Slave =3 etc.)
Wireless channel (11 –26) –All wireless devices of a group must use the same wireless channel.
The wireless channel can be changed in the event of interference from other transmitters (e.g.
WLAN or Bluetooth) or when several independent Mitras LX7 groups are to be operated
© GHL Advanced Technology
GmbH & Co. KG
Marie-Curie-Straße 20
67661 Kaiserslautern
www.aquariumcomputer.com
Other manuals for Mitras LX7
1
This manual suits for next models
1
Table of contents
Other GHL Aquarium manuals
Popular Aquarium manuals by other brands

Aqua Medic
Aqua Medic Spectrus LED Operation manual

Aqua Medic
Aqua Medic FB 5000 Operation manual

Blue Marine
Blue Marine WavePower 1200 instruction manual

AQUA EL
AQUA EL Nano Reef instruction manual

Aqua One
Aqua One Infinity AP-150R instructions

Airmax
Airmax SilentAir LR Series Installation & maintenance instructions

Aqua Medic
Aqua Medic phosphatfilter Fe Operation manual

Aqua Medic
Aqua Medic Reactor 500 Instruction leaflet

Cobalt Aquatics
Cobalt Aquatics MAXI-JET 400 Instructions and warranty

Newa
Newa Mirabello MIR 40 Instructions and warranty

SunSun
SunSun CUP-807 operating manual

Smarter Reefs
Smarter Reefs Protein Skimmer 150 instructions