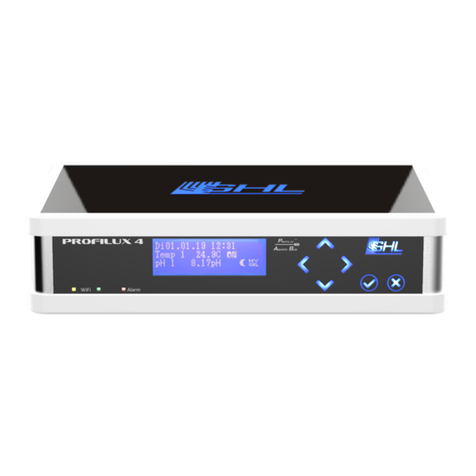
GHL ProfiLux 4 User manual

ProfiLux 4 / 4e
Instruction Manual
As of 2019-02-01

Instruction Manual ProfiLux 4 / 4e
EN 2019-01-22 2
Table of Contents
GET THE MOST OUT OF YOUR GHL PRODUCT ..........................................................................................................................5
1SAFETY INSTRUCTIONS ...................................................................................................................................... 5
1.1 SAFETY OF CHILDREN AND VULNERABLE PERSONS.........................................................................................................6
1.2 INTENDED USE.......................................................................................................................................................6
2GENERAL ........................................................................................................................................................... 7
2.1 ABOUT THIS MANUAL .............................................................................................................................................7
2.2 FEATURES .............................................................................................................................................................7
2.3 SCOPE OF DELIVERY ................................................................................................................................................8
2.4 IMPORTANT OPERATING INSTRUCTIONS......................................................................................................................8
3CONNECTIONS OF THE PROFILUX 4 / 4E ............................................................................................................ 8
3.1 GENERAL ..............................................................................................................................................................8
3.2 3.2 CONNECTION OVERVIEW ...................................................................................................................................9
3.2.1 Sensor Inputs ...........................................................................................................................................10
3.2.2 Powerbar Connection (ProfiLux 4 only) ...................................................................................................11
3.2.3 Interface for Mitras Lightbar/Slimline or RS232......................................................................................11
3.2.4 Expansion Slots........................................................................................................................................11
3.2.5 PAB Ports .................................................................................................................................................11
3.2.6 Level Sensor Connections.........................................................................................................................12
3.2.7 1-10V Interfaces ......................................................................................................................................12
3.2.8 Power Failure Monitor/ Line Monitor Port ..............................................................................................12
3.2.9 USB Connection .......................................................................................................................................12
3.2.10 GHL Control Pad Connection ...................................................................................................................12
3.2.11 DCF Receiver Connection .........................................................................................................................12
3.2.12 AUX Connection.......................................................................................................................................13
3.2.13 Power Supply Input..................................................................................................................................13
4FUNCTIONS OF THE PROFILUX 4 / 4E ............................................................................................................... 13
4.1 FUNCTIONALITY OF THE PROFILUX 4/4E..................................................................................................................13
4.2 FUNCTIONS .........................................................................................................................................................14
5ACTIVATION .................................................................................................................................................... 16
5.1 INSTALLING THE PROFILUX 4/4E............................................................................................................................16
5.2 IMPORTANT OPERATING INSTRUCTIONS....................................................................................................................16
5.3 CONNECTING THE SENSORS ....................................................................................................................................18
5.4 CONNECTING POWERBARS TO PROFILUX 4/4E.........................................................................................................19
5.4.1 STDL4-4 (ProfiLux 4 only).........................................................................................................................19
5.4.2 Powerbar 6D............................................................................................................................................20
5.4.3 Powerbar5.1-PAB ....................................................................................................................................21
5.5 CONNECTION OF LUMINAIRES.................................................................................................................................21
5.5.1 Connection of Dimmable Luminaires or Lightbars ..................................................................................21
5.5.2 Connecting the Mitras Lightbar or the Mitras Slimline ...........................................................................22
5.6 CONNECTION OF STREAM PUMPS OR FANS ...............................................................................................................22
5.7 CONNECTION OF PAB-DEVICES...............................................................................................................................23
5.7.1 What is the PAB.......................................................................................................................................23
5.7.2 How does the ProfiLux Aquatic Bus work ................................................................................................23
5.7.3 Exemplary Connection of ProfiLux 4 / 4e with PAB Devices ....................................................................24
5.8 CONNECTION TO THE POWER SUPPLY.......................................................................................................................24
5.9 STATUS INDICATORS OF THE PROFILUX 4/4E............................................................................................................25
5.9.1 System-Status- LED on the housing cover ...............................................................................................25

Instruction Manual ProfiLux 4 / 4e
EN 2019-01-22 3
5.9.2 WiFi Status LEDs on the Front Panel........................................................................................................26
6OPERATION ..................................................................................................................................................... 28
6.1 OPERATION ON THE DEVICE....................................................................................................................................28
6.1.1 Menu Structure........................................................................................................................................30
6.1.2 Display Indications...................................................................................................................................31
6.1.3 Standard Display .....................................................................................................................................32
6.1.4 Feeding Pause..........................................................................................................................................33
6.2 OPERATING THE DEVICE VIA THE APP GHL CONNECT ..................................................................................................33
6.2.1 Requirements ..........................................................................................................................................33
6.2.2 General Settings Setup ............................................................................................................................34
6.2.3 Hotspot Setup..........................................................................................................................................35
6.2.4 Assign PAB-Devices..................................................................................................................................36
6.2.5 WI-FI Setup –Adding the P4/4e to your network....................................................................................37
6.3 OPERATING THE DEVICE VIA THE SOFTWARE GCC.......................................................................................................38
6.3.1 Requirements ..........................................................................................................................................38
6.3.2 GCC General Information ........................................................................................................................38
6.3.3 What can be set via GCC .........................................................................................................................38
6.4 CONNECTION BETWEEN THE PROFILUX 4/4E AND PC ................................................................................................39
6.5 SAVE AND LOAD SETTINGS .....................................................................................................................................42
6.5.1 Saving Settings ........................................................................................................................................42
6.5.2 Loading Settings ......................................................................................................................................42
6.6 MEASUREMENT DATA...........................................................................................................................................43
7EXPANSION MODULES..................................................................................................................................... 43
7.1 GENERAL INFORMATION ........................................................................................................................................43
7.2 INSTALLATION......................................................................................................................................................45
7.2.1 How to Open the Housing .......................................................................................................................45
7.2.2 How to Insert Modules ............................................................................................................................46
7.2.3 How to Close the Housing........................................................................................................................46
7.2.4 Restart .....................................................................................................................................................47
8WARRANTY/LIABILITY ..................................................................................................................................... 47
9ADDITIONAL INFORMATION............................................................................................................................ 48
9.1 HELP AND INFORMATION.......................................................................................................................................48
9.2 FIRMWARE-UPDATE .............................................................................................................................................48
10 TECHNICAL DATA............................................................................................................................................. 48

Instruction Manual ProfiLux 4 / 4e
EN 2019-01-22 4
Congratulations on your Purchase
Thank you for purchasing our product and allowing us to help support your path to
successful fishkeeping!
With a GHL ProfiLux 4 / 4e, you now own a highly professional piece of equipment that is
more than capable of assisting you in your daily monitoring and maintenance routines.
We are confident that our product will help make your hobby more efficient, safe, and
ultimately help you spend more time enjoying your aquarium or terrarium.
Enjoy Your Passion!
GHL Takes Care of the Rest

Instruction Manual ProfiLux 4 / 4e
EN 2019-01-22 5
Get the Most out of your GHL Product
GHL products are well-equipped with simple and intuitive features. In order to get the most
out of our products, we recommend you read our Programming Guide and Instruction
Manual together. Doing so will provide you with the most profound details for using our
product. These and other helpful documents can be downloaded from our website’s
download area (Support->Downloads). Visit our homepage at www.aquariumcomputer.com,
our Knowledge Base or our Support Forum or meet us on Facebook to become a GHL-
Product expert and fully utilize the full range of functions offered from your device!
1Safety Instructions
Please read these instructions carefully before operating the ProfiLux 4 /4e.
GHL products are built with maximum security and safety in mind. However, product safety
for this device can only be guaranteed if you follow these guidelines.
Anyone who uses this device must become familiar with the following safety instructions and
the operation of the device.
Failure to follow these instructions will void any warranty claims.
Be sure to read over the safety instructions provided by this ProfiLux manual; including the
respective manuals of other equipment manufacturers.
In this manual, the following symbols are used:
TIP
General note, tip or advice.
WARNING
Important note for operation, to avoid damage to the equipment, and for
your safety.
DANGER
Warning that non-compliance can result in injury or damage to the device.

Instruction Manual ProfiLux 4 / 4e
EN 2019-01-22 6
1.1 Safety of Children and Vulnerable Persons
WARNING
This equipment must not be used:
•By small children and vulnerable persons with limited physical,
sensory or mental capabilities.
•By people who are unfamiliar with the functions of this product.
1.2 Intended Use
The ProfiLux 4 / 4e is intended exclusively for use in the domestic area. ProfiLux 4 / 4e may
only be operated with GHL accessories.
Make sure to place the device away from splashing water, moisture or other liquids.
WARNING
Moisture indicators are placed inside the unit and will change color when
exposed to excessive moisture.
Removing these indicators will void all warranty claims.
DANGER
•Make sure that the power cord is plugged into a grounded outlet;
otherwise you could get an electric shock or cause a fire.
•Protect the power cable from damage (For example, twisting,
kinking, clamping). Please also pay attention to the joints and
connections to the device.
•Disconnect the power plug by pulling the plug, not the cable.
•Never attempt to disassemble, repair or alter the equipment by
yourself.
•Do not insert sharp objects into the electrical contacts and ports.
DANGER
•If the unit falls into the aquarium or has been exposed to moisture
or humidity, first turn off the power to the device via the fuse or
circuit breaker, then pull the power cord.
•Never touch the power plug with wet hands.

Instruction Manual ProfiLux 4 / 4e
EN 2019-01-22 7
For your own safety, please look at the hazard prevention and safety instructions in the
chapters that follow.
2General
2.1 About this Manual
These instructions apply to the Controller ProfiLux 4 / 4e.
2.2 Features
•Illuminated blue graphical display
•Control panel with capacitive buttons
•LED Status indicator
•2x Connections for Powerbar (Red Western socket), ProfiLux 4 only
•1x Digital light control interface for Mitras Lightbar and compatible devices (Black
Western socket, on the right next to power supply inputs) or RS232
•3x Expansion slots (2x external, 1x internally accessible)
•2x PAB Ports (Black Western sockets)
•2x Level sensor ports (Double allocation)
•3x 1-10V-interfaces (Yellow Western sockets, double allocation)
•1x Power failure monitor port
•1x USB Connection
•1x GHL Control Pad Connection
•1x DCF Receiver Connection
•1x AUX Connection
•1x Connection for power supply unit (12V DC hollow socket)
•4x Sensor Connections for Temperature, pH/Redox, Redox/pH, Conductivity (White BNC-
connectors) (ProfiLux 4)
•If the device has become wet or dirty, thoroughly clean and dry it
with a dry cloth.
DANGER
•The device may not be operated if it has been damaged in any way
(e.g. damaged power cord or plug, liquids or objects have gotten
into the interior, device has been exposed to excessive moisture,
the normal operation is disturbed, or the device has been dropped.)

Instruction Manual ProfiLux 4 / 4e
EN 2019-01-22 8
•2x Sensor Connections for Temperature, pH/Redox (White BNC-connectors), (ProfiLux
4e)
2.3 Scope of Delivery
Please check the contents of this box. The following items should be included:
•Controller ProfiLux 4 or ProfiLux 4e
•Digital Temperature Sensor
•USB-cable
•Power supply
•Null-plug
•Supplementary sheet
Please check to make sure all items are in perfect condition. In case of damage, immediately
contact the dealer from whom you purchased the ProfiLux 4 / 4e.
WARNING
Damaged ProfiLux 4 4e controllers or components may not be put into
operation under any circumstances.
2.4 Important Operating Instructions
WARNING
To ensure safe operation, the following guidelines must be followed.
Disregarding these safety guidelines, will result in voiding your warranty. In
which case, the manufacturer rejects any responsibility or liability for
damage!
3Connections of the ProfiLux 4 / 4e
3.1 General
Applies to all connections:

Instruction Manual ProfiLux 4 / 4e
EN 2019-01-22 9
3.2 3.2 Connection Overview
The total of all available inputs and outputs in the ProfiLux 4 / 4e is referred to as resources.
The ProfiLux 4 controller includes the following connection ports:
WARNING
•Connect only original accessories from GHL.
•Do not use force when plugging connectors. If a plug contact does
not fit, it is imperative to check that you have chosen the correct
socket.
DANGER
•Incorrect connection (For example, plugging a lighting unit plug into
a PAB connection) can lead to damaging the ProfiLux 4 and/or the
light bar!
•A repair caused by this, is not covered under warranty and will
therefore incur repair charges.

Instruction Manual ProfiLux 4 / 4e
EN 2019-01-22 10
The ProfiLux 4e controller includes the following connection ports:
3.2.1 Sensor Inputs
The following sensors can be connected to the white BNC sockets of the ProfiLux 4 (Left to
right):
•Digital Temperature Sensor, only (Left BNC connector)
•pH/Redox
•Redox/pH (ProfiLux 4 only)
•Conductivity (Right BNC connector) (ProfiLux 4 only)
The inputs for pH, Conductivity and ORP can be switched and adapted to the desired
measurement range. The default function of each sensor input corresponds to the first-
mentioned sensor input label at the back of the ProfiLux 4 / 4e. For example, if an input is
labeled, pH / redox, the sensor input is by default, adjusted to pH. If it is labeled, Redox / pH,
the sensor input is set to Redox, etc.

Instruction Manual ProfiLux 4 / 4e
EN 2019-01-22 11
3.2.2 Powerbar Connection (ProfiLux 4 only)
The control cable of the powerbars (STDL4-4, Powerbar 6D) is connected to the Red RJ12
Western sockets S1-S4 and S5-S8 (from left to right). Our first generation GHL Dosing pump
unit (Doser with black housing and blue clips) can also be connected to this socket.
The function of each socket can be freely programmed to best fit your needs.
By default, for safety reasons, all sockets are deactivated!
If a digital powerbar is to be connected, the ProfiLux controller must be programmed
and set accordingly.
3.2.3 Interface for Mitras Lightbar/Slimline or RS232
The Black RJ45 Western socket can either be used to connect one or more Mitras Lightbar or
to connect to a PC using an additional special GHL RS232 cable.
3.2.4 Expansion Slots
The ProfiLux 4 / 4e allows you to modularly expand upon the existing system by using the 3
on-board Expansion Card slots. If you wish to add additional sensors, powerbars, dimmable
lamps, etc, you can install up to 2 ProfiLux Expansion Cards. Two of the slots are accessible
externally and used for connecting external accessories. The third expansion slot inside the
housing is solely for Expansion Cards which require no access from the outside. (E.g. PLM
PWC).
When these slots are full, you can further expand the ProfiLux 4 by connecting our Expansion
Box 2 to it. Doing so will grant you even more resources such as sensor connections, 1-10 V
interfaces and switching outputs.
3.2.5 PAB Ports
The two RJ45 Western sockets are PAB ports for PAB-devices such as
•Powerbar PAB
•ProfiLux Touch
•GHL Doser Slave
•Expansion Box 2
•SMS Module-PAB
Any PAB-device can be connected to this port. For more information, please refer to the
"Connection to PAB" section.

Instruction Manual ProfiLux 4 / 4e
EN 2019-01-22 12
3.2.6 Level Sensor Connections
Level sensors are used for monitoring and maintaining set water levels and is also used for
leakage detection purposes. These sensors can be connected to the Level ports (Mini DIN
sockets: Level 1 & 2 Purple, 3 & 4 Green). Since these are sockets with double allocation, you
can also use a splitter cable (Y-cable PL-LY; not included) to connect two level sensors to a
single Level sensor port and control them independently.
3.2.7 1-10V Interfaces
Devices that use 1-10V interfaces are connected to the three Yellow RJ12 Western sockets
L1/L2, L3/L4, L5/L6 (Right to left).
1-10V interface devices include:
•Dimmable tubular GHL Lightbars ALB
•Dimmable Effect-LED-Light Mitras-Simu-Stick
•Dimmable sockets
•Controllable heating or cooling (e.g. Propeller Breeze)
•Controllable stream pumps
Each of these ports include two independent 1-10V interfaces and associated relay control
outputs. If necessary, each port can be extended with the splitter cable -YL2, available in
different lengths.
3.2.8 Power Failure Monitor/ Line Monitor Port
A mains voltage monitor (12V plug-in power supply with jack plug) can be connected to this
connection.
3.2.9 USB Connection
The ProfiLux 4 Controller can be connected to a PC via USB cable. This means that all settings
can be configured comfortably using GHL Control Center. GCC software can be downloaded
free of charge from our website’s download area.
3.2.10 GHL Control Pad Connection
A GHL Control Pad can be connected here.
3.2.11 DCF Receiver Connection
A DCF77 Receiver from GHL can be connected to this RJ10 Western socket. The DCF Receiver
must be activated so that ProfiLux 4 / 4e is able to decode and use the time transferred from
the receiver.

Instruction Manual ProfiLux 4 / 4e
EN 2019-01-22 13
The DCF receiver receives radio signals from a DCF77 station at Frankfurt. As with any device
that works with radio, interference may result from electrical equipment, poor reception, or
the like. In most cases it helps to place the receiver at a more favorable place.
3.2.12 AUX Connection
This Mini-DIN socket can be used to connect devices with AUX plugs.
3.2.13 Power Supply Input
12V DC hollow socket for connection to the power supply. Use only the original power supply
for supplying power to the ProfiLux 4 Controller.
4Functions of the ProfiLux 4 / 4e
4.1 Functionality of the ProfiLux 4 / 4e
ProfiLux 4 / 4e can reliably and accurately measure and control all the important parameters
and thus help you in obtaining the sensitive biological balance in your aquarium, terrarium
or pond.
Depending on the model and application, examples are: Water temperature, pH,
Conductivity, Redox potential, Level, Flow, Oxygen content, Air temperature or humidity.
The controller monitors and controls heater, ground heater and cooling operations. The
sequence control with intelligent and self-learning intermittent wipers always ensures
optimal heating with pinpoint accuracy. If desired, a nightly temperature decrease can be
programed.
DANGER
•Connecting a non-GHL branded power supply may lead to the
destruction of the ProfiLux 4 / 4e!
•A repair caused by this is not a guarantee and is therefore subject
to a charge.

Instruction Manual ProfiLux 4 / 4e
EN 2019-01-22 14
The highly accurate pH control
electronics can down regulate (e.g. CO2
supply) or up regulate (Alkalization)
based on the programming that is made.
Disabling pH control during the night
can also be programed.
For measuring and controlling, you will
need the following items in addition to
the controller:
•GHL Powerbar STDL4-4 or
Powerbar 5.1/ 6E PAB: For
switching on and switching off
consumers such as Solenoid
valves, heating, cooling and
pumps, nebulizers.
•GHL Sensors: To measure various
water values.
•Possibly Expansion Cards or additional equipment: Depends on the desired
application.
The diagram shows an example of how the ProfiLux Controller systematically controls the
interaction of individual components and ways it can assist you.
4.2 Functions
•Up to 32 independent channels of dimmable and non-dimmable lamps, freely
adjustable
•Sunrise and sunset
•True calendar moon phase simulation
•Cloud simulation with adjustable random generator, cloud cover, rainy days, seasonal
lighting, Thunderstorm simulation
•Acclimation program
•Feed pause (4 different customizable preferences for pump behavior possible)
•Measurement and control of Temperature, pH Values, Redox, Conductivity
•Sequential temperature control for tubular heater, substrate heater and cooling,
programmable nightly decrease, speed regulated fans controllable
•Menu guided sensor calibration
•Data log
How ProfiLux 4 works

Instruction Manual ProfiLux 4 / 4e
EN 2019-01-22 15
•Operation hour meter for all sensors
•Universal analog and digital inputs
•Level (level, leakage, automatic water change etc.)
•Flow (stream)
•Versatile Pump Controlling (up to 16 stream pumps independently controllable,
several modes: High/low tide, surge, random and much more; different wave modes)
•Operation hour meter for lamps
•Burning-in mode for fluorescent tubes
•Battery buffered real-time clock (RTC)
•Digital Mitras Lightbar interface or RS232
•Integrated webserver: Display of values and states, change of important settings,
email client, DHCP
•USB and WiFi
•Cloud service myGHL®
•Connection options for GHL Control Pad, Power-Failure-Monitor, AUX
•Connectivity for radio-controlled clock receiver (DCF)
•Programmable reminders
•Control of 64 switchable sockets and dosing pumps
•32 timers and dosing programs
•Child protection via PIN code
•No coding required
•Settings are stored during power loss in nonvolatile memory (FRAM)
•Computer is expandable with 3 add-on modules (2x external, 1x internal), with our
Expansion Box 2 added, there are virtually no limits
•Flexible extensions on the ProfiLux Aquatic Bus (Expansion Box 2 for example)
•Multiple aquarium controllers can be networked
•Alarm function, output of the alarm optical, acoustical or via switchable socket
•Therapy Program for sick fishes
•Maintenance programs
•Notifications per email or SMS
•Operation via convenient PC software (Free of charge)
•Virus proof
•GHL-developed operating system for aquatics, ProfiLuxOS
Additional features (with corresponding expansion card):
•Measurement and control of oxygen, humidity and air temperature
•Use of external signals (such as buttons) to control the ProfiLux
•Lighting control via DALI

Instruction Manual ProfiLux 4 / 4e
EN 2019-01-22 16
5Activation
5.1 Installing the ProfiLux 4 / 4e
The device must be protected from water at all times!
Mount the controller in a water-protected area. When selecting the mounting material, make
sure that you have adequate sizing and stability. Make sure that the unit cannot fall into the
water during assembly or normal use.
If the device is placed inside an aquarium cabinet, make sure that it is placed in an area free
from splashing water; moisture or liquids that can penetrate.
5.2 Important Operating Instructions
ProfiLux 4 / 4e as well as its accessories (e.g. Powerbar) are destroyed by excess
moisture or too high atmospheric humidity - Please observe the technical data and
notes below!
To ensure safety and safe operation, the following regulations must be followed! In the case
of non-compliance, warranty claims expire, the manufacturer also rejects any responsibility
or liability for damage!
DANGER
•Never leave your aquarium or terrarium unsupervised for an
extended amount of time.
•The ProfiLux can assist you with many tasks and inform you about
error conditions (For example, via email or SMS) - it can in no-way,
replace regular personal supervision and on-site checks-ins.
•The maximum amount of time without personal view depends on
how long your aquarium, terrarium, or pond can survive without
significant damage, even when errors occur.
•Always remember that each technology can fail and malfunctions
can never be ruled out!
Power failures, incorrect settings, damage (For example, by water or
overvoltage) or simply an unexpected operating situation can lead
to fatal damage.
•The manufacturer disclaims any liability for (consequential)
damages or losses which might arise in connection with the use of
the ProfiLux System extent legally permissible.

Instruction Manual ProfiLux 4 / 4e
EN 2019-01-22 17
Powered equipment and water can become a dangerous combination if precautions are not
taken. It is therefore essential to supply power to all mains-operated devices which are
operated in the aquarium or in the vicinity of the device via a residual current circuit breaker!
The Powerbar is operated with mains voltage and is not waterproof. This means that the
socket strip must be protected against moisture and splashing water! Please take note of this
when choosing the installation location.
In order to avoid any danger, all mains-operated devices must be disconnected from the
mains; all plugs must be disconnected! When working in the basin. It can never be ruled out
that a heating element, a pump, or a luminaire is defective.
For safety reasons, the use of a controlled heater is recommended. This should be adjusted
that it switches off slightly above the desired temperature. Thus, the temperature can be
controlled further, but a possible malfunction of the control does not lead to an overheating
of the aquarium.
TIP
•Please ensure good access to the connections of the device
•Please consider the maximum cable lengths of the connected PAB
cables, sensors, Light Bar etc. when selecting the installation site
•Additional sensor cable extensions (BNC2 or VTN cables) and PAB
cables are available in different lengths to fit your needs. They are
available online in our GHL Store (For US customers, GHL USA Store).
WARNING
•To ensure proper operation, the connection cables should never be
kinked, crimped, or positioned in an unsuitable way.
DANGER
On all cables and lines leading out of the aquarium water can run
downwards. Therefore, they must be routed in a way that no water can
enter electrical or electronic parts! This could be accomplished by
arranging so called drip loops at all cables and lines.

Instruction Manual ProfiLux 4 / 4e
EN 2019-01-22 18
5.3 Connecting the Sensors
Connect the sensor connection cables into the corresponding connector sockets provided for
the specific purpose.
TIP
•Place the sensors in an area where water can constantly circulate
around them.
•To prevent algae growth, it is best to place the sensors in a dark
spot. For mounting, an open external filter would be a good place.
•To ensure proper sensor measurement, attach the sensors
perpendicular to the water surface.
•Make sure that the cable connection of the sensor is not immersed
in water under any circumstances.
•Many sensors are very susceptible to interference due to their low
level signals. To provide the most accurate measurements, please
have enough distance between the sensors/cables and sources of
interference. These can include: Electronic ballasts, power lines,
DANGER
Products that are already powered should never be pulled by the cable.
This may cause malfunction or damage the connected products and the
ProfiLux 4 / 4e.
They should only be pulled by the plug connected to the power socket.
ProfiLux 4 / 4e and its accessories are destroyed by moisture or excessive
humidity.
DANGER
•Sensor plugs must not be wet or damp when connecting to the
socket.
•Do not use force.
•Only connect Digital Temperature Sensors from GHL to the
temperature sensor socket of ProfiLux 4 / 4e.
•Always connect the sensors to the respective jacks, as this could
damage the device or the sensors.
•A repair caused by this is not a guarantee and is therefore subject
to a charge.

Instruction Manual ProfiLux 4 / 4e
EN 2019-01-22 19
pumps, consumer electronics, etc. False readings can be avoided by
following these precautions.
•Please also refer to the instruction manual for the individual
sensors.
5.4 Connecting Powerbars to ProfiLux 4 / 4e
For switching electrical loads with the ProfiLux 4 / 4e, you need a Powerbar, which is not
included in the scope of delivery of the controller.
The following Powerbar options are available:
•STDL4-4
•Powerbar 6D (Digital Powerbar)
•Powerbar 5.1 PAB
•Powerbar 6E PAB
All sockets are freely programmable in their function. The exact procedure can be found in
the supplementary "Programming manual ProfiLux 4" for download in the download area of
our homepage www.aquariumcomputer.com.
5.4.1 STDL4-4 (ProfiLux 4 only)
Plug the connecting cable of the STDL4-4, into the red connector sockets (S-Ports).
DANGER
•ProfiLux 4 / 4e cannot be connected to any of the older Powerbars of
ProfiLux or ProfiLux Plus (the previous models, until 2005)! This
would destroy the electronics.
•Powerbars are operated with mains voltage and are not waterproof.
This means that the socket strips must be protected against
moisture and splashing water!
TIP
•If you have connected a Powerbar, you should label the sockets
with a water-proof pen or sticker with the corresponding numbers
and their function.

Instruction Manual ProfiLux 4 / 4e
EN 2019-01-22 20
At ports S1-S4 and S5-S8, two STDL4-4 (each with four sockets) can be connected. If a
corresponding expansion card is used, two additional STDL4-4 can be controlled.
5.4.2 Powerbar 6D
Alternatively, you can also connect a Digital Powerbar (Powerbar 6D with 6 sockets) to the S-
Ports.
The Digital Powerbar Powerbar 6D has its own microprocessor and is bus-compatible (up to 4
Powerbar 6D can be daisy-chained).
The microprocessor control offers additional security features.
WARNING
•If you want to use a Digital Powerbar (Non-PAB) with the ProfiLux 4,
the corresponding S-socket in the ProfiLux 4 must be activated
before any programming takes place.
Other manuals for ProfiLux 4
2
This manual suits for next models
1
Table of contents
Other GHL Controllers manuals