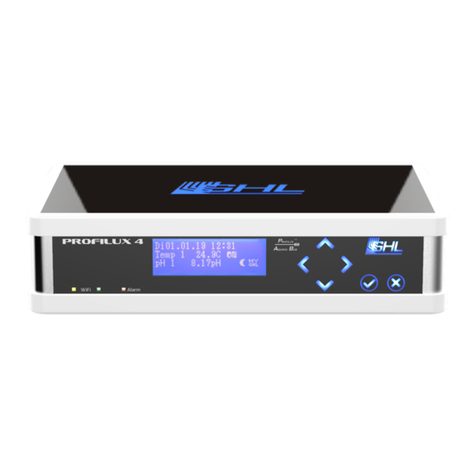
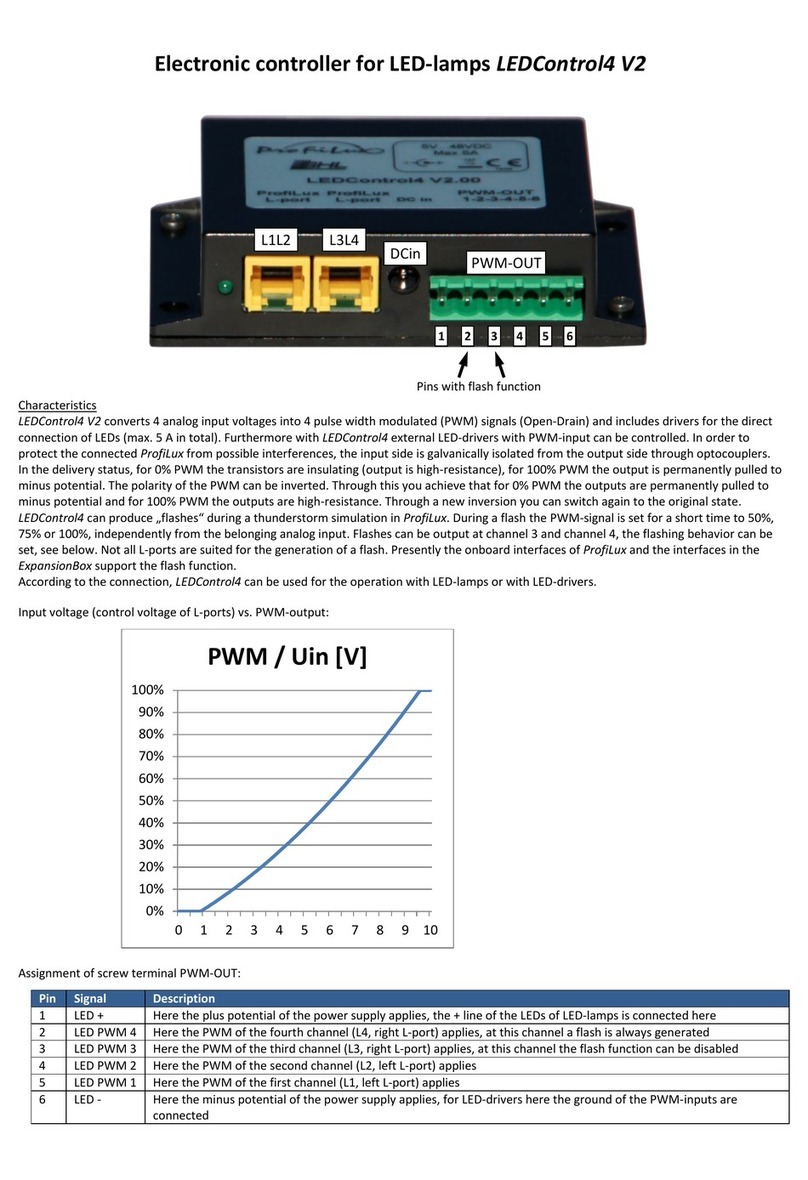
GHL ProfiLux 4 Firmware update

ProfiLux 4
Resource Guide
Step-by-step resource guide for ProfiLux 4
As of November 2018

ProfiLux 4 Resource Guide
EN 2018-13-11 2
Table of Contents
GETTING STARTED.........................................................................................................................................................5
ABOUT THIS GUIDE..........................................................................................................................................................5
PLEASE READ: NAVIGATING THROUGH THIS RESOURCE GUIDE ..............................................................................................5
PLEASE READ: PROFILUX 4CONNECTION PORTS OVERVIEW..................................................................................................6
FINDING YOUR CURRENT PROFILUX 4FIRMWARE VERSION AND MORE .......................................................................................7
UNDERSTANDING THE MEANING OF THE GHL LOGO LED COLOR CODES.......................................................................................7
WI-FI CONNECTION STATUS LEDS ON P4 FRONT PANEL ...........................................................................................................7
TO DO: UNPACK AND CONNECT ALL CABLES TO THE P4.........................................................................................................8
TO DO: CHANGE THE LANGAGE FROM GERMAN TO ENGLISH...................................................................................................9
TO DO: INSTALL GHL CONTROL CENTER ............................................................................................................................9
TO DO: DOWNLOAD GHL CONNECT APP...........................................................................................................................9
PROFILUX 4 CONNECTIVITY OPTIONS ........................................................................................................................10
LEARNING THE BASICS OF GHL CONTROL CENTER.....................................................................................................10
GCC START SCREEN ........................................................................................................................................................11
GCC TABS:DEVICES .......................................................................................................................................................12
GCC TABS:VIEW ...........................................................................................................................................................13
GCC TABS:HELP............................................................................................................................................................13
GCC TABS:TOOLS ..........................................................................................................................................................13
GCC TABS:EXTRAS .........................................................................................................................................................14
GCC TABS:BACKUP AND RESTORE .....................................................................................................................................14
GCC TABS:COMMUNICATION...........................................................................................................................................15
TO DO: CONNECT VIA USB..........................................................................................................................................15
TO DO: SETUP WI-FI CONNECTIVITY...........................................................................................................................17
WI-FI AUTO IP SETUP.....................................................................................................................................................18
WI-FI STATIC IP SETUP....................................................................................................................................................19
RECOMMENDED: SETUP P4 WI-FIHOTSPOT SETTINGS .....................................................................................................21
HOW TO CONNECT TO THE P4 VIA WI-FI....................................................................................................................22
RECOMMENDED: CONNECT VIA WI-FI USING GHL CONTROL CENTER...................................................................................23
RECOMMENDED: CONNECT VIA WI-FI USING GHL CONNECT APP........................................................................................24
HOW TO SETUP MYGHL CLOUD ACCESS.....................................................................................................................24
GHL CONTROL CENTER WALKTHROUGH....................................................................................................................27
ILLUMINATION –LIGHT COMPOSER...................................................................................................................................28
ILLUMINATION –ILLUMINATION CH 1-32..........................................................................................................................29
ILLUMINATION –THUNDERSTORM....................................................................................................................................30
ILLUMINATION –SIMULATION .........................................................................................................................................31
ILLUMINATION –TEMP.-DEP.LIGHTRED .............................................................................................................................32
ILLUMINATION –ACCLIMATION........................................................................................................................................33
PROCESSES –TIMERS.....................................................................................................................................................34
PROCESSES –REMINDERS ...............................................................................................................................................35
DOSE OVERVIEW ...........................................................................................................................................................36

ProfiLux 4 Resource Guide
EN 2018-13-11 3
DOSE OVERVIEW –DOSING PUMP (PART 1) .......................................................................................................................37
DOSE OVERVIEW –DOSING PUMP (PART 2) .......................................................................................................................39
EXTRAS –STREAM GROUP...............................................................................................................................................40
EXTRAS –FEED PAUSE....................................................................................................................................................41
EXTRAS –MAINTENANCE MODE /POWER CUT MONITORING .................................................................................................41
PROBE/SENSOR CONTROLS –BASICS .................................................................................................................................42
PROBE/SENSOR CONTROLS –LEVEL SETTINGS .....................................................................................................................44
PROBE/SENSOR CONTROLS –MEASUREMENT DATA ............................................................................................................46
DISPLAY .....................................................................................................................................................................47
SYSTEM .....................................................................................................................................................................47
SYSTEM –COMMUNICATION ..........................................................................................................................................48
SYSTEM –SWITCH CHANNELS AND OUTLETS .......................................................................................................................49
SYSTEM –1-10V INTERFACE ..........................................................................................................................................50
EMAIL NOTIFICATION (PROFILUX)....................................................................................................................................51
TO DO: ASSIGN PAB-DEVICES TO THE PROFILUX 4 ....................................................................................................52
TO DO: PROBE CALIBRATION......................................................................................................................................55
PROBE CALIBRATION TERMINOLOGY..................................................................................................................................56
PHPROBE CALIBRATION .................................................................................................................................................56
REDOX PROBE CALIBRATION ...........................................................................................................................................57
CONDUCTIVITY PROBE CALIBRATION .................................................................................................................................58
TO DO: SETUP HEATER CONTROL...............................................................................................................................59
TO DO: SETUP RETURN PUMP CONTROL ...................................................................................................................62
REACT TO A FEED PAUSE ...............................................................................................................................................63
SHUT DOWN PUMP IF SUMP WATER LEVEL GETS TOO LOW ...................................................................................................63
COMBINE FEED PAUSE AND LEAKAGE DETECTION ................................................................................................................63
CONTROL FLOW RATE VIA 1-10V INTERFACE .....................................................................................................................63
REACT TO A MAINTENANCE MODE ...................................................................................................................................63
TO DO: SETUP SKIMMER CONTROL............................................................................................................................64
REACT TO A FEED PAUSE ...............................................................................................................................................64
TURN ON SKIMMER DURING CERTAIN TIMES OF THE DAY (TIMER) .......................................................................................64
SHUT DOWN SKIMMER IF SUMP WATER LEVEL GETS TOO HIGH OR CUP IS FULL .........................................................................64
REACT TO A MAINTENANCE MODE ..................................................................................................................................64
SETTING A SKIMMER DELAY AFTER A MAINTENANCE MODE ...................................................................................................64
COMBINE FEED PAUSE AND TIMER FUNCTION ....................................................................................................................65
COMBINE FEED PAUSE AND LEAKAGE DETECTION ................................................................................................................65
TO DO: SETUP NON-DIMMABLE LIGHTING TIMERS...................................................................................................65
OPTIONAL:TEMPERATURE DEPENDENT LIGHT REDUCTION ....................................................................................................68
TO DO: SETUP NORMAL ON/OFF TIMERS..................................................................................................................69
HOW TO SETUP 1-10V LIGHTING CONTROL...............................................................................................................71
OPTIONAL:TEMPERATURE DEPENDENT LIGHT REDUCTION ....................................................................................................74
HOW TO SETUP 1-10V PUMP CONTROL.....................................................................................................................76
HOW TO SETUP DOSING PUMP SCHEDULES..............................................................................................................80

ProfiLux 4 Resource Guide
EN 2018-13-11 4
HOW TO SETUP REMINDERS.......................................................................................................................................81
HOW TO SETUP FEED PAUSE FUNCTIONS..................................................................................................................82
HOW TO SETUP MAINTENANCE MODES....................................................................................................................85
HOW TO SETUP ATO CONTROL (1 OR 2 SENSORS) ....................................................................................................86
HOW TO SETUP AWC FUNCTION................................................................................................................................90
HOW TO SETUP LEAKAGE DETECTION........................................................................................................................94
HOW TO SETUP EMAIL NOTIFICATION.......................................................................................................................98
HOW TO UPDATE PROFILUX 4 FIRMWARE ..............................................................................................................101
HOW TO UPDATE PROFILUX 4 WI-FI MODULE, WEB SERVER, WEB INTERFACE.....................................................105
HOW TO UPDATE PAB-DEVICE FIRMWARE..............................................................................................................107
PROGRAMMABLE LOGIC EXAMPLES........................................................................................................................110
HOW TO DELAY A SKIMMER FROM TURNING ON AFTER MAINTENANCE MODE ENDS ..................................................................110
COMBINING FEED PAUSE AND LEAKAGE DETECTION (USING *AND* FUNCTION)......................................................................112
COMBINING FEED PAUSE AND TIMER FUNCTION (USING *OR* FUNCTION).............................................................................113
COMBINING MULTIPLE PL FUNCTIONS (USING *AND*FUNCTION).........................................................................................114
HOW-TO VIDEOS.......................................................................................................................................................115
QUICK WAY TO CONNECT TO YOUR P4 RIGHT OUT OF THE BOX............................................................................115

ProfiLux 4 Resource Guide
EN 2018-13-11 5
Getting Started
Congratulations on purchasing a GHL ProfiLux 4 controller. You now own a piece of equipment
built to last the test of time!
Please read this section to understand the intended purpose of this Resource Guide.
About this guide
This guide is a supplement to the existing ProfiLux 4 Programming Guide and Manual. The
information provided by this guide will cover various aspects of the controller’s functionality and
include step-by-step instructions for programming the most commonly used functions on GHL
Control Center. These steps will be very similar to programming/assigning functions on myGHL
and the GHL Connect app.
In order to get the most out of our product, we recommend you read both our Programming
Guide and Instruction Manual. Doing so will provide you with the most profound details for
using our product. These documents can be downloaded from our website’s download area:
ProfiLux 4 Manual
ProfiLux 4 Programming Guide
Safety guidelines, warranty information, technical data, etc., can be found in the respective
documents above.
NOTE: ProfiLux 3 controllers
Many of the details and instructions provided by this guide can still be used
for programming the ProfiLux 3 controller.
PLEASE READ: Navigating through this Resource Guide
This guide will provide step-by-step instructions and photos for setting up the most commonly
used features and functions of the ProfiLux 4. When navigating through this guide, refer to the
table of contents and pick a topic of choice. We HIGHLY recommend new ProfiLux 4 users to
follow the TO DO steps first. This will get you started with the basics.

ProfiLux 4 Resource Guide
EN 2018-13-11 6
PLEASE READ: ProfiLux 4 connection ports overview
Right out of the box your ProfiLux 4 controller comes packed with many ports for various
purposes ranging from BNC-ports to ports for 1-10v devices. Here is a brief overview of the
ports behind the ProfiLux 4. For more specific information on these ports, please refer to our
ProfiLux 4 Manual; see page 9
Connection Overview
.
BNC Connections: For connecting Temperature, pH, Redox, and Conductivity probes.
Red ports: For connecting GHL devices such as Gen 1 Dosing pumps, STDL4-4 and
Powerbar6D powerbars. Ports deactivated by default for safety reasons.
Digital light interface: For connecting Mitras Lightbar LEDs.
Green/Purple ports: For connecting level sensors such as GHL Flow sensors,
float/optical sensors, leak interface for leak sensors, etc.
PAB ports: For connecting PAB devices such as Powerbar5.1, Doser 2.1, etc.
Expansion card slots: Used for adding additional ports to the P4 via expansion cards.
Yellow ports: For connecting 1-10V compatible devices such as dimmable lighting, flow
pumps, return pumps, etc.
Power failure port: For connecting a backup power source to the P4.
USB port: For connecting to P4 via USB connection.
GHL Control Pad port: For GHL Control Pad device.
DCF receiver port: For radio controlled clock receiver (For German time)
AUX port: For future P4 features and upgrades.
Power port: For connecting primary 12V power source to P4.

ProfiLux 4 Resource Guide
EN 2018-13-11 7
Finding your current ProfiLux 4 firmware version and more
For support and general information purposes, we recommend knowing your current ProfiLux 4
firmware version, serial number, and Wi-Fi module firmware version. Here is where you can find
this information:
ProfiLux 4 firmware
Shown during P4 startup; when ProfiLux is powered ON
GHL Control Center
General
settings page
myGHL
General
settings page
GHL Connect
General
settings page
ProfiLux 4 serial number
Underneath the P4 device; shown on silver sticker
GHL Control Center
General
settings page
Wi-Fi module firmware
GHL Control Center
Communications
settings page; bottom right of screen
myGHL
General
settings page
GHL Connect
General
settings page
Understanding the meaning of the GHL Logo LED color codes
The on-board LED status display at the top of the ProfiLux 4 serves as a notification tool to tell
you the current status of your controller. Each color code has a separate meaning. In most
cases, the ProfiLux 4 LED logo may light up with different colors indicating multiple
notifications. The meaning for each color code can be found here:
GHL Logo Status Display color codes
Wi-Fi connection status LEDs on P4 front panel
At the front of the P4, there are 3 LED indicator lights; 1 for Alarm notification and 2 for Wi-Fi
connection and communication status.

ProfiLux 4 Resource Guide
EN 2018-13-11 8
YELLOW LED is ON: A device is connected
directly to the ProfiLux 4’s hotspot via Access
Point (AP).
YELLOW LED flashes: ProfiLux 4 is actively
communicating with connected device.
GREEN LED is ON: ProfiLux 4 is connected to
an existing Wi-Fi network.
GREEN LED flashes: ProfiLux 4 is actively
communicating within the connected network.
BOTH LEDs are OFF: ProfiLux 4 has no Wi-Fi
connection
TO DO: Unpack and connect all cables to the P4
Carefully open up your ProfiLux 4 and unpack all the contents that are included in the box.
Make sure that all parts are included. The list of included parts are shown on the product box.
Find a suitable spot for your ProfiLux 4
Connect all your probes to the correct BNC ports. Each port is labeled so please look at
what ports you will be connecting accessories to BEFORE you actually connect them.
Connect your Powerbar5.1 to the PAB port, labeled as
PAB
.
(Ultimate-set only) Connect your ProfiLux Touch to the Touch Interface. Connect the
Touch Interface to an available PAB-port either on the P4 itself or on another PAB-
device such as Powerbar5.1.
Apply power to the ProfiLux 4, Powerbar 5.1, and ProfiLux Touch (Ultimate-set only)
NOTE
When you turn on the ProfiLux 4 for the first time, there may be alarms
going off. Disregard these for now, they will be addressed later.

ProfiLux 4 Resource Guide
EN 2018-13-11 9
TO DO: Change the Language from German to English
When you power-on your controller for the first time, you will see that the text is displayed in
German. The displayed language can be changed by either using the ProfiLux 4 touch keys or
through GHL Control Center.
Changing displayed language to English (Using touch keys)
1. Press any of the arrow keys
2. Scroll down and select
EXTRAS
3. Scroll up and select
SPRACHE
4. Select
ENGLISH
5. Select JA if you’d like the keys to make a sound when pressed. Select
NEIN
if you’d like
the key sounds to be muted.
6. Confirm language in the next screen by selecting
JA
TO DO: Install GHL Control Center
Please visit our website’s downloads page to download GHL Control Center. This is the PC
Software that will be used for programming your GHL device. To connect to the ProfiLux 4
controller via your PC, please visit our website downloads page and download the latest version
of GHL Control Center. GCC will be in the
Software, Tools & Driver
section:
GHL Downloads Page
TO DO: Download GHL Connect app
We highly recommend you download the GHL Connect app for mobile access to your ProfiLux 4
controller. GHL Connect will provide you with another way to connect to your controller if you
do not wish to use a PC. App is available for download at Google Play Store or Apple Store.

ProfiLux 4 Resource Guide
EN 2018-13-11 10
ProfiLux 4 Connectivity Options
ProfiLux 4 offers various connectivity options:
Direct USB Connection to a PC
Direct Wi-Fi Connection (Access point)
Standard Wi-Fi Connection (Client mode)
ProfiLux Webserver
myGHL Cloud
Direct USB Connection to a PC
Allows you to connect to the P4 controller via GHL Control Center over a USB connection.
Direct Wi-Fi Connection
Allows you to connect directly to the P4’s built-in Wi-Fi hotspot. With this connection option,
you can connect directly to the P4’s hotspot, then connect to the device via GHL Control Center
or the GHL Connect app.
Standard Wi-Fi Connection
Allows you to add the P4 to your existing Wi-Fi network. With this connection option, you can
connect to the P4 over your Wi-Fi network via GHL Control Center or the GHL Connect app.
ProfiLux Webserver
Allows you to access the P4 through the built-in webserver.
myGHL Cloud
Allows you to access the P4 from anywhere in the world via a web browser.
(Requires the
ProfiLux 4 to be connected to the internet, see Standard Wi-Fi Connection.)
Learning the basics of GHL Control Center
GHL Control Center, GCC for short, is the PC-based software that is used for connecting to GHL
products such as the ProfiLux 4, Mitras LX 7 series, and Doser 2.1.
Think of this piece of software as your gateway to accessing all that your GHL product has to
offer. From firmware updates to creating and assigning functions, GCC is there to help you
navigate through our product’s features with ease.

ProfiLux 4 Resource Guide
EN 2018-13-11 11
Before we get into product-specific details, let’s first cover the basics and get a better
understanding of the basic features within GCC.
TIP
GHL Control Center (GCC) is the PC-based platform that is used for
programming GHL Devices.
GCC allows you to connect to devices to perform tasks such as firmware
updates, setup basic and advanced functions, assign devices, and more.
GCC Start Screen
This is the screen you will see when you open up GHL Control Center for the first time.
A. This window is basically a shortcut for creating a new connection for your GHL device.
The options you see listed in section B are what we call “Connections”. This GHL
CONTROL CENTER START window can be used if you do not see your device listed (see
B). You can create a new connection by selecting your device from the options that are
shown. More details on this later.

ProfiLux 4 Resource Guide
EN 2018-13-11 12
B. This area shows what devices you can connect to. You can connect to your GHL device
by double-clicking on the device icon or by selecting the device, then clicking CONNECT
at the upper left-side of the screen.
C. Clicking on the (?) icon will display the version of GHL Control Center you are currently
using.
TIP
If you’d like to see fewer or more GHL device connections listed, you can
always click on the double-arrow and change the number of devices you see
listed. The order of GHL devices can also be changed by clicking on
NAVIGATION PANE OPTIONS.
GCC Tabs: Devices
The
Devices
tab is used for connecting to a GHL device. Here is where you can also add a new
GHL device connection or modify an existing one. The UPDATE VIEW and SAVE CHANGES
option is available when you are connected to a GHL device.
Connect: Click here to connect to the selected GHL device
Disconnect: Click here to disconnect from the GHL device you’re connected to. Option
is clickable when you are connected to a device.
Administrate: Click here to add, remove, or edit a GHL connection
Update view: Click here to undo any changes you made to your device settings before
you clicked save changes. Option is clickable when you are connected to a device.
Save changes: Click here to save whatever changes you made to your device.

ProfiLux 4 Resource Guide
EN 2018-13-11 13
GCC Tabs: View
The
View
tab is where you can change the language shown in GCC, enable expert mode, and
re-open the GHL CONTROL CENTER START window.
Language: Click here to change the language shown in GCC.
Expert mode: Check the box to enable
Expert mode
. Enabling this option will show you
every available option in GCC. (Recommended)
Start window: Check the box to display the GHL CONTROL CENTER START window.
GCC Tabs: Help
This tab provides tips to learning more about GCC. It also includes a shortcut to our official
support forum.
Support Forum: Shortcut to our support forum.
Tip of the day: Click here to view other GCC tips.
GCC Tabs: Tools
You have the option to view graphical data when you click on this tab.

ProfiLux 4 Resource Guide
EN 2018-13-11 14
Show graphs: Click here to view graphical data. You will be asked to locate the file
which contains the graph data for your probes.
GCC Tabs: Extras
This tab is where you’ll find various options ranging from firmware updates, touch key
calibration, restore factory settings, etc. These options are only clickable when you are
connected to a GHL device.
Default settings: Click here to restore your GHL device back to factory settings.
Firmware update: Click here to update the firmware on your P4 controller.
WiFi-Module update: Click here to update the Wi-Fi module firmware for your P4.
Serial number: Click here to display your device serial number
Keys: Click here to calibrate the touch keys on your P4 controller.
PIN: Click here to assign a PIN for your P4 controller. This option will make your device
password protected.
Firmware update (PAB): Click here to update the firmware on a GHL PAB-device.
Serial number (PAB): Click here to view PAB-device serial number
Calibration (Expansion Box): Not applicable to this guide.
GCC Tabs: Backup and restore
This is where you can backup and restore your ProfiLux 4’s settings and probe calibration data.

ProfiLux 4 Resource Guide
EN 2018-13-11 15
Transmit all settings from ProfiLux to file: Click here to create a backup file of your
ProfiLux settings.
Transmit all sensor data from ProfiLux to file: Click here to create a backup file of
your probe calibration data.
Transmit from file to ProfiLux: Click here to load your ProfiLux settings and/or
sensor data from a file.
GCC Tabs: Communication
This tab is useful for those who have multiple ProfiLux controllers on a single network or for
those who wish to check the quality of their connection to the device.
Adjust device address: Useful for those who have more than 1 ProfiLux on their
network. Click to change device address.
Communication monitor: Click to view the quality of the connection to your GHL
device.

ProfiLux 4 Resource Guide
EN 2018-13-11 16
TO DO: Connect via USB
When you connect your ProfiLux to the PC for the first time, a driver will begin to install itself.
Please wait for your PC to finish installing this driver before proceeding with the steps below.
TIP
If the driver does not automatically install itself or fails to install, please see
our how-to video for manually installing the necessary driver:
https://youtu.be/5arEm807628
1. Using the USB cable included in the box, connect one end to the PC and other end to
the ProfiLux.
2. Open GHL Control Center and select
ProfiLux 4
on the lower left side of the screen. If
you do not see
ProfiLux 4
listed, follow steps a-d before proceeding any further.
a. Click on
Administrate
, a new window will pop up.
b. Click
New
and another window will pop up. Select the correct ProfiLux device to
create a new connection.
c. Give this new connection a name, set COM to
AUTO
and Baud to
9600
d. Click
Save
.
3. Click
Connect
and the ProfiLux 4 will now connect via USB

ProfiLux 4 Resource Guide
EN 2018-13-11 17
Have trouble connecting?
If you followed the above steps and could not connect, please do the
following:
1. Click
Administrate
at the upper left-side of the screen; a new window
will pop up.
2. In that window, double-click on the ProfiLux 4 connection.
3. Make sure the COM is set to AUTO
4. Click SAVE and try to connect again.
TO DO: Setup Wi-Fi Connectivity
This section will show you how to connect the ProfiLux 4 to your Wi-Fi network using GCC.
The steps provided in this section will show you how to configure the P4’s Wi-Fi settings using
Automatic IP and Static IP assignment methods. Follow the instructions for your IP address
assignment method of choice.
NOTE
The P4’s WiFi module can be configured to connect directly to your existing
Wi-Fi network, have devices connect to it’s built-in Wi-Fi hotspot, or connect
in both ways. During the setup steps, select the Wi-Fi option that suits you
best:
Client (Infrastructure): Select if you will only be connecting to this
device over your Wi-Fi network.
Access Point: Select if you will only be connecting directly to this
device’s built-in WiFi hotspot.
Client / AP: Select if you wish to connect to the device over your Wi-
Fi network and directly to the built-in hotspot.

ProfiLux 4 Resource Guide
EN 2018-13-11 18
TIP: Benefits of Access Point mode
ProfiLux 4 is equipped with its own Wi-Fi hotspot which emitts a Wi-Fi signal
for other devices (PC, Smartphone, Tablet) to connect to it. This is called
Access Point Mode
. This feature is especially useful if your primary internet
goes down. With
Access Point
or
Client/AP mode
, you can still connect to
your P4 by searching for nearby Wi-Fi networks and selecting the P4’s WiFi
hotspot.
Need a visual?
You can view our Wi-Fi setup how-to video by clicking the link below.
Auto IP Wi-Fi Setup:
https://youtu.be/AyHJoXlkJAo
Static IP Wi-Fi Setup:
https://youtu.be/3Rn9xMo76lk
Wi-Fi Auto IP Setup
1. Using the USB cable included in the box, connect one end to the PC and other end to
the ProfiLux.
2. Select the ProfiLux 4 USB connection and click CONNECT.
3. Click on the (+) beside
System
and select COMMUNICATION.
4. Select CLIENT & ACCESS POINT mode.
5. Enter the following information:
SSID: Exact name of your Wi-Fi network
Encryption: WPA WPA2PSK
WiFi Key: Your Wi-Fi password
6. Select OBTAIN IP ADDRESS AUTOMATICALLY
(DHCP).
7. Click SAVE CHANGES, then DISCONNECT.

ProfiLux 4 Resource Guide
EN 2018-13-11 19
8. Wait 20-30 seconds for the ProfiLux 4 to connect to your network. When the middle
light on the front of the P4 turns GREEN, the device is connected to your Wi-Fi
network.
9. Reconnect via USB, go to the
Communication
settings page, and note the IP address
that has been assigned to the ProfiLux 4.
Wi-Fi Static IP Setup
1. Using the USB cable included in the box, connect one end to the PC and other end to
the ProfiLux.
2. Select the ProfiLux 4 USB connection and click CONNECT.
3. Click on the (+) beside
System
and select COMMUNICATION.
4. Select CLIENT & ACCESS POINT mode.

ProfiLux 4 Resource Guide
EN 2018-13-11 20
5. Enter the following information:
SSID: Exact name of your Wi-Fi network
Encryption: WPA WPA2PSK
WiFi Key: Your Wi-Fi password
6. Select USE FOLLOWING SETTINGS.
7. Enter the following information:
IP address: The IP address you wish to assign to the P4
i. The first 3 set of numbers must match the first 3 set of numbers of the
Gateway
Subnet Mask: Found in your network details
Gateway: Found in your network details, also the IP address of your router
DNS: IP address of the DNS, usually it’s the same as your Gateway IP
TIP
You can find the details of your network by using Windows Command
Prompt and typing-in
ipconfig
, then pressing enter. Look for
Subnet Mask
and
Default Gateway
and type it into the respective fields in the
Communication
settings page.
8. Click SAVE CHANGES, then DISCONNECT.
Other manuals for ProfiLux 4
2
Table of contents
Other GHL Controllers manuals
Popular Controllers manuals by other brands

SmartPID
SmartPID M5 PRO quick start guide

Technische Alternative
Technische Alternative UVR16x2***-D Programming guide

Santerno
Santerno SINUS PENTA Series Guide

DH Instruments
DH Instruments PPCH - V1.01 Operation and maintenance manual

Digital Monitoring Products
Digital Monitoring Products X1 Series quick start guide

Mitsubishi
Mitsubishi FX2N-4AD-PT user guide