Giatsu GIA-S09AR2B-R32 User manual

AROMA 2 R32
GIA-S09AR2B-R32 | GIA-S12AR2B-R32
GIA-S18AR2B-R32 | GIA-S24AR2B-R32
ES
EN
FR
PT
IT
Por favor lea atentamente este manual antes de usar este producto.
Please, read carefully this manual before using the product.
Avant d’utiliser l’équipement, lisez attentivement les instructions.
Por favor leia atentamente este manual antes de usar o equipamento.
Per favore leggere attentamente questo manuale prima di utilizzare questo prodotto.
Gracias | Thank you | Merci | Obrigado | Grazie
SPLIT 1X1
OWNER’S MANUAL

AROMA 2 R32
OWNER’S MANUAL
ENGLISH
SPLIT 1X1
GIA-S09AR2B-R32 | GIA-S12AR2B-R32
GIA-S18AR2B-R32 | GIA-S24AR2B-R32

Table of contents
Owner’s Manual
0. Safety Precautions ......................................................................................... 24
2. Manual Operation (Without Remote) ............................................................ 33
3. Care and Maintenance ................................................................................... 34
4. Troubleshooting ............................................................................................. 36
5. European Disposal Guidelines...................................................................... 40
23
1.
Unit Specifications and Features .................................................................. 28

.............................................
Page 4
Precautions
This device can be used by children over 8 years old and by people with reduced physical, sensory or mental
abilities or lack of experience and knowledge provided they are under supervision or have received relevant
instructions on the use of the device safely and Understand the dangers involved. Make sure children do not
play with the device. The cleaning and maintenance of the user must not be carried out by children without
supervision (requirements of the EN standard).
This appliance is not intended for use by persons (including children) with reduced physical, sensory or mental
abilities, or lack of experience or knowledge, unless they are supervised or have been instructed about the use
of this appliance. by a person responsible for their safety. Children should be supervised to ensure that they do
not play with the device (requirements of IEC standard).
• If an abnormal situation arises (such as a burning smell), immediately turn off the unit and turn
off the power. Call your dealer for instructions on how to avoid electric shock, fire or injury.
•Do not insert fingers, rods or other objects into the air inlet or outlet. This can cause injuries, as
the fan may be rotating at high speeds.
•Do not use flammable sprays such as hairspray, hairspray or paint near the unit. This can
cause a fire or start a fire.
•Do not operate the air conditioner in places that are near or around combustible gases. The
emitted gas can accumulate around the unit and cause an explosion.
•Do not operate your air conditioner in a damp room, such as a bathroom or laundry. Too much
exposure to water can cause a short circuit in electrical components.
•Do not expose your body directly to cold air for an extended period of time.
•Do not allow children to play with the air conditioner. Children must be supervised by an adult
when being near the unit at all times.
•If the air conditioner is used together with burners or other heating devices, fully ventilate the
room to avoid oxygen deficiency.
•In certain functional environments, such as kitchens, server rooms, etc., the use of special air
conditioning units is recommended.
WARNING
WARNINGS FOR PRODUCT USE
This symbol indicates the possibility of property
damage or serious consequences.
Read safety precautions before operation and installation
Improper installation due to ignoring instructions can cause serious damage or injury.
The severity of possible damage or injury is classified as a WARNING or CAUTION.
This symbol indicates the
possibility of personal injury.
WARNING CAUTION
24

Page 5
• Turn off the device and turn off the power before cleaning. Otherwise, it may cause an electric
shock.
•Do not clean the air conditioner with excessive amounts of water.
•Do not clean the air conditioner with flammable cleaning products. Flammable cleaning agents
can cause fires or deformations.
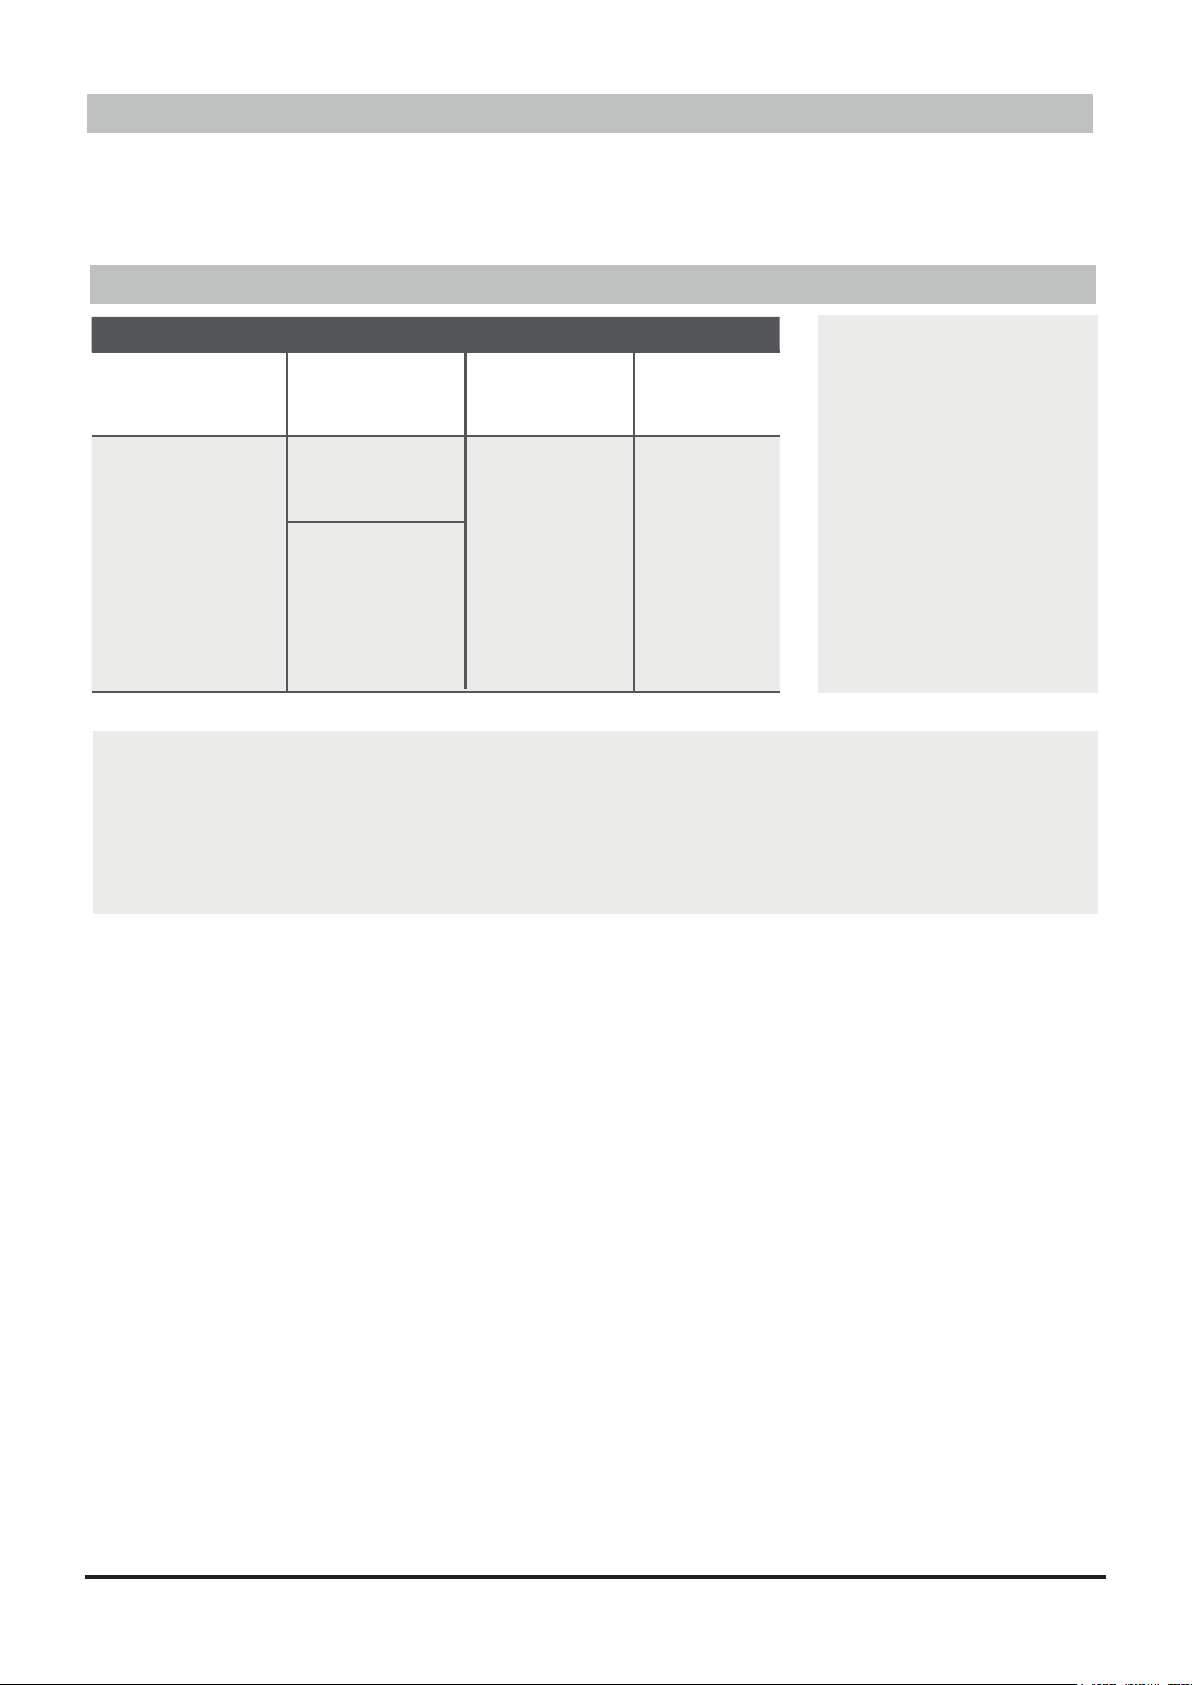
The air conditioning circuit board (PCB) is designed with a fuse to provide overcurrent protection. Fuse specifications
are printed on the circuit board, such as:
Indoor unit: T3.15AL / 250VAC, T5AL / 250VAC, T3.15A / 250VAC, T5A / 250VAC, etc.
Outdoor unit: T20A / 250VAC (units with Btu / h <= 18000), T30A / 250VAC (units with Btu / h> 18000)
NOTE: For units with R-32 refrigerant, only the explosion-proof ceramic fuse can be used.
CLEANING AND MAINTENANCE WARNINGS
TAKE NOTE OF THE FUSE SPECIFIATIONS
•Turn off the air conditioner and turn off the power if you are not going to use it for a long time.
•Turn off and unplug the unit during storms.
•Make sure that the water condensation of the unit can drain without obstacles.
•Do not operate the air conditioner with wet hands. It can cause an electric shock.
•Do not use the device for any purpose other than the intended use.
•Do not climb or place objects on the outdoor unit.
•Do not allow the air conditioner to operate for long periods of time with the doors or windows open,
or if the humidity is very high.
• Use only the specified power cord. If the power cord is damaged, it must be replaced by the
manufacturer or its service agent or a duly qualified person, in order to avoid risks.
•Keep the power plug clean. Remove dust or dirt that collects in or around the plug. Dirty plugs can
cause fire or electric shock.
•Do not pull the power cord to unplug the unit. Hold the plug firmly and remove it from the power
outlet. Pulling the cable directly can damage it, which can cause a fire or an electric shock.
•Do not modify the length of the power cord or use an extension cord to power the unit.
•Do not share the power outlet with other devices. An inadequate or insufficient power supply can
cause a fire or an electric shock.
•The product must be properly grounded at the time of installation, otherwise an electric shock may
occur.
•For all electrical maneuvers, follow all local and national wiring regulations, regulations and Installation
Manual. Connect the wires firmly and secure them firmly to prevent external forces from damaging the
terminal. Incorrect electrical connections can overheat and cause a fire, and can also cause a
discharge. All electrical connections must be made in accordance with the Electrical Connections
Diagram located on the panels of the indoor and outdoor units.
•All wiring must be properly arranged to ensure that the control board cover can be closed properly. If
the control board cover is not closed properly, it can cause corrosion and cause the connection points
in the terminal to become hot, catch fire or cause an electric shock.
•If you connect the power to the fixed wiring, you must incorporate a disconnection device of all the
poles that has at least 3 mm of free space towards all the poles, and with a leakage current that can
exceed 10 mA, having the device residual current (RCD) a nominal residual operating current that
does not exceed 30 mA, and the disconnection must be included in the fixed wiring in accordance with
established standards.
CAUTION
ELECTRICAL WARNINGS
25

1. Installation must be performed by an authorized dealer or specialist. A faulty installation can cause
water leakage, electric shock or fire.
2. Installation must be carried out in accordance with the instructions for this. Improper installation can
cause water leakage, electric shock or fire.
3. Contact an authorized service technician for repair or maintenance of this unit. This appliance must be
installed in accordance with national wiring standards.
4. Use only the accessories, spare parts and parts specified for installation. The use of non-standard parts
may cause water leakage, electric shock, fire and the unit may fail.
5. Install the unit in a firm place that can support the weight of the unit. If the chosen location cannot
support the weight of the unit, or the installation is not successful, the unit may fall and cause serious
injury and damage.
6. Install the drain pipe according to the instructions in this manual. Improper drainage can cause
moisture and flood damage to your home and property.
7. For units that have an auxiliary electric heater, do not install the unit within 1 meter (3 feet) of any
combustible material.
8. Do not install the unit in a place that may be exposed to fuel gas leaks. If combustible gas accumulates
around the unit, it may cause a fire.
9. Do not turn on the power until all work has been completed.
10. When moving or relocating the air conditioner, consult experienced service technicians for
disconnecting and reinstalling the unit.
11. For details on how to install the device on its stand, read the information in the sections “Installing the
indoor unit” and “Installing the outdoor unit”.
WARNINGS FOR PRODUCT INSTALLATION
1. This air conditioning unit contains fluorinated greenhouse gases. For specific information on the type
of gas and quantity, refer to the corresponding label on the unit itself or "User Manual - Product sheet"
on the packaging of the outdoor unit.
2. (Only products of the European Union)
3. Installation, service, maintenance and repair of this unit must be performed by a certified technician.
4. Uninstallation and recycling of the product must be performed by a certified technician.
5. For equipment containing fluorinated greenhouse gases in quantities of 5 tons of CO2 equivalent or
more, but less than 50 tons of CO2 equivalent, if the system has a leak detection system installed, it
should be checked for leaks At least every 24 months.
6. When verifying that the unit is not leaking, it is strongly recommended that you properly keep track of
all verifications.
NOTE ON FLUORATED GASES
26

• When flammable refrigerant is used, the appliance must be stored in a well ventilated area
where the size of the room corresponds to the area of the room as specified for its operation.
For R-32 refrigerant models:
The device must be installed, operated and stored in a room with a surface area greater than
4m2. The device must not be installed in a space without ventilation, if that space is less than
4m2.
•Reusable mechanical connectors and flared joints are not allowed indoors.
(Requirements of the EN standard).
•Mechanical connectors used indoors must have a rate of no more than 3g / year at 25% of the
maximum allowable pressure. When mechanical connectors are reused indoors, the sealing
parts must be renewed. When flare joints are reused indoors, the flare part must be
remanufactured. (Requirements of UL standard)
•When mechanical connectors are reused indoors, the sealing parts must be renewed. When
flare seals are reused indoors, the flare part must be remanufactured. (IEC Standards
Requirements)
WARNING FOR THE USE OF R-32 REFRIGERANT
27
Caution: Fire hazard.
(only for R32 refrigerant)

Page 6
Unit Specifications and Features 1
Unit Parts
Power Cable (Some Units )
Remote Control
Remote Holder (Some Units)
Louver
Front Panel
Display window
Display Code
Meanings
In Fan mode, the unit will display the room temperature.
In other modes, the unit will display your temperature setting.
NOTE:
“
”
A guide on using the infrared remote is not
included in this literature package.
display the temperature setting or room temperature.
When error occurs, it displays error code (some units)
“fresh
”
“ defrost
when FRESH feature is turned on(some units). ”
when defrosting.
“ ” when the unit is operational.
“
timer ” when Timer is set.
run
fresh defrost run timer
28

Page 7
COOL mode HEAT mode DRY mode
Room Temperature 17°C - 32°C
(63°F - 90°F)
0°C - 30°C
(32°F - 86°F)
10°C - 32°C
(50°F - 90°F)
Outdoor
Temperature
0°C - 50°C
(32°F - 122°F)
-15°C - 30°C
(5°F - 86°F)
0°C - 50°C
(32°F - 122°F)
-15°C - 50°C
(5°F - 122°F)
(For models with
low temp.
cooling systems.)
To further optimize the performance of your unit, do the following:
• Keep doors and windows closed.
• Limit energy usage by using TIMER ON and TIMER OFF functions.
• Do not block air inlets or outlets.
• Regularly inspect and clean air filters.
FOR UNITS WITH
AUXILARY
ELECTRIC HEATER
Achieving Optimal Performance
Optimal performance for the COOL, HEAT, and DRY modes can be achieved in the
following temperature ranges. When your air conditioner is used outside of these
ranges, certain safety protection features will activate and cause the unit to perform
less than optimally.
Inverter Split Type
When outside
temperature is below
0°C
(32°F ), we strongly
recommend keeping the
unit plugged in at all
timers to ensure smooth
ongoing performance.
29

NOTE ON ILLUSTRATIONS
Illustrations in this manual a
r
e for explanatory purposes. The actual shape of your indoor unit
may be slightly different. The actual shape shall prevail.
For a detailed explanation of each
function, refer to the Remote Control
Manual.
Other Features
•Auto-Restart
If the unit loses power, it will automatically
restart with the prior settings once power
has been restored.
•Anti-mildew (some units)
When turning off the unit from COOL,
AUTO (COOL), or DRY modes, the air
conditioner will continue operate at very
low power to dry up condensed water and
prevent mildew growth.
•Wi-Fi Control (some units)
Wi-Fi control allows you to control your
air conditioner using your mobile phone
and a Wi-Fi connection.
•Louver Angle Memory(some units)
When turning on your unit, the louver
will automatically resume its former
angle.
•Refrigerant Leakage Detection (some
units)
The indoor unit will automatically display
“EC” when it detects refrigerant leakage.
For a detailed explanation of your unit’s
advanced functionality (such as TURBO
mode and its self-cleaning functions), refer
to the Remote Control Manual.
Page 8
30

Page 9
Setting vertical angle of air flow
While the unit is on, use the SWING /
DIRECT button to set the direction
(vertical angle) of airflow.
1. Press the SWING /DIRECT button once
to activate the louver. Each time you
press the button, it will adjust the louver
by 6°. Press the button until the direction
you prefer is reached.
2. To make the louver swing up and down
continuously, press and hold the
SWING/DIRECT button for 3 seconds.
Press it again to stop the automatic
function.
The horizontal angle of the airflow must be set
manually. Grip the deflector rod (See Fig.2.3)
and manually adjust it to your preferred
direction. For some units, the horizontal angle
of the airflow can be set by remote control.
please refer to the Remote Control Manual.
NOTE ON LOUVER ANGLES
When using COOL or DRY mode, do not set
louver at too vertical an angle for long periods
of time. This can cause water to condense on
the louver blade, which will drop on your floor
or furnishings. (See Fig. 2.2)
When using COOL or HEAT mode, setting
the louver at too vertical an angle can
reduce the performance of the unit due to
restricted air flow.
Do not move louver by hand. This will cause
the louver to become out of sync. If this
occurs, turn off the unit and unplug it for a
few seconds, then restart the unit. This will
reset the louver
Fig. 2.2
CAUTION
Do not put your fingers in or near the
blower and suction side of the unit. The
high-speed fan inside the unit may cause
injury.
Fig. 2.3
Setting Angle of Air Flow
Setting horizontal angle of air flow
•
Range
Caution: Do not keep louver at too
vertical an angle for long periods of
time. This can cause water
condensation to drip on your
furnishings.
Deflector rod
31

Page 10
The SLEEP function is used to decrease
energy use while you sleep (and don’t need
the same temperature settings to stay
comfortable). This function can only be
Press the SLEEP button activated via remote
control. when you are ready to go to sleep.
When in COOL mode, the unit will increase
the temperature by 1°C (2°F) after 1 hour,
and will increase an additional 1°C (2°F) after
another hour. When in HEAT mode, the unit
will decrease the temperature by 1°C (2°F)
after 1 hour, and will decrease an additional
1°C (2°F) after another hour.
It will hold the new temperature for 7 hours,
then the unit will turn off automatically.
Note: The SLEEP function is not
available in FAN or DRY mode.
Sleep Operation
Set
temperature 1hr 1hr
7 hours
timer off˜
+/- 1ºC/ 2º F
SLEEP Operation
Fig. 3.1
•
+/- 1ºC/ 2º F
32

Page 11
How to operate your unit without
the remote control
In the event that your remote control fails to
work, your unit can be operated manually
with the MANUAL CONTROL button
located on the indoor unit. Note that manual
operation is not a long-term solution, and
that operating the unit with your remote
control is strongly recommended.
BEFORE MANUAL OPERATION
Unit must be turned off before
manual operation.
To operate your unit manually:
1. Open the front panel of the indoor unit.
2. Locate the MANUAL CONTROL button on
the right-hand side of the unit.
3. Press the MANUAL CONTROL button one
time to activate FORCED AUTO mode.
4. Press the MANUAL CONTROL again
to activate FORCED COOLING mode.
5. Press the MANUAL CONTROL button a
third time to turn the unit off.
6. Close the front panel.
Manual Operation (Without Remote) 2
CAUTION
The manual button is intended for testing
purposes and emergency operation only.
Please do not use this function unless the
remote is lost and it is absolutely necessary.
To restore regular operation, use the remote
control to activate the unit.
Manual control button
33

Page 12
Cleaning Your Indoor Unit
BEFORE CLEANING
OR MAINTENANCE
CAUTION
Only use a soft, dry cloth to wipe the unit
clean. If the unit is especially dirty, you
can use a cloth soaked in warm water to
wipe it clean.
•
Do not use chemicals or chemically
treated cloths to clean the unit
•
Do not use benzene, paint thinner,
polishing powder or other solvents to clean
the unit. They can cause the plastic
surface to crack or deform.
•
Do not use water hotter than 40°C (104°F)
to clean the front panel. This can cause the
panel to deform or become discolored.
Cleaning Your Air Filter
A clogged air conditioner can reduce the
cooling efficiency of your unit, and can also
be bad for your health. Make sure to clean
the filter once every two weeks.
1. Lift the front panel of the indoor unit.
The air filter is under the top airinlet
2. grill.Grip the tab on the end of the filter,
pull it towards yourself.
3. Now pull down to extract the filter.
4. If your filter has a small air freshening
filter, unclip it from the larger filter.
Clean this air freshening filter with a
5. hand-held vacuum. Clean the large air
filter with warm, soapy water.
Be sure to use a mild detergent.
Care and Maintenance
3
6. Rinse the filter with fresh water, then
shake off excess water.
7. Dry it in a cool, dry place, and refrain
from exposing it to direct sunlight.
8. When dry, re-clip the air freshening filter
to the larger filter, then slide it back into
the indoor unit.
9. Close the front panel of the indoor unit.
CAUTION
Do not touch air freshening (Plasma) filter
for at least 10 minutes after turning off
the unit.
Fig. 5.1
Filter Tab
Remove air freshening filter from back
of larger filter (some units)
ALWAYS TURN OFF YOUR AIR CONDITIONING
UNIT AND DISCONNECT IT FROM THE CURRENT
TO PERFORM THE MAINTENANCE OR CLEANING
OF THE UNIT.
3
Page 13
CAUTION
• Before changing the filter or cleaning,
turn off the unit and disconnect its
power supply.
• When removing filter, do not touch metal
parts in the unit. The sharp metal edges
can cut you.
• Do not use water to clean the inside of
the indoor unit. This can destroy
insulation and cause electrical shock.
• Do not expose filter to direct sunlight
when drying. This can shrink the filter.
Air Filter Reminders (Optional)
Air Filter Cleaning Reminder
After 240 hours of use, the display window on
the indoor unit will flash “CL.” This is a
reminder to clean your filter. After 15
seconds, the unit will revert to its previous
display.
To reset the reminder, press the LED button
on your remote control 4 times, or press the
MANUAL CONTROL button 3 times. If you
don’t reset the reminder, the “CL” indicator
will flash again when you restart the unit.
Air Filter Replacement Reminder
After 2,880 hours of use, the display window
on the indoor unit will flash “nF.” This is a
reminder to replace your filter. After 15
seconds, the unit will revert to its previous
display.
To reset the reminder, press the LED button
on your remote control 4 times, or press the
MANUAL CONTROL button 3 times. If you
don’t reset the reminder, the “nF” indicator will
flash again when you restart the unit.
CAUTION
• Any maintenance and cleaning of
outdoor unit should be performed by an
authorized dealer or licensed service
provider.
•Any unit repairs should be performed
by authorized dealer or licensed
servic e provider.
Maintenance – Long Periods of
Non-UseIf you
If you plan not to use your air conditioner for
an extended period of time, do the following:
Clean all filters
Turn on FAN function
until unit dries out
completely
Turn off the unit and
disconnect the power
Remove batteries
from remote
control
Maintenance –
Pre-Season Inspection
After long periods of non-use, or before
periods of frequent use, do the following:
Check for damaged wires Clean all filters
Check for leaks Replace batteries
Make sure nothing is blocking all air inlets and outlets
34

3
Page 13
CAUTION
• Before changing the filter or cleaning,
turn off the unit and disconnect its
power supply.
• When removing filter, do not touch metal
parts in the unit. The sharp metal edges
can cut you.
• Do not use water to clean the inside of
the indoor unit. This can destroy
insulation and cause electrical shock.
• Do not expose filter to direct sunlight
when drying. This can shrink the filter.
Air Filter Reminders (Optional)
Air Filter Cleaning Reminder
After 240 hours of use, the display window on
the indoor unit will flash “CL.” This is a
reminder to clean your filter. After 15
seconds, the unit will revert to its previous
display.
To reset the reminder, press the LED button
on your remote control 4 times, or press the
MANUAL CONTROL button 3 times. If you
don’t reset the reminder, the “CL” indicator
will flash again when you restart the unit.
Air Filter Replacement Reminder
After 2,880 hours of use, the display window
on the indoor unit will flash “nF.” This is a
reminder to replace your filter. After 15
seconds, the unit will revert to its previous
display.
To reset the reminder, press the LED button
on your remote control 4 times, or press the
MANUAL CONTROL button 3 times. If you
don’t reset the reminder, the “nF” indicator will
flash again when you restart the unit.
CAUTION
• Any maintenance and cleaning of
outdoor unit should be performed by an
authorized dealer or licensed service
provider.
•Any unit repairs should be performed
by authorized dealer or licensed
servic e provider.
Maintenance – Long Periods of
Non-UseIf you
If you plan not to use your air conditioner for
an extended period of time, do the following:
Clean all filters
Turn on FAN function
until unit dries out
completely
Turn off the unit and
disconnect the power
Remove batteries
from remote
control
Maintenance –
Pre-Season Inspection
After long periods of non-use, or before
periods of frequent use, do the following:
Check for damaged wires Clean all filters
Check for leaks Replace batteries
Make sure nothing is blocking all air inlets and outlets
35

Page 14
SAFETY PRECAUTIONS
If ANY of the following conditions occurs, turn off your unit immediately!
• The power cord is damaged or abnormally warm
• You smell a burning odor
• The unit emits loud or abnormal sounds
• A power fuse blows or the circuit breaker frequently trips
• Water or other objects fall into or out of the unit
DO NOT ATTEMPT TO FIX THESE YOURSELF! CONTACT AUTHORIZED SERVICE
PROVIDER IMMEDIATELY!
Common Issues
The following problems are not a malfunction and in most situations will not require repairs.
Issue Possible Causes
Unit does not turn
on when pressing
ON/OFF button
The Unit has a 3-minute protection feature that prevents
the unit from overloading. The unit cannot be restarted
within three minutes of being turned off.
The unit may change its setting to prevent frost from
forming on the unit. Once the temperature increases, the
unit will start operating in the previously selected mode
again.
The set temperature has been reached, at which point the
unit turns off the compressor. The unit will continue
operating when the temperature fluctuates again.
The indoor unit
emits white mist
Both the indoor
and outdoor units
emit white mist
In humid regions, a large temperature difference between
the room’s air and the conditioned air can cause white mist.
When the unit restarts in HEAT mode after defrosting, white
mist may be emitted due to moisture generated from the
defrosting process.
Troubleshooting
4
The unit
changes from
COOL/HEAT
mode to FAN
mode
36

4
Page 15
Issue Possible Causes
The indoor unit
makes noises
A rushing air sound may occur when the louver
resets its position.
A squeaking sound may occur after running the unit in
HEAT mode due to expansion and contraction of the
unit’s plastic parts.
Both the indoor
unit and outdoor
unit make
noises
Low hissing sound during operation: This is normal and
is caused by refrigerant gas flowing through both
indoor and outdoor units.
Low hissing sound when the system starts, has just
stopped running, or is defrosting: This noise is normal and
is caused by the refrigerant gas stopping or changing
direction.
Squeaking sound: Normal expansion and contraction of
plastic and metal parts caused by temperature changes
during operation can cause squeaking noises.
The outdoor unit
makes noises
The unit will make different sounds based on its
current operating mode.
Dust is emitted
from either the
indoor or outdoor
unit
The unit may accumulate dust during extended periods of
non-use, which will be emitted when the unit is turned on.
This can be mitigated by covering the unit during long
periods of inactivity.
The unit emits
a bad odor
The unit may absorb odors from the environment
(such as furniture, cooking, cigarettes, etc.) which will
be emitted during operations.
The unit’s filters have become moldy and should be cleaned.
The fan of the
outdoor unit does
not operate
During operation, the fan speed is controlled to
optimize product operation.
Operation
is erratic,
unpredictable
, or unit is
unresponsive
Interference from cell phone towers and remote boosters
may cause the unit to malfunction.
In this case, try the following:
• Disconnect the power, then reconnect.
• Press ON/OFF button on remote control to restart operation.
NOTE: If problem persists, contact a local dealer or your nearest customer service
center. Provide them with a detailed description of the unit malfunction as well as your
model number.
37

Page 16
Troubleshooting
When troubles occur, please check the following points before contacting a repair
company.
Problem Possible Causes Solution
Poor Cooling
Performance
Temperature setting
may be higher than
ambient room
temperature
Lower the temperature setting
The heat exchanger on
the indoor or outdoor
unit is dirty
Clean the affected heat exchanger
The air filter is dirty Remove the filter and clean it
according to instructions
The air inlet or outlet of
either unit is blocked Turn the unit off, remove the
obstruction and turn it back
on
Doors and windows
are open
Make sure that all doors
and windows are closed
while operating the unit
Excessive heat is
generated by sunlight
Close windows and curtains
during periods of high heat
or bright sunshine
Too many sources of
heat in the room
(people, computers,
electronics, etc.)
Reduce amount of heat sources
Low refrigerant due to
leak or long-term use
Check for leaks, re-seal if
necessary and top off refrigerant
SILENCE
function is
activated
SILENCE function can lower
product performance by
reducing operating frequency.
Turn off SILENCE function.
38

Page 17
Problem Possible Causes Solution
The unit is
not working
Power failure Wait for the power to
be restored
The power is turned off Turn on the power
The fuse is burned out Replace the fuse
Remote control batteries
are dead Replace batteries
The Unit’s 3-minute
protection has been activated Wait three minutes
after restarting the unit
Timer is activated Turn timer off
The unit starts
and stops
frequently
There’s too much or too
little refrigerant in the
system
Check for leaks and
recharge the system
with refrigerant.
Incompressible gas or
moisture has entered
the system.
Evacuate and recharge
the system with
refrigerant
The compressor is broken Replace the compressor
The voltage is too high or
too low
Install a manostat to
regulate the voltage
Poor heating
performance
The outdoor temperature
is lower than 7°C (44.5°F)
Use auxiliary
heating device
Cold air is entering
through doors and
windows
Make sure that all
doors and windows
are closed during use
Low refrigerant due to leak
or long-term use
Check for leaks, re-
seal if necessary and
top off refrigerant
Indicator lamps
continue flashing The unit may stop operation or continue to run safely. If
the indicator lamps continue to flash or error codes
appear, wait for about 10 minutes. The problem may
resolve itself.
If the problem persists, disconnect the power and
contact your nearest customer service center.
Error code appears
in the window
display of indoor
E0, E1, E2…
•P1, P2, P3…
•F1, F2, F3…
NOTE: If your problem persists after performing the checks and diagnostics above, turn
off your unit immediately and contact an authorized service center.
•
If not, disconect the power, then connect it again.
Turn the unit on.
39

Page 18
European Disposal Guidelines 5
The design and specifications are subject to change without prior notice for product improvement.
Consult with the sales agency or manufacturer for details.
This mark on a product or in its documentation indicates that your electrical waste and electrical waste
equipment should not be mixed with household waste.
Disposal of this device in the forest or other natural environments endangers your health and is
harmful to the environment. Hazardous substances can seep into the groundwater and enter the
food chain.
This appliance contains refrigerant and other potentially hazardous materials. When disposing of this
appliance, the law requires special collection and treatment. Do not dispose of this product as
household waste or unclassified collection waste.
When disposing of this appliance, you have the following options:
• Dispose of the appliance at the designated municipal electronic waste collection facility.
•When buying a new appliance, the retailer will receive the appliance free of charge.
•The manufacturer will receive the old device for free.
•You can sell the device to certified scrap merchants.
Correct disposal of this product
(Waste electrical and electronic
equipment)
European Guidelines for Disposal
Special Notice
40
This manual suits for next models
3
Table of contents
Other Giatsu Air Conditioner manuals

Giatsu
Giatsu VIOLET UV GIA-S09VIOUV User manual

Giatsu
Giatsu VIOLET UV GIA-S12VIOUV User manual

Giatsu
Giatsu INVISIBLE User manual

Giatsu
Giatsu DIAMANT GIA-S09DIAR32-INT Service manual

Giatsu
Giatsu MAMBA GIA-S09MAMB-I Service manual

Giatsu
Giatsu GIA-D-12IX43R32 User manual

Giatsu
Giatsu IX41B Series User manual

Giatsu
Giatsu PREMIUM R32 Service manual

Giatsu
Giatsu GIA-MDI-12IX43R32 User manual

Giatsu
Giatsu IX43 R32 User manual