Gilderfluke & Co Sd-50/0 User manual

Sd-50/0, Sd-50/8, Sd-50/40
Audio & Show Control Systems
The Sd-50/0 is a complete, stand alone .Mp3/.wav player system. Just add a power supply and your
speakers, and it will play audio from the Sd flash card.
The Sd-50/8 & Sd-50/40 add up to forty digital Show Control outputs, DMX-512, MIDI or Net Serial
RS-422 serial port input, DMX-512 output and 365 day scheduling to an Sd-50/0 player. The Sd-50/8 &
Sd-50/40 are complete audio and Show Control solutions.
The Sd-50/GPS8 & Sd-50/GPS40 adds a GPS receiver for 1/1000 second accuracy when triggering
by time. This gives you ‘Atomic’ clock accuracy for carillons, schools, churches, bell towers & industrial
annunciator systems.
Gilderfluke & Co.• 205 South Flower Street • Burbank, California 91502 • 818/840-9484 • 800/776-5972 • fax 818/840-9485
Sd-50/xx Manual / July 13, 2020 2:36 AM / page 1 of 167

Gilderfluke & Co.• 205 South Flower Street • Burbank, California 91502 • 818/840-9484 • 800/776-5972 • fax 818/840-9485
Sd-50/xx Manual / July 13, 2020 2:36 AM / page 2 of 167
Safety Disclaimer: Any electronic or mechanical sys-
tem has a potential to fail. Certain applications using
Gilderfluke & Company equipment may involve potential
risks of death, personal injury, or severe property, or en-
vironmental damage (“Critical Application”). Gilderfluke
& Company equipment is not designed, intended,
authorized, or warranted to be suitable in life support
applications, devices, or systems, or other critical appli-
cations. Inclusion of Gilderfluke & Company products in
such applications is understood to be fully at the risk of
the customer. In order to minimize risks associated with
the customer's applications, adequate design and oper-
ating safeguards should be provided by the customer to
minimize inherent or procedural hazards.
Gilderfluke & Company assumes no liability for appli-
cations assistance, customer produced design, software
performance, or infringement of patents or copyrights.
Nor does Gilderfluke & Company warrant or represent
that any license, either express, or implied, is granted
under any patent right, copyright, mask work right, or
other intellectual property right of Gilderfluke & Com-
pany covering or relating to any combination, machine,
or process in which Gilderfluke & Company products or
services might be or are used.

.............................................Sd-50/0, Sd-50/8 or Sd-50/40 Overview!10
.......................................................................Features of the Sd-50/0 include:!10
......................................Features the Sd-50/8 and Sd-50/40 adds includes...!12
..................................................................Differences between Sd-50s and Mp3-50s!15
.............................................Sd-50/0 Sd-50/8 or Sd-50/40 Indicators!17
....................................................................Right (Sd-50/0, Sd-50/8, Sd-50/40)!18
...........................................................Sd Access (Sd-50/0, Sd-50/8, Sd-50/40)!18
...........................................................Audio Run (Sd-50/0, Sd-50/8, Sd-50/40)!18
........................................................Board Error (Sd-50/0, Sd-50/8, Sd-50/40)!18
..........................................................................Show Run (Sd-50/8, Sd-50/40)!18
................................................................DMX/MIDI/Serial (Sd-50/8, Sd-50/40)!18
....................................................................Heart (Sd-50/0, Sd-50/8, Sd-50/40)!19
......................................................................Left (Sd-50/0, Sd-50/8, Sd-50/40)!19
..............................................Fuses (1 LED on Sd-50/8, 5 LEDs on Sd-50/40)!19
......................................J8 ʻAʼ, ʻBʼ, ʻCʼ, & ʻDʼInput LEDs (Sd-50/8, Sd-50/40)!19
..............................Output LEDs (8 LEDs on Sd-50/8, 40 LEDs on Sd-50/40)!19
.........................................................................................Input Open (Sd-50/0)!20
.........................................................................................Input Close (Sd-50/0)!20
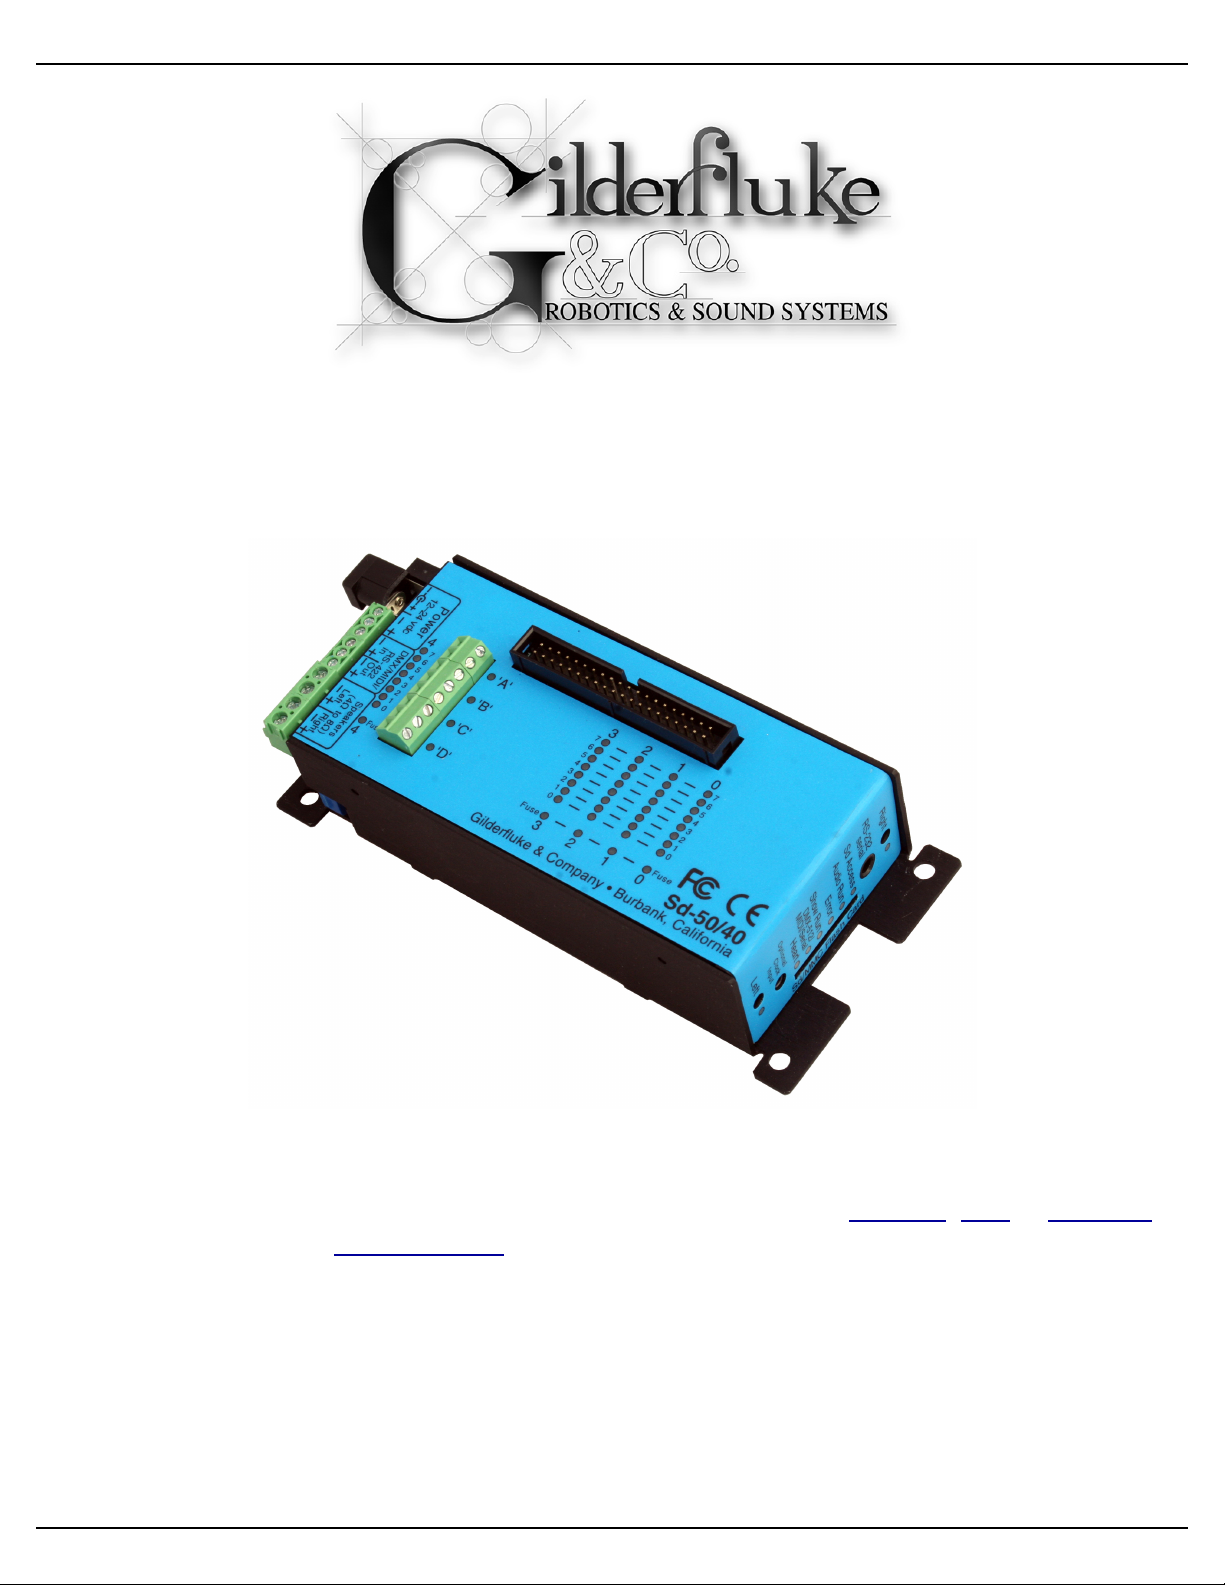
.......................................Sd-50/0, Sd-50/8 or Sd-50/40 Connections!21
..............................................RS-232 Serial Port (Sd-50/0, Sd-50/8, Sd-50/40)!22
...........................................................Sd Socket (Sd-50/0, Sd-50/8, Sd-50/40)!22
........................................................Optional Clock Input (Sd-50/8, Sd-50/40)!23
......................................Card Cage Connection (Sd-50/0, Sd-50/8, Sd-50/40)!23
.....................................................Power Supply (Sd-50/0, Sd-50/8, Sd-50/40)!23
..............................................DMX-512/MIDI/Net Serial In (Sd-50/8, Sd-50/40)!24
DMX-512 Input!24
MIDI Notes Input!24
Net Serial Input!26
IR Input Mode!26
IR MultiLingual Mode!28
None!29
................................................................DMX-512 Output (Sd-50/8, Sd-50/40)!29
..........................................Left Speaker Output (Sd-50/0, Sd-50/8, Sd-50/40)!30
........................................Right Speaker Output (Sd-50/0, Sd-50/8, Sd-50/40)!30
.................................................Left Line Output (Sd-50/0, Sd-50/8, Sd-50/40)!31
..............................................Right Line Output (Sd-50/0, Sd-50/8, Sd-50/40)!31
........................................ʻ¼ J6ʼInputs/Outputs (Sd-50/0, Sd-50/8, Sd-50/40)!31
Outputs via the ‘"J6’ port!32
Inputs via the ‘"J6’ port!32
ServoMotor PWM via the ‘"J6’ port!32
................................................J8 ʻAʼ, ʻBʼ, ʻCʼ& ʻDʼinputs (Sd-50/8, Sd-50/40)!34
J8 ‘A’, ‘B’, ‘C’ & ‘D’ Binary:!35
.............................................................ʻJ6ʼShow Control Outputs (Sd-50/40)!36
................................Defaults for Sd-50/0s, Sd-50/8s and Sd-50/40s!40
Sd-50/0 (audio only) Defaults!40
Sd-50/8 Defaults!41
Sd-50/40 Defaults!42
Gilderfluke & Co.• 205 South Flower Street • Burbank, California 91502 • 818/840-9484 • 800/776-5972 • fax 818/840-9485
Sd-50/xx Manual / July 13, 2020 2:36 AM / page 3 of 167

...............................................What You Should And Shouldn’t See!43
................................Shows Capacities for Sd-50/8s and Sd-50/40s!45
............................................What To Do With A New Sd Flash Card!48
..............................................................................Locking Your Data!50
Getting Started with Pc•MACs and an Sd-50/8 or Sd-50/40 (quickly)!51
Install the Software........!52
Getting started........!52
Select the serial port........!52
...................................................................Starting a New Show in Pc•MACs:!54
Open Pc•MACs:!54
Select ‘new’ show from under Pc•MACs’ ‘File’ menu:!54
Select a ‘new’ or existing ‘Site’ file:!54
Close the ‘New Show’ dialog / Open the ‘Channels List’ dialog:!55
Select the ‘Add Device with Channels’ command:!56
Attaching DMX-512 Devices to an Sd-50/8 or Sd-50/40!57
...........................................................................Triggering Audio/Video Files:!58
Add a Trigger:!58
..................................................'Offline' Programming & Editing Your Show:!60
...............Moving Channels to the OffLine Editing Window for Editing........!60
..................................................Quick Tour the OffLine Editing Window........!61
.......................................................................Where in the show are we?........!62
...........................................................................Transport Time Markers.........!62
.....................................................Change the amount of show you see.........!62
..........................................................................Which channel is which?........!62
...................................................................How Much Time Is Selected?........!63
...............................................................OffLine Editing Window Presets.......!63
......................................................................................Selected Channels...…!63
.......................................................OffLine Editing Window shortcut menu.....…!64
...........................................Adding Drag-n-Drop Triggers to Your Timeline.....…!65
..................................Selecting one or more channels for modification........!65
......................................................Changing the channels you selected........!66
...............................Another way to change the channels you selected........!66
..........................Yet another way to change the channels you selected........!66
...........................Still more ways to change the channels you selected........!67
............................Sorting the channels on the OffLine Editing Window........!68
....................Saving and recalling the OffLine Editing Window Presets........!68
...................................................Changing the amount of time selected........!68
...............................................Drawing digitals with a right mouse click........!69
...................................Moving digitals with a <shift>+right mouse click........!69
.......................Duplicating digitals with a <Control>+right mouse click........!69
...............Making a Chase with a <shift>+<Control>+right mouse click........!69
...........................................Modifying analogs with a right mouse click........!70
...................................Cut, Copy and Paste, just like a word processor........!74
......................................................Paste in something a bunch of times........!75
.............................................................Copy to a file…. Paste from a file........!76
..............................................................................Reverse events in time........!76
.......................................................................Flip your show on its head........!77
.......................................................................Stretch and compress time........!78
Gilderfluke & Co.• 205 South Flower Street • Burbank, California 91502 • 818/840-9484 • 800/776-5972 • fax 818/840-9485
Sd-50/xx Manual / July 13, 2020 2:36 AM / page 4 of 167

....................................................................Adding and subtracting time........!79
..................................................Generating a ramp between two points........!81
................................Copying from digital channels to analog channels........!83
................................Copying from analog channels to digital channels........!88
..........Copying from Audio/Video tracks to analog or digital channels........!90
...........................................................................Ramp analogs to a color........!92
...............................................Scale Analogs without stopping patterns........!94
....................................................More ways to modify a digital channel........!95
.................................................More ways to modify an analog channel........!96
.............................................................................Save your show (again)........!96
'RealTime' Programming Your Show:!97
................................................................................Turn On Manual Mode…...!97
...............................................................................Open the Soft Console…...!97
......................................................................................Analogs at the Top…...!97
.................................................................................Digitals at the Bottom…...!98
.......................Assigning your Analog and Digitals to the Soft Console…...!98
.......................................................................Test Drive the Soft Console…...!99
............................................................................Try recording something…...!99
......................................Reverse, Alternate and Punch Out Checkboxes…...!99
............................................................Save and Recall Console Presets…...!100
..............................................................................AutoDownloading Shows:!101
Open the ‘Save to AutoDownload’ dialog:!101
Pick the ‘Target Device’ for this AutoDownload:!101
Pick the Range of Channels for this AutoDownload:!101
Pick the ‘Shows to AutoDownload to Target Device’:!101
Set what the Target Device does on StartUp:!101
Set what the Target Device does on each Trigger Input:!102
Build your AutoDownload file:!102
Close the AutoDownload dialog:!102
...................................................................................Updating Older Shows:!104
Archive Your Existing Shows:!104
Open the ‘Channels List’ Dialog:!105
View by ‘Devices’:!105
‘Add devices without channels’:!105
Move Existing Audio/Video Trigger Channels into the Appropriate ‘Devices’:!106
Tell Pc•MACs that this is an ‘ Audio/Video Trigger’:!106
Save and ‘Convert Audio/Video Sync’:!107
..................................................................Getting Started with an Sd-50/0 (quickly)!108
............................Sd-50/0, Sd-50/8 or Sd-50/40 Serial Commands!111
............................................................................................Echo Commands:!112
Echo On: “a” [nn] (card address)!112
Echo Off: “b”!112
..............................................................Card Status: “i” [nn] (card address)!112
..............................................................................................Start Commands!113
Start Track: “t” [nn] (card address)!113
Start Global: “u”!113
..............................................................................................Stop Commands!113
Stop Track: “x” [nn] (card address)!113
Stop Global: “y”!113
Gilderfluke & Co.• 205 South Flower Street • Burbank, California 91502 • 818/840-9484 • 800/776-5972 • fax 818/840-9485
Sd-50/xx Manual / July 13, 2020 2:36 AM / page 5 of 167

..............................................................................................Loop Commands!113
Loop Track: “!” [nn] (card address)!113
Loop Global: ““”!113
..................................................................................Stop at End Commands!113
Stop at End Track: “%” [nn] (card address)!113
Stop at End Global: “&”!113
.................................................................................Select Show Commands!113
Select Show Track: “)” [nn] (Card Address) [nn] (show#)!113
Select Show Global: “*” [nn] (show#)!113
....................................................................Select & Play Sound Commands!114
Select Sound Track: “^t” [nn] (Card Address) [nn] (sound#)!114
Select Sound Global: “^u” [nn] (sound#)!114
.......................Volume Command: “^v” [nn] (Card Address) [vv] (Volume)!114
.................................................................................Show Pause Commands!114
Pause Show: “<” [nn] (card address)!114
Continue Show: “>” [nn] (card address)!114
...............................................AutoDownload: “sA5A5” [nn] (card address)!114
......................................................................................RealTime Update: “~”!115
......................................................Card Reset: “j5AA5” [nn] (card address)!115
.........................................................................................Serial Command Summary!116
.............................Sd-50/0, Sd-50/8 or Sd-50/40 Hardware Config.!117
........................................................................ʻ¼ J6ʼInternal/External Power!117
........................................................................................RS-422/Optoisolated!117
......................................................................................Right Volume Control!117
.........................................................................................Left Volume Control!117
........................Sd-50/0, Sd-50/8 or Sd-50/40 Serial Configuration!118
.........................................................................Entering Serial Configuration!119
.....................................................................................................Play a Sound!122
.......................................................................................................Stop Sound!122
.....................................................................................Daylight Savings Time!123
.......................................................................................................Stop at End!123
............................................................................................................Set Time!124
..........................................................................................................Show Info!124
.....................................................................................................Loop a Show!124
..................................................................................Display Config. from Sd!124
................................................................................................Reload Defaults!125
......................................................................................................Play a Show!125
........................................................................................................Stop Show!125
..............................................................................Set ServoMotor Endpoints!125
.....................................................................................................Verify Shows!126
....................................................................................................................Exit!127
..................................................................................................Set Time Zone!127
.......................Sd-50/0, Sd-50/8 or Sd-50/40 Software Installation!128
......................................................................................Software/Firmware Versions!129
..........................................Updating Firmware on an Sd-50/0, Sd-50/8 or Sd-50/40!130
..................................Manual Configuration using ‘SdConfig.exe’!131
..................................................................................................................Track Setup!134
Gilderfluke & Co.• 205 South Flower Street • Burbank, California 91502 • 818/840-9484 • 800/776-5972 • fax 818/840-9485
Sd-50/xx Manual / July 13, 2020 2:36 AM / page 6 of 167

............................................................................................................Move Up!134
.......................................................................................................Move Down!134
..................................................................Reload Track List From Directory!134
................................................................................................................At End!134
Stop!135
Play Next Higher Selection!135
Play Random Selection!135
Play Same Selection Again!135
Play Specific SoundFile!135
.................................................Can Step On Track with a new Play request!135
................................................................................Track to Play at PowerUp!136
..............................................................................................................PlayList Setup!137
.................................................................................................................Audio Setup!138
...........................................................................................Main Volume Level!138
...........................................................................................................Half Mute!138
...................................................................................RealTime Level Control!139
.......................................................................................................EQ Settings!139
...................................................................................Enable Power Amplifier!139
........................................................................................................‘"J6’ Input Setup!140
.................................................................................................Playback Level!142
Do not change Playback Level!142
Fade to Full In!142
Fade to Zero In!142
Fade to ‘Half Mute’ In!142
.....................................................................................................Start Playing!142
Whatever is Next!143
Next Higher Show or SoundFile!143
The Same Show or SoundFile Again!143
A Random Show or SoundFile!143
Specific Show or SoundFile!143
.....................................................................................................Stop Playing!143
Stop Now!144
Stop at End!144
.............................................................................................Pause or Resume!144
........................................................................Do not Start or Stop Anything!144
..........................................................................................................MCU Input Setup!145
.................................................................................................Playback Level!146
Do not change Playback Level!146
Fade to Full In!146
Fade to Zero In!147
Fade to ‘Half Mute’ In!147
.....................................................................................................Start Playing!147
Whatever is Next!147
Next Higher SoundFile!147
The Same SoundFile Again!147
A Random SoundFile!148
Specific SoundFile!148
.....................................................................................................Stop Playing!148
Stop Now!148
Stop at End!148
Gilderfluke & Co.• 205 South Flower Street • Burbank, California 91502 • 818/840-9484 • 800/776-5972 • fax 818/840-9485
Sd-50/xx Manual / July 13, 2020 2:36 AM / page 7 of 167

.............................................................................................Pause or Resume!148
........................................................................Do not Start or Stop Anything!148
............................................................................................Animation Control Setup!149
.............................................................................DMX/MIDI/Serial Port Setup!149
Disable Serial Reception!149
Enable DMX-512 Reception!149
Enable DMX-512 Checksums!150
Enable MIDI Reception!150
MIDI Notes Trigger Animation Playback!150
MIDI Channel Number!151
MIDI First Note Number!151
Net Serial Mode!151
IR Trigger Mode!151
...................................................................................................Brick Address!153
......................................................................Repeater MCU Control Channel!153
..................................................................................First Animation Channel!153
.........................................................................................First Servo Channel!153
.......................................................................................................Flash Setup!153
Enable Animation From Flash!153
Disable Outputs When Stopped!154
Write Protect Flash Memory!154
............................................................................................................Schedule Setup!155
..................................................Disable Schedule Starts on ʻDʼ/White Input!157
..............................................................Daylight Savings TIme & Time Zone Setup!158
.....................................................................................Daylight Savings Time!158
.........................................................................................................Time Zone!158
........................Automatically Correct for Daylight Savings Time Changes!159
................................................................................Display GPS Lock Status!159
....................................Sd-50/0, Sd-50/8, and Sd-50/40 Installation!160
...........................Battery Replacement on an Sd-50/8 or Sd-50/40!161
...............................................Care & Feeding of an GPS Receiver!162
.....................................................C-50Trans Transition Connector!163
...................................................................Sd-50/CC-10 Card Cage!164
FCC and CE Compliance:!166
EC DECLARATION OF CONFORMITY!166
.....................................................HEXadecimal to Decimal to ASCII to Percentage!167
Gilderfluke & Co.• 205 South Flower Street • Burbank, California 91502 • 818/840-9484 • 800/776-5972 • fax 818/840-9485
Sd-50/xx Manual / July 13, 2020 2:36 AM / page 8 of 167

Gilderfluke & Co.• 205 South Flower Street • Burbank, California 91502 • 818/840-9484 • 800/776-5972 • fax 818/840-9485
Sd-50/xx Manual / July 13, 2020 2:36 AM / page 9 of 167
A note about this manual:
This manual covers the specifics of the Sd-50/
40, Sd-50/8 and Sd-40/0.
The Sd-50/8s and Sd-50/40s can be pro-
grammed using our free Pc•MACs software.
To program the Br-miniBrick8 using our free
Pc•MACs software you will also want to refer to the
'QuickStart' sections of this manual which cover
programming using the PC•MACs software. These
are excerpted from the main Pc•MACs manual,
and edited with the content specific to the Sd-50/
8s and Sd-50/40s.
The Sd-50/8s and Sd-50/40s are typically pro-
grammed in ʻSoftware-onlyʼor ʻHardwareless Real-
timeʼmode using a standard USB-to-RS232 con-
verter and Mp3-50/cbl for connecting the Sd-50/8
or Sd-50/40 to your computer. You can program up
to the first 16 DMX-512 channels using a Rs-232
connection. This allows you to program the Br-
miniBrick8 itself (which uses one DMX-512 ad-
dress), the two optional servo outputs which uses
zero, one or two DMX-512 addresses, and twelve
to fifteen additional DMX-512 addresses for de-
vices attached to the DMX-512 network.
If you are using the MACs-License and USB-
to-DMX or ArtNet for programming your Sd-50/8
or Sd-50/40 through their DMX-512 input/output
terminals, please refer to the PC•MACs ʻLicensedʼ
mode.
As a DMX-512 'master', the Sd-50/8 or Sd-50/
40 can output up to 512 DMX-512 channels.
As a DMX-512 'slave', the Br-miniBrick8 can be
addressed anywhere from DMX-512 address one
through DMX-512 address 512.
The full PC•MACs manual can be downloaded
from our web site at:
http:/ /www.gilderfluke.com

Sd-50/0, Sd-50/8 or Sd-50/40 Overview
The Sd-50/xx family consists of three members:
The Sd-50/0 is a complete .Mp3/.wav player system. It uses a standard Sd flash card to hold audio
files stored in .mp3 or .wav formats. It includes an amazingly efficient 100 Watt Class-D stereo amplifier
which has the output power of many 500 Watt linear amplifiers. With no moving parts to wear out, the Sd-
50/0 should well outlast the speakers it is attached to. The Sd-50/0 can be used singly, or in combination
with additional Sd-50/xx’s, BR-SmartMedia cards or any Gilderfluke & Co. equipment. It can provide the
audio for animated shows and displays, fountains, fireworks, safety announcements, advertising, alarm
systems, window displays special effects, signs, clocks and carillons, or anything else that needs a sound
to be played back.
Audio is loaded onto the Sd-50/0s by first converting it to an .mp3 or .wav format files. There are a
number of commercial, freeware and shareware programs for doing this. All audio editing programs now
include .mp3 encoders1. You can even use Apple’s iTunes!
SoundFiles are moved to the Sd-50’s by temporarily moving the Sd flash card to an appropriate slot or
reader attached to your computer. The Sd flash card will appear as a ‘removable disk drive’ on your
computer. You can then ‘drag and drop’ your audio and show files onto to the Sd flash card. This works
identically when using either a Macintosh or Windows-based computer.
The Sd-50/8 and Sd-50/40 add Show Control features to the Sd-50/0s. The Sd-50/8s or Sd-50/40s
can be used singly, or in combination with additional Sd-50/xx’s, BR-SmartMedia cards or any Gilder-
fluke & Co. equipment. It can be used to control animated shows and displays, fountains, fireworks, light-
ing, sound systems, simulators, slide and movie projectors, fiber optics, window displays, motors, pneu-
matic and hydraulic systems, neon special effects, signs, machines and machine tools in process control,
or anything else that can be controlled by an electrical signal.
The Show Control side of the Sd-50/8 or Sd-50/40 is programmed using our PC•MACs Show Control
software. While programming, data can be sent to the Sd-50/8 or Sd-50/40 through its DMX-512 input,
‘Net Serial’ RS-422 port, or RS-232 serial port. Once programed, data is sent to the Sd-50/8 or Sd-50/40
through the PC’s serial port or loaded onto the Sd flash card for permanent storage. The Sd-50/8 or Sd-
50/40 can then be disconnected from the PC and it will run all by itself.
When used with a ‘Hardwareless RealTime’ licensed copy of PC•MACs software, Sd-50/8s or Sd-50/
40s can have their outputs programmed and updated in real time with just a PC and a serial connection.
When used with the PC•MACs hardware (MACs-License and USB-DMX512 Adapter), up to sixty-four Sd-
50/8s or Sd-50/40s can be updated in RealTime through each DMX-512 port.
Features of the Sd-50/0 include:
•Stand alone stereo playback of standard .mp3 and .wav audio files. The Sd-50s support all
standard .mp3 encoding rates, including ‘variable’. Sixteen bit .wav files with sample rates up
Gilderfluke & Co.• 205 South Flower Street • Burbank, California 91502 • 818/840-9484 • 800/776-5972 • fax 818/840-9485
Sd-50/xx Manual / July 13, 2020 2:36 AM / page 10 of 167
1 Contact our sales staff for current .mp3/.wav file converter recommendations.

to 48K per second are supported.
•Amazingly powerful 100 Watt Stereo Class-D Amplifier (fifty watts/channel). This amplifier has
the output power of a typical 400 to 500 Watt linear amplifier, but without the high current
draw and waste heat. In most applications, this amplifier means that all you need to add are
appropriate speakers, an Sd flash card and a power supply to get up and running.
•Up to 255 different SoundFiles can be selected and played.
•Sound capacity is only limited by the size of the Sd flash card installed. For firmware revisions
through v1.24, Sd cards of up to two GBytes can be used with the Sd-50/xxʼs. Firmware
versions larger than this will work with SdHC cards up through 64 GBytes, as long as they
don't draw too much current.
•Audio data is stored in standard Sd flash cards. You move the Sd flash card to your computer
for high speed ‘drag-n-drop’ downloading. Some computers have Sd slots built in. Others will
need to use a USB-to-Sd adapter. In either case, your Macintosh or Windows-based com-
puter will mount the Sd flash card as a ‘removable Drive’. You copy your sound and animation
files to the Sd flash card by just drag-n-dropping it, just as you would copy any file from one
folder to another.
•Two line level outputs (RCA Jacks) for attaching external amplifiers.
•All configuration is done automatically on Pc•MACs when you AutoDownload your shows. If
you need to manually reconfigure your Sd-50/8 or Sd-50/40. through a user friendly
Windows-based ‘SdConfig.exe’ program. You can set the volume, EQ, and what each of the
trigger inputs does. Eight of the inputs are from the outside world through optoisolators, The
other eight inputs come directly from the Show Control side of the Sd-50/8 or Sd-50/40, if
these options are installed. Any of the inputs can be used to ramp audio to preset levels, se-
lect and play specific SoundFiles or select SoundFiles from a preset list or randomizer. Shows
can be selected directly by an input, or using a binary pattern to allow access to all 255 differ-
ent possible audio files.
•Screwdriver-accessible volume controls. These make it easy to make final adjustments in the
output level of the Sd-50s. Additional ‘software’ volume controls set up through the
‘SdConfig.exe’ program allow you to set ‘limits’, so the volume can not be turned too high us-
ing these pots.
•Mounts stand alone, in 2-3/4” Augat Snap Track, or up to ten in an Sd-50/CC10 cage (Sd-
50/0 only). Using optional brackets, mounts on most flavors of DIN rails.
•The Sd-50/xx will run from power supplies with output voltages between twelve to twenty-four
volts DC. The Sd-50/xxʼscan even be run from batteries! For maximum output with the
onboard amplifier, use twenty-four volts, and add approximately 100 Watts (for amplifier) plus
your loads when selecting your power supply. Both screw terminal and 2.1 mm power con-
nections are available.
Gilderfluke & Co.• 205 South Flower Street • Burbank, California 91502 • 818/840-9484 • 800/776-5972 • fax 818/840-9485
Sd-50/xx Manual / July 13, 2020 2:36 AM / page 11 of 167

Features the Sd-50/8 and Sd-50/40 adds includes...
•Eight (Sd-50/8) or forty (Sd-50/40) digital (on/off) Show Control outputs to an Sd-50/0. These
can be used to drive solenoid valves, relays, LEDs and other typical loads directly.
•DMX-512 input for programming or controlling the .Mp3/.wav player and show control outputs.
The Sd-50/8 or Sd-50/40 can be operated as a ‘slave’ following whatever DMX-512 data it
receives from the DMX-512 network.
•DMX-512 output from onboard Show Control memory or when running from RealTime up-
dates through the RS-232 serial port. The Sd-50/8 or Sd-50/40 can be operated as a ‘master’,
sending DMX-512 to control other Sd-50/8s or Sd-50/40s, light dimmers, wiggle lights, strobe
lights, or any other DMX-512 controlled devices. The DMX-512 output is also an easy way to
add additional Show Control outputs to Sd-50/8s or Sd-50/40s.
•Up to eight of the ‘"J6’ Show Control outputs can be used to control model airplane-style
PWM ServoMotor outputs.
•Automatic ‘program in place’ download through the serial port on your PC or through the Sd
flash card. The amount of time it takes to download shows the Sd-50/8 or Sd-50/40 depends
on the length of the show(s) and the number of channels used. Short shows take only sec-
onds. Shows that fill the entire Sd-50/8s or Sd-50/40s memory will take longer to download. It
is much quicker to move the completed shows to the Sd flash card, and let the Sd-50/8s or
Sd-50/40s load them from there. Show audio and animation data can be distributed to clients
by sending out preloaded Sd flash cards.
•Four MBytes of nonvolatile Show Control memory. Using all forty Sd-50/40 Show Control out-
puts (and the audio control channel), this gives a show capacity of about six hour at thirty up-
dates per second! About eighteen hours for the Sd-50/8 using all eight of its outputs (and the
audio control channel)! Once downloaded, show data is retained for approximately forty
years, with or without power applied. Up to 255 individual shows can be loaded onto an Sd-50/
8or Sd-50/40 at one time.
•Battery-backed Real Time Clock. The Clock is factory trimmed for an accuracy of 50 parts per
million (PPM). Using the 365 day schedule, you can set when shows and sounds will be
played up to a year in advance. You can set it to play a specific schedule on a specific day, or
you can select a schedule by the day of the week. As an example, you can set a special
schedule to be used on the Fourth of July each year, or set a different schedule to be used
only on Sundays only through an entire month. In school and factory bell systems, different
schedules can be used on weekdays, and different schedules (or no schedule at all) for the
weekends. As long as the rules for the Gregorian calendar and leap years don’t change, the
Real Time Clock will be accurate until the year 10,000. The centuries will not automatically
advance, and will need to be adjusted manually each 100 years.
•Optional GPS can be used to continuously synchronize the clock inside the Sd-50/8 or Sd-50/
40 to the world time standards broadcast from the GPS satellites orbiting over the earth. This
keeps the Sd-50/8 or Sd-50/40 synchronized to UTC (also known as ‘Zulu’ or ‘Greenwich
Gilderfluke & Co.• 205 South Flower Street • Burbank, California 91502 • 818/840-9484 • 800/776-5972 • fax 818/840-9485
Sd-50/xx Manual / July 13, 2020 2:36 AM / page 12 of 167

Mean Time’ (‘GMT’)) to within .001 of a second. Multiple Sd-50/8s and Sd-50/40s located
anywhere on Earth can be scheduled to play the same shows and sounds at the same times,
and will play them with .001 second accuracy. A more down-to-earth application would be to
synchronize the sounds and animation on a series of parade floats so that they all play with
perfect synchronization. The GPS receivers will work anywhere a clear view of the sky is
available. They are sealed to IP67 standards for mounting outdoors or in wet locations, and
come with a 25 foot cord to allow them to be mounted where they can receive the best GPS
signals.
•AudioFiles can be selected, played and audio levels controlled from the Show Control Sys-
tem. Digital controls can be used to ramp levels between full, half and completely muted. The
rate of fades can be set up to 9.9 seconds. Left and Right audio outputs can also be assigned
to one or two analog channels, and the volume can be controlled individually, or assigned to
the same analog control channel and controlled together.
•Two hundred fifty-five shows can be loaded onto an Sd-50/8 or Sd-50/40 at one time. Shows
can be accessed sequentially or directly using the four optoisolated ‘J8’ inputs or serial com-
mands sent through the RS-422 serial port. The ‘Next’ show can be set for the end of any
show, allowing you to loop a single show or build ‘chains’ of shows.
•The Sd-50/8 or Sd-50/40 supports update rates from one frame per second to a maximum of
one hundred frames per second. Different shows can each be programmed at different frame
rates. This allows you to program ‘delay’ shows that tick along at a low frame rate between
your main shows, and use very little memory.
•Four optoisolated ‘J8’ inputs to synchronize Sd-50/8s or Sd-50/40s with pushbuttons or other
real-time events. Multiple Sd-50/8s or Sd-50/40s can be triggered simultaneously or sequen-
tially. Each Sd-50/8 or Sd-50/40 input can be set to start, stop, pause, continue, or directly
select and play a specific show. Different actions can be requested on each inputs’ opening or
closing edges. If not used for anything else, the four optically isolated inputs can be used to
select and play up to fifteen shows at random through using a binary weighted pattern.
•Shows can also be triggered via the RS-232 or RS-422 serial ports, MIDI in ‘notes’, or IR
Trigger Mode.
•Each of the eight (Sd-50/8) or forty (Sd-50/40) Show Control outputs is rated for a continuous
load of 150 ma., or 500 ma. peak. This is enough to drive small solenoid valves, relays, LEDs
and similar loads. Relays can be used to control higher current or voltage loads (DRV-03, Pb-
DMX/08 through Pb-DMX/32,Pb-08 through Pb-32, LC-8SP, or SSR-FS). If more than forty
outputs are needed, additional Sd-50/8s or Sd-50/40s can be added to give you as many
outputs as you need.
•The digital Show Control outputs from an Sd-50/8 or Sd-50/40 can be fed to Digital to Analog
converters (like our single channel DAC-08 or four channel DAC-QUAD) wherever you need
0-10 volt analog control signals.
•When programming, or when installed as a permanent part of a larger control system, the Sd-
Gilderfluke & Co.• 205 South Flower Street • Burbank, California 91502 • 818/840-9484 • 800/776-5972 • fax 818/840-9485
Sd-50/xx Manual / July 13, 2020 2:36 AM / page 13 of 167

50/8 or Sd-50/40 accepts data through its DMX-512 and RS-422 serial port. This data is used
to update the outputs, and takes precedence over the on board Flash memory.
Gilderfluke & Co.• 205 South Flower Street • Burbank, California 91502 • 818/840-9484 • 800/776-5972 • fax 818/840-9485
Sd-50/xx Manual / July 13, 2020 2:36 AM / page 14 of 167

Differences between Sd-50s and Mp3-50s
Many long-time users of the Sd-50/xx will be familiar with our Mp3-50/0, Mp3-50/8 or Mp3-50/40. The
Mp3-50/xx series of Audio Repeaters and Show Controllers are the direct ancestors of the Sd-50/xx se-
ries. At first glance, it may be hard to tell the two of them apart. Their cases, mounting holes, and connec-
tors are almost identical.
Some of the differences are:
•The Mp3-50s used SmartMedia Flash cards for audio storage, which were the most com-
mon type of flash card available at the time the Mp3-50s were released. The Sd-50/xx
series use Sd flash cards. Sd flash cards are now the most common type of flash card avail-
able. SmartMedia Flash cards topped out with capacities of 128 MBytes. Sd flash cards are
widely available with capacities well into the GByte range.
•The Mp3-50 series required ‘blessing’ the flash card to load the firmware the player needed
to run before it could be used. No ‘blessing’ is needed with the Sd-50/xx series.
•The Mp3-50 series required drivers be loaded on your computer before it would work with
them. The Sd-50s need no special drivers on your computer.
•The Mp3-50 series featured a USB port to download sounds and configurations to the
SmartMedia card. This was also the only way to ‘bless’ a flash card before use. The Sd-50s
eliminate the USB port and ‘blessing’ altogether. Cards are loaded with sounds and config-
ured by moving them to a computer with a suitable Sd slot or adapter.
•The Mp3-50 series limited the number of DMX-512 output channels to sixteen. No such limi-
tation exists on the Sd-50s.
•DMX-512 is output on the Sd-50s, no matter what mode is selected for the DMX-512/MIDI
serial input. On the Mp3-50s, the output port always followed what was set on the input
port.
•The Mp3-50s could not use the ‘"J6’ port for triggering animation. The Sd-50s can. You
can select shows directly using these eight inputs, or use a binary pattern to directly select
any of 255 different shows.
•The Sd-50/8 or Sd-50/40 will allow you to take over pins used on the ‘"J6’ port for con-
trolling up to eight model airplane-style PWM ServoMotors.
•The amplifier used on the Sd-50/xx series is rated for 100 Watts of class-D power, which is
equivalent to many 500 Watt linear amplifiers. The amplifier on the Mp3-50s was rated for
22 Watts stereo, or 11 watts per side.
•The inputs and outputs on the Sd-50/xx series are better protected against transients.
•Onboard flash memory is eight times larger on the Sd-50/xx series than the Mp3-50 se-
ries.
•The RTC was installed on Mp3-50s only with the ‘Atomic’ Clock option. The Sd-50/8 or Sd-
50/40 come with the Real Time Clock chip installed, so the 365 day scheduling of sounds
Gilderfluke & Co.• 205 South Flower Street • Burbank, California 91502 • 818/840-9484 • 800/776-5972 • fax 818/840-9485
Sd-50/xx Manual / July 13, 2020 2:36 AM / page 15 of 167

and shows can be used, albeit with less accuracy than is available with either the GPS or
‘Atomic’ clock options.
•Schedules can now be ‘named’, and the names are retained for display on the serial menus
and for further editing.
•Firmware upgrades only need the appropriate file be loaded onto an Sd flash card. On the
next boot, the player will check to see whether the firmware is more up-to-date than it already
has, and load it if it is.
•Show, schedule and GPS files are loaded at boot-up only if they are different (different name,
date or time) from the files that are already loaded into the Sd-50. This means that there is
only a delay on boot-up if you have changed to a different flash card with a different show,
schedule or GPS files on it.
•Real time updates on serial port menus. Shows sounds and shows playing, input status,
schedules being used, and names of the shows and sounds that are started from the RTC
schedules.
Gilderfluke & Co.• 205 South Flower Street • Burbank, California 91502 • 818/840-9484 • 800/776-5972 • fax 818/840-9485
Sd-50/xx Manual / July 13, 2020 2:36 AM / page 16 of 167

Sd-50/0 Sd-50/8 or Sd-50/40 Indicators
There are only a small number of connections, indicators, and configuration switches on each Sd-50/0, Sd-50/
8, Sd-50/40.
Sd-50/0 (Audio Only):
6.000
2.750
2.250
5.500
Gilderfluke & Company • Burbank, California
1.300
Sd/MMC Flash Card
Power
12–24 vdc
Speakers
(4!to 8!)
Left Right
Sd-50/0
Gilderfluke & Company • Burbank, California
Error
Heart
Input Close
Input Open
Sd Access
Audio Run
Right
serial
Left
RS-232
1
23
412137
8
Sd-50/8 (Audio & Eight Show Control Outputs):
6.000
2.750
2.250
5.500
Gilderfluke & Company • Burbank, California
1.300
Sd/MMC Flash Card
'A'
'B'
'C'
'D'
Fu se
7
6
5
4
3
2
1
0
0
0
Power
12–24 vdc
DMX/MIDI/
RS- 422
In Out
Speakers
(4!to 8!)
Left Right
Sd-50/8
Error
Heart
Show Run
DMX-512/
MIDI/Serial
Sd Access
Audio Run
Right
serial
Left
Op tional
Clock
Input
RS-232
1
23
45
11
109
67
8
Sd-50/40 (Audio & Forty Show Control Outputs):
6.000
2.750
2.250
5.500
Gilderfluke & Company • Burbank, California
1.300
Sd/MMC Flash Card
Error
Heart
Show Run
DMX-512/
MIDI/Serial
Sd Access
Audio Run
Right
serial
Left
Op tional
Clock
Input
RS-232
'A'
'B'
'C'
'D'
3
7
6
5
4
2
1
0
Fuse
7
6
5
4
3
2
1
0
Fuse
Fu se
3 2 1 0
3 2 1 0
7
6
5
4
3
2
1
0
4
4
Power
12–24 vdc
DMX/MIDI/
RS- 422
In Out
Speakers
(4!to 8!)
Left Right
Sd-50/40Sd-50/40
1
23
45
11
109
67
8
There are up to fifty-seven Status LEDs on the Sd-50/xx:
Gilderfluke & Co.• 205 South Flower Street • Burbank, California 91502 • 818/840-9484 • 800/776-5972 • fax 818/840-9485
Sd-50/xx Manual / July 13, 2020 2:36 AM / page 17 of 167

1) !Right (Sd-50/0, Sd-50/8, Sd-50/40)
!!This LED flickers to give you a rough approximation of the audio being played out of the right side of
the audio player. It is downstream of the volume processing done on the Sd-50/0, and will dim to reflect
changes in volume level. It is upstream of the Right Volume Control Pot. Changes in the Right Volume
Control Pot will not affect the output level of this LED.
2) !Sd Access (Sd-50/0, Sd-50/8, Sd-50/40)
!!This LED glows to show accesses to the Sd-card. Even when idle, this led will be flickering slightly as
the audio processor makes sure its friend, the Sd card hasn’t left it stranded.
3) !Audio Run (Sd-50/0, Sd-50/8, Sd-50/40)
!!This LED will light to show that the Audio Player is currently playing back an .mp3 or .wav audio file.
4) !Board Error (Sd-50/0, Sd-50/8, Sd-50/40)
!!This LED will flash to show you that the Sd-50/8 or Sd-50/40 has sensed one of the following errors:
a)!RealTime DMX-512 Update Error: The optional checksum in the DMX-512 RealTime update
didn’t agree with the data received.
b)!RealTime Serial Update Error: The checksum in the serial RealTime update didn’t agree with the
data received.
c)!Download Error: There was an error in the data being downloaded to the Sd-50/8 or Sd-50/40.
d)!Download Timeout: If the data being downloaded to the Sd-50/8 or Sd-50/40 stops midstream,
this LED will flash as the Sd-50/8 or Sd-50/40 returns itself to normal operating mode.
e)!Data Verification Failure: If you ask the Sd-50/8 or Sd-50/40 to verify the data in its flash mem-
ory, and it finds an error, it will flash this LED as well as displaying an error message on your com-
puter screen.
f)!Memory locked: If you try to clear the flash memory or send a show to the Sd-50/8 or Sd-50/40
while the Write Protect is in the ‘locked’ position.
5) !Show Run (Sd-50/8, Sd-50/40)
!!This LED will light to show that the Show Control half of the Sd-50/8 or Sd-50/40 is currently running a
preprogrammed show. This LED will also flash at half of the frame rate (usually 15 Hz) when the Sd-50/8 or
Sd-50/40 is receiving RealTime update data either through the DMX-512 or serial ports. During flash mem-
ory downloads, this LED will alternate on each 256 bytes of data received. At the normal 9600 baud serial
rate, this is about one Hz. This LED flashes at about the same rate when loading files from the Sd, even
though the data is being loaded much more quickly.
6) !DMX/MIDI/Serial (Sd-50/8, Sd-50/40)
!!This LED will light to show that the Sd-50/8 or Sd-50/40 is receiving RealTime Update data through the
DMX-512, MIDI, RS-232 or RS-422 serial ports. If the Sd-50/8 or Sd-50/40 is receiving show starts from
MIDI input, then this led will flash for about 1/10th of a second each time a ‘start’ happens. During flash
memory downloads, this LED will flash alternately with the Show Control Heart LED at twice the normal
heartbeat rate.
Gilderfluke & Co.• 205 South Flower Street • Burbank, California 91502 • 818/840-9484 • 800/776-5972 • fax 818/840-9485
Sd-50/xx Manual / July 13, 2020 2:36 AM / page 18 of 167

7) !Heart (Sd-50/0, Sd-50/8, Sd-50/40)
!!The ‘heartbeat’ will always flash so that you can see that the Sd-50/xx is alive. If this LED doesn’t flash
at least twice per second, you should power down the Sd-50/xx and check the power supply and connec-
tions to the Sd-50/xx. During flash memory downloads, this LED will flash alternately with the DMX/MIDI/
Serial LED at twice the normal heartbeat rate. During firmware upgrades, these two really go pitter-pat.
8) !Left (Sd-50/0, Sd-50/8, Sd-50/40)
!!This LED flickers to give you a rough approximation of the audio being played out of the left side of the
audio player. It is downstream of the volume processing done on the Sd-50/0, and will dim to reflect
changes in volume level. It is upstream of the Left Volume Control Pot. Changes in the Left Volume Control
Pot will not affect the output level of this LED.
9) !Fuses (1 LED on Sd-50/8, 5 LEDs on Sd-50/40)
!!The eight inputs of an Sd-50/0 and the eight outputs of the Sd-50/8 or Sd-50/40 make one, eight-bit
wide ‘channel’. The forty outputs of the Sd-50/8 or Sd-50/40 are divided into five, eight-bit wide ‘channels’.
!!The eight inputs of an Sd-50/0, eight outputs of an Sd-50/8, and last channel of an Sd-50/40 are
shared with the eight optically isolated inputs to the audio half of the Sd-50/8 or Sd-50/40. This channel,
and only this channel can be switched between using ‘internal’ and ‘external’ power using the switch on the
bottom of the unit. This will be lit when there is an external voltage source present between pins #1 and #10
of the ‘"J6’ input, when the switch is in the ‘external’ position. If the fuse LED is off for this channel, check
to confirm that this switch is not in the ‘external’ position if you are not feeding this channel an external volt-
age source.
!!Each channel is fused for approximately one Amp of continuous current. These LEDs light to show if
the fuses are OK. If any are out, then a short circuit (or too heavy of a load) is dragging the outputs down
and causing the fuse to open. The fuses are actually ‘Polyswitch fuses’, which act more like circuit break-
ers. Once the overload is removed, they reset.
10)!J8 ʻAʼ, ʻBʼ, ʻCʼ, & ʻDʼInput LEDs (Sd-50/8, Sd-50/40)
!!These four LED will light to show current is flowing through the four ‘J8’ Show Control Trigger inputs.
These LEDs are on the output side of the optoisolators, so if they are glowing, the microcontroller in the unit
should be seeing the signal. These four trigger inputs are the only way to use a switch closure input to start
the animated sequence playing on an Sd-50/8 or Sd-50/40. If not using the GPS, these LEDs will flash
slightly as the clock chip in the Sd-50/8 or Sd-50/40 is read.
11)!Output LEDs (8 LEDs on Sd-50/8, 40 LEDs on Sd-50/40)
!!These LEDs show the current status of the Show Control digital outputs. If a LED is lit, then that output
is ‘ON’. Because the outputs of an Sd-50/8 or Sd-50/40 are ‘Open Collector, Switch To Ground’, you can
ground out any output pin, and the appropriate LED will light. This can be useful when diagnosing output
wiring problems. If you are commanding ‘on’ an output and you don’t see a LED, then the output is proba-
bly drawing too much current and the output is ‘self protecting’. Disconnect the load and see whether the
LED now lights. If it does, then it definitely is an overload problem. If it does not, then try turning ‘on’ some
of the other outputs. If they light OK, then the output driver might be damaged. If they do not, then verify
your addressing and retest.
Gilderfluke & Co.• 205 South Flower Street • Burbank, California 91502 • 818/840-9484 • 800/776-5972 • fax 818/840-9485
Sd-50/xx Manual / July 13, 2020 2:36 AM / page 19 of 167

!!If any of the pins on the ‘"J6’ output from an Sd-50/8 or Sd-50/40 are being used a ServoMotor PWM
outputs, the corresponding output LEDs will have a steady glow.
!!ASd-50/0 has eight optically isolated trigger inputs which can be used to select, start shows and
SoundFiles and change the audio levels of the audio half of the Sd-50/0 player. The only output channel on
an Sd-50/8, and the last output channel on an Sd-50/40 are shared with these audio trigger inputs. Nor-
mally these are not used to trigger the audio on an Sd-50/8 or Sd-50/40. The Animation ‘Virtual’ MCU
Trigger inputs from the Show Control half of the Sd-50/8 or Sd-50/40 are normally used instead. This
leaves these eight outputs free to be used as outputs on most Sd-50/8 and Sd-50/40 applications.
12)!Input Open (Sd-50/0)
!!This LED flashes briefly to show that an opening edge has occurred on any of the eight ‘"J6’ inputs.
13)!Input Close (Sd-50/0)
!!This LED flashes briefly to show that a closing edge has occurred on any of the eight ‘"J6’ inputs.
Gilderfluke & Co.• 205 South Flower Street • Burbank, California 91502 • 818/840-9484 • 800/776-5972 • fax 818/840-9485
Sd-50/xx Manual / July 13, 2020 2:36 AM / page 20 of 167
Other manuals for Sd-50/0
1
This manual suits for next models
2
Table of contents
Other Gilderfluke & Co Control System manuals
Popular Control System manuals by other brands

Lippert Components
Lippert Components OneControl ConnectAnywhere owner's manual

BriskHeat
BriskHeat XtremeFLEX MSTAT Series instruction manual

Contro l4
Contro l4 Control4 Smart Home quick start guide

elero
elero Picolo 0 operating instructions

Sony
Sony JumboTron JTC-C200 operating instructions

CAME
CAME PST001 installation manual

NEC
NEC NEAX2000 IVS user manual

Veeder-Root
Veeder-Root TLS-300 Operator's quick guide

D&R ELECTRONICS
D&R ELECTRONICS RDS17S-ELITE1-R1 installation manual

WEIHONG
WEIHONG NK300CX quick start guide

NAVIOP
NAVIOP Loop S user manual

Topcon Positioning Group
Topcon Positioning Group NORAC UC5 installation manual