Every effort has been made to ensure that the information in this manual is correct,
but please remember that it has been produced for guidance only. This owner's
manual is subject to changes without prior notice. Please check www.gingliders.com
for the latest information regarding the ONE G and other GIN products.
re-packing cardcare and maintenance
- On landing, be sure to do a PLF (Parachute Landing Fall)to minimize the risk of injury
- Once on the ground, deflate the canopy by pulling on the risers and/or lines to
avoid the possibility of being dragged.
Care, Maintenance and Repairs
The ONE G should be repacked at least every 6 months, as detailed in the packing
instructions. We always recommend that this rescue parachute is inspected and
repacked by a trained professional repacker. Additional inspections should be per-
formed if there is any suspicion of damage or undue wear.
After a deployment, the rescue should be checked by the distributor or manufacturer.
Always seek professional advice whenever in doubt.
The materials used in the ONE G have been carefully selected for maximum durabi-
lity. Nevertheless, maintaining your rescue following the guidelines below will
extend its lifetime. It is recommended that a rescue is replaced after 10 years, even
if it has never been used.
Care and Maintenance
Unnecessary exposure to UV rays, heat and humidity should always be avoided. Keep
your harness and rescue in your rucksack when not in use.
Store all your paragliding equipment in a cool, dry place, and away from solvents
such as grease, acid, oil and paint.
Never put your rescue away while damp or wet.
If your rescue parachute does ever get wet (i.e. water landings or snow) you must
remove it from the harness, dry it naturally in the air,and repack it before putting it
back into the container.
A dirty rescue canopy or container can be cleaned with lukewarm water. Mild, neutral
soap may be used if necessary, but do not rub the fabric. Rinse the canopy tho-
roughly and allow it to dry naturally. If the canopy shows signs of mildew or mould,
it must be sent to the distributor or manufacturer for repairs, as the strength could
be compromised.If the rescue is to be stored for an extended period, the canopy
should be opened and loosely rolled.
Repairs
Any repairs should only be carried out by the manufacturer or by an approved
agent. This will ensure that the correct materials and repair techniques are used.
flying with the One G
Pre-flight checks
For maximum safety,use a complete and consistent system of pre-flight checks of
your equipment and repeat the same mental sequence at every flight.
Specifically for the rescue, check that:
- There is no visible damage that could affect its airworthiness.
- The rescue parachute container is closed correctly with the pin in place.
- The deployment handle is secured correctly and all parts are in good condition. If
any part of the harness/reserve/handle system include Velcro, then this must be
separated and re-attached regularly to prevent Velcro 'bedding in'over time which
can make rescue deployment much more difficult.
Rescue Deployment
It is vital to periodically feel the position of the rescue handle in normal flight, so
that the action of reaching for the rescue is instinctive in an emergency.
In the event of an emergency, the pilot must quickly evaluate his or her height and
the seriousness of the incident. On that basis, an instantaneous decision to deploy
the rescue or not must be taken. Deploying the rescue when the glider is recovera-
ble may increase the danger of injury. If you have sufficient height and the glider
is in a flat spin, it is preferable to first try to stop the spin (e.g. full stall), due to
the risk of entanglement. On the other hand, a second hesitation in deploying the
reserve could prove costly if there is insufficient height.
Deployment Procedure
If the rescue is to be deployed, the procedure is as follows:
- Look for the rescue handle and grasp it firmly with one hand.
- Pull firmly upwards/sidewards on the handle. This action undoes the Velcro and
allows the release pins to be pulled out of the release loops, so that the inner
container can be released from the harness'rescue compartment.
- Look for a clear area, and in a continuous motion, throw (and RELEASE!) the res-
cue as quickly and forcefully as possible away from yourself and the glider.
Throwing the rescue in the direction of the air stream will speed opening, and
throwing it against the direction of spin will help prevent tangling with the glider.
- After deployment, avoid entanglement and pendulum motions by pulling in the
glider as symmetrically as possible with the B, C, D or brake lines
installation in harness
The ONE G is compatible with GIN harnesses. It may also be compatible with
most other manufacturer's harnesses, but there is no guarantee of this and
you should check with your instructor or dealer.
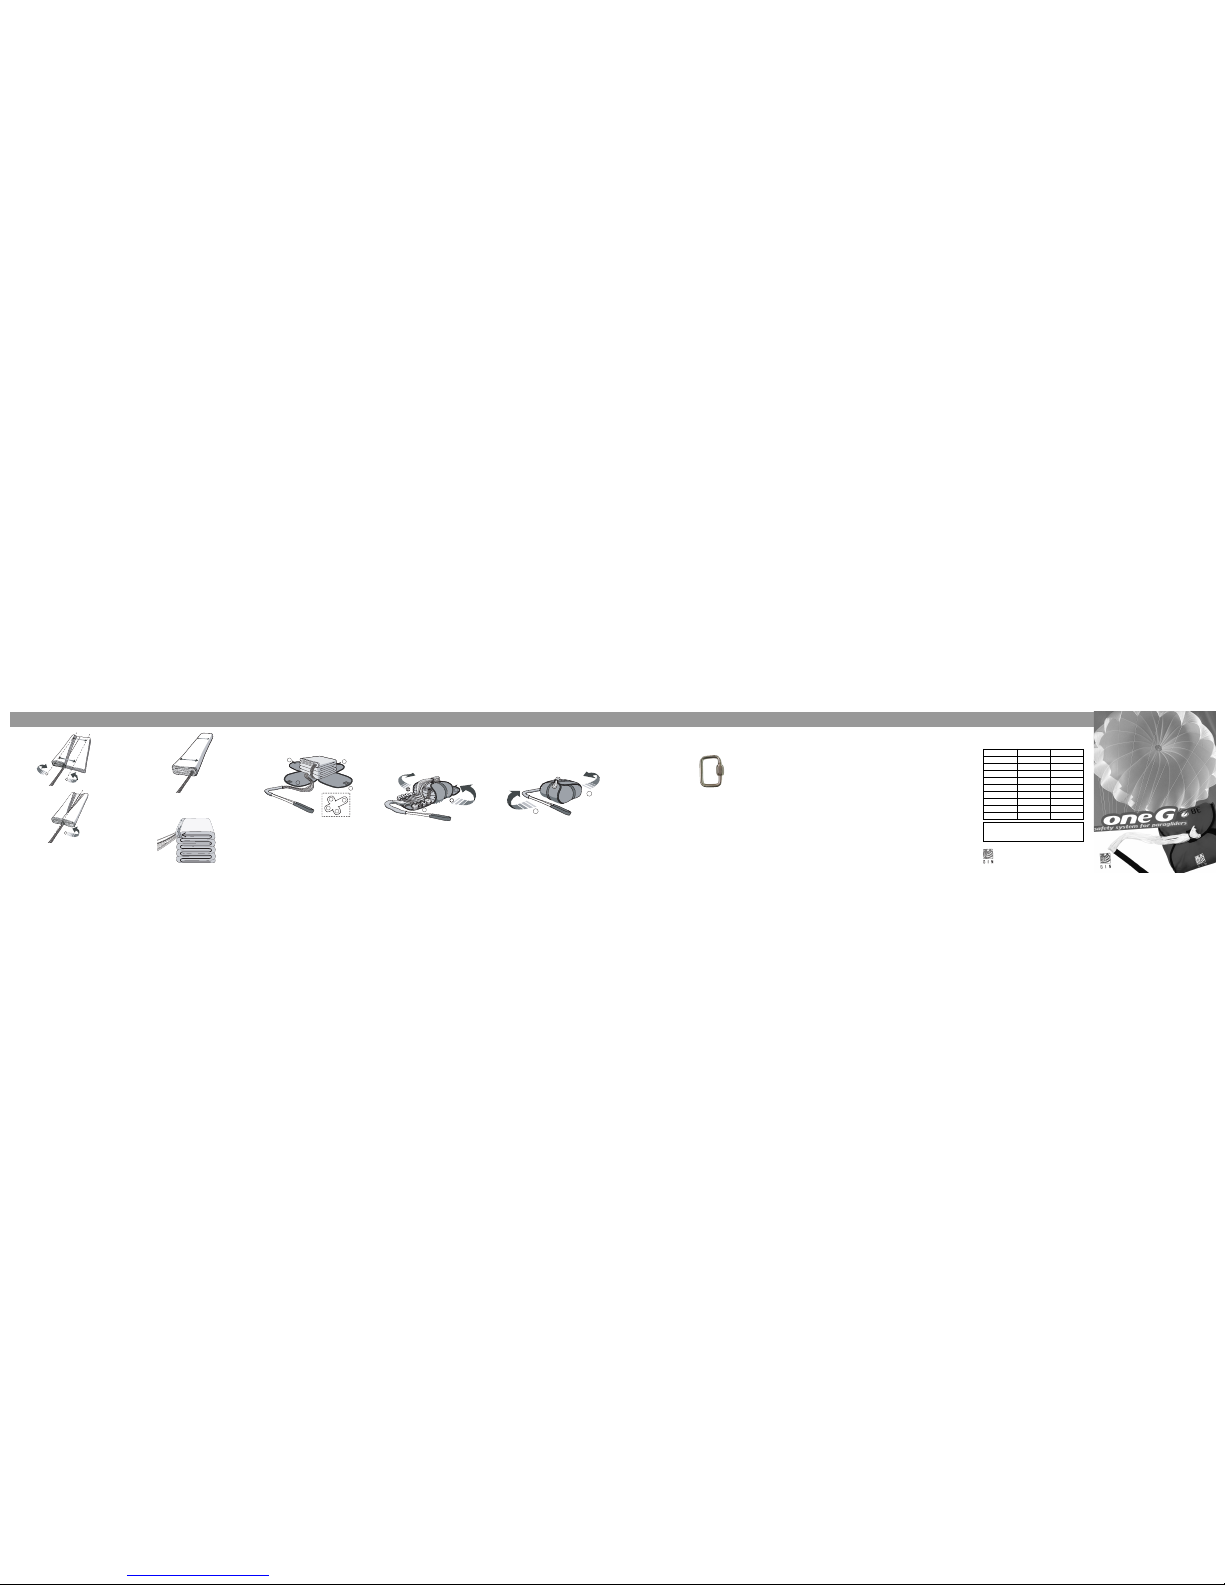
Attaching the rescue bridle to the harness webbing
A suitable screw gate connector should be used, for
example: a 7mm, square, Stainless Steel maillon, but in any
case, the connector must have a minimum strength of at
least 9 times of the total suspended weight.
The maillon should be held in place with rubber bands, tape
or plastic heat sealed tube. Webbing to webbing connections
are not recommended, due to the danger of getting the knot
the wrong way round, which significantly weakens it.
Attaching the rescue deployment bag to the harness deployment handle
Most harnesses come with their own deployment handle. This handle and it's
strap must be connected to the inner deployment bag of the parachute. If your
harness does not have the proper handle, please contact your harness dealer.
The ONE G has a choice of 4 loops by which to attach the harness deployment
handle. The choice of one or the other depends on the position of the rescue
container in your harness. Front or back mounted rescue systems are generally
attached by the centre loop, whereas side mounted systems are attached by the
loop at the top. Under seat mounted systems are attached by the loop at the
side. ATTACHMENTPOINT IS DEPEND ON HARNESS !! If in doubt, consult with a
professional.
After each repacking it must be checked again that the rescue can be easy
pulled out less than 7kg. This is DHV recommendation. At this time you
check also again the right connection of bridle, inner bag and harness.
12
Test
Lifting the bridle, check the force required to allow the lines to free them-
selves from the closing loop of the deployment bag. This force should be
around 200g. This force may be verified with a spring balance, if available.