Gin Yeti Convertible 2 User manual

1
User manual
v1.0 - 11/2017
EN

2
Reversible harness
Introducing the
Yeti Convertible 2
The Yeti Convertible 2 is a lightweight reversible harness. It
is ideal for hike ‘n fly, para-alpinism, travel, and soaring. The
Yeti Convertible 2 features new advancements in lightweight
materials combined with excellent geometry to maximise
comfort and usability.

3
Contents
Thank you
Warning
About Gin Gliders
Development and Philosophy
Specifications
Before you fly
Setting up
Rescue installation
Adjustments
Helmet Storage
Flying with the Yeti Convertible 2
General warnings and advice
Pre-flight checks
Rescue deployment
Landing with the Yeti Contvertible 2
Miscellaneous
Maintenance and repairs
Care and maintenance
Storage
Materials
GIN quality and service
GIN lifetime guarantee
Care of the environment
Product registration
Final words
.......................................................4
.......................................................5
.......................................................6
.....................................7
.......................................................8
.......................................................9
.....................................................20
...........................21
........................................24
....................................................27

4
Thank you...
...for choosing Gin Gliders. We are confident you’ll enjoy many rewarding experiences in the air with
your GIN harness.
This manual contains important safety, performance and maintenance information. Read it before your
first flight, keep it for reference, and please pass it on to the new owner if you ever re-sell your harness.
Any updates to this manual, or relevant safety information, will be published on our website: www.
gingliders.com. you can also register for e-mail updates via our website.
Happy flying and safe landings,
GIN team

5
INTENDED USE: Lightweight air sports
equipment with a maximum mass of less than
120kg, operated in the paragliding division.
Warning
Like any extreme sport, paragliding involves unpredictable risks which may lead to injury or death. By
choosing to fly, you assume the sole responsibility for those risks. You can minimize the risks by having
the appropriate attitude, training and experience and by properly understanding, using and maintaining
your equipment. Always seek to expand your knowledge and to develop self-reliance. If there is anything
you do not understand, consult with your local dealer as a first point of contact, with the GIN importer in
your country or with Gin Gliders directly.
Because it is impossible to anticipate every situation or condition that can occur while paragliding, this
manual makes no representation about the safe use of the paragliding equipment under all conditions.
Neither Gin Gliders nor the seller of GIN equipment can guarantee, or be held responsible for, the safety of
yourself or anyone else.
Many countries have specific regulations or laws regarding paragliding activity. It’s your responsibility
to know and observe the regulations of the region where you fly.
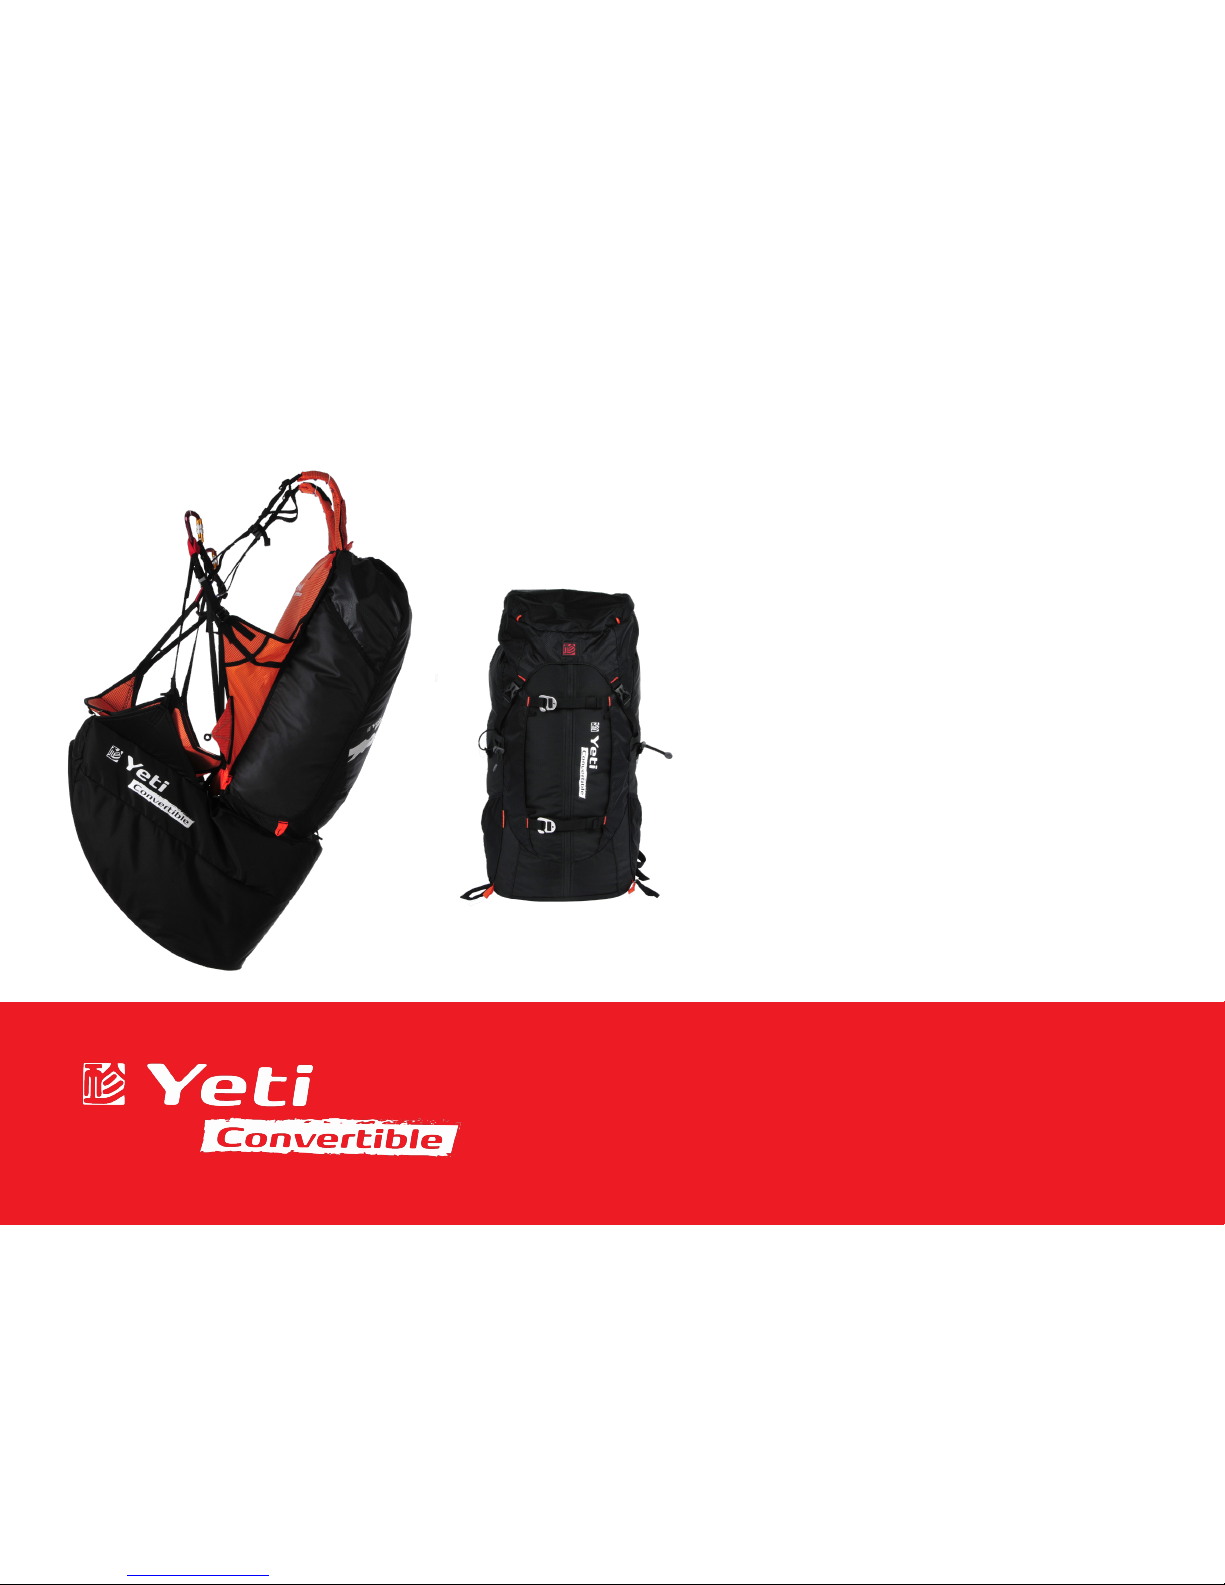
The Yeti Convertible 2 harness is certified according to EN 1651 with a max load of 120kg. This harness
is for paragliding use only, extreme flight manoeuvres including SIV safety training are not recommended.

6
About Gin Gliders
Dream
In forming Gin Gliders, designer and competition pilot Gin Seok Song had one simple dream: to make
the best possible paragliding equipment that pilots all over the world would love to fly—whatever their
ambitions.
At Gin Gliders, we bring together consultant aerodynamists, world cup pilots, engineers and paragliding
school instructors, all dedicated to fulfilling this dream.
Touch
We’re a “hands-on” company that puts continuous innovation and development at the center of
everything we do.
At our purpose-built R&D workshop at head office in Korea, we are able to design, manufacture, test-fly
and modify prototypes all in a matter of hours. Our international R&D team is on hand both in Korea and
at locations worldwide. This guarantees that your equipment has been thoroughly tested to cope with the
toughest flying conditions.
Our own production facilities in East Asia ensure the quality of the finished product and also the well-
being of our production staff.
Believe
We believe that the product should speak for itself. Only by flying can the pilots understand their
equipment and develop trust and confidence in it. From this feeling comes safety, comfort, performance
and fun. The grin when you land should say it all!

7
Development & Philosophy
The Yeti Convertible 2 our latest lightweight reversible harness. It is a development from the orginal
highly successful Yeti Convertible. We took your feedback onboard throughout the development. As a
result we have managed to improve in all aspects.
The materials used for the rucksack have been upgraded a specially designed Air-Flow System has been
incorporated. This new system dramatically increases the comfort for the wear and rapidly wicks away
sweat.
The reversible rucksack has been redesigned to appropriately re-distribute the load of your flying gear
from the shoulders to the waist strap for a 30 / 70 weight distribution.
The new, optional, airbag has been designed with an integrated rescue compartment that can be used
with all GIN lightweight rescues. This feature will imporve the pilots experience as a front mounted resuce
can be cumbersome and many pilots prefer an under seat rescue. However some pilots do prefer the frount
mounted rescue, on the right side of the harness there is a bridle tunnel to allow front mounted rescues to
be connected to the shoulder attachment points. Or the pilot can connect the rescue bridles directly to the
carabiners.
The front air intake of the air bag improves inflation and the interal structure of the airbag helps to
reduce impact forces and maximise efficiency. The new titanium wire structure improves pre-inflation and
is resistant to bending or retaining improper shape, making packing easier and flying safer.

8
Specifications
Size One Size
Harness weight 1.4kg
Certification
The Yeti Convertible has EN certification, max load 120daN
Certification Number: PH 192.2017
Delivery package
1 Harness
2 Carabiner (30mm)
1 Speedbar
1 Helmet cover
- Delivery weight- 1.6kg
Optional
- Airbag (rescue combo)
- Light Yeti rescue bridle (125 / 80cm)
- Soft shackle

9
CAUTION: Make sure that the speed system
is not too short. The front risers of your
paraglider must not be pulled down in normal
(unaccelerated) flight.
Speed line should go between airbag and
harness, do not run the speed line on the
outside of the airbag!
Before you fly
Make sure your dealer has checked the harness for completeness and basic settings. Your harness must
be assembled by a suitably qualified paragliding professional, for example, your instructor.
Gin Gliders recommends that assembly be carried out in the following order. If you are in any doubt
whatsoever about this procedure, please seek professional advice from your instructor, GIN dealer or
importer.
Setting up
Speed system assembly
The Yeti Convertible 2 is fitted with a fully functional, easy to use and lightweight speed bar. Careful
attention has gone into the precise position for maximum comfort and usability. To assemble the speed
system, first pass the line through the ceramic ring (1). Next, pass the line through the metal ring at the
bottom edge of the seat (2). Connect the line to the speedbar using a secure knot.
The black plastic stopper on the speed system should be placed above the ceramic ring during assembly
This can be used to hold the speed bar close to the harness during ground handling and take off. Once in
the air simply push the speed bar and the stopper will slide out of the way.
To connect the speedbar to your glider riser use a simple loop knot (3).
2
1
1
2
3

10
Connecting the main carabiner
The carabiner attachment points are colour coded to match your
GIN Glider. BLUE on the right and RED on the left to match your
GIN glider. To connect your carabiner to the attachment points be
sure to pass the carabiner through all 3 webbing loops on each
side. Each loop is sewn together to make assembly easier and
safer for the pilot.
It is important that the carabiner remains in the upright
position so the load is distributed lengthwise. Be sure to check
that your carabiner gates are securely closed before takeoff to
ensure they do not open or break during flight.

11
Connecting the Airbag
The Yeti Convertible 2 can be flown with an optional airbag. The
Convertible 2 airbag is designed with a reserve container with a
volume of 7 litters.
There is one zipper and 3 connection points on each side of the
airbag.
1) Connect zipper and anchor to the harness loop
2) Connect Side harness toggle
3) Connect front harness toggle
4) Connect rear harness toggle

12
Adjustments
The Yeti Convertible harness is designed with full feature adjustments to allow you to adjust to your
harness to your individual physique and flying style. It is important to adjust it correctly to ensure you
can easily slide into the sitting position after take off. A poorly adjusted harness can adversely affect the
flying characteristics of your paraglider.
Perform adjustments before your first flight by hanging in a simulator and fine-tune the settings if
necessary during your first few flights.
Shoulder straps (1)
The optimum setting for the shoulder straps depends on the height of the pilot. Step into the harness
and stand upright, symmetrically adjust the shoulder straps until they are a snug fit, but not tight.
To tighten: pull DOWN on the BLACK webbing
To loosen: pull UP on the buckle
Lateral straps (2)
The Lateral straps can be tightened or loosened to adjust the sitting angle of the pilot.
To tighten: pull FORWARD on the BLACK webbing
To loosen: pull BACK on the buckle
2
1
2
1

13
WARNING: If you are in any doubt about any
aspect of rescue installation, seek professional
advice!
IMPORTANT: You must perform a test
deployment from a simulator to verify the
installation.
Rescue Installation and compatibility check
Gin Gliders recommend that rescue installation is performed properly by a competent person. The
rescue parachute is a pilots last resort and failure to pack or connect the reserve parachute in the correct
way may cause death or severe injury. The pilot is responsible for ensuring proper installation.
This harness is compatible with the G-Lite, Yeti and Yeti Cross rescue parachutes. Other manufacturers’
rescues may also be used but we cannot guarantee their function. The pilot is responsible for checking
compatibility.
Every first installation of a rescue system into the harness (that means every new combination of
harness and rescue system) must be checked by a qualified paragliding professional for compatibility. To
verify the installation, you must perform a test deployment by sitting in a simulator.
Rescue should be repacked upon the recommendations of the rescue manufacturer. After every repack of
the rescue parachute you should also do a compatibility check.
Rescue compatibility
MAKE SURE THAT THE RESCUE PARACHUTE CAN BE RELEASED FROM THE RESCUE CONTAINER—it must be
done by you, the pilot, sitting in the harness hanging from a simulator.

14
The deployment bag and handle
The rescue container for this harness comes with its own deployment handle. The handle and inner bag
are already connected.
Be sure to check the length of the strap connecting the rescue deployment handle to the rescue inner
container. It should be long enough that the reserve can be extracted without the danger of the pins not
being pulled before the strap tightens on the reserve, but not so long that there is excessive slack that
extends the movement required for deployment.
The deployment bag of other manufacturers’ rescue systems (i.e. non-GIN rescue systems) may have
different loop positions which may cause a deployment failure. Be sure to contact your parachute dealer
or a qualified professional to check the connection, position and secure deployment, and refer to the
rescue manual for details.
WARNING: The rescue parachute inner container
of other manufacturers’ may have different
loop positions which make it impossible to
deploy the rescue correctly.

15
WARNING: When connecting the rescue bridle
be sure to secure the connection using tape,
rubber bands or heat shrink wrap. If the
bridles are not secure they may burn or cut
from excess friction.
Connecting the rescue bridle
To connect a rescue to your harness we recommend using a GIN Rescue Carabiner. If you choose to
use different type of connector, it should be rated at least 9 times the maximum weight. For example, our
recommended 8mm Stainless Steel screwgate maillon (square) connector has a minimum breaking load of
24kN (2400 Kgf). It is the pilot’s responsibility to check the compatibility of the rescue system and ensure
that it is installed properly.
Be sure to inspect your connector during normal maintenance and safety checks. Replace it whenever
there are any signs of wear and check your rescue system with a professional after any deployment. We
recommend that you cover the connection using the Maillon rapid cover to prevent excess friction. Rubber-
bands should also be used to secure the attachment and prevent excess friction.
Recommended by GIN: 8mm stainless steel screwgate maillon
8mm square maillon
Breaking load: 28kN

16
WARNING: When installing the reserve make
sure the reserve handle is up and the reserve
lines are facing down.
Rescue installation guide
It is very important to properly install the rescue parachute. If the parachute is not folded correctly or
the lines are not placed properly then a serious if not fatal accident could result. If you have any doubts
speak with your instructor or GIN dealer.
Main rescue installation guide
Begin by first connecting the Y bridle and the rescue handle to the rescue parachute . Install the rescue
into the harness with the handle connection FACING UP and the extra para line neatly folded on the bottom
of the container. Be sure that the inner bag is installed so the rescue handle loop is facing the opening of
the rescue container.
Close the rescue container in the following order.
1) Insert reserve with rescue bridle on bottom and handle attachment facing out
2) Connect the LEFT zipper and bring both zippers to the center of the rescue container
3) Pull the anchor loops through the outer container cover grommets
4) Pass the rescue handle wire through the anchor points and hide the ends in the wire covers
5) Close both zippers.
IMPORTANT: Make sure both zippers are fully closed! The LEFT zipper must run all the way off the
zipper track or it will interfeer with rescue deployment.
Rescue container volume: 3000-7000cm3
*Follow the instructions on the next page.

17
5
3
2
1
4
IMPORTANT: The zipper head must go to
the end of the zipper track!
Close zipperPlace the rescue handle into outer cover
pocket
Pass the rescue handle wire throught the
anchor loops
Pass anchor loops through outer cover
eyelets
Make sure the rescue handle is in the
middle
Connect zipperInsert reserve with rescue bridle on
bottom and handle attachment facing out

18
Rescue shoulder connection
To connect the rescue bridle to the harness shoulder attachment point we recommend using the GIN
Soft Shackle.
1) Use a maillon or soft shackle to connect the rescue bridle to the shoulder attachment point.
2) Use the BLACK elastic band fixed to the shoulder attachment to hold the attachment point close to
the harness.
3) Run the rescue bridle through the bridle tunnel.
IMPORTANT: Make sure the connection is clean and secure with no twists or knots in the line.

19
Connecting a front reserve
The reserve risers can be connected to:
1) Main carabiner (as shown in the photo)
- Be sure that the carabiner gate is facing the pilot to allow
the reserve to freely slide up the carabiner in the event of a
rescue deployment.
2) Shoulder attachment points
- To connect to the shoulder attachment points we recommend
using the Light Yeti Rescue “Y” Bridle 80cm
- Pass the rescue bridle along the RIGHT side of the harness
and through the rescue bridle tunnel.
CAUTION: Make sure that carabiner gate faces
the rear of the harness to allow the reserve
risers to move unimpeded.

20
Helmet Packing
We realise that there are a huge number of equipment combinations that pilots use these days. To
accomodate for this we have made this our most versitile hike and fly harness yet.
After packing the harness there are several ways to pack the helmet into or onto the bag. Provided with
your Yeti Convertible 2 you will find a helmet cover, this cover can be used to secure the helmet on to the
top or rear of the back pack. Or if you prefer you can store the helmet inside the back pack along with the
glider.
Table of contents
Other Gin Accessories manuals