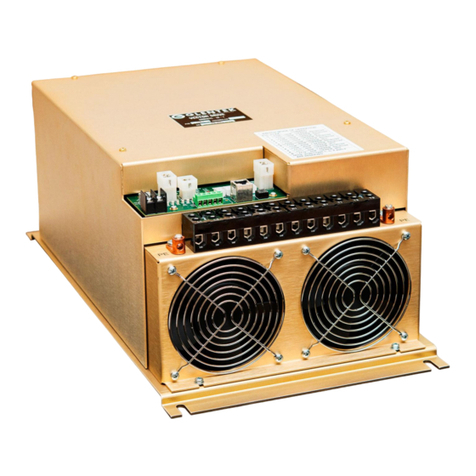
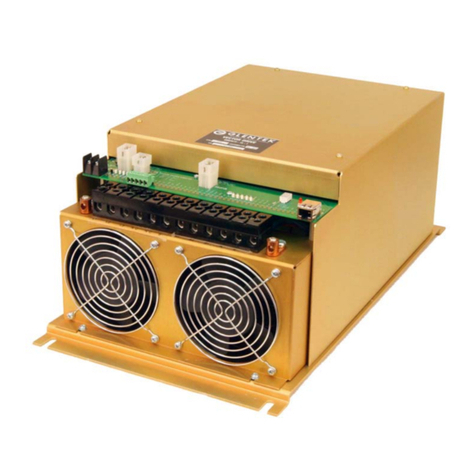
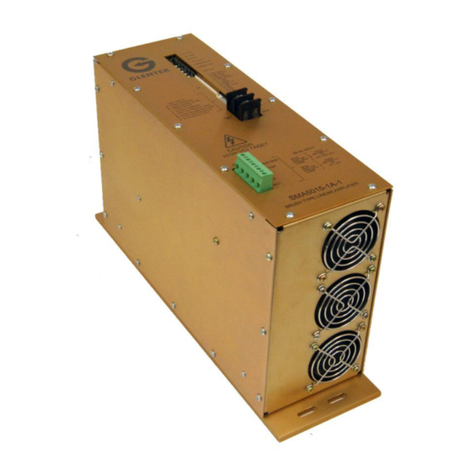
Glentek SMB9675-1A-1 User manual

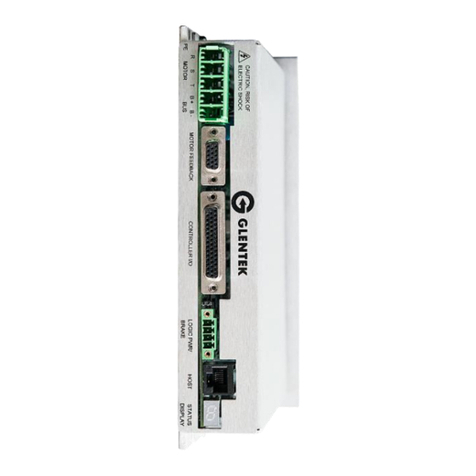
INSTALLATION
&
OPERATION MANUAL
Model SMB9675-1A-1
MANUAL#: 9675-1040-000
REVISION: (B)
DATE: 9 Sep 2011
FADAL REPLACEMENT
SENSORED VECTOR DRIVE &
SENSORLESS INVERTER DRIVE
Fadal is a trademark of Fadal Machining Centers, we have no affiliation with Fadal or Mag IAS


TABLE OF CONTENTS
CHAPTER ONE: GENERAL
1.1 Overview……………………………………….…………………...3
1.2 Intended Application………………………….…………………...3
1.3 Equivalent GTK Vector Drive Replacement…….…….………...4
1.4 Equivalent GTK VFD Drive Replacement……….……………...5
CHAPTER TWO: APPLICATION SOFTWARE
2.1 MotionMaestro©……………………………….…………………..6
2.2 Installing MotionMaestro©………………………..……………….6
2.2.1 Requirements………………………...………………...6
2.2.2 MotionMaestro© v1.37………………...……………...6
2.2.3 Installation………………………………...…………….6
2.3 Communicating with the Vector Drive……………….…………..7
2.3.1 Serial Port……………………………….……………...7
2.3.2 USB Port………………………………...……………...7
CHAPTER THREE:
INSTALLING THE GLENTEK VECTOR DRIVE INTO A FADAL VMC
3.1 Removing the old drive………………………….………………...8
3.2 Mechanical Installation…………………………….……………...8
3.3 Electrical Installation………………………………….…………...8
3.3.1 Power Terminal Block Connections……..…………...8
3.3.2 Load Meter Cable……………………………………...8
3.3.3 Control Cable…………………………..……………….8
3.3.4 Wye/Delta Cable…………………………..…………...8
3.3.5 Encoder Feedback Cable……………….…………….8
3.3.6 Rigid Tap Cable (Encoder Output)……….…………..8
CHAPTER FOUR: SETUP AND TUNING
4.1 Turning the power on………………………….…………………..10
4.2 Establishing Communications……………….…………………...10
4.3 Motor Parameters……………………………….………………….11
4.4 Tuning & Offset Adjustment……………………..………………..12
4.5 Saving Your Setup…………………………….…………………..12
4.6 Rigid Tap Test………………………………….…………………..13
CHAPTER FIVE: TROUBLESHOOTING AND MAINTENANCE
5.1 Status Display Codes………………..…………………………….15
5.2 Maintenance…………………………..…………………………….15
CHAPTER SIX: WARRANTY, FACTORY REPAIR AND SAFETY
6.1 Warranty……………………..……………………………………..16
6.2 Factory Repair…………..………………………………………….16
6.3 Safety…………………………..…………………………………...17
APPENDIX A - SERVO DRIVE CONNECTIONS
A - 1 Power, Regen, and Motor Connector………………………….18
A - 2 Controller I/O Connector………………..……………………...18
A - 3 Encoder Input Connector………………..……………………..19
A - 4 Encoder Ooutput Connector………………..………………….20
A - 5 Serial Communication Connector……..……………………….20
1
Fadal is a trademark of Fadal Machining Centers, we have no affiliation with Fadal or Mag IAS
2 Fadal is a trademark of Fadal Machining Centers, we have no affiliation with Fadal or Mag IAS
A - 6 Power and Signal Wiring……..………………………………...20
APPENDIX B - AMPLIFIER CONNECTION INTERFACE
Status Display…………………………………………………………..21
Controller Input and Output Signals………………………………….21
Analog Input, Command Signal………………………………………22
Controller Inputs/Outputs……………………………………………...22
Encoder Feedback……………………………………………………..24
Encoder Output………………………………………………………...24
Load Meter Output……………………………………………………..24
PC Interface…………………………………………………………….25
Power Input and Motor Output………………………………………..26
DRAWINGS & DIAGRAMS
FADAL Vector Drive Installation Drawing…………………………...27
Vector Drive Connection Diagram Sheet 1………………………….28
Vector Drive Connection Diagram Sheet 2………………………….29
Sensored Vector Command Input Control Diagram………………..30
Sensored Vector Velocity Control Loop Diagram…………………..31
Sensored Vector Current Control Loop Diagram…………………...32

CHAPTER ONE: GENERAL
1.1. Overview
The Glentek Inc. SMB9675-1A-1 vector drive uses flux vector technology to close
a torque (current) feedback loop. When applied to a three phase induction motor,
the result is servo motor like performance from a standard three phase induction
motor. The Digital Signal Processor (DSP) based vector drive uses it’s high speed
math processing capability to continuously calculate flux and torque vectors and to
maintain a constant 90 degree phase difference between the vectors. This technique
allows torque control from zero speed to base speed and above. Encoder feedback
provides the shaft position data needed to calculate the vectors and velocity data, thus,
Vector Control allows precise speed control down to and including zero speed of an
induction motor.
The SMB9675-1A-1 vector drive can operate in sensorless mode (no feedback is
needed). This mode of operation is usually referred to as inverter mode or VFD
(Variable Frequency Drive) mode. With advanced mathematic algorithms and latest
DSP technology, Glentek SMB9675-1A-1 VFD is optimized to produce a steady start-
ing torque from standstill right up to full speed with high efficiency. The applied fre-
quency and voltage are increased at a controlled rate and ramped up to accelerate the
load without drawing excessive current.
1.2. Intended Application
The SMB9675-1A-1 is a drop-in replacement vector drive or VFD drive on FADAL EN-
GINEERING VMC’s having the part numbers listed in Table 1 (vector drive) and Table
2 (VFD drive). Specify equivalent GTK P/N when ordering.
Fadal is a trademark of Fadal Machining Centers, we have no affiliation with Fadal or Mag IAS
3

1.3 Fadal Engineering VMC and Equivalent GTK Vector Drive Replacement
Table 1:
Note: Glentek Vector drives SMB9675-1A-1-6889 and SMB9675-1A-1-7090 are shipped
with parameters tuned and optimized for 15HP motors. Please contact one of
Glentek’s sales engineers for help in tuning and optimizing vector drives for motors
that have different horsepower rating.
Fadal is a trademark of Fadal Machining Centers, we have no affiliation with Fadal or Mag IAS
FADAL P/N Description Spindle
RPM
Motor HP GTK Replacement P/N
INV-0015 VECTOR,BALDOR; 10HP 10K CL 10000 10 SMB9675-1A-1-6889
INV-0016 VECTOR,BALDOR; 10HP VMC15 CL 7500 10 SMB9675-1A-1-7090
INV-0020 VECTOR,BALDOR; 15HT 10K CL 10000 15 SMB9675-1A-1-6889
INV-0039 VECTOR,BALDOR; 15HT 10K CE 10000 15 SMB9675-1A-1-6889
INV-0040 VECTOR,BALDOR; 15HT 10K 10K/7.5K 15 SMB9675-1A-1-7090
INV-0041 VECTOR,BALDOR; 10HP 10K CL 10K/7.5K 10 SMB9675-1A-1-7090
INV-0042 VECTOR,BALDOR; 10HP 10K CE 10000 10 SMB9675-1A-1-6889
INV-0043 VECTOR,BALDOR; 15HT 7.5K YD 7500 15 SMB9675-1A-1-7090
INV-0044 VECTOR,BALDOR; 10HP 7.5K YD CE 7500 10 SMB9675-1A-1-7090
INV-0045 VECTOR,BALDOR; 10HP 7.5K YD 10K/7.5K 10 SMB9675-1A-1-7090
INV-0046 VECTOR,BALDOR; 15HT 7.5K YD CE 7500 15 SMB9675-1A-1-7090
INV-0049 VECTOR,BALDOR; 10HP 7.5K/10K 10K/7.5K 10 SMB9675-1A-1-7090
INV-0055 VECTOR,BALDOR; 10HP 6.5K CL 6500 10 SMB9675-1A-1-7090
INV-0056 VECTOR,AMC; 10 or 15HP 10K/7.5K 10K/7.5K 15 SMB9675-1A-1-7090
INV-0058 VECTOR,BALDOR; 20HPVHT 10K CL 10000 20 SMB9675-1A-1-6889
INV-0059 VECTOR,BALDOR; 20HPVHT 10K CE 10000 20 SMB9675-1A-1-6889
INV-0070 VECTOR,BALDOR; 20HPVHT 10K CE 10000 20 SMB9675-1A-1-6889
INV-0077 VECTOR DRIVE,YASKAWA; 15HT 10K CE 104D 10000 15 SMB9675-1A-1-6889
INV-0083 VECTOR DRIVE,YASKAWA; 10HP CE 7.5/10L 10K/7.5K 10 SMB9675-1A-1-7090
INV-0086 VECTOR DRIVE, YASKAWA; 20VHT 10K CE CNC88 10000 20 SMB9675-1A-1-6889
INV-0093 VECTOR DRIVE,YASKAWA; 15HT 10K CE CNC88 10K/7.5K 15 SMB9675-1A-1-7090
INV-0095 VECTOR, AMC; 10 or 15HP 10K/7.5K CE PWR SUPPLY 10K/7.5K 15 SMB9675-1A-1-7090
INV-0096 VECTOR, AMC; 10 or 15HP 10K/7.5K 10K.7.5K 15 SMB9675-1A-1-7090
INV-0097 VECTOR DRIVE, YASKAWA; 10HP CE 104D 10K/7.5K 10 SMB9675-1A-1-7090
4

5
1.4 Fadal Engineering VMC and Equivalent GTK VFD Drive Replacement
Table 2:
Note: Glentek VFD drives SMB9675-1A-1-7091 are shipped with parameters tuned and
optimized for 15HP motors. Please contact one of Glentek’s sales engineers for
help in tuning and optimizing VFD drives for motors that have different horsepower
rating.
Fadal is a trademark of Fadal Machining Centers, we have no affiliation with Fadal or Mag IAS
FADAL P/N Description Spindle
RPM
Motor HP GTK Replacement P/N
INV-0085 INVERT/CBL,YASKAWA G7 7.5HP CL CE 104D 7500 10 SMB9675-1A-1-7091
INV-0076 INVERTER,.CBL,YASKAWA; 7.5HP 7500RPM NON-RT 7500 7.5 SMB9675-1A-1-7091
INV-0075 INVERTER,/CBL,YASKAWA; 7.5HP 7500RPM RT 7500 7.5 SMB9675-1A-1-7091
INV-0052 INVERTER,BALDOR; 10HP 10K NCL- NON RT 10000 10 SMB9675-1A-1-7091
INV-0054 INVERTER,BALDOR; 15HT 10K NCL- NON RT 10000 20 SMB9675-1A-1-7091
INV-0057 INVERTER,BALDOR; 5HP 6500RPM 6POLE 6500 5 SMB9675-1A-1-7091
INV-0032 INVERTER,BALDOR; 5HP 7.5K NCL- NON RT YD 7500 5 SMB9675-1A-1-7091
INV-0037 INVERTER,MITS; 10HP 10K CL 10000 10000 10 SMB9675-1A-1-7091
INV-0036 INVERTER,MITS; 10HP 10K CL YD 10000 10 SMB9675-1A-1-7091
INV-0026 INVERTER,MITS; 10HP 15K CL 10000 10 SMB9675-1A-1-7091
INV-0025 INVERTER,MITS; 10HP 15K NCL- NON RT 10000 10 SMB9675-1A-1-7091
INV-0038 INVERTER,MITS; 15HP 10K CL YD 10000 15 SMB9675-1A-1-7091
INV-0034 INVERTER,MITS; 15HT 10K CL 10000 15 SMB9675-1A-1-7091
INV-0006 INVERTER,MITS; 20HP 10K W/BRAKE 10000 20 SMB9675-1A-1-7091
INV-0035 INVERTER,MITS; 20HP NCL- NON RT 10000 20 SMB9675-1A-1-7091
INV-0027 INVERTER,MITS; 5HP 10K NCL- NON RT 10000 5 SMB9675-1A-1-7091
INV-0031 INVERTER,MITS; 5HP 10K NCL- NON RT 10000 5 SMB9675-1A-1-7091

CHAPTER TWO: APPLICATION SOFTWARE
2.1. MotionMaestro©
MotionMaestro© is Glentek's Windows based application software that you will need
to setup and tune the vector drive. MotionMaestro© has many features that allow
users to easily configure and tune the entire Glentek digital product line. However, for
the Fadal VMC replacement vector drive and VFD drive most of the setup has been
done at the factory. The installer only needs go through a quick tuning procedure to
get the vector drive or the VFD drive up and running. But first MotionMaestro needs
to be installed.
2.2. Installing MotionMaestro©
2.2.1. Requirements
MotionMaestro© requires Windows95, Windows 98 SE, Windows ME, Windows 7,
Windows NT 4.0, Windows 2000 or Windows XP operating system running on a laptop
with a serial port or a USB port. It is suggested that you have a minimum of 3 mega
bytes of application program disk space available prior to installation.
2.2.2. MotionMaestro© v1.37
Only MotionMaestro© v1.37 or later will work with Glentek Inc. vector or VFD drives,
earlier versions are not compatible.
2.2.3. Installation
The MotionMaestro© install disk is set up to utilize Install Shield to simplify installation.
There are only a few setup options offered. In general you can press NEXT or YES
until installation is complete. When installation is complete, you will find a
MotionMaestro© icon on the Windows Start\Programs menu. The MotionMaestro©
installation program is named Setup.exe. It is found in the MotionMaestro© \disk1
directory of the distribution CD, included with the vector drive. The installation will
create a Glentek folder in the Program Files folder. A MotionMaestro© 1.37 folder is
created when 1.37 installed. You can have multiple versions of MotionMaestro©
installed, if you wish, and they will be placed into their own directories. When
MotionMaestro© is directed to establish communications with the amplifier,
the amplifier is queried for a model ID and Firmware version. MotionMaestro© will
configure itself and select the appropriate configuration files based on the amplifier
returned values.
Fadal is a trademark of Fadal Machining Centers, we have no affiliation with Fadal or Mag IAS
6

2.3. Communicating With The Vector Drive or VFD Drive
2.3.1. Serial Port
If your PC has a serial port (RS-232) you can connect to the vector drive or the VFD
drive with Glentek cable (GTK # GC2400-AL005AM-000). This cable has a female
DB-9 (computer) on one end and an RJ-45 (vector drive) on the other.
2.3.2. USB Port
If your PC has a USB port, a USB to serial port (RS-232) adapter (GTK # GC2410-
001). is necessary in addition to the cable above. Two known tested adapters are
available: USBG-232 from USBGEAR and US232R-10 from FUTURE TECHNOLOGY
DEVICES INTERNATIONAL Ltd.
GC2400-AL005AM-000SERIAL PORT ON THE VECTOR DRIVE
USBG-232
7

CHAPTER THREE:
INSTALLING THE GLENTEK VECTOR/VFD DRIVE INTO A FADAL VMC
3.1. Removing the old drive
Turn off the power to the VMC and wait 5 minutes before beginning removal.
Disconnect all the wires and cables. If any wires are not labeled take note of their
location. Of the cables, only the Control cable and the Delta/Wye cable can be
confused, both are 6 terminal connectors. The control cable has 6 sockets in
the connector and Delta/Wye cable has 3 sockets in the connector. Unbolt
the old drive and remove.
3.2. Mechanical Installation
Install the new drive (slots down) by first resting the drive on the lower mounting studs
in the panel and positioning the drive over the studs at the top. Hold the drive against
the panel and loosely install four nuts, top two first. Tighten all four nuts.
3.3. Electrical Installation
3.3.1. Power Terminal Block Connections
Begin the wiring by connecting the AC, regenerative braking, motor and green ground
wires. Match the wire labels to the terminal block labels. Check connections for
tightness. See the Appendix A for more details.
3.3.2. Load Meter Cable
Connect the load meter cable by connecting the black wire to P1-1 screw terminal and
the red wire to P1-2.
3.3.3. Control Cable
Connect the control cable to P5, the Control cable has 6 sockets installed, do not
mistake the Wye/Delta connector with only 3 sockets.
3.3.4. Wye/Delta Cable
Connect the Wye/Delta cable to P6 (Wye/Delta is an option for 7500 RPM spindle,
your VMC may not have this cable).
3.3.5. Encoder Feedback Cable
Connect the encoder feedback from the motor (9 terminal connector) to P4 (VFD drive
does not need this cable).
3.3.6. Rigid Tap Cable (Encoder Output To CNC Control)
For VMC’s with the Rigid Tap option, connect the rigid tap cable from the CNC to P2 of
the vector drive. Use installation drawing 6889-6 (Appendix) to match the wires by
color to the correct terminal.
Fadal is a trademark of Fadal Machining Centers, we have no affiliation with Fadal or Mag IAS
8

Before and after photos of a typical installation
9

CHAPTER FOUR: SETUP AND TUNING
Note: There is no setup or tuning required by the end user. All the setup and tuning are pre-
set at the factory. Should the customer must make any major change (such as using
different motor and/or feedback), please contact one of Glentek’s sale engineers for
help in setup and tuning the amplifier for optimum performance. If minor change (such
as adjusting input command offsets, etc.) to the amplifier, use the procedures as follow
for reference.
4.1. Turning the Power On.
Carefully recheck the wiring. Restore power to the VMC. After the VMC is finished
initializing, check the vector drive status 7 segment display. One segment may be
lighted or if the spindle is rotating slowly you will see a rotating pattern of segments
lighting.
4.2. Establishing Communications
Connect your laptop to the vector drive at P3.
Open MotionMaestro 1.37 or later version and go to the communication menu drop
down and select OPEN.
The Open Communications dialog box will appear.
Press the OK button and the COM status box to the right will turn green.
10

4.3. Motor Parameters
Note: These parameters are preset at the factory and do not normally need to be
changed.
From the Setup menu drop down, open the Induction Motor Vector Control dialog box
as seen below.
Motor Parameters Section;
In the working column verify the Stator Resistance (phase to phase) and
the Stator Inductance are correct and match the motor to be used. The Nominal DC
Bus is preset to 325VDC.
Motor Safety Limits;
Verify that the value is same as motor rating.
Vector Control Parameters;
Verify that the parameters are correct and match the motor to be used.
If new parameters are entered, check that your parameters are correct and push the
Send to Amp button (make sure to disable the amp, otherwise amplifier will prohibit
new parameters to be sent). The parameters in the working column will appear in the
Amp column, next push the Enable Amp button, then the Done button. Close the box.
11

4.4. Tuning & Offset
From the Tools menu drop down select the Control Panel dialog box. From the Setup
menu drop down select the Analog I/O dialog box. Arrange the boxes side by side.
Observe any small rotation in the Actual Velocity box in the control panel dialog.
Adjust that rotation to zero by changing the value in the Signal Offset box in
the Analog I/O dialog (only if slightly signal adjustment is needed).
4.5. Saving your setup
You are almost done setting up. In order for the newly set parameters to permanently
store on the amplifier, the parameters need to be saved to NVM (Non Volatile Mem-
ory). The saving sequence is amplifier model/part number dependent. Refer to the
appropriate amplifier model/part number below for the necessary steps for saving pa-
rameters to NVM.
SMB9675-1A-1-6889:
When using SMB9675-1A-1-6889, type “sc6” at the “Terminal” window, and press the
“Enter” key. Repeat the same steps for “sc7”, “sc8”, and “sc9”.
SMB9675-1A-1-7090:
When using SMB9675-1A-1-7090, and the amplifier is operated in “Wye” mode, type
“sc7” at the “Terminal” window, and press the “Enter” key. Repeat the same steps for
“sc8”.
When using SMB9675-1A-1-7090, and the amplifier is operated in “Delta” mode, type
“sc6” at the “Terminal” window, and press the “Enter” key. Repeat the same steps for
“sc9”.
12

SMB9675-1A-1-7091:
When using SMB9675-1A-1-7091, type “sc6” at the “Terminal” window, and press the
“Enter” key. Repeat the same steps for “sc7”, “sc8”, and “sc9”.
Setup is completed.
4.6 Rigid Tap Test (Optional)
If desired you can test the rigid tap mode of your VMC by performing the following
procedure. This procedure is drawn from the FADAL maintenance manual.
Install test screw (SVT-0077). The screw can be fabricated from 1.000”
round stock, by threading a 14 TPI Acme thread.
Program is for Format 1. Use test program #6000 or the following program:
%
N1O6000(RIGID TAP CYCLE
N2G80
N3S750
N4G91
N5X0.1Y0.1G1F10.
N6M5
N7G4P2000
N8G84.1Z-1.R+0F500.Q0.0714
N9M45
N10X-0.1Y-0.1G1F10.
N11M45
N12M45
N13M45
N14M45
N15G80
N16G4P2000
N17M99P5
N18(!
N19( NOTE: O5827 CNC88 TEST WAS MOVED TO TA,5!!!
%
3801
13
Fadal is a trademark of Fadal Machining Centers, we have no affiliation with Fadal or Mag IAS
Fadal is a trademark of Fadal Machining Centers, we have no affiliation with Fadal or Mag IAS
Once the program is loaded jog the z axis down so the screw can be indicated.
Type “SETZ” and press ENTER. Start the test program and observe
the program is running correctly. Depress the SINGLE STEP key. Be sure the test
screw returns to its original position.
Set the indicator as shown below, the tip must be touching the lower thread
halfway into the thread, the second thread from the bottom.
Run the test and observe the indicator. The reading should not deviate from zero
More than .002” on either side of zero.
If necessary consult the FADAL maintenance manual for your machine.
TEST SCREW TEST SCREW W/ TOOL HOLDER
TEST SCREW IN SETUP WITH DIAL INDICATOR
14

5.2. Maintenance
The only maintenance required is to periodically inspect the fans. The blades should
be free turning and built up dirt should be removed from the blades.
CHAPTER FIVE: TROUBLESHOOTING AND MAINTENANCE
5.1 Status Display Codes
Display Name Description Possible Cause
1 EEPROM
Fault
Parameter EEPROM
checksum fault Internal problem
8 Reset External reset Improper configuration
setting
8. Reset Drive processor is in
reset Internal problem
A Overspeed Motor RPM is over
speed limit
Mechanical linkage
problem
b Bus Over
Voltage
DC bus exceeded
450VDC
Regenerative braking
circuit not working, regen
resistor does not match
spindle, check fuse in
regen circuit
C Clamp
(Disabled) Vector drive disabled Control is disabling the
drive
E Encoder
Fault Encoder fault detected Encoder faulty or en-
coder wiring broken
F Foldback Motor current draw
exceeded set point
Mechanical binding in
motor or spindle
H
Heatsink
Over
Temperature
Heatsink exceeded
65ºC Fan(s) failed
L LS/ECB Motor RMS over
current
Mechanical binding in
motor or spindle
0 Normal
Operation Amp enabled Normal when rotating
S HS/ECB Output short circuit
detected Motor windings shorting
U Bus Under
Voltage
DC bus below 50VDC
nominal
AC input voltage to drive
is low or off
Single
segment
Normal
Operation Amp enabled Normal @ zero speed
15

CHAPTER SIX: WARRANTY, FACTORY REPAIR AND SAFETY
6.1. Warranty
Any product, or part thereof, manufactured by Glentek, Inc., described in this manual,
which under normal operating conditions, in the plant of the original purchaser, thereof
proves defective in material or workmanship within one year from the date of shipment by
us, as determined by an inspection by us, will be repaired or replaced free of charge, FOB
our factory, El Segundo, California, U.S.A. provided that you promptly send to us notice of
the defect and establish that the product has been properly installed, maintained, and
operated within the limits of rated and normal usage, and that no factory sealed
adjustments have been tampered with. Glentek's liability is limited to repair or
replacement of defective parts.
Any product or part manufactured by others and merely installed by us, such as an electric
motor, etc., is specifically not warranted by us and it is agreed that such product or part
shall only carry the warranty, if any, supplied by the manufacturer of that part. It is also
understood that you must look directly to such manufacturer for any defect, failure, claim
or damage caused by such product or part.
Under no circumstances shall Glentek, Inc. or any of our affiliates have any liability
whatsoever for claims or damages arising out of the loss of use of any product or part sold
to you. Nor shall we have any liability to yourself or anyone for any indirect or
consequential damages such as injuries to person and property caused directly or
indirectly by the product or part sold to you, and you agree in accepting our product or part
to save us harmless from any and all such claim
6.2. Factory Repair
Should it become necessary to return a vector drive to Glentek for repair, please follow
the procedure described below:
1. Reassemble the unit, if necessary, making certain that all the hardware is
in place.
2. Tag the unit with the following information:
A. Serial number and model number.
B. Company name, phone number, and name of representative
returning the unit.
C. A brief notation explaining the malfunction.
D. Date the unit is being returned.
3. Repackage the unit with the same care and fashion in which it was re-
ceived. Label the container with the appropriate stickers (e.g.: FRAGILE:
HANDLE WITH CARE).
4. Contact a Glentek representative, confirm that the unit is being returned
to the factory and obtain an RMA (Return Material Authorization) number.
The RMA number must accompany the unit upon return to Glentek.
16

5. Return the unit by the best means possible. The method of freight chosen
will directly affect the timeliness of its return.
6.3. Safety
•Serious or fatal injury can result from failure to work safely on this
equipment.
•Only qualified personnel should install and maintain this vector drive.
•The drive has capacitors that remain charged after the power is shutoff.
Wait 5 minutes to allow the capacitors to discharge before removing the
cover or working on the drive.
•Be sure the system is properly grounded before applying power.
•Regenerative braking resistors can generate temperatures that ignite
combustible materials or vapors. Keep all combustible materials way
from braking resistors.
•Braking resistors should be shielded to prevent burn injuries.
•The motor will rotate when autotuning, take precautions to prevent injury
and damage to equipment.
17

18
APPENDIX A - SERVO DRIVE CONNECTIONS
A - 1. Power, Regen, and Motor Connector
Table A - 1.1. Power/Regen/Motor Designations
Table A - 1.2. Power/Regen/Motor Connectors
A - 2. Controller I/O Connectors
Table A - 2.1. Load Meter Designations: Labeled as P1 on servo drive
Table A - 2.2. Load Meter Connector
Designations Pin# I/O Name Function
1 Output Black - GND
2 Output Red + Current Monitor Output
Designations Pin# I/O Name Function
1 Input L1 AC LINE 1, three phase AC input
2 Input L2 AC LINE 2, three phase AC input
3 Input L3 AC LINE 3, three phase AC input
4 Rsvd Reserved Reserved
5 Rsvd Reserved Reserved
6 Output B- DC BUS Return output
7 Input R1 Brake/Regen resistor output
8 Input R2 Brake/Regen resistor output
9 Output B+ DC BUS + output
10 Output T1 Motor Output Phase T1
11 Output T2 Motor Output Phase T2
12 Output T3 Motor Output Phase T3
Connector Description/Type 12-Pin Terminal Block
Terminal Block, Barrier,
12 Position, 10-4 AWG Marathon 985-GP-12
Connector Description/Type 2-Pin Terminal Block
Terminal Block, Single Row,
2 Position, 22-12 AWG Magnum A202202NL
Table of contents
Other Glentek Servo Drive manuals