Before Starting
Test principle
The Gmate™WHeeL is designed for detecting a small electrical
current variation, which produced by the reaction of glucose in the
blood sample with the reagents on the strip. This current is varied
by the amount of glucose in the blood sample. The current
variation is calculated to glucose concentration of sample.
Your Gmate™WHeeL comes with a preset time, date and year.
Before your first using the meter, or when you change battery, you
should check the setting of time and date for your local time zone.
In case of you don’t set your meter at first time or after changing
battery, you can hear beep 3 times when inserting a test strip.
See the 28 page(Setting the Meter).
There are two types of glucose units: mg/dL and mmol/L. Your
Gmate™ meter does not allow you to change the glucose unit
yourself in order to prevent misinterpretation of the test results.
The glucose unit has been preset before leaving our factory. If
you have received a Gmate™ meter with the glucose unit
different from the method you use to measure your glucose
levels, do not perform any tests, and contact your local Philosys
distributor for assistance.
Setting the time and date
6
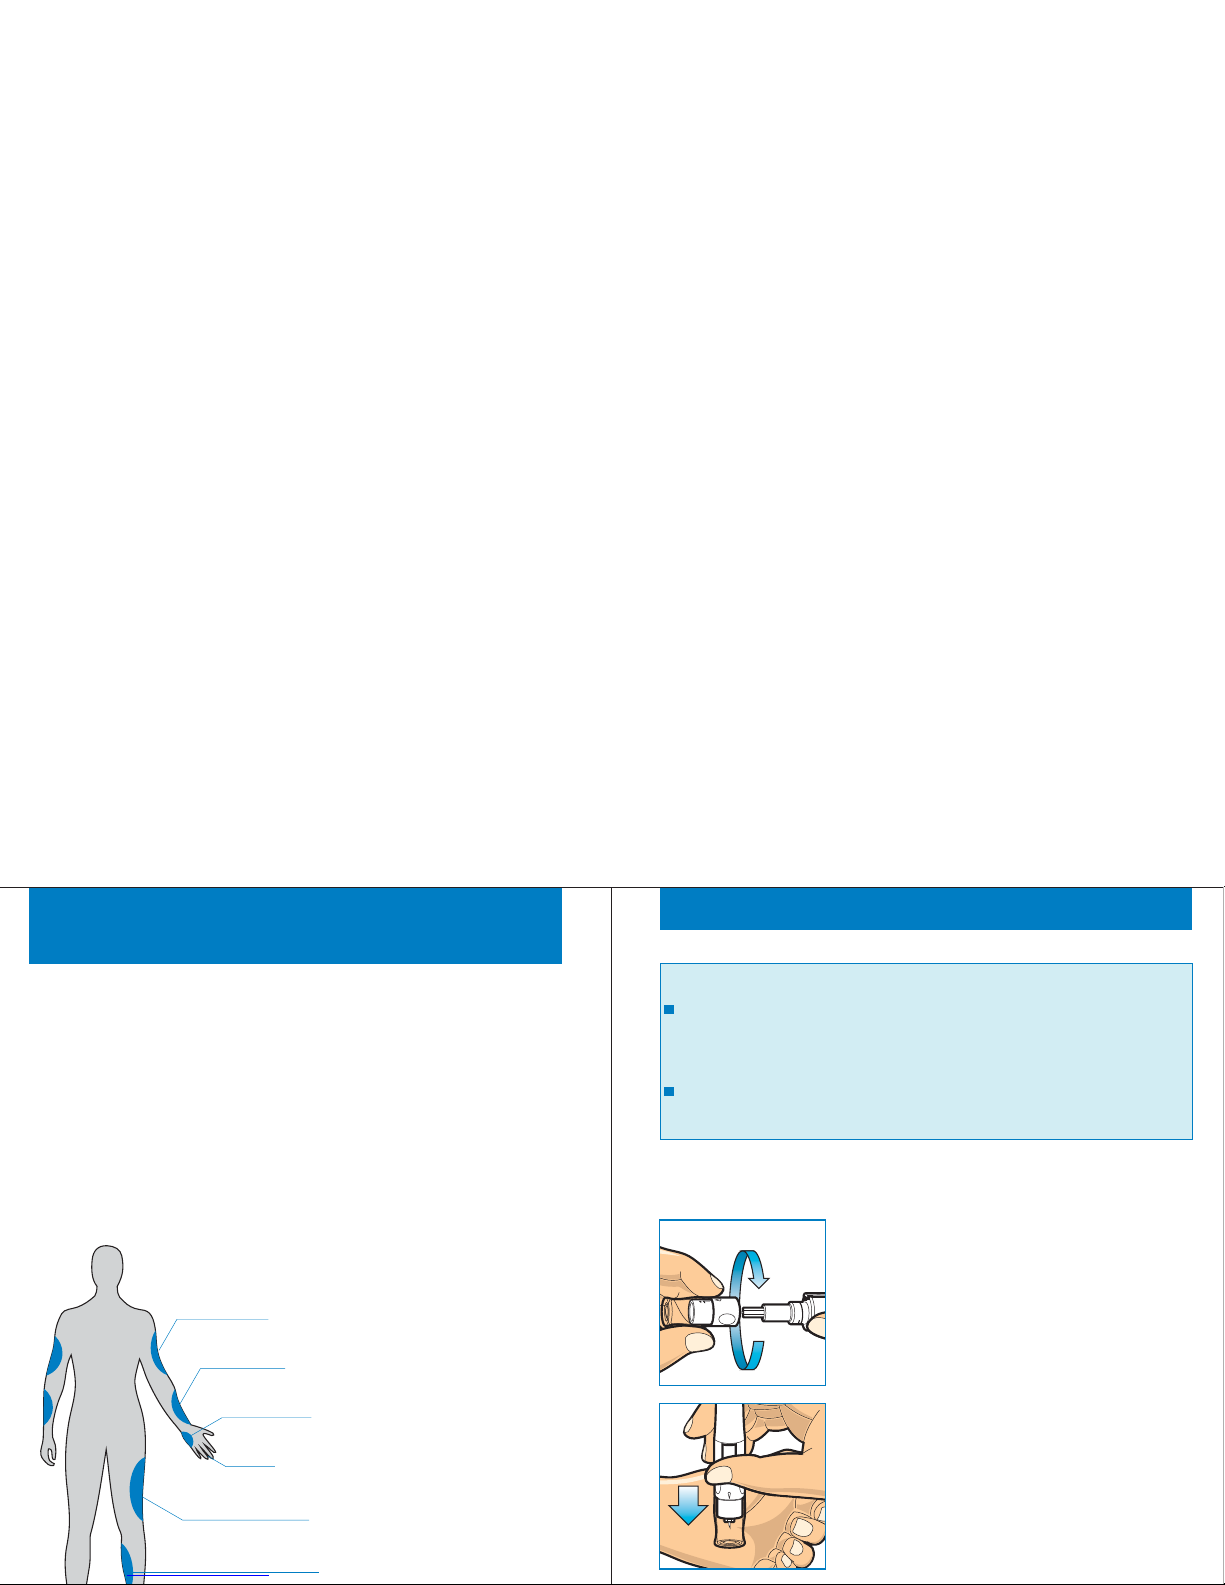
Gmate™WHeeL is intended to be for personal self-testing to
monitoring glucose concentration in fresh whole blood. Gmate™
WHeeL can apply for outside body( diagnostic use) on
fingertips, forearm, upper arm, hand, thigh and calf.
in vitro
Intended Use
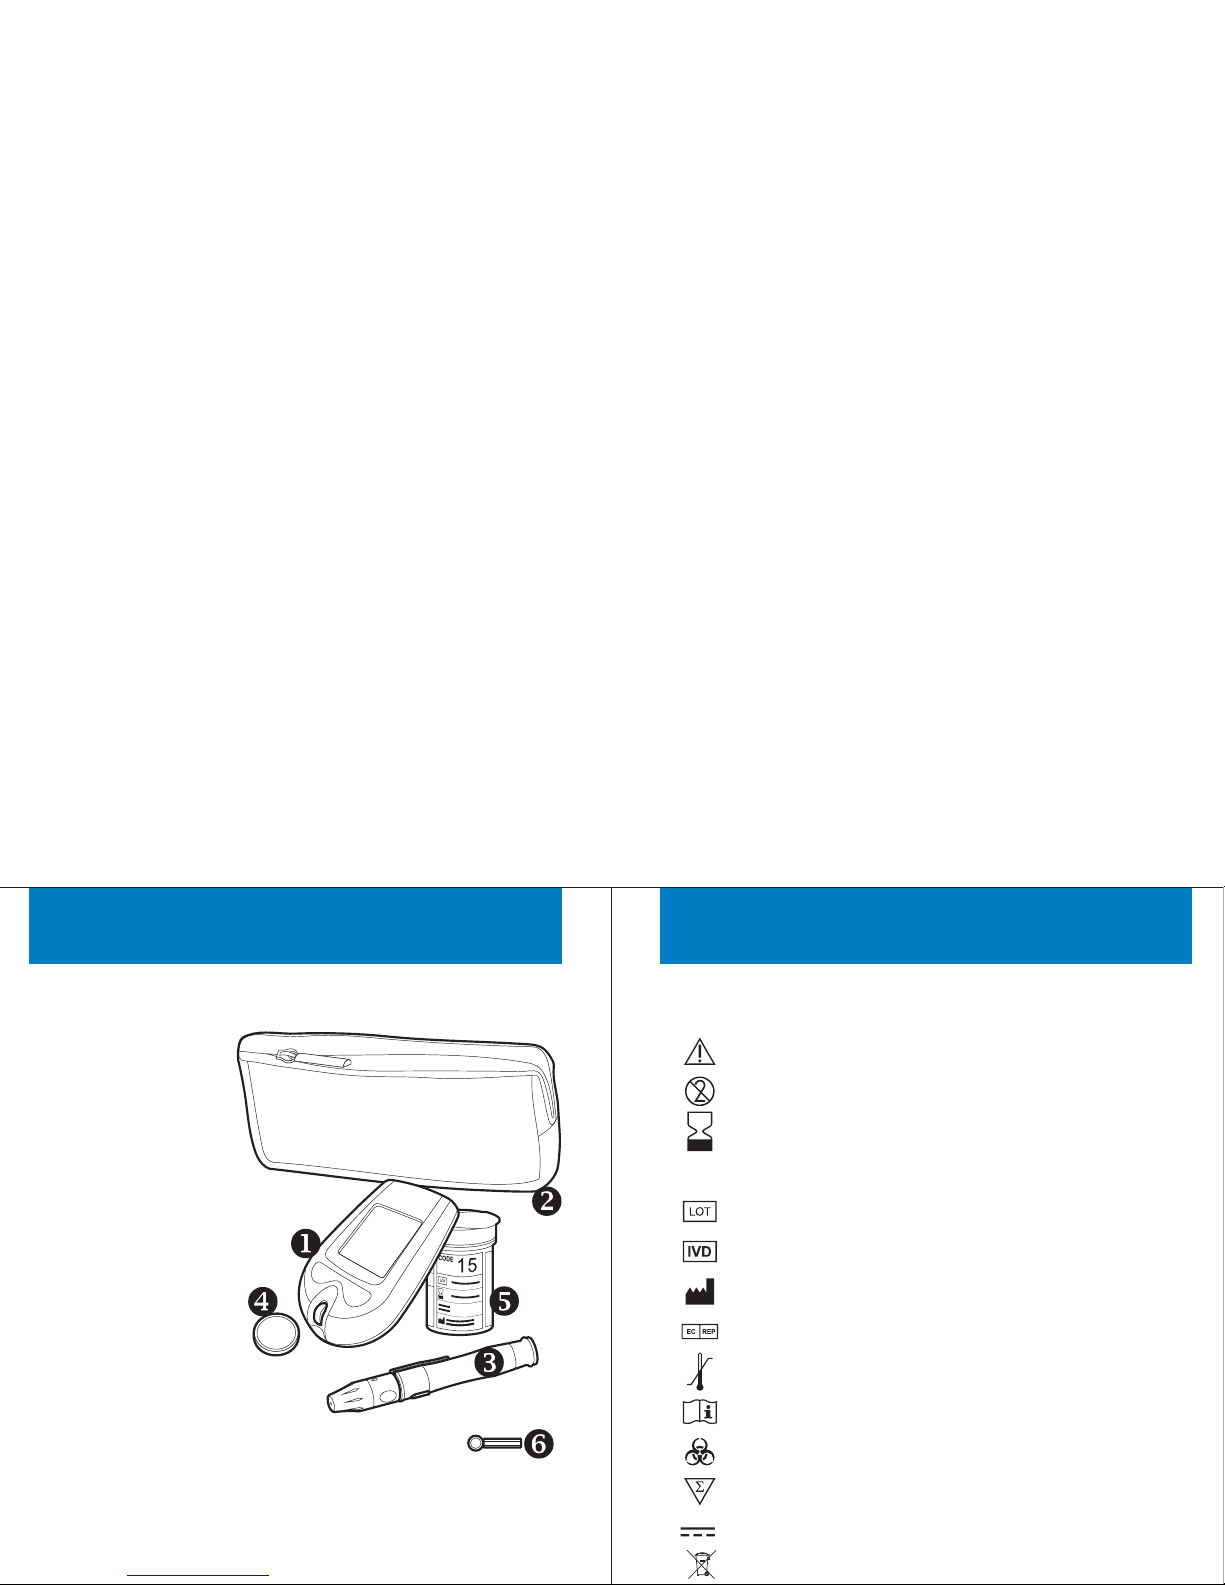
Names and Functions
Display test result and other information.
Review stored results and adjust
parameters in setup mode. You can turn
the meter off by pressing '<' button and '>'
button at same time.
Remove the tested strips by rolling.
Insert the Gmate™ Test Strip. The meter
will turn on automatically when inserting
the test strip.
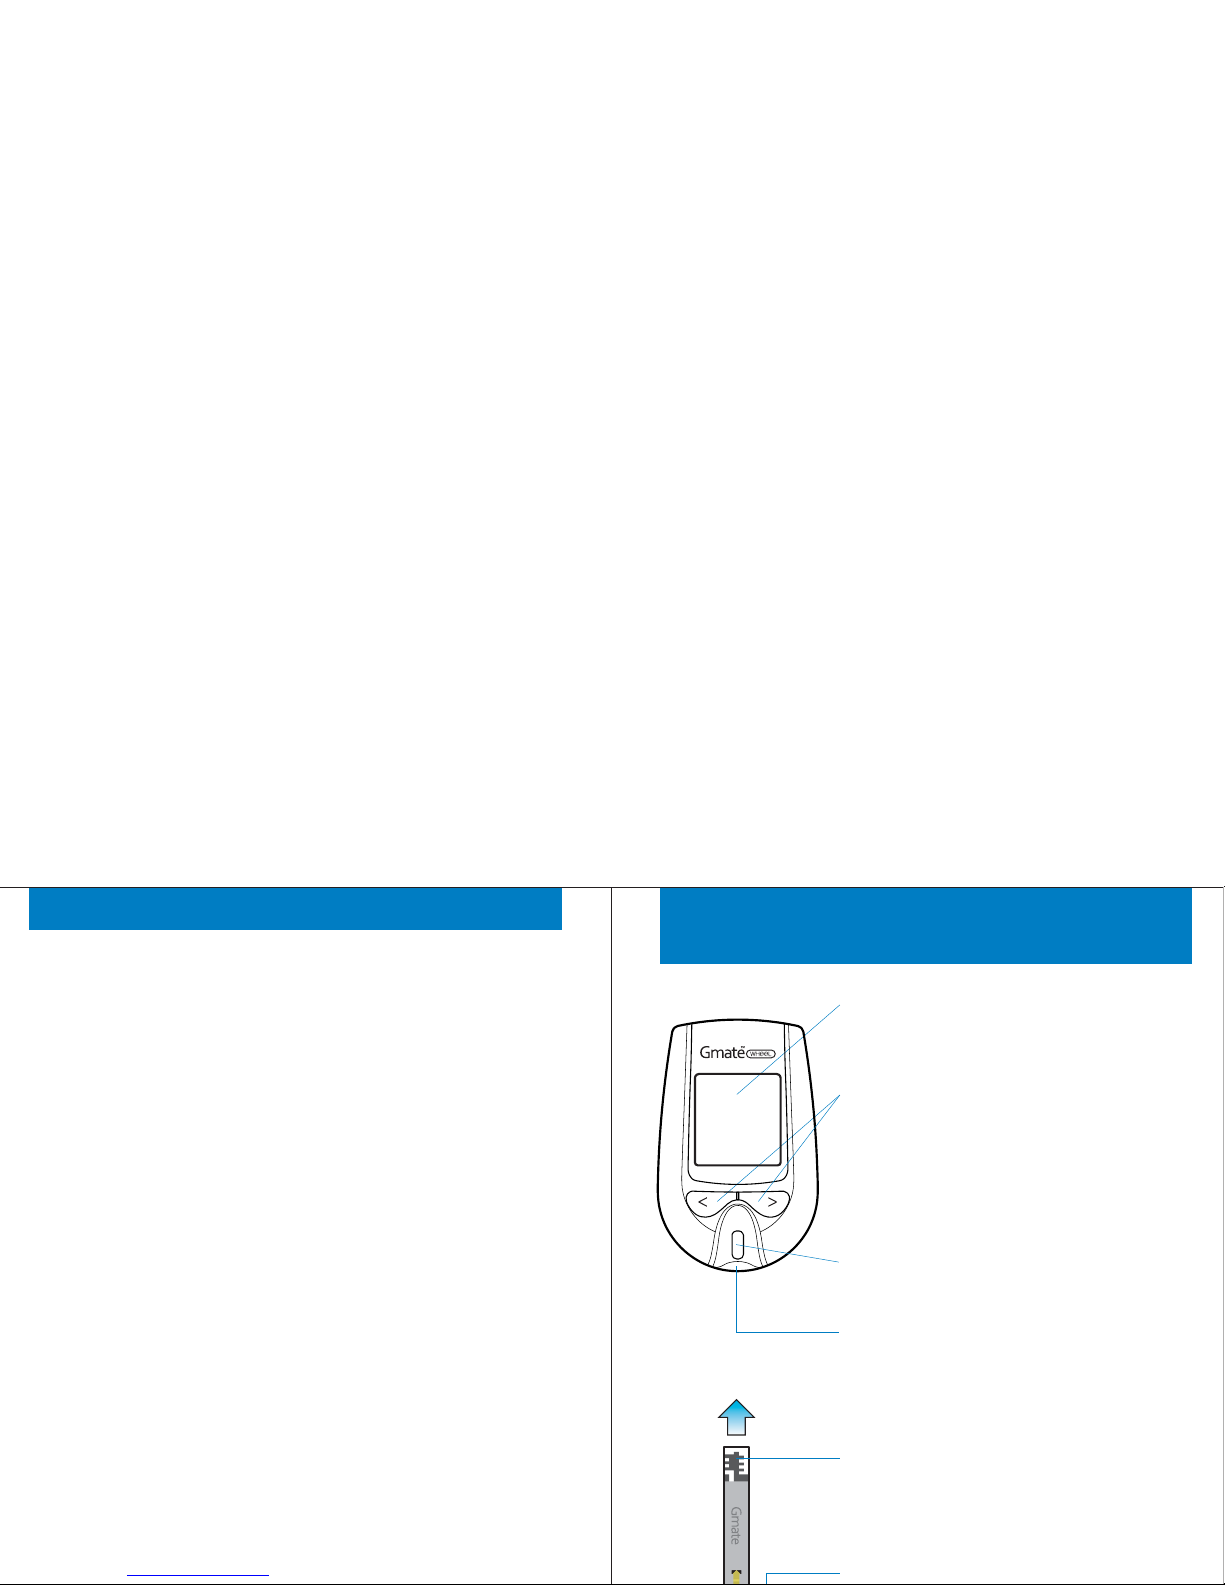
Display Screen
Buttons
Eject Wheel
Insert into test strip slot while facing up.
The fresh blood sample is drawn into.
Sample Tip
Electrodes
Gmate™ Test Strip
Front View
7
Test Strip Port