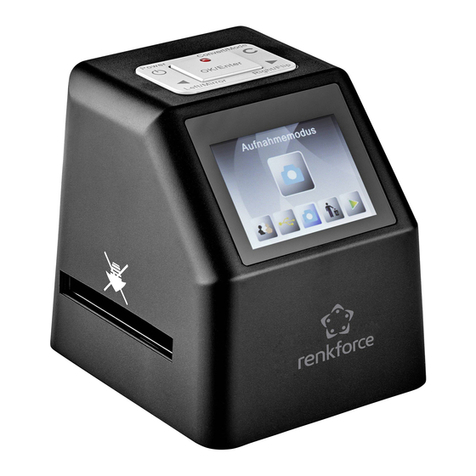
Goldanalytix BARSCREENSENSOR User manual

BARS
CREEN
THE U
LTRASOUND
Instruction manual
CREEN
S
ENSOR
LTRASOUND
SCANNER BY G
OLDANALYTIX
Instruction manual
ENSOR
OLDANALYTIX
Instruction manual

0
September 2020, Rev. 1, 09/20
© 2020 MARAWE GmbH & Co. KG, All rights reserved. Printed in the EU.
All brand names and product names in this manual are registered trademarks of the respective
manufacturer or enterprise.

1
Table of contents
1. About Goldanalytix / Contact..................................................................................................... 2
2. Introduction ............................................................................................................................... 2
3. Scope of supply .......................................................................................................................... 3
4. Ultrasound scanning .................................................................................................................. 4
5. Scanning bars ............................................................................................................................. 5
6. Tips & Tricks ............................................................................................................................. 10
7. Environmental and Disposal Instructions ................................................................................ 11
8. More non-destructive Gold-Testing Devices by Goldanalytix ................................................. 12

2
1. About Goldanalytix / Contact
Goldanalytix, established in 2010, nowadays is the leading provider of precious metal testing
methods in Germany. In our team we are working on the development of safe and reliable
testing methods for each kind of precious metal. Thanks to the close synergy of analytics
knowhow and device development, we are always up to date. Due to continuous improvements
we achieve and guarantee highest standards of quality.
Do you need support with product data, service assistance or customer service? Feel free to
contact us through one of the following channels:
Homepage: www.gold-analytix.com
E-Mail: gold-analyti[email protected]
Phone: +49 941 29020439
We are looking forward to your contact!
2. Introduction
Congratulations on your purchase of the Goldanalytix BarScreenSensor, the professional
scanning device for precious metal bars and coins.
Important! Please read this instruction manual thoroughly prior to the first use of the
BarScreenSensor. Please keep in mind that no testing method can detect every fake. We will not
assume any responsibility for false identifications. The most recent instruction manual can be
found on www.gold-analytix.com/BarScreenSensor by clicking on “information” in order to
always be up-to-date after your purchase.
The ultrasound test is used to examine the authenticity of bigger objects. An important
characteristic for exact examination is that opposite surfaces are arranged in a parallel order.
The value can differ because of strong hallmarks, flutings or scratches.
.

3. Scope of supply
Your Goldanalytix
BarScreenSensor
In the unlikely event that something is damaged or missing please contact Goldanalytix
immediately (for contact data see page 2)
BarScreenSensor
set
is delivered with the following elements
In the unlikely event that something is damaged or missing please contact Goldanalytix
immediately (for contact data see page 2)
.
Ultrasound measuring
device
Ultrasound gel
3x AA
Instruction manual
Small suitcase
3
is delivered with the following elements
:
In the unlikely event that something is damaged or missing please contact Goldanalytix
Ultrasound measuring
device
Ultrasound gel
3x AA
-batteries
Instruction manual
Small suitcase

4
4. Ultrasound scanning
Fun
ctions of the ultrasound analysis device
The ultrasound measuring device is controlled by a
measurement of the thickness and sound speed of materials.
transmission circuit, a receive circuit, a high
operating surface.
For the connect
100 ml of coupling gel.
Specification
Measuring frequency
Measuring head (Radius)
Ultrasound speed range
Display
Minimum unit
Measuring range
Precision
Working temperature
Power supply
Exterior dimensions
ctions of the ultrasound analysis device
The ultrasound measuring device is controlled by a
microprocessor and allows quick and precise
measurement of the thickness and sound speed of materials.
This device consists of a
transmission circuit, a receive circuit, a high
-
frequency oscillator, a CPU, a screen and an
For the connect
ions between sample and measuring head, the set contains
Description
5 MHz
5 mm
1000-9999 m/s
4-digit visualization
0.1 mm
1.2-225.0 mm (steel)
+/- (1% D +0.1) mm, D
describes the measured
thickness, for thicknesses inferior to
20 mm
precision is of +/- 5%
0 to 40 °C
3x 1.5 V AA-batteries
70 x 145.5 x 28 mm
microprocessor and allows quick and precise
This device consists of a
frequency oscillator, a CPU, a screen and an
ions between sample and measuring head, the set contains
describes the measured
20 mm
, the

5
5. Scanning bars
In this chapter, we briefly explain the scanning of bars with the ultrasound measuring device.
The bar has been divided by the middle and provided with drill holes then filled with lead. This
method is used frequently to fake silver bars using lead-tin alloys.
Preparation of measurement: Calibrating the BarScreenSensor
The first step consists of the calibration of the measurement unit by using the included stainless
steel measurement plate. The calibration should be done at least after every replacement of the
measurement head and/or the batteries. Apply enough coupling gel on the measurement head
and/or the stainless steel plate and press the measurement head on the test block on the device.
Press CAL to get to the calibration mode. Wait until the display shows 4.0 mm, which indicates
that the calibration has finished. After that, the device will turn back to the selected speed and
the measurement can begin.
Measurement 1: Testing with already known sound speed
1.) Establishing the speed value
We have summarized some values of the most important (precious) metals for you in an
overview that you can find in “6. Tips and tricks“. If you know the material you want to test, you
can read the values in this overview.
After starting the device, please adapt the sound speed in the menu by pressing the VEL-button.
You can now use the arrow keys up and down to switch between the saved sound speeds. If the
sound speed is close to your desired value, push the VEL-button again. This allows fine
adjustment oft he sound speed. In this example, we have selected 4329 m/s for the brass bar.

6
The next step is measuring the bar’s thickness at the spot you want to test by using calipers.
Over its complete length, our bar has a thickness of 20 mm. In case of bars of unusual forms, you
might have to measure the thickness of various spots.
Now you can carry out the actual ultrasound measurement. Apply enough ultrasound gel on the
spot you want to measure and lay the measurement head onto it. Now the device will give you
the object’s thickness. In our example, the value matches exactly with the previously established
thickness. This means that the selected sound speed of 4329 m/s for this object at this spot is
correct.

7
After this, you should „scan“ the bar. To do so, you lay the measurement head on different
spots to exclude inclusions of foreign material. In case of a fake, the value of the thickness can
differ significantly.
Measurement 2: Examination of UNKNOWN sound speeds
There are several situations where the sound speed is not exactly known. Some bars are made
of alloys, others of uncommon materials. The sound speeds for those are not listed in our
overviews and the online data sources sometimes differ significantly from each other. In this
case, you have to choose the procedure that is explained as follows.
If you know that the material (for example on the exterior edge) is not pervaded by the normally
centrally situated foreign metal bars, you can establish the speed of sound here. The
measurement head is laid on spot in question with the ultrasound gel. In this case, it is
irrelevant, which speed of sound is selected.

8
The device now gives you a value for the object‘s thickness.
Of course, this value is incorrect because the previously selected sound speed is wrong. This is
why you now take off the measurement head from the bar and measure the objects thickness
with calipers. Use the arrow keys to adjust the thickness for the BarScreenSensor in a way that it
matches with the actual thickness.
Table of contents
