GOODSSY SIMPLICITY S1 User manual

SIMPLICITY S1°

English
Dutch
French
01-09
10-16
17-23
01
INDEX

Product Characteristics
Safety Cautions
How to Fill the Water Tank
Use Instructions
Cleaning and Maintenance
Service Warranty
03
04
05
06
09
09
02
CONTENT

PRODUCT CHARACTERISTICS
03
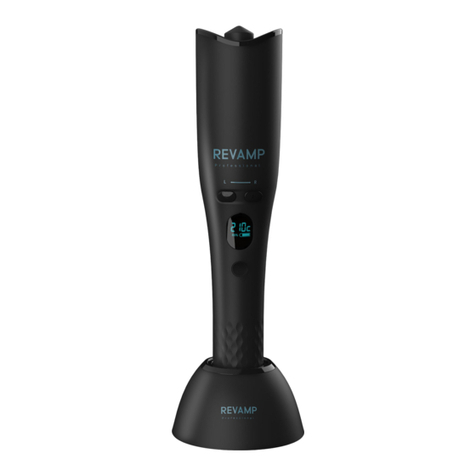
4 ultra-fast ceramic
heating elements(MCH) ON/OFF
Steam button
Steam LCD
Temperature LCD
ON/OFF
button
+/- temperature button
Smart temperature
with build-in sensors
360 Swivel cord
Built-in 10 ml water tank
Rounded outer shell
designed for curly styling
Lock button
Temperature adjustable
from 120 to 230 C
Infrared technology

SAFETY CAUTIONS
04
WARNING: This Appliance Must Not Be Taken Into A Bathroom, It Should Not Be Used Near Bathtubs, Showers, Basins Etc.
This Product Is Not Suitable For Use In Bath Or Shower. The Styler Should Be Unplugged When Not In Use.
• Do not leave the styler unattended when switched on.
• Allow the styler to cool down before storaging it.
• Do not immerge in water or other liquids.
• Do not place styler on flammable materials
• Always ensure the voltage to be used corresponds to the voltage of the styler.
• Keep this product out of reach of children.
• Avoid allowing any part of the hot plates to contact the face, neck or scalp.
• Do not wrap the cord around the unit. Check cord regularly for any sign of damage.
• Damaged cords can be dangerous. If the supply cord of this unit becomes damaged, stop using it immediately, contact us for repairs or replacement in order to avoid a hazard.
• Special tools are required for any repairs. Unqualified repair work could lead to accidents for the user.
• We do not accept responsibility for damage to the product, persons or other items(s), caused by misuse, abuse or non-compliance with these instructions.
• Do not use any liquid or water other than pure water or factory-provided hair conditioner in this product to avoid damage to the device.
• Purified water is recommended.

HOW TO FILL THE WATER TANK
05
Step 1:
Ensure the Styler is turned off. Do not attempt to fill the tank
while the Styler is hot.
Step 3:
Put on the attachment for the water tank. Fill the water as
shown in FIG 2 fill the tank.
Tips: When filling the water tank, please tilt the water tank by 45° to
avoid the water in the water tank overflowing during the filling process.
Step 4:
Close the water tank cover
Step 5:
Plug in the appliance and turn it on. Turn the steam button
until the temperature rises to 100°C/210°F, see FIG 4.
Step 2:
Open the water tank cover,

HOW TO FILL THE WATER TANK
06
1) Please note that steam will be generated at temperatures above 100°C / 212°F. The hair straightener will automatically generate steam every five seconds.
2) After the device is turned on, the system will automatically do a self-test. The hair straightener generates a slight vibration after the device is turned on, which is normal.
3) When the water tank is empty, turn on the steam switch, and the hair straightener will emit a sound. Please turn off the hair straightener when filling water.
USE INSTRUCTIONS
Before use, make sure hair is clean and tangle -free.
Fill the tank to your desired level with water. (Our product willhave ±10temperature difference)
Plug in the device and press and hold the on-off switch
When the appliance reaches the desired temperature, the unit will make a sound.
Run the straightener through the entire length of the hair, without stopping.
Repeat only twice per section to prevent hair damage.
The hair straightener will automatically generate steam every five seconds.
After the device is turned on, the system will automatically do a self-test. The hair straightener generates a slight vibration after the device is turned on, which is normal.
When the water tank is empty, turn on the steam switch, and the hair straightener will emit a sound. Please turn off the hair straightener when filling water.

STRAIGHTENING YOUR HAIR
07
STEP 1: Prep your hair. Make sure your hair is clean & tangle -free.
STEP 2: Depending on your hair type and hair length – (information below is aimed at medium hair type and shoulder length hair). Take a “2 wide x 1/4” thick section of hair. Move the Styler over the sectioned
hair starting at the roots about “1/4” away from the scalp, run the Styler slowly through to the ends of the Hair with light pressure.
STEP 3: Repeat this process, section by section until your hair is completely straightened, soft and smooth.
CURLING YOUR HAIR
The steam hair straightener with its rounded edge plates enables you to also create Curls, waves, and lots of other hair styles. You are also able to vary the texture to give a purpose fully imperfect look to your hair.
STEP 1: Prep your hair. make sure your hair is clean & tangle -free.
STEP 2: Take a small section of hair, and insert it into your Styler. Your sections can vary in size for a more natural, beautifully imperfect look - this up to you. You may also decide where you would like your curl to
start and can place your Styler accordingly.

08
STEP 3: Twist your wrist, (the one holding the Styler), about a half-turn, then pull, then twist again, then pull. Keep repeating this until you reach the end of your hair. For a beach look, keep the very ends of
your hair out of the styler.
STEP 4: (ALTERNATIVE): Twist and pull just as Step 3 indicated, but for a tighter, more curly curl, twist the mid-shaft to ends around the entire iron mimicking what you would do with a curling iron.
Tips: you may want to change the direction of your curls near your face based on personal preference.
SUGGESTION STYLER TEMPERATURE SETTING
HAIR TYPE TEMPERATURE
Low 150°C = 300˚F
Medium 190˚C = 375˚F
High 230˚C = 450˚F
Fragile, very fine textured hair
Normal, medium textured hair
Thick hair
CURLING YOUR HAIR

09
CLEANING AND MAINTENANCE
Ensure the unit is unplugged and cool. To maintain the effectiveness of your product wipe clean after use with a damp cloth. Do not use an abrasive cleaning fluid to clean, as damage will occur.
This product has been checked and is free of defects. We warrant this product against any defects that are due to faulty material or workmanship for the warranty period from the original date of consumer
purchase. If the product should become defective within the warranty period, we will repair any defect or replace the product or any part of it without change provided whilst there is proof of purchase. This
does not mean an extension of the warranty period.
If the tank has a little water while you’ve never used it, that is normal, because our product is tested with water as part of our quality control procedure.
SERVICE AND WARRANTY

VEILIGHEIDSWAARSCHUWINGEN
HOE HET WATERRESERVOIR TE VULLEN
GEBRUIKSAANWIJZING
SUGGESTIE TEMPERATUURINSTELLING STYLER
SCHOONMAKEN EN ONDERHOUD
SERVICE EN GARANTIE
11
12
13
15
16
16
10
CONTENT

VEILIGHEIDSWAARSCHUWINGEN
11
Waarschuwing - Dit Toestel Mag Niet Gebruikt Worden In Een Badkamer; Het Mag Niet Gebruikt Worden In De Buurt Van Badkuipen,
Douches, Wastafels Enz.
Dit Product Is Niet Geschikt Voor Gebruik In Bad Of Douche. De Styler Moet Uit Het Stopcontact Worden Gehaald Als Het Niet In Gebruik Wordt.
• Laat de styler niet onbeheerd achter als het aan staat.
• Laat de styler afkoelen voor je hem opbergt.
• Niet onderdompelen in water of andere vloeistoffen.
• Plaats de styler niet op ontvlambare materialen.
• Controleer altijd of de te gebruiken spanning overeenkomt met de spanning van de styler.
• Houd dit product buiten bereik van kinderen.
• Vermijd dat een deel van de hete platen in aanraking komt met gezicht, hals of hoofdhuid.
• Wikkel het snoer niet om het toestel. Controleer het snoer regelmatig op tekenen van beschadiging.
• Beschadigde snoeren kunnen gevaarlijk zijn. Als het aansluitsnoer van dit toestel beschadigd raakt, stop dan onmiddellijk met het gebruik ervan en neem contact op voor reparatie of vervanging, om gevaar te
voorkomen.
• Voor alle reparaties is speciaal gereedschap nodig. Ondeskundig reparatiewerk kan tot ongelukken voor de gebruiker leiden.
• We aanvaarden geen verantwoordelijkheid voor schade aan het product, personen of andere voorwerpen(en), veroorzaakt door verkeerd gebruik, misbruik of niet-naleving van deze gebruiksaanwijzing.
• Gebruik geen andere vloeistof of water dan zuiver water of de fabriek haarconditioner in dit product om beschadiging te voorkomen.
• Gezuiverd water wordt aanbevolen.

HOE HET WATERRESERVOIR TE VULLEN
12
Stap 1:
Zorg ervoor dat de Styler uitgeschakeld is. Probeer de
tank niet te vullen terwijl de Styler heet is
Stap 3: Zet het hulpstuk voor het waterreservoir op.
Vul de bak met water zoals in FIG 2 te zien is.
Tips: Kantel het waterreservoir bij het vullen 45° om te voorkomen
dat het water in het waterreservoir tijdens het vullen overstroomt.
Stap 4:
Sluit het deksel van het waterreservoir, zie FIG 3.
Stap 5:
Steek de stekker in het stopcontact en zet het apparaat aan.
Draai aan de stoomknop tot de temperatuur oploopt tot
100°C/210°F, zie FIG 4.
Stap 2:
Open het deksel van het waterreservoir, zie FIG 1.

13
Tips:
1) Stoom wordt gegenereerd bij temperaturen boven 100°C / 212°F. De stijltang genereert automatisch stoom om de vijf seconden.
2) Nadat het apparaat is aangezet, doet het automatisch een zelftest. De stijltang genereert een lichte trilling nadat het apparaat is aangezet, wat normaal is.
3) Als het waterreservoir leeg is, zet je de stoomschakelaar aan, en de stijltang geeft een geluid. Zet de haarstyler uit als je water bijvult.
GEBRUIKSAANWIJZING
Voor gebruik, zorg dat het haar schoon en klitvrij is.
Vul de tank tot het gewenste niveau met water. (Ons product zal ±10temperatuurverschil hebben)
Steek het apparaat in het stopcontact en houd de aan-uit schakelaar ingedrukt.
Als het toestel de gewenste temperatuur bereikt, maakt het een geluid.
Laat de stijltang over de hele lengte van het haar lopen, zonder te stoppen.
Herhaal dit slechts tweemaal per sectie om beschadiging van het haar te voorkomen.
De stijltang genereert automatisch stoom om de vijf seconden.
Nadat het apparaat is aangezet, doet het automatisch een zelftest. De stijltang genereert een lichte trilling nadat het apparaat is aangezet, wat normaal is.
Als het waterreservoir leeg is, zet je de stoomschakelaar aan, en de stijltang geeft een geluid. Zet de haarstyler uit als je water bijvult.

JE HAAR STEIL MAKEN
14
STAP 1: Bereid je haar voor. Zorg ervoor dat je haar schoon is & klitvrij.
STAP 2: Afhankelijk van je haartype en haarlengte - (onderstaande informatie is gericht op medium haartype en van schouderlengte). Beweeg de Styler over het haar, beginnend bij de wortels op ongeveer "1/4"
afstand van de hoofdhuid, en laat de Styler langzaam met lichte druk doorlopen tot aan de uiteinden van het haar.
STAP 3: Herhaal dit proces, sectie voor sectie, tot je haar helemaal steil, zacht en glad is.
JE HAAR KRULLEN
Met de stoom stijltang met zijn platen met afgeronde randen kun je ook krullen, golven, en veel andere haarstijlen maken. Je bent ook in staat de textuur te variëren om je haar een doel volledig onvolmaakte look te geven.
Stap 1: Bereid je haar voor. Zorg dat je haar schoon is & klit -vrij.
Stap 2: Neem een kleine sectie van het haar, en steek die in je styler. Je secties kunnen in grootte variëren voor een meer natuurlijke, mooi onvolmaakte look - dit bepaal je zelf. Je kunt ook bepalen waar je je krul wilt laten
beginnen en je styler wil plaatsen.
Stap 3: Draai je pols, (degene die de styler vasthoudt), ongeveer een halve slag, trek dan, draai dan nog eens, trek dan. Blijf dit herhalen tot je het einde van je haar bereikt hebt. Voor een strandlook, houd je de uiteinden
van je haar buiten de styler.
Stap 4: (ALTERNATIEF): Zoals stap 3 aangaf, maar voor een strakkere, meer krullende krul, draai je de middensteel tot de uiteinden rond het hele ijzer, mimiekend wat je met een krultang zou doen.
Tips: je kunt de richting van je krullen in de buurt van je gezicht veranderen, naar persoonlijke voorkeur.

15
SUGGESTIE TEMPERATUURINSTELLING STYLER
HAAR TYPE TEMPERATUUR
Laag 150°C = 300˚F
Medium 190˚C = 375˚F
Hoog 230˚C = 450˚F
Breekbaar, zeer fijn getextureerd haar
Normaal, medium getextureerd haar
Dik haar

16
SCHOONMAKEN EN ONDERHOUD
SERVICE EN GARANTIE
Zorg ervoor dat het apparaat niet in het stopcontact zit en koel is. Om de werking van je product te behouden veeg je het na gebruik schoon met een vochtige doek. Gebruik geen schurende reinigingsvloeistof
om schoon te maken, want dan ontstaat schade.
Dit product is gecontroleerd en vrij van gebreken. Wij garanderen dit product tegen gebreken die te wijten zijn aan materiaal- of fabricagefouten gedurende de garantieperiode vanaf de oorspronkelijke datum
van aankoop door de consument. Als het product binnen de garantieperiode defect raakt, repareren we het defect of vervangen we het product of een deel ervan zonder verandering, op voorwaarde dat er
een aankoopbewijs is. Dit betekent geen verlenging van de garantieperiode.
Als de tank een beetje water bevat terwijl je hem nog nooit gebruikt hebt, is dat normaal, want ons product wordt met water getest als onderdeel van onze kwaliteitscontrole.

AVERTISSEMENTS DE SÉCURITÉ
COMMENT REMPLIR LE RÉSERVOIR D'EAU
MANUEL DE L'UTILISATEUR
LE NETTOYAGE ET L'ENTRETIEN
SERVICE ET GARANTIE
18
19
20
23
23
17
CONTENT

AVERTISSEMENTS DE SÉCURITÉ
18
AVERTISSEMENT - CET APPAREIL NE DOIT PAS ÊTRE UTILISÉ DANS UNE SALLE DE BAINS; IL NE DOIT PAS ÊTRE UTILISÉ À PROXIMITÉ DE BAIGNOIRES,
DOUCHES, LAVABOS, ETC.
Ce produit ne convient pas à une utilisation dans le bain ou la douche. LE STYLER DOIT ÊTRE DÉBRANCHÉ LORSQU'IL N'EST PAS UTILISÉ.
• Ne laissez pas le styler sans surveillance lorsqu'il est en marche.
• Laissez-le styler refroidir avant de le ranger.
• Ne pas plonger dans l'eau ou d'autres liquides.
• Ne pas placer le styler sur des matériaux inflammables
• Vérifiez toujours que la tension à utiliser correspond à la tension du styler.
• Gardez ce produit hors de portée des enfants.
• Évitez que toute partie des plaques chauffantes entre en contact avec le visage, le cou ou le cuir chevelu.
• N'enroulez pas le cordon autour de l'appareil. Vérifiez régulièrement que le câble ne présente aucun signe d'endommagement.
• Les cordons endommagés peuvent être dangereux. Si le cordon de raccordement de cet appareil est endommagé, cessez immédiatement de l'utiliser et contactez le service de réparation ou de remplacement
afin d'éviter tout danger.
• Des outils spéciaux sont nécessaires pour toutes les réparations. Une réparation incorrecte peut entraîner des accidents pour l'utilisateur.
• Nous n'acceptons aucune responsabilité pour les dommages au produit, aux personnes ou à d'autres objets causés par une mauvaise utilisation, un abus ou le non-respect deces instructions.
• N'utilisez pas de liquide ou d'eau autre que de l'eau pure ou du conditionneur de cheveux fourni par l'usine dans ce produit pour éviter d'endommager l'appareil.
• L'eau purifiée est recommandée.

COMMENT REMPLIR LE RÉSERVOIR D'EAU
19
Étape 1:
Assurez-vous que le styler est éteint. N'essayez pas de remplir le
réservoir lorsque le Styler est chaud.
Étape 3:
Mettez l'attache du réservoir d'eau. Remplissez le récipient d'eau
comme indiqué sur la.
Conseils: Inclinez le réservoir d'eau à 45° lors du remplissage pour
éviter que l'eau du réservoir ne déborde pendant le remplissage.
Étape 4:
Fermez le couvercle du réservoir d'eau, voir.
Étape 5:
Branchez la fiche d'alimentation et mettez l'appareil sous tension.
Tournez le bouton de vapeur jusqu'à ce que la température atteigne
100°C/210°F, voir FIG 4.
Étape 2:
Ouvrez le couvercle du réservoir d'eau, voir.
Table of contents
Languages: