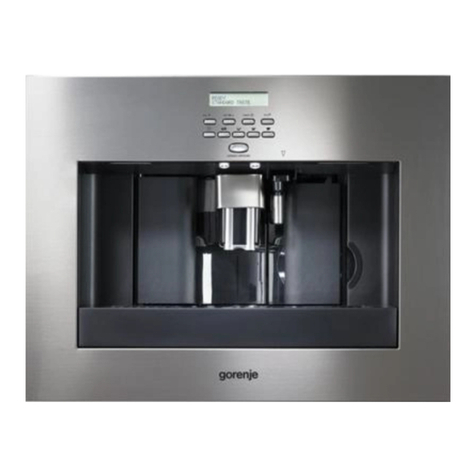
Gorenje 5713215761 User manual

User manual
Bedienungsanleitung
Uporabniški priročnik
Uživatelská příručka
Руководство пользователя
Посібник користувача
article nuber
Gorenje+_cover_6 languages.indd 1
5713215761/02.11

Index
1
Y
our
espr
esso
coffee
maker
1.1
Description
1
- 2
1.2
Contr
ol
panel
3
1.3
Introduction
4
2
Safety
instructions
Important matters
5
3
Use
3.1
Pr
eparation
6
-
7
3.2
Operation
8
-
16
4
Maintenance
4.1
Cleaning and maintenance
17
-
19
4.2
Changing and setting the menu
parameters
20-
24
5
Messages
What
to
do
if...
25
-26
6
Faults
Pr
oblems that
can
be r
esolved
before calling the
service
centre
27
-
29
7
Installation instructions
7.1
Important matters
30
7.2
Building-in
31
-
32
8
Appendices
8.1
Disposal
of appliance and packaging
33
8.2
Technical
information
33
105

1
Y
our
espr
esso
machine
1.1
Description
C
N
O
1

1
Y
our
espr
esso
machine
A. Main ON/OFF
switch
B.
Handles
C.
Steam
spout
D. Water tank
(r
emovable)
E.
Cup
tray
F.
Drip
tray
(r
emovable)
G.
Service
door
H.
Coffee spout
(adjustable
in height)
I.
Contr
ol
panel
J.
Bean
container
lid
K.
Central ground coffee
lid
L.
Infuser
M.
Power
cable
N. Cappuccino
maker
(r
emovable)
O. Cappuccino
maker
nozzle
(r
emovable)
P.
Measuring spoon for preground coffee
Q. Coffee grounds container
(r
emovable)
R.
Grinding
coarseness
regulator
S.
Coffee
beans
container
T.
Compartment for
measuring
spoon
U.
Filling chute
fot
preground coffee
V.
Mobile drawer
W.
Accessories
holder
(
left
and
ri
g
ht
)
2

1
Y
our
espr
esso
machine
1.2
Contr
ol
panel
1
2
3
4
5
6
7
8
9
10
11
1.
Display
2.
Appliance
on/of
f
button
3.
Coffee taste selection
button
4.
One or two
cups
short coffee
button
5.
One or two
cups
standar
d
coffee
button
6.
One or two
cups
long coffee
button
7.
Button
to
activate or deactivate menu parameter setting mode
8.
Button
to
select
ground coffee or
to
display
the next parameter on the menu
9.
Button
to
rinse
the appliance or
to
change
the menu
parameters
10.
Button
to
select
hot water or OK
to
confirm
11.
Steam
button
3

1
Y
our
espr
esso
machine
1.3
Introduction
This
espresso
machine
will
make
delicious
cups
of coffee,
espresso
and cappuccino.
Y
ou
can
customise
the settings of the
machine
to
suit
your
personal
prefer
ences
and
tastes.
This
manual
describes
how
to
make
optimum
use
of the
espresso
machine.
Besides
information on how
to
operate the
machine,
you will
also
find background information
that
may
come in
handy
when
using
this
appliance.
Coffee
has
been
used
in the factory
to
test the appliance and
it
is
therefore completely
normal that there
ar
e
traces
of coffee in the mill.
This
appliance
is
however
guaranteed
to
be
new
.
Stor
e
the
user manual
in
a
safe place.
This
will
ensure
that
any subsequent
users
also
benefi
t
fr
om
it.
Enjoy
your
espresso
machine!
4

2
S
a
f
ety
instructions
Important matters
As
with
any
appliance, there
ar
e
a
number of matters that you should
pay
attention to.
•
This
appliance
is
intended for domestic
use
only
(ar
ound
3000
cups
a
year).
Any
other
use
is
considered improper and in that
case
no guarantee will be given.
•
This
appliance
is
designed
to
“make
espresso
cof
fee”
and
“heat
drinks”.
Use
it
with
car
e
to
avoid
scalds
from the water and
steam
jets
or through incorrect
use.
•
Do not
put
fr
ozen
or
caramelised
coffee
beans
into the bean container
,
only
roasted coffee beans!
Remove
foreign bodies from the coffee
beans.
Otherwise no
guarantee
can
be given.
•
Do not
lean
or hang on the
machine
when
it
has
come out of the cabinet and
do
not
place
heavy
or unstable objects on the
machine.
•
The
manufacturer
is
not liable for damage
caused
by improper
,
incorrect or
unr
easonable
use
of the appliance.
•
When
using
the appliance,
do
not touch the hot
surfaces.
Use
the knobs or
handles.
•
Persons
(including childr
en)
with reduced
physical,
sensory
or mental capabilities,
or
lack
of experience and knowledge, should be
supervised
when
they
use
the
appliance
•
Never
let
children
play
with the appliance.
•
Only
ask
for original
spar
e parts
to
be
used.
Failur
e
to
respect the above could
reduce the
safety
of the appliance.
•
Do not
put
objects containing liquids, inflammable or corr
osive
materials
on the
machine.
•
Use
the
accessories
holder
to
contain coffee
accessories
(for
example coffee
beans).
•
The
parts
which
could come into contact with coffee or milk conform
to
the
pr
ovisions
of the
EEC
directive
1935/2004
relating
to
materials
suitable for contact
with foodstuf
fs.
•
This
appliance
is
marked
accor
ding
to
the
Eur
opean directive
2004/108/EC
on W
aste
Electrical
and
Electr
onic E
q
ui
p
ment
(
WEEE
)
.
5

3
Use
3.1
Pr
eparation
Using
for
the
fi
rst
time
The
fi
rst
time you
switch
on the appliance and
every
time that
it
is
plugged in, the
appliance
makes
a
SELF-DIAGNOSIS
operation
when
you pr
ess
the main ON/OFF
switch
(see
A on page
2).
Then
the appliance
switches
off.
T
o turn
it
on, pr
ess
the
on/of
f
button
on the contr
ol
panel.
1.
The
fi
rst
time you
use
the appliance,
select
the language.
Press
the main ON/OFF
switch
on the right
side
of the appliance
(see
A on page
2);
the lights on the front
side
and the
display
go
on. Wait for the appliance
to
display
PRESS
OK TO
INSTALL
ENGLISH
.
Press
the OK
button
for at
least
3
seconds
until the appliance
displays
ENGLISH
INSTALLED
.
The
appliance then
displays
the setting
message
in
English.
2.
After
a
few
seconds,
the appliance
displays
FILL
T
ANK
.
To fill, remove the tank
(fi
g.
1),
rinse
and fi
ll
with fr
esh
water
.
Never exceed the MAX line.
(When
removing the
tank,
the
cappuccino
maker
must
always
be positioned outwar
ds
(fi
g.
2,
position
1),
otherwise the tank cannot be r
emoved).
Put
the tank
back
and
push
as
far
as
it
will go. Move the
cappuccino
maker
towar
ds
the centre of the appliance and
place
a
cup underneath
it
(fi
g.
2,
position
3).
Only
fill
the
water
tank
with
cold
water
. Never
fill
it
with
other
liquids
such
as
mineral
water
or
milk.
T
o
ensur
e good,
ar
omatic coffee at
all
times, you should:
-
change
the water in thewater tank
every
day;
-
clean
the water tank with normal water for rinsing (not in
the
dishwasher)
at
least
once
a
week.
Then
rinse
off with
fr
esh
water
.
3
2
1
1
2
6

3
Use
3.
The
appliance now
displays
PRESS
OK
.
Press
the OK button. After
a
few
seconds,
a
little
water
runs
out of the cappuccino
maker
.
When the cup
contains
about
30cc
of
water
,
the water stops delivering.
4.
The
appliance
now
displays
TURNIN
G
O
FF
PLEA
S
E
WAIT
and
it
goes
o
ff
.
5.
Extract
the appliance by pulling
it
outwar
ds
taking
car
e
to
use
the
special
handles,
open the left
lid
and fi
ll
the
container with coffee
beans
(fi
g.
3),
then
close
the
lid
and
push
inwards
the appliance.
T
o
pr
event
malfunction,
never
fill
with
gr
ound
coffee,
fr
eeze
dried
coffee,
caramelised beans
or
anything
else
which could damage
the
appliance.
3
6.
Press
the
on/of
f
button
.
The
appliance
displays
HEATING
UP
PLEASE
WAIT...
to
indicate that preheating
is
underway
.
7.
When preheating
is
complete, the appliance
displays:
RINSING
and performs
an
automatic
rinse
cycle
(a
little
hot water
runs
out of the spouts and
is
collected in the
drip
tray
beneath).
If you want
to
make
a
short coffee
(less
than
60
cc),
to
make
it
hotter
,
fi
ll
the cup with
this
hot rinsing water fi
rst.
Y
ou
can
also
use
the
button
(see
paragraph
3.2.2
on
page
9,
‘T
ips
to
make
hotter cof
fee’).
8.
The
appliance
now
displays
the
r
eady
message
READY
S
T
ANDARD
TA
S
TE
.
When
using
the appliance for the fi
rst
time,
4-5
cups
of coffee need
to
be made
before the appliance
starts
to
give
satisfying
r
esults.
7

3
Use
3.2
Operation
3.2.1 Pr
eparing
coffee
(using
cof
feebeans)
1.
The
appliance
is
pr
eset
to
make
coffee with
a
normal
taste.
Y
ou
can
also
choose
coffee with
an
extra-mild mild,
str
ong or
extra-str
ong
taste.
T
o
choose
the required
taste,
pr
ess
the
button
:
the selected coffee taste will be displayed.
2.
Place
1
cup under the spouts
to
make
1
coffee
(fi
g.
4)
or
2
cups
for
2
cof
fees
(fi
g.
5).
By
moving the
dispenser
up or down
(fi
g.
6),
you
can
adjust
the height of the
dispenser
to
suit
the height of your cup
so
as
to
reduce heat
loss
and coffee
splashes.
4
For
a
creamier
coffee, lower the spouts
to
bring them
as
close
to
the
cups
as
possible
(fi
g.
6).
5
6
3.
Press
the
button
to
make
a
short coffee, the
button
for
a
standar
d
coffee and
the
button
for
a
long coffee.
T
o
make
2
cof
fees,
pr
ess
the
button
twice (within
3
seconds).
T
o
change
the quantity
of coffee delivered automatically into the cup, follow the instructions at paragraph
3.2.3
on page
11.
(The
appliance now grinds the
beans
and
starts
running off the
8

3
Use
coffee into the cup. Once the
desir
ed quantity
has
been r
eached,
the appliance
automatically stops delivering the coffee and
ejects
the grounds into the
special
container).
4.
After
a
few
seconds,
the
message
that the
machine
is
r
eady
is
displayed
again
and
you
can
make
another coffee.
5.
T
o turn the appliance off, pr
ess
the
on/of
f
button
.
Before going off, the appliance
performs
an
automatic
rinse
cycle
(a
little
hot water
runs
out from the spouts and
is
collected in the
drip
tray
beneath).
Take
car
e
to
avoid
scalds.
Once switched off, the lights don’
t
shut
off immediately and the cooling
span
motor
operates
to
avoid condensation into the housing. After about
10
minutes, the
appliance
switches
completely off.
3.2.2
Notes
•
If the coffee
is
delivered
a
dr
op
at
a
time or not at
all,
turn the grinding
coarseness
regulator
(fi
g.
7)
one
click
clockwise
(see
paragraph 3.2.4 on page 12,
‘Regulating
the
coffee
mill’
)
T
urn one
click
at
a
time until thecoffee
is
delivered
satisfactorily
.
•
If the coffee
is
delivered
too
fast
and
is
not
creamy
enough, turn the grinding
coarseness
regulator
(fi
g.
7)
one
click
anticlockwise
(see
paragraph 3.2.4 on page 12,
‘Regulating
the
coffee
mill’
).
Avoid turning the grinding
coarseness
regulator
excessively
,
otherwise the coffee
may
run
out
in
dri
p
s
when
y
ou
select
2
cu
p
s.
7
•
Tips
to
make
hotter coffee
º
If 2/3 minutes
have
passed,
since
you
last
made coffee, before making coffee
again
you must preheat the
infuser
by pr
essing
the
button
.
Run
off thewater
into the underlying
drip
tray
or alternatively
use
this
water
to
fi
ll
(and
then empty)
the cup
to
be
used
for the coffee,
so
as
to
preheat
it.
9

3
Use
º
Unless
preheated,
do
not
use
cups
that
ar
e
too
thick,
as
they will absorb
too
much
heat.
º
Use
cups
that
have
been preheated by rinsing them with hot water
.
Y
ou
can
use
the
button
.
•
While the appliance
is
making the coffee,
delivery
can
be
stopped
at
any
time
by
pr
essing
the
button
,
or
as
pr
eviously
selected.
•
As
soon
as
the delivery
is
complete,
to
increase
the quantity of coffee,
simply
pr
ess
and hold the
button
,
or
as
pr
eviously
selected, until the
desir
ed quantity
is
r
eached
(this
operation must be performed within
3
seconds
from
when
the coffee
delivery from the spouts
ceases).
•
When the appliance
displays
FILL
T
ANK
the water tank must be refilled or the
appliance will not
make
coffee.
(It
is
normal for there
to
be
a
little
water left in the
tank
when
the
message
is
displayed).
•
The
appliance counts the number of cof
fees
made.
Every
14
single cof
fees
(or
7
doubles) the appliance
displays
EMPTY
GROUNDS
CONT
AINER
,
indicating that the
grounds container
is
full and must be emptied and
cleaned.
Until the grounds container
has
been
cleaned,
the
a
pp
liance
continues
to
dis
p
la
y
the
messa
g
e
and
cannot
make
coffee.
T
o
clean,
open the
service
door at the front by
pulling the coffee spout
(fi
g.
8),
remove the
drip
tray
(fi
g.
9),
empty and
clean.
8
9
10

3
Use
When proceeding,
always
completely extract the
drip
tray
,
to
avoid that
it
falls
when
removing the grounds container
(fi
g.
10).
Empty the grounds container and
clean
thoroughly
,
making
sur
e
all
r
esidues
deposited on the
bottom
ar
e
removed.
10
When removing the
drip
tray
,
the grounds container must be emptied,
even
if
it
is
not completelyfull. If
this
is
not done,
when
next making coffee the grounds in the
container
may
exceed the maximum
level
and block the appliance.
While the appliance
is
running off coffee, never
r
emove
the
water
tank.
If
it
is
removed, the appliance will not be able
to
make
the coffee. If the appliance
malfunctions,
do
not contact the
service
centre straight
away
.
The
problem
can
almost
always
be r
esolved
by following the instructions indicated on
pages
25
until
29.
If
this
is
not the
case,
or for further explanations, contact the customer
service.
3.2.3 Changing
the
quantity
of
coffee
in
the
cup
The
appliance
is
factory pr
eset
to
automatically deliver the following
quantities of coffee:
•
Short
(when
the
button
is
pr
essed);
•
Standar
d
(when
the
button
is
pr
essed);
•
Long
(when
the
button
is
pr
essed);
T
o
change
these
quantities, proceed
as
follows:
1.
Press
the
button
corresponding
to
the quantityyou want
to
change
(
,
or
)
for at
least
8
seconds
until the
message
PROGRAM
QUANTITY
is
displayed.
2.
When the coffee in the cup r
eaches
the required
level,
pr
ess
the
same
button
again
to
memorise the
new
amount.
11

3
Use
3.2.4 Regulating
the
coffee
mill
However
,
after making the fi
rst
cof
fees,
if
you find that the
coffee delivery
is
either
too
fast
or
too
slow
(in
drips),
the
grinding
coarseness
regulator
can
be adjusted
(fi
g.
11).
The
grinding
coarseness
r
egulator
must
only
be
tur
ned
when
the
coffee
mill
is
on.
T
urning
it
1
click
(1
number)
clockwise
speeds
up the coffee
delivery (without
drips).
T
urning
it
1
click
anticlockwise
slows
down the delivery
,
giving
a
creamier
appearance
to
the coffee.
These
adjustments will only be evident after at
least
2
cups
of
coffee
have
been
run
off.
11
•
T
urn
anticlockwise
to
obtain finer ground coffee,
slower
delivery and
a
creamier
appearance.
•
T
urn
clockwise
for
coarser
ground coffee and
faster
delivery (not
a
dr
op
at
a
time).
3.2.5 Pr
eparing
espr
esso
coffee
using
gr
ound
coffee
(instead
of
beans)
1.
Press
the
button
to
select
the ground coffee function.
This
disables
the coffee
mill function.
The
appliance
displays
READY
PRE-GROUND
.
2.
Extract
the appliance by pulling
it
outwar
ds
taking
car
e
to
use
the
special
handles
(fi
g.
12).
12
12

3
Use
3.
Lift the central
lid
and place one or two
levels
measur
e of
ground coffee in the funnel
(see
fig.
13).
Close
the lid,
push
the appliance
to
replace
it
and proceed
as
described in
paragraph
3.2.1
on page
8
(‘Pr
eparing cof
fee’).
13
3.2.6
Notes
•
Y
ou
can
make
just
one or two cof
fees
at
a
time by pr
essing
the
button
,
or
only once or twice (within
3
seconds).
•
Never add the ground coffee
when
the appliance
is
off
to
avoid
it
being dispersed
inside the appliance.
•
Never add more than two
levels
measur
ed scoop, otherwise either the appliance will
not
make
the coffee, the ground coffee will be lost inside the appliance, dirtying
it,
or
the coffee will run off in drips and the
message
GROUND TOO
FINE
ADJUST
MILL
AND
PRESS
OK will be displayed. A
little
water
comes
out from the
steam
spout.
•
When dosing the quantity of coffee
to
be added,
use
the
measur
e supplied only
.
•
Use
ground coffee for
espresso
coffee
makers
only
.
Do not
use
coffee
beans,
fr
eeze-
dried coffee or other
materials
that could damage the appliance.
•
If the funnel
blocks
due
to
moisture inside the appliance
or
if
more than two
measuring
scoops
of pre-ground coffee
has
been
used,
use
a
knife
to
push
the coffee down
(fi
g.
14).
Then
remove and
clean
the
infuser
and appliance
as
described in paragraph
4.1.1
and
4.1.2
on
pages
17,
18
and
19.
14
13

3
Use
Once the coffee
has
been delivered,
to
go
back
to
making coffee
using
beans,
deactivate the ground coffee function by pr
essing
the
button
again
(the
coffee mill
is
enabled for operation
again).
3.2.7
Hot
water
delivery
Always
make
sur
e the appliance
is
r
eady
.
1.
Move the cappuccino
maker
towar
ds
the centre of the
appliance and place
a
container under
it
(fi
g.
15,
position
3).
3
2
1
15
2.
Press
the
button
.
The
appliance
displays
HOT W
A
TER
PRESS
OK
.
3.
Press
the
button
(OK)
again
to
confirm.
4.
Hot water
runs
off from the cappuccino
maker
and
starts
to
fi
ll
the container
underneath.
Y
ou should not run off hot water for more than
2
minutes at
a
time.
5.
T
o interrupt the hot water delivery
,
pr
ess
the
button
again
and place the
cappuccino
maker
in the original position
near
the centre of the appliance.
3.2.8 Pr
eparing
cappucinos (using steam)
1.
Move the cappuccino
maker
outwar
ds
and place
an
empty cup under the
cappuccino
maker
(fi
g.
15,
position
2).
2.
Press
the
steam
button
.
The
appliance
displays
STEAM
PRESS
OK
.
3.
Press
the OK button. Allow the
steam
mixed with water
to
run off for
a
few
seconds
until
steam
only
is
given off.
4.
T
o interrupt the
steam
delivery
,
pr
ess
the
steam
button
again.
5.
Empty the container
.
Then
fi
ll
it
with about
100
ml of milk for
each
cappuccino
to
be
prepared.
In
choosing the
size
of the container
,
bear in mind that the milk doubles
or triples in volume.
Y
ou
ar
e recommended
to
use
semi-skimmed
milk at refrigerator
tem
p
eratur
e.
14

3
Use
6.
Dip the cappuccino
maker
into the recipient containing
the milk, taking
car
e not
to
immerse
the
raised
line on the
cappuccino
maker
(indicated by the
arr
ow in fig.
16).
Press
the
steam
button
(bewar
e of
burns)
and the OK button.
Steam
is
dischar
ged from the cappuccino
maker
,
giving
the milk
a
creamy
frothy
appearance.
T
o obtain
a
creamier
froth,
dip
the cappuccino
maker
into the milk and rotate the
container with
slow
movements from the
bottom
upwar
ds.
(Y
ou should not
dischar
ge
steam
for more than two minutes
at
a
time
)
.
16
7.
Once the required amount of frothed milk
is
r
eached,
interrupt the
steam
delivery by
pr
essing
the
steam
button
.
8.
Pr
epare the coffee
as
described above,
using
lar
ge enough
cups,
then fi
ll
with the
frothed milk prepared pr
eviously
.
The
cappuccino
is
r
eady
.
Sweeten
to
taste and,
if
desir
ed,
sprinkle
the froth with
a
little
cocoa powder
.
Always clean
the
cappuccino maker
immediately
after
use.
Proceed
as
follows:
1.
Dischar
ge
a
little
steam
for
a
few
seconds
by pr
essing
the
steam
button
.
This
empties
any
milk left inside the
steam
spout.
T
o
guarantee hygiene, you are
r
ecommended
to
follow
this
pr
ocedure
each
time
you make cappuccino
to
avoid
milk
stagnating
in
the
milk
circuit.
2.
Press
the
steam
button
and the OK button.
3.
Wait
a
couple of minutes for the cappuccino
maker
to
cool
down.
Then,
with one hand, hold the cappuccino spout
handle firm and with the other
unscrew
the cappuccino
maker
itself by rotating
clockwise
and extracting downwar
ds
(fi
g.
17).
17
15

3
Use
4.
Remove
the
nozzle
from the
steam
spout by pulling
it
downwar
ds
(fi
g.
18).
5.
Car
efully
wash
the cappuccino
maker
and
steam
nozzle
in
warm
water
.
18
6.
Make
sur
e the two
holes
shown
in fig.
19
ar
e not blocked.
If
necessary
,
clean
with
a
pin.
19
7.
Replace
the
steam
nozzle
by inserting
it
and vigor
ously
turning
it
upwar
ds
into the
steam
spout.
8.
Replace
the cappuccino
maker
by pushing
it
upwar
ds
and turning
it
anticlockwise.
16

4
Maintenance
4.1
Cleaning and maintenance
Before performing
any
cleaning operations, turn the appliance off by pr
essing
the
on/of
f
button
on the contr
ol
panel and
leave
the appliance
to
cool down. Never
immerse
the
espresso
machine
in water
.
It
is
an
electrical appliance. Do not
use
solvents
or
abrasive
cleaning products
to
clean
the appliance. A soft damp cloth will
suffice.
Never
wash
any
of
the
com
p
onents
of
the
a
pp
liance
in
a
dishwasher
.
4.1.1 Cleaning
the
espr
esso
machine
Clean
the grounds container
(as
described on page
10)
whenever
it
requir
es
emptying.
The
water tank should
also
be
cleaned regularly
.
The
drip
tray
is
fi
tted
with
a
level
indicator
(r
ed)
showing the
level
of water
it
contains.
When the indicator
starts
to
become
visible
(a
few millimetr
es
under the
drip
tray),
the
drip
tray
must be emptied and
cleaned.
Check
that the
holes
in the coffee spout
ar
e not blocked.
T
o unblock them,
20
scrape
the
dry
co
ff
ee
r
esidues
away
with
a
needle
(f
i
g.
20
)
.
4.1.2 Cleaning
the
infuser
The
infuser
must be cleaned regularly
to
avoid the build-up of coffee
encrustations
which
could
cause
malfunction.
Pr
oceed
as
follows:
1.
T
urn the appliance off by pr
essing
the
on/of
f
button
on the contr
ol
panel
(
do
not
switch
of
f
the
main switch
or
unplug) and wait for the
display
to
go
of
f).
2.
O
pen the
service
door
(see
fig.
8
on page
10).
3.
Remove
the
drip
tray
and the grounds container
(fi
g.
9
on page
10)
and
clean.
4.
Press
the two red r
elease
buttons on the
infuser
sideways
and towar
ds
the centre
(fi
g.
21)
and pull
it
out.
21
17

4
Maintenance
The infuser
can
only
be
r
emoved when
the
appliance
is
of
f
(by
pr
essing
the
on/of
f
button
).
Attempting
to
r
emove
the
infuser
with
the
appliance on may
cause
serious damage.
W
ash
the
infuser
under
running
water
,
without
using
deter
gents. Never wash
the
infuser
in
the
dishwasher.
5.
Clean
the inside of the appliance thoroughly
.
T
o remove
coffee
encrustations
from the inside of the appliance,
scrape
with
a
plastic or wooden fork
(fi
g.
22).
22
6.
V
acuum
up
the
r
esidues
with
a
vacuum
cleaner
(f
i
g.
23
)
.
7.
Replace
the
infuser
(A)
bysliding
it
onto the supports
(B)
and pin
(C)
at the
bottom
(D),
then
push
the
PUSH
symbol
(E)
fully in until
it
clicks
into place
(fi
g.
24).
B
A
E
23
C
D
24
18
Table of contents
Languages:
Other Gorenje Coffee Maker manuals

Gorenje
Gorenje GFACM20S User manual

Gorenje
Gorenje TCM330B User manual

Gorenje
Gorenje TCM800E User manual

Gorenje
Gorenje CM15BK User manual

Gorenje
Gorenje CM06BK User manual

Gorenje
Gorenje TCM330W User manual

Gorenje
Gorenje CFA9100E User manual

Gorenje
Gorenje ATCM730T User manual

Gorenje
Gorenje CMA9200BG User manual

Gorenje
Gorenje TCM300W User manual
Popular Coffee Maker manuals by other brands

Hamilton Beach
Hamilton Beach 40515 user manual

Cuisinart
Cuisinart Grind & Brew Thermal DGB-600BCC user manual

Philips
Philips HD7810/70/C Service manual

Philips Saeco
Philips Saeco Saeco Xelsis HD8944/01 quick guide

ARIETE
ARIETE Miro 1339B instructions

Cimbali
Cimbali M2 Barsystem Description of the machine and of the control panel