sotera.com 4
| 820,825, 850 DIGITAL PULSE OUTPUT METERS INSTALLATION AND OPERATION MANUAL
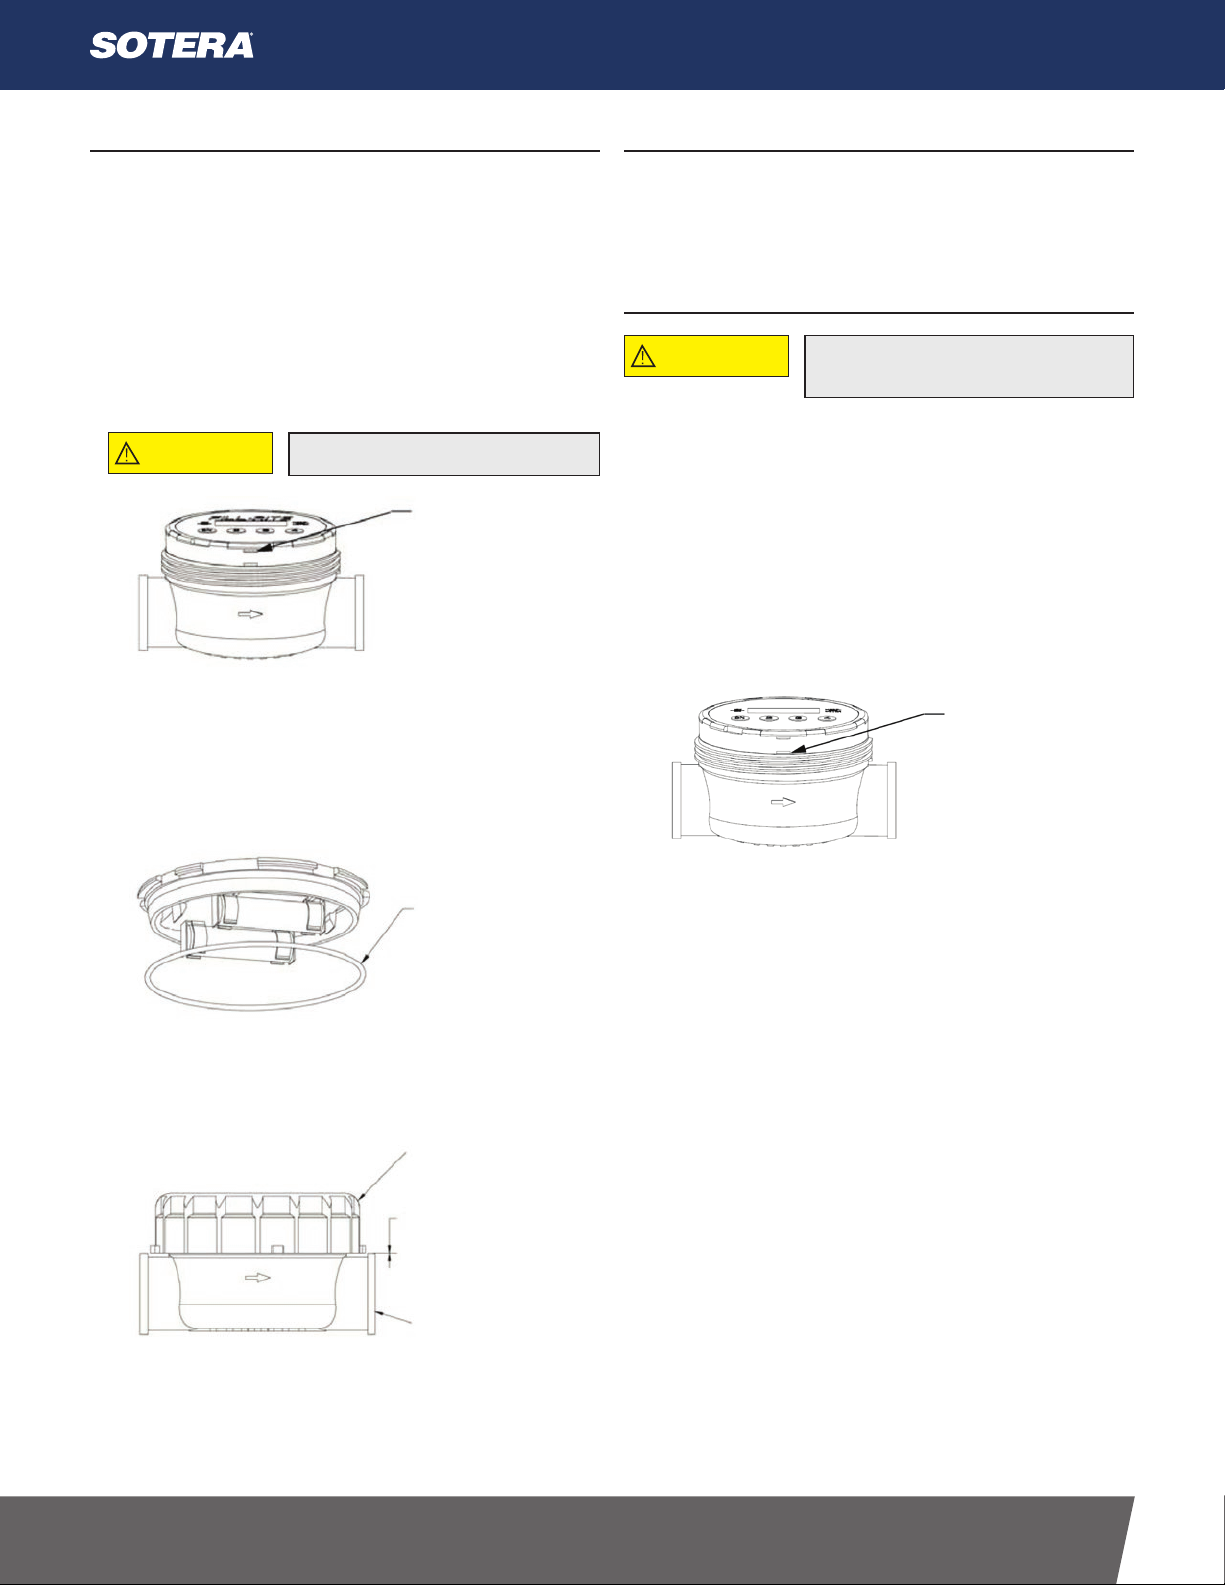
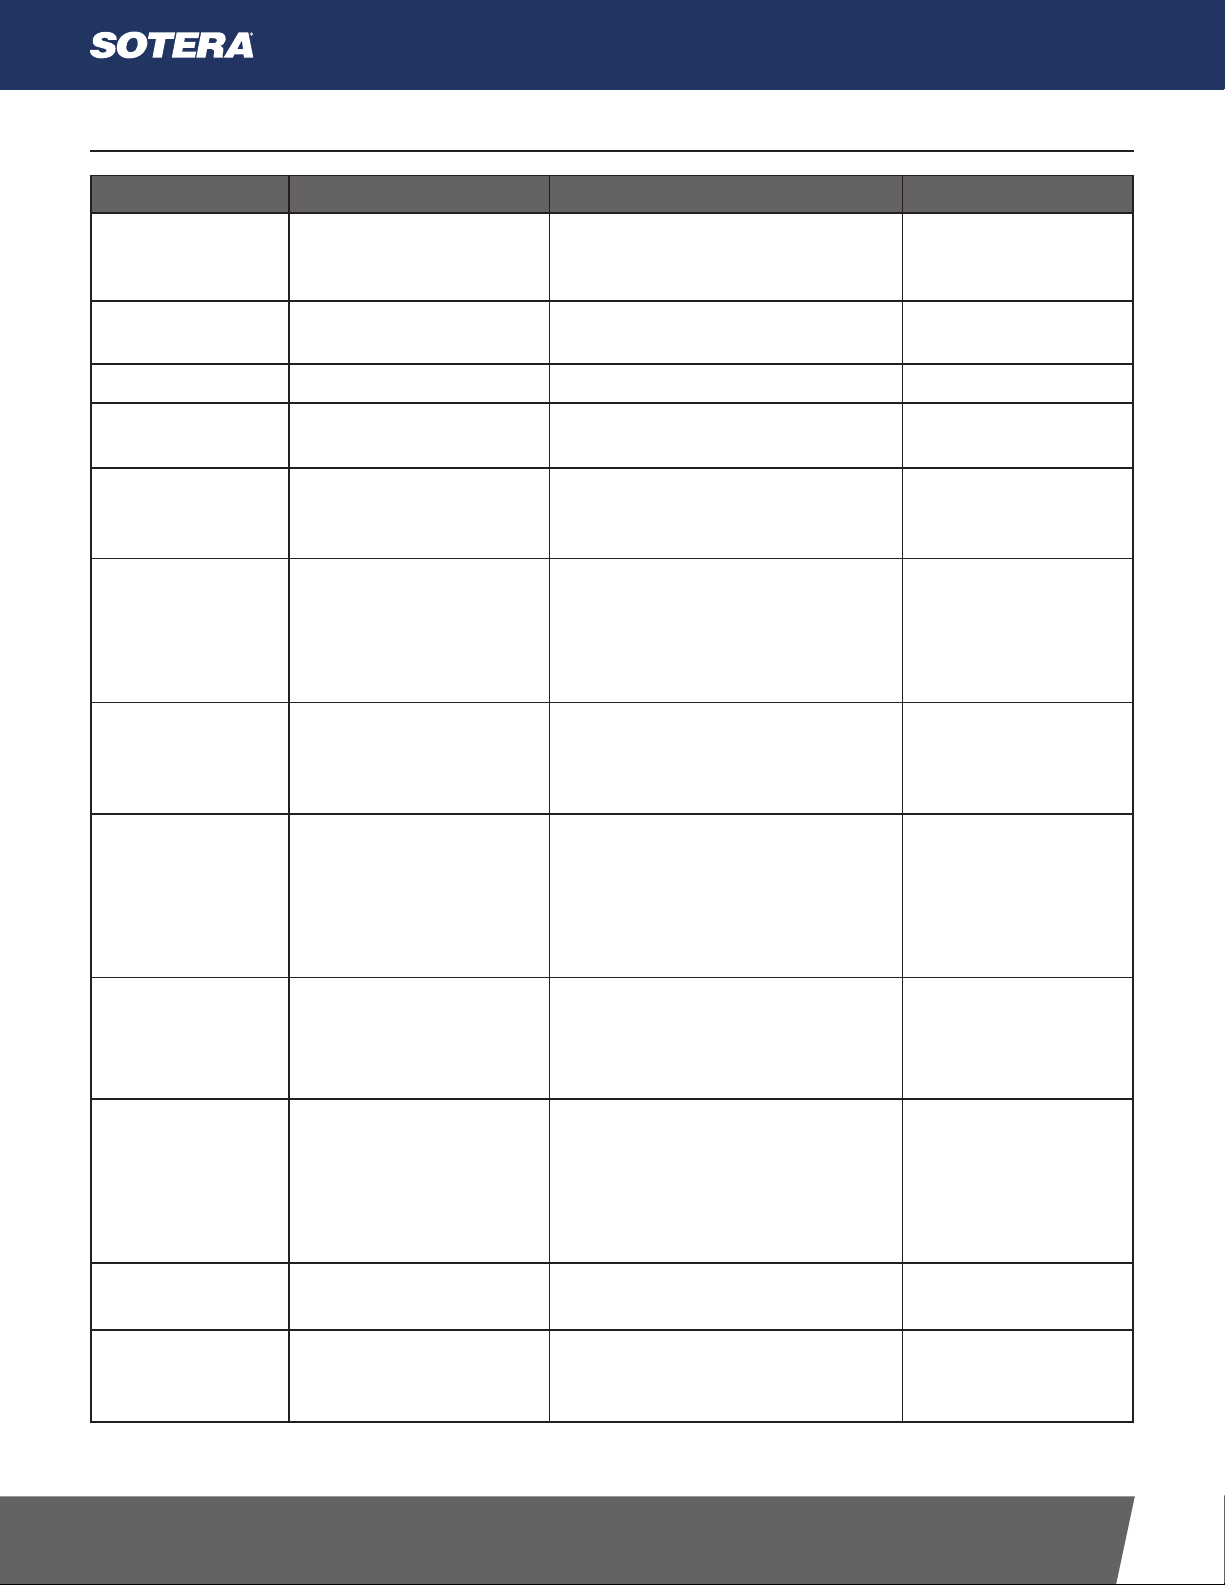
Technical Information
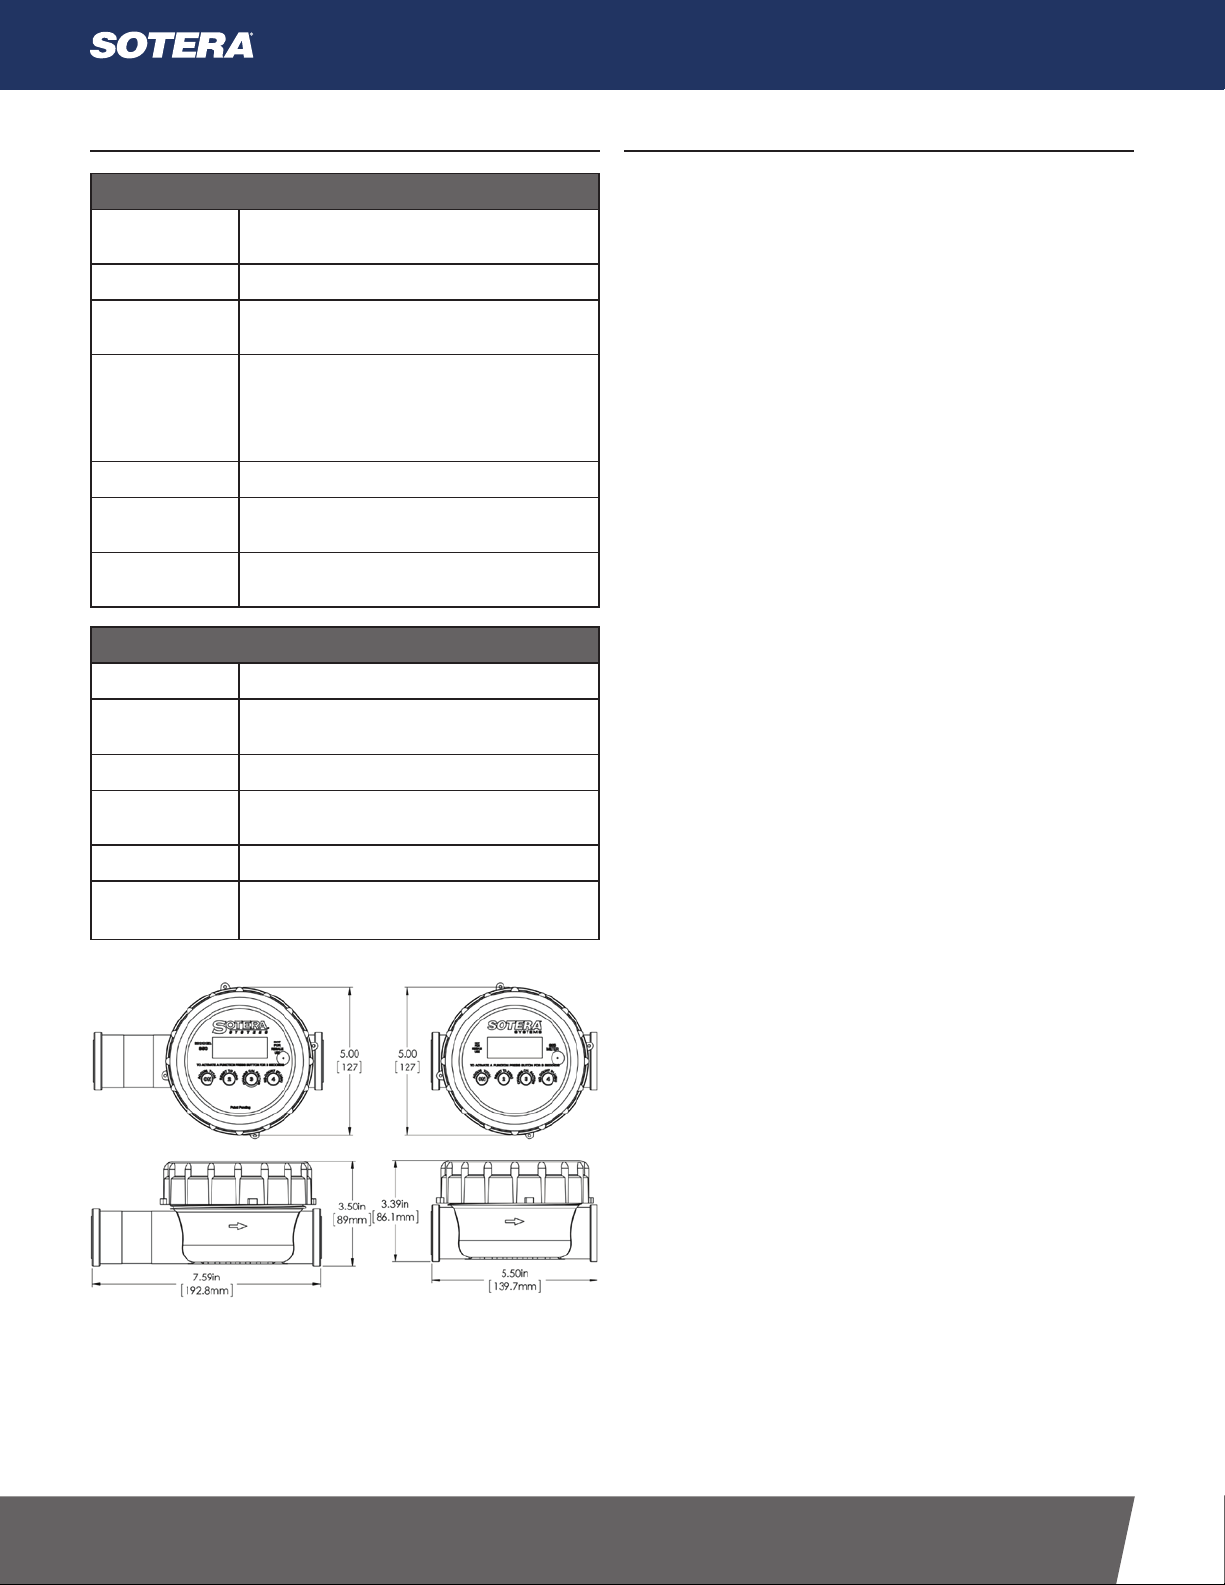
Flow ports 1" NPT inlet / outlet ports, female threads
(3/4" BSPP also available)
Flow Range 2 to 20 U.S GPM / 7.6 to 75.7 LPM
Pressure 120 PSI / 8.2 Bar maximum @ 70°F / 21°C
50 psi / 3.4 Bars maximum @ 130°F / 54°C
Temperature Min. operating temperature = 0°F / 17°C
Max. operating temperature = 130°F / 54°C
Meter can be stored at lower temperatures but
display may not work below 0°F.
Accuracy ± 0.5%
Units of Measure Ounces, pints, quarts, liters, gallons;
special calibration option also available.
Range 9999 current total;
10,000,000 accumulated total
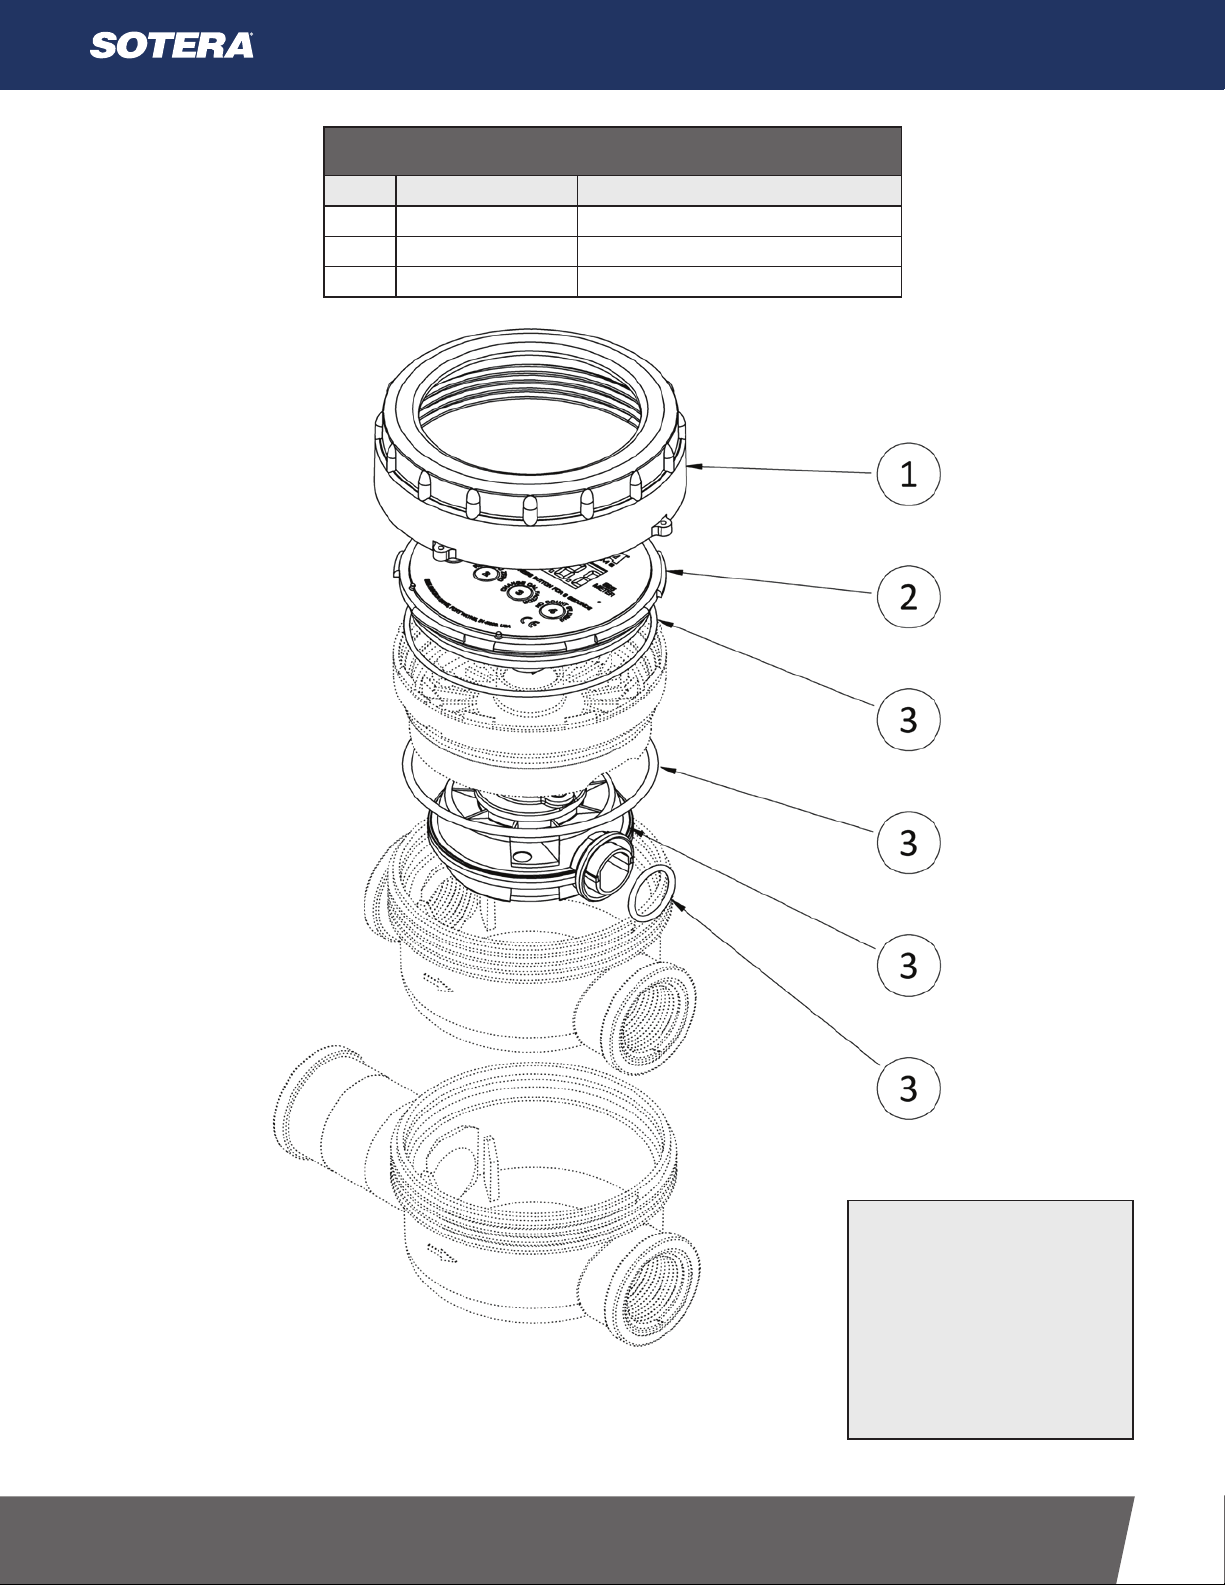
Technical Information
Materials of Construction
Body Polypropylene
Chamber Polyphenylene sulfide (PPS) and
303 Stainless Steel
Wetted Seals Fluorocarbon (EPDM optional)
Weather &
Dust Body Seal
BUNA-N
Display LCD (Liquid Crystal Display)
Power Two CR2032 Lithium batteries and external
5 - 24 VDC (see page 8)
The 825 & 850 Digital Meters will handle most pesticides,
automotive fluids (except gasoline), and mild acids.
It is also compatible with the following fluids**:
Aatrex 4L®
Abate 4E®
Apron®
Agrotain®
Assure II®
Atrazine 4L
Banvel®
Banvel SFG®
Bicep®
Blazer®
Treflan®
Dual®
**Camix TM
Caustic Soda (50%)
Clarity®
Command®
Conclude®
Conclude®xtra
Contour
Diesel Fuel
Doubleplay®
Dual II®
Ethylene Glycol
Flexstar®
Fultime®
Fusion®
Gramoxone lnteon™
3.38EC Pursuit®
Rezult®
Roundup®
Squadron®
Surpass®
Superboll®
Touchdown®
Treflan™ HFP
** Requires EPDM Seals.
Aatrex®, Aatrex® 4L., Bicep®, Bicep 11®, Dual®, and Dual 11® are registered trademarks
of Syngenta Corporation. Broadstrike and Treflan are registered trademarks of Dow AgroSciences.
Banvef®, BanvelSGF®, Blazer®, camix, Clarity®, Conclude®, Galaxy®, Guardsman®, Lumax,
Manifest “Marksman® Poast®, Poast HC®, Poast Plus®. Rezult®, and Storm® are registered
trademarks of BASF. DoublePlay®, Eptam® 7E, FulTime, Fusion®, Gramaxone® Extra, Karate®,
ReHex®, Surpass®. TopNotch, and Touchdown® are registered trademarks of Syngenta.
Contour®.Detail, Pursuit®, Prowl®, and Squadron® are registered trademarks of American
Cyanimld. Harness® Xtra, Roundup® are registered trademarks of Monsanto Company.
Command®, and Furadan® are registered trademarks of FMC.Agrotain® Isa registered
trademark of IMCAgrico. Superboll®is a registered trademark of Griffin.
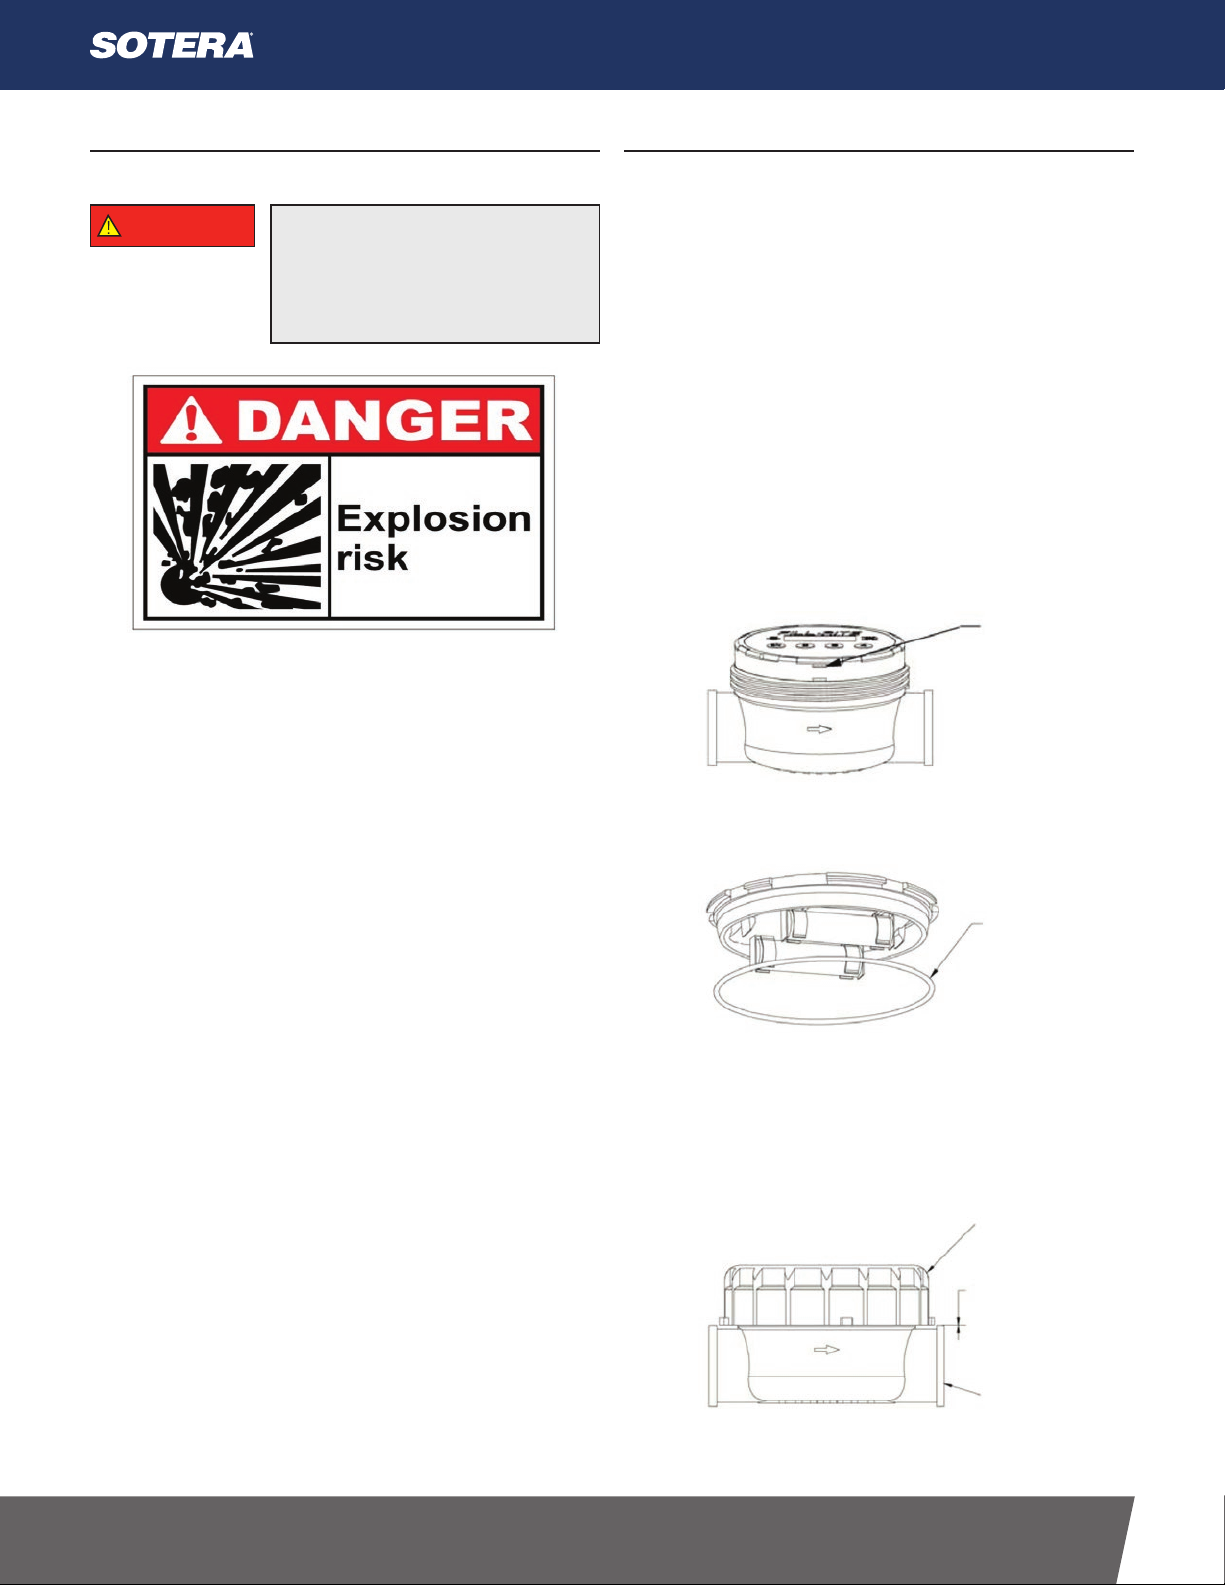
The 825P & 850P Digital Meters are NOT compatible with very strong
acids or if fluid flash point is below 100°F (38°C). If in doubt about
compatibility of a specific fluid, contact supplier of fluid to check for
any adverse reactions to the following wetted materials:
Guardsman®
Harness xtra®
Karate®
Laddock S-12®
Lasso Micro Tech®
*Lumax TM
Manifest™
Marksman®
Maxim®
Methyl Parathion Broadstrike®+
Motor Oil Broadstrike®+
Nufos®
Phosphoric Acid
Poast®
Poast HC®
3ME Poast Plus®
Princep 4L®
Prowl®
Detail™
Oil.Adend®
Dual®
Eptam 7E®
Fallowmaster®
Frontier®
Furadan®
Gramoxone Extra®
Prowl®
Reflex®
Ridomil Gold®
Sodium Hydroxide (50%)
Storm®
100 Surpass® EC
Topnotch®
Treflan™
Water
Fluid Compatibility