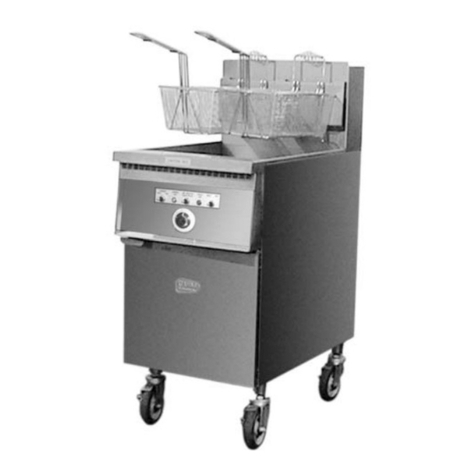
Gourmia GDF-475 User manual

DEEP FRYER
THE
FRYSTATION
PLUS 2.0
1
650W
4.2 L
MODEL#GDF-475

MODEL NUMBER: DY-SV200
POWER: 120V; 50HZ
USER
MANUAL
Safety Precautions 4
Cleaning and Care 10
Product Specs 6
Using Your Device 7
Manufacturer’s Tips 9
Storage and Disposal 10
Warranty Details 11
UMGDF475-A
MODEL#GDF-475
DEEP FRYER
THE
FRYSTATION
PLUS 2.0

SAFETY PRECAUTIONS
Disclaimer: Manual instructions should always be read and implemented prior to
product use. Manufacturer/ importer advisory board are not reliable for inadequate
use due to instruction manual negligence or failure to follow direction.
This product is intended for indoor household use only!
Children: Keep this device out of the reach of children or other unqualified persons,
since the misuse of contents and packaging materials may result in hazard or
death.
1. To protect against risk of electrical shock, do not immerse cord, plug or unit in
water or any other liquid.
2. Never leave the appliance unattended while in use.
3. Connect the appliance to a grounded outlet.
4. Do not let the cord hang over the edge of a table or touch hot surfaces.
5. Make sure the inner bowl is completely dry before you fill the fryer with oil or
fat.
6. Ensure that the oil is filled between the minimum and maximum oil level
marks inside the oil bowl. Do not switch the appliance on before you have
filled with oil or fat.
7. Hot steam is released through the filter during frying. Keep your hands and
face at a safe distance from the steam.
8. Do not use outdoors.
9. Do not fry food with heavy moisture content as this might cause heavy
splattering of oil or fat.
10. Do not operate any appliance with a damaged cord or plug or after the appli-
ance malfunctions, or is dropped or damaged in any manner.
11. Do not use any accessories that are not recommended by the manufacturer.
They would constitute a danger to the user and can damage the appliance.
12. Ensure there is proper ventilation when using the appliance.
13. Unplug from outlet when not in use. Allow to cool before moving, cleaning or
storing the appliance.
14. Remove the plug from wall outlet. Do not pull the supply cord.
4 5
15. If the supply cord is damaged, it must be replaced by the manufacturer, or
similarly qualified person in order to avoid any hazard.
16. This appliance is not intended for use by persons (including children) with
reduced physical, sensory or mental capabilities, or lack of experience and knowl-
edge, unless they have been given supervision or instruction concerning use of the
appliance by a person responsible for their safety.
17. Children should be supervised to ensure that they do not play with the appli-
ance.
18. The appliance is not intended to be operated by means of an external timer or a
separate remote-control system.
CONNECTING TO POWER
•Before connecting, check that the voltage indicated on the appliance (bottom
of the appliance) corresponds with the main voltage in your home. If it does not
match, do not use the appliance and contact you dealer.
•This appliance may be fitted with a non-rewirable plug. If you need to change
the fuse in a non-rewirable plug, the fuse cover must be refitted. If the fuse
cover is lost or damaged, the plug must not be used until a replacement is
obtained (available from the appliance manufacturer).
•This unit must be grounded. The equipment must be disconnected from the
outlet when not in use. Do not allow this unit to be exposed to water or
moisture.
•For your own safety, read the instructions carefully before attempting to
connect this unit to the outlet.
•You should only plug the appliance into a 110/120V, 50/60Hz supply.
Connecting it to other power sources may damage the appliance.

USING YOUR DEVICE
PRODUCT SPECS
6 7
SAFETY CUT-OUT
BEFORE FIRST USE
1. Remove the lid, frying basket, inner oil bowl and all packaging material from
the retail box (Fig.1).
2. Remove the control panel from the appliance by pulling upwards gently from
the panel holder at the fryer base (Fig.2).
3. Clean them thoroughly.
4. Make sure the inner bowl is completely dry before you fill the fryer with oil or
fat.
ASSEMBLY INSTRUCTION
1. Place the fryer base on a stable, flat and dry surface.
2. Place the inner oil bowl into the fryer base.
1. Lid
2. Basket handle
3. Frying basket
4. Removable inner bowl
5. Main electrical control box
6. VDE plug
7. Timer control knob
8. Power ON indicator
9. Ready indicator
10. Temperature control knob
This fryer is equipped with a safety cut-out to
protect the appliance from overheatIng from not
enough oil or fat, or if blocks of solid fat are
being melted in the fryer.
Follow the following steps when the safety
cut-out has switched o the appliance:
1. Let oil or fat cool down for 30 minutes.
2. Press the reset button at the back of the
control panel.
3. Slide in the control panel downwards into the
grooves of the panel holder where located at the
fryer base. You will hear a “click” sound when the
control panel is correctly placed.
4. Fold the basket handle from the inner side and
lock it by pressing the steel wires into the slot
(Fig.3).
Note: The appliance will only operate when the
control panel is correctly positioned.
PREPARING OIL / FAT
It is advised not to mix dierent types of oil or fat. We recommend using frying oil or
liquid frying fat. If you intend to use solid frying fat, the following steps must be
taken to prevent the fat from splattering:
1. Put the blocks of fat into a pan and melt it first on low heat.
2. Pour the melted fat carefully into the fryer.
If the solid fat is solidified, punch some holes into the solidified fat with a fork.
USING THE FRYER
1. Place the fryer on a stable, flat and dry surface.
2. Ensure the fryer is switched o.
3. Slowly fill the oil between the minimum and maximum oil level marks inside the
oil bowl. Follow the instructions above under “preparing oil/fat” if you are using oil /
fat for frying.
4. Set the temperature knob to the required temperature by turning the tempera-
ture control knob clockwise and select the desire time by turning the timer control
knob on the appliance.
5. Once you select the desired cooking time, the red power ON indicator will light
up. After the cooking time is up, the unit will “Ding” to stop and the power ON
indicator will go o.
6. The green ready indicator will light up when the temperature is reached. The oil
or fat will be heated to the selected temperature in 8 to 12 minutes.
7. With the basket positioned on the hook, put the food into the basket (e.g. fries)
and slowly immerse into the heated oil or fat.
8. Ensure the basket has been inserted properly. The appliance should be used
with the lid o.
9. During the frying cycle, the green ready indicator will go on and o, and this is
normal as the appliance is equipped with a temperature regulator.
10. When you accidently switch ON your deep fryer without oil or without the
minimum amount of oil required, the deep fryer will automatically cut out, to stop
the appliance from overheating. If this happens, first switch o and unplug the deep
fryer. Wait until the element cools down. Use a pin or small screwdriver to push the
reset button down. This will reset the deep fryer. Your deep fryer will now be ready
to use.
AFTER FRYING
1. Remove the basket from the fryer.
2. Shake the basket to remove excess oil or fat. You can also put the fried food in a
bowl containing grease-absorbing paper.
3. Switch o the appliance.
4. Unplug the appliance after use.
5. Let it cool down before cleaning or storing.
TIPS FOR BEST RESULTS
1. Oil or fat can be used 10 to 12 times if you mainly use the fryer to prepare french
fries.
2. If you use the fryer to prepare food such as meat or fish, you should change the
oil or fat more often.
3. Never add fresh oil or fat to used oil or fat.
4. Always change the oil or fat if it starts foaming when it is heated, it has a strong
smell or turns dark in color.
TEMPERATURE AND TIME REFERENCE
8 9
SAFETY CUT-OUT
BEFORE FIRST USE
1. Remove the lid, frying basket, inner oil bowl and all packaging material from the
retail box (Fig.1).
2. Remove the control panel from the appliance by pulling upwards gently from the
panel holder at the fryer base (Fig.2).
3. Clean them thoroughly.
4. Make sure the inner bowl is completely dry before you fill the fryer with oil or fat.
ASSEMBLY INSTRUCTION
1. Place the fryer base on a stable, flat and dry surface.
2. Place the inner oil bowl into the fryer base.
3. Slide in the control panel downwards into the
grooves of the panel holder where located at the
fryer base. You will hear a “click” sound when the
control panel is correctly placed.
4. Fold the basket handle from the inner side and
lock it by pressing the steel wires into the slot
(Fig.3).
Note: The appliance will only operate when the
control panel is correctly positioned.
PREPARING OIL / FAT
It is advised not to mix dierent types of oil or fat. We recommend using frying oil or
liquid frying fat. If you intend to use solid frying fat, the following steps must be
taken to prevent the fat from splattering:
1. Put the blocks of fat into a pan and melt it first on low heat.
2. Pour the melted fat carefully into the fryer.
If the solid fat is solidified, punch some holes into the solidified fat with a fork.
USING THE FRYER
1. Place the fryer on a stable, flat and dry surface.
2. Ensure the fryer is switched off.
3. Slowly fill the oil between the minimum and maximum oil level marks inside the
oil bowl. Follow the instructions above under “preparing oil/fat” if you are using
oil /fat for frying.
4. Set the temperature knob to the required temperature by turning the
temperature control knob clockwise and select the desire time by
turning the timer control knob on the appliance.
5. Once you select the desired cooking time, the red power ON indicator
will light up. After the cooking time is up, the unit will “Ding” to stop and
the power ON indicator will go off.
6. The green ready indicator will light up when the temperature is reached.
The oil or fat will be heated to the selected temperature in 8 to 12
minutes.
7. With the basket positioned on the hook, put the food into the basket
(e.g. fries) and slowly immerse into the heated oil or fat.
8. Ensure the basket has been inserted properly. The appliance should be
used with the lid off.
9. During the frying cycle, the green ready indicator will go on and off, and
1. Remove the basket from the fryer.
2. Shake the basket to remove excess oil or fat. You can also put the fried food
in a bowl containing grease-absorbing paper.
3. Switch off the appliance.
4. Unplug the appliance after use.
5. Let it cool down before cleaning or storing.
TIPS FOR BEST RESULTS
1. Oil or fat can be used 10 to 12 times if you mainly use the fryer to prepare
French fries.
2. If you use the fryer to prepare food such as meat or fish, you should change
the oil or fat more often.
3. Never add fresh oil or fat to used oil or fat.
4. Always change the oil or fat if it starts foaming when heated, has a strong
smell,or turns dark in color.
TEMPERATURE AND TIME REFERENCE
MANUFACTURER’S TIPS
Temperature
325˚F
325˚F
325˚F
340˚F
350˚F
350˚F
355˚F
355˚F
375˚F
Fresh potato chips 600g
450g
3-5 pcs
8-10 pcs
450g
4-5 pcs
8-10 pcs
8-10 pcs
3-4 pcs
7-8 mins
5-7 mins
12-15 mins
2-3 mins
5 mins
3-4 mins
3-4 mins
3-4 mins
5-6 mins
Fish
Chicken drumsticks
Vegetables
Frozen french fries
Potato croquettes
Chicken nuggets
Shrimp
Doughnuts
Type of Food Quantity Frying Time (minutes)
Oil Level
Min.
Max.
Liter
3.8 Liter
4 Liter
This is normal as the appliance is equipped with a temperature regulator.
10. When you accidentally switch ON your deep fryer without oil or without the
minimum amount of oil required, the deep fryer will automatically cut out to
stop the appliance from overheating. If this happens, first switch off and
unplug the deep fryer. Wait until the element cools down. Use a pin or small
screwdriver to push the reset button down. This will reset the deep fryer.
Your deep fryer will now be ready to use.
AFTER FRYING

CLEANING AND CARE WARRANTY DETAILS
This product is guaranteed under aone-year limited warranty period, applicable to
the original purchaser and not transferable to a third party user.
Repair or replacement of defective parts are at the seller's discretion. In the event
that repair isn't possible, the seller will replace the product/ part. If product repair/
replacement won’t suce, the seller has the option of refunding the cash value of
the product or component returned.
Product defects not covered under the warranty provisions include normal wear
and damage incurred from use or accidental negligence, misuse of instruction
specifications, or repair by unauthorized parties. The manufacturing company is not
liable for any incidental or consequential damages incurred by such circumstances.
10 11
•Unplug and let the appliance completely cool down.
•Do not use any abrasive cleaning agents or materials (e.g. scouring pads) to
clean the appliance.
•Clean the control panel with a dry cloth.
•Clean the oil bowl and the basket in hot water with some dish washing liquid.
•Rinse the parts with water and dry them thoroughly.
•Do not immerse appliance in water or any liquid.
STORAGE AND DISPOSAL
Storage:
•Ensure that the fryer is completely cooled before storing.
•Do not fold the handle into the basket until the oil has cooled down.
•Store the appliance in a cool, dry and clean place, out of the reach of
children and pets.
•Keep the packaging for transporting the appliance or for storing your
appliance when not in use for a prolonged period of time.
Product Disposal:
This product may not be disposed of along with with ordinary household waste,
as electrical and electronic waste must be disposed of separately.
Contact your retailer, distributor or the municipal authorities for further information
on product disposal.
Table of contents
Other Gourmia Fryer manuals

Gourmia
Gourmia GAF849 User manual

Gourmia
Gourmia GAF856 User manual

Gourmia
Gourmia GTF7460 User manual

Gourmia
Gourmia GTF1150 User manual

Gourmia
Gourmia GAF-228 User manual

Gourmia
Gourmia GAF-678 User manual

Gourmia
Gourmia GAF566 User manual

Gourmia
Gourmia GAF249 User manual

Gourmia
Gourmia GAF-328 User manual

Gourmia
Gourmia GAF-218 User manual

Gourmia
Gourmia GAF716 User manual

Gourmia
Gourmia GAF-375 User manual

Gourmia
Gourmia GTF7900 User manual

Gourmia
Gourmia GAF846 User manual

Gourmia
Gourmia GAF-395A User manual

Gourmia
Gourmia GAF685 User manual

Gourmia
Gourmia GAF-265 User manual

Gourmia
Gourmia GAF778 User manual

Gourmia
Gourmia GAF798 User manual

Gourmia
Gourmia GAF236 User manual