Gourmia GPM630 User manual

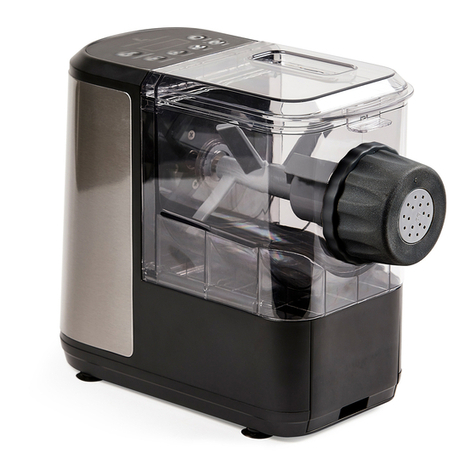
PHOTO OF PRODUCT
MODEL# GPM630
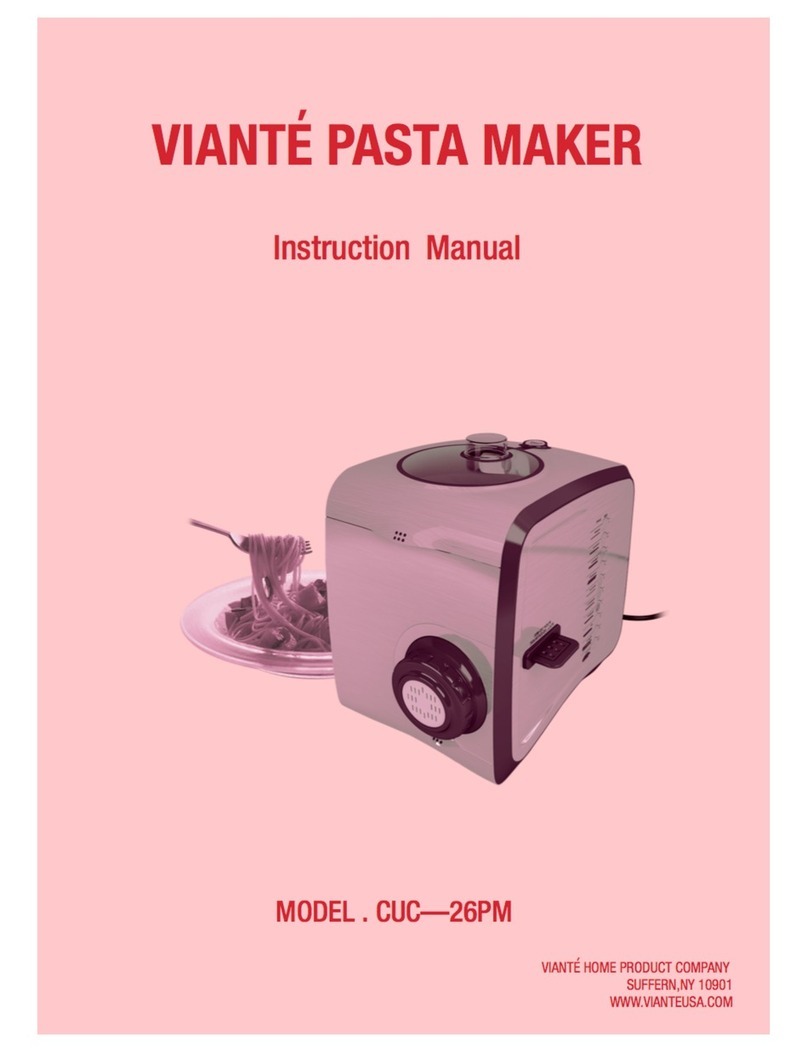
PASTA MAKER
HOMEMADE PASTA
www.gourmia.com

© 2016 Gourmia
www.Gourmia.com
The Steelstone Group
Brooklyn, NY
All rights reserved. No portion of this manual may be reproduced by any means whatsoever
without written permission from The Steelstone Group, except for the inclusion of quotations in a
media review.
Although every precaution has been taken in the preparation of this manual, The Steelstone
Group assumes no responsibility for errors or omissions. Nor is any liability assumed for damages
resulting from the use of the information contained herein. Although every eort has been made
to ensure that the information contained in this manual is complete and accurate, The Steelstone
Group is not engaged in rendering professional advice or services to the individual consumer;
further, The Steelstone Group shall not be held responsible for any loss or damage allegedly
arising from any information or suggestion in this manual.
10 9 8 7 6 5 4 3 2 1
Printed in China
Welcome to Indulgenceof Homemade
Pasta Maker from Gourmia!
Fresh, delicious homemade pasta has never been easier than it is with the Gourmia
Pasta Maker. Everything is automated—from blending to kneading to extracting—so
you have avorful pasta in just minutes with almost no work. Add dierent avors like
herbs and vegetables and use any of the 9 dierent pasta shaping discs to make a
unique meal every time. Plus, the Gourmia Pasta Maker disassembles easily, making
clean-up a breeze.
The following pages of this manual oer full and complete instructions for
all the functions and features of your Pasta Maker. Inside these pages, you’ll nd
information on and instructions for assembly, operating, cleaning and maintenance
of your Pasta Maker. Please read all safety instructions and complete directions
carefully for safe usage at all times.
Thank you for your purchase! We hope you will enjoy all the innovative products
brought to you by our family at Gourmia.

TABLE OF CONTENTS
SAFETY FIRST p. 6
FEATURES & PARTS p. 8
ASSEMBLY & USAGE p. 10
CLEANING & TROUBLESHOOTING p. 12
WARRANTY & SERVICEp. 14

SAFETY FIRST
SAFETY FIRST
IMPORTANT SAFEGUARDS
When operating this electric appliance, basic safety instructions should always be
followed. Refer to the following for these instructions.
1. Before connecting the appliance to the mains, check whether the type of supply and
the mains voltage corresponds with the appliance.
2. Always switch OFF and pull the plug out of the socket before you clean the appliance
or when you have nished using it. To disconnect the device from the electricity
supply, never pull the plug out using the power cord, always pull directly on the plug.
Never carry the unit by its power cord.
3. Indoor use only. Never immerse the device in water and do not expose the device to
rain or moisture. If the device should fall into water, rst pull the plug out of the
socket and only then remove the device from the water. Afterwards have the unit
examined by an authorized service center before you use it again.
4. Do not use the appliance if your hands are wet or if you are standing on a wet oor.
5. Set up and store the appliance and its attachments out of reach of children.
6. Do not leave the appliance unattended while it is on.
7. Always ensure that the device is safely set up before you start to use it.
8. Do not reach into the feed tube. Always use food pusher to avoid injury.
9. This device is not suitable for ice blocks crushing and extremely hard products.
10. Keep your hair, clothing and jewelry away from the rotating parts.
11. Check unit and its components regularly for damages. Do not use the appliance if it
is damaged in any way. Have it immediately repaired at an authorized service center.
Do not ever try to repair the unit yourself. There is danger of electrical shock.
12. If the supply cord is damaged, it must be replaced by the manufacturer, its service
agent or similarly qualied persons in order to avoid injury.
13. No claims under the warranty or liability for damages will be accepted if they result
from improper or incorrect use .
14. Switch o and unplug the device before removing or inserting the attachments.
CAUTION! Handle the attachments with care.
15. Do not try to open the housing yourself. Do not introduce any kind of objects into
the housing.
16. Do not operate the unit continuously for more than 2 minutes. Allow the unit to
cool completely before using again.
17. The manufacturer does not recommend the use of accessory attachments. Use of
accessory attachments may cause injuries.
18. Position the appliance as close to the outlet as possible to prevent injury due to
tripping over cord.
19. Do not place on or near a hot gas or electric burner, nor in a heated oven.
20. A short power supply cord is provided to reduce the risk resulting from becoming
entangled or tripping over a long cord.
21. Longer detachable power-supply cord or extension cord are available and may be
used if care is exercised in their use. Exception: An extension cord or longer
detachable cord is not recommended for use with this appliance.
22. Appliances can be used by persons with reduced physical, sensory or mental
capabilities or lack of experience and knowledge if they have been given supervision
or instruction concerning use of the appliance in a safe way and if they understand
the hazards involved.
23. Children shall not play with the appliance.
24. If a long detachable power-supply cord or extension cord is used: 1)The marked
electrical rating of the cord or extension cord should be at least as great as the
6 7
FOR HOUSEHOLD USE ONLY
Electrical 3-conductor Cord Set:
Appliance is equipped with a
3-conductor cord set that has a 3 prong
grounding-type plug. It should be
properly connected to a grounding-type
a 3-grounding outlet unit, and as such,
the grounding prong should never be
removed. If needed, purchase a 2-prong
adapter and ground it to the outlet.
Do not use an adapter unless you are
for assistance.
WARNING: This product contains
a chemical known to the State of
California to cause cancer.
WARNING: This product contains
a chemical known to the State of
California to cause birth defects or
other reproductive harm.
electrical rating of the appliance; 2) If the appliance is of the grounded type, the
extension cord should be a grounding 3-wire cord; and 3)The longer cord should be
arranged so that it does not drape over the counter top or table top where it can be
pulled on by children or tripped over unintentionally.
25. Do not let cord hang over edge of table or counter or touch hot surface.
26. Never set the device up on a hot surface or near an open ame.
27. Make sure that the cord does not pass over hot or sharp edged objects.
28. Do not allow the main lead to become kinked or trapped. The cable should be laid so
that there will not be any risk of anyone pulling it inadvertently or tripping over it.
29. Set up the device on a at, non-slip surface close to an electrical socket.
30. Connect the device to an earthed socket.
SAVE THESE INSTRUCTIONS

FEATURES & PARTS
FEATURES & PARTS FEATURES & PARTS
8 9
D
D
C
C
L
L
J
J
K
K
B
B
E
E
F
F
G
G
H
H
I
I
A
A. Control Panel G. Front Panel
B. Upper Cover H. Pasta Shaping Disc
C. Water Adding Dish I. Knob
D. Plastic Mixing Bowl J. Pasta Shaping Disc Drawer
E. White Plastic Panel K. Spiral Rod
F. Open Button L. Machine Body
M. Watering Adding Case
N. Flour Cup
O. Measuring Cup
P. Thru-hole Pin
Q. Small Water Cup
M
M
N O P Q A. Udon
B. Vermicelli
C. Macaroni
D. Rotini
E. Sausage/Ravioli Adapter
F. Angel hair
G. Lasagna
H. Linguine
I. Spaghetti
J. Penne
K. Sausage Core
L. Dumpling/Ravioli Core
M. Dumpling/Ravioli Press
A
CONTROL PANEL
PASTA SHAPING DISCS

ASSEMBLY & USAGE
ASSEMBLY & USAGE ASSEMBLY & USAGE
10 11
ASSEMBLY
1. Insert the plastic mixing bowl into the groove of the base with the large round
opening facing out and the square opening on top.
2. Insert the spiral rod through the front opening of the mixing bowl into the
opening in the back of the base. The rod should securely attach to the small hole
on the interior of the base.
3. Secure the white plastic panel to the front of the base by securing it through the
attached screws.
4. Choose the plastic pasta shaping disc you want to use and insert it into the back
of the metallic front panel. Make sure the tab on the plastic shaping disc is
inserted into the groove on the front panel.
5. Attach the metallic panel to the screws on the front of the machine and push the
panel in so it is ush against the machine. Secure the panel by tightly screwing
the knobs on.
6. Place square plastic cover on top of the machine and push down to lock it in
place.
USE
Making Pasta
Refer to the following chart for the correct amounts of our and liquid to make the
perfect noodles.
Notes:
• When measuring our with a measuring cup, atten the scoop with the at
side of a butter knife.
• Use the included water measuring cup to measure the liquids.
• When making egg pasta, add the egg to the measuring cup and then add
water until the required liquid amount is reached.
• To make the extrusion process smoother, add a teaspoon of oil to the liquid
before you add it to the our.
Making Pasta Automatically:
1. Assemble the machine as described above, making sure to choose the correct
shaping disc for the type of pasta you want to make.
2. Open the top of the machine.
3. Measure the our and add to the mixing bowl. Replace the cover and lock in
place.
4. Measure the water and set aside.
5. Place the water-adding dish in the grooved area on the top cover. You know it
is in correctly when it ts snugly in the area.
6. Put a bowl under the extruding holes in the front of the machine.
7. Plug the machine in and the display turns on.
8. Press the Auto button. The spiral rod begins turning and the timer starts for the
indicated amount of time.
9. As soon as the mixing process begins, add the water into the water-adding
dish. The water is slowly added and mixed into the our to make the dough.
10. When the mixing is nished, the machine automatically begins extruding the
pasta into the bowl.
11. When the machine nishes extracting all of the dough, 4 beeps sound and the
machine stops.
12. When nished, unplug the machine.
Making Pasta Manually:
1. Assemble the machine as described above, making sure to choose the correct
shaping disc for the type of pasta you want to make.
2. Open the top of the machine.
3. Measure the our and add to the mixing bowl. Replace the cover and lock in
place.
4. Measure the water and set aside.
5. Place the water-adding dish in the grooved area on the top cover. You know it
is in correctly when it ts snugly in the area.
6. Plug the machine in and the display turns on.
7. Press the Mix button. The display blinks a few times, showing the default time
of 4 minutes. You can increase or decrease the amount of mixing time by
pressing the + and – buttons while the time is blinking.
8. After a couple of seconds, the display stops blinking, the spiral rod begins
turning and the timer starts for the indicated amount of time.
9. As soon as the mixing process begins, add the water into the water-adding
dish. The water is slowly added and mixed into the our to make the dough.
10. When the mixing is nished, the machine beeps 3 times.
11. Put a bowl under the extruding holes in the front of the machine. Press the
Extrude button. The pasta begins coming out of the machine into the bowl.
12. When the machine nishes extracting all of the dough, 4 beeps sound and the
machine stops.
13. When nished, unplug the machine.
USE continued...
Making Egg Noodles
To make egg noodles, follow either of the two noodle making processes above with one
exception. Instead of adding the liquid to the water-adding cup, you need to mix the egg-water
combination well and then pour it directly through the small holes in the plastic cover on top of
the machine.
Making Sausage
1. Assemble the machine as described above, making sure to choose the Sausage/Ravioli
Adapter parts and the sausage core in place of the pasta shaping disc. Insert the sausage
core into the shell and secure the shell to the spiral rod with the sausage core facing out.
Then attach the metallic front panel.
2. Add the meat and other sausage ingredients to the bowl and secure the lid to the top of the
machine.
3. Plug the machine in and press Mix. While the time is still blinking, press the – button to
reduce the mixing time to 3 minutes.
4. When the mixing is nished, put the sausage casing over the sausage core, leaving enough
to be able to tie the casing closed.
5. Hold the sausage casing in place on the sausage core and press Extrude. The sausage
mixture begins lling up the sausage casing.
6. Once the sausage casing is lled, press Cancel to stop the extruding process.
7. Remove the sausage casing and tie it closed.
8. Repeat with more casings.
9. When nished, unplug the machine.
CLEANING
• Unplug the machine before cleaning.
• The mixing bowl, spiral rod, upper cover, panels, pasta shaping discs, and knobs should all
be washed with warm, soapy water.
• The exterior of the machine should be wiped down with a soft, damp cloth.
• Dry all parts thoroughly before storing or using.
• The machine should not be submerged in water or any other uid.
• Store the pasta machine in a cool, dry place.
Flour using included Cup
1 cup
250 g
1 cup 1 egg plus
enough water
to make 94 mL
82 mL
1.5 cups
375 g
1.5 cups 1 egg plus
enough water
to make 140 mL
124 mL
2 cups
500 g
2 cups
2 eggs plus
enough water
to make 187
mL
165 mL
Flour using
Included
Cup
OR
Flour by
Weight
OR
Water &
Egg
OR
Vegetable
Juice
Water using
Included
Cup
82 mL
122 mL
164 mL
OR
Water By
Volume

USAGE & CLEANING TROUBLESHOOTING
CLEANING & TROUBLESHOOTING
13
12
ASSEMBLY
1. Insert the plastic mixing bowl into the groove of the base with the large round
opening facing out and the square opening on top.
2. Insert the spiral rod through the front opening of the mixing bowl into the
opening in the back of the base. The rod should securely attach to the small hole
on the interior of the base.
3. Secure the white plastic panel to the front of the base by securing it through the
attached screws.
4. Choose the plastic pasta shaping disc you want to use and insert it into the back
of the metallic front panel. Make sure the tab on the plastic shaping disc is
inserted into the groove on the front panel.
5. Attach the metallic panel to the screws on the front of the machine and push the
panel in so it is ush against the machine. Secure the panel by tightly screwing
the knobs on.
6. Place square plastic cover on top of the machine and push down to lock it in
place.
USE
Making Pasta
Refer to the following chart for the correct amounts of our and liquid to make the
perfect noodles.
Notes:
• When measuring our with a measuring cup, atten the scoop with the at
side of a butter knife.
• Use the included water measuring cup to measure the liquids.
• When making egg pasta, add the egg to the measuring cup and then add
water until the required liquid amount is reached.
• To make the extrusion process smoother, add a teaspoon of oil to the liquid
before you add it to the our.
Making Pasta Automatically:
1. Assemble the machine as described above, making sure to choose the correct
shaping disc for the type of pasta you want to make.
2. Open the top of the machine.
3. Measure the our and add to the mixing bowl. Replace the cover and lock in
place.
4. Measure the water and set aside.
5. Place the water-adding dish in the grooved area on the top cover. You know it
is in correctly when it ts snugly in the area.
6. Put a bowl under the extruding holes in the front of the machine.
7. Plug the machine in and the display turns on.
8. Press the Auto button. The spiral rod begins turning and the timer starts for the
indicated amount of time.
9. As soon as the mixing process begins, add the water into the water-adding
dish. The water is slowly added and mixed into the our to make the dough.
10. When the mixing is nished, the machine automatically begins extruding the
pasta into the bowl.
11. When the machine nishes extracting all of the dough, 4 beeps sound and the
machine stops.
12. When nished, unplug the machine.
Making Pasta Manually:
1. Assemble the machine as described above, making sure to choose the correct
shaping disc for the type of pasta you want to make.
2. Open the top of the machine.
3. Measure the our and add to the mixing bowl. Replace the cover and lock in
place.
4. Measure the water and set aside.
5. Place the water-adding dish in the grooved area on the top cover. You know it
is in correctly when it ts snugly in the area.
6. Plug the machine in and the display turns on.
7. Press the Mix button. The display blinks a few times, showing the default time
of 4 minutes. You can increase or decrease the amount of mixing time by
pressing the + and – buttons while the time is blinking.
8. After a couple of seconds, the display stops blinking, the spiral rod begins
turning and the timer starts for the indicated amount of time.
9. As soon as the mixing process begins, add the water into the water-adding
dish. The water is slowly added and mixed into the our to make the dough.
10. When the mixing is nished, the machine beeps 3 times.
11. Put a bowl under the extruding holes in the front of the machine. Press the
Extrude button. The pasta begins coming out of the machine into the bowl.
12. When the machine nishes extracting all of the dough, 4 beeps sound and the
machine stops.
13. When nished, unplug the machine.
USE continued...
Making Egg Noodles
To make egg noodles, follow either of the two noodle making processes above with one
exception. Instead of adding the liquid to the water-adding cup, you need to mix the egg-water
combination well and then pour it directly through the small holes in the plastic cover on top of
the machine.
Making Sausage
1. Assemble the machine as described above, making sure to choose the Sausage/Ravioli
Adapter parts and the sausage core in place of the pasta shaping disc. Insert the sausage
core into the shell and secure the shell to the spiral rod with the sausage core facing out.
Then attach the metallic front panel.
2. Add the meat and other sausage ingredients to the bowl and secure the lid to the top of the
machine.
3. Plug the machine in and press Mix. While the time is still blinking, press the – button to
reduce the mixing time to 3 minutes.
4. When the mixing is nished, put the sausage casing over the sausage core, leaving enough
to be able to tie the casing closed.
5. Hold the sausage casing in place on the sausage core and press Extrude. The sausage
mixture begins lling up the sausage casing.
6. Once the sausage casing is lled, press Cancel to stop the extruding process.
7. Remove the sausage casing and tie it closed.
8. Repeat with more casings.
9. When nished, unplug the machine.
CLEANING
• Unplug the machine before cleaning.
• The mixing bowl, spiral rod, upper cover, panels, pasta shaping discs, and knobs should all
be washed with warm, soapy water.
• The exterior of the machine should be wiped down with a soft, damp cloth.
• Dry all parts thoroughly before storing or using.
• The machine should not be submerged in water or any other uid.
• Store the pasta machine in a cool, dry place.
The machine does not turn on
Check that the top cover is
closed tightly
Check that the knobs in the front
of the machine are securely
fastened.
The dough cannot be extruded
The consistency of the dough is
not right. If it seems too wet, add
more our; if it’s too dry, add
more water.
The equipment cannot be
cleaned easily
Wait for the dough to dry for
about 30 minutes and then wash
the equipment.

WARRANTY & SERVICE
1514
WARRANTY & SERVICE
This Limited Warranty is for one full year from the date of purchase. It is
applicable to the original purchaser only and is not transferable to a third party
user. Repair or replacement of defective parts is solely at the seller’s discretion.
In the event that repair isn’t possible, the seller will replace the product/part. If
the cash value of the product or component returned.
Product defects not covered under the Warranty provisions include normal wear
and damage incurred from use or accidental negligence, misuse of instruction
is not liable for any incidental or consequential damages incurred by such
circumstances.
For Customer Service or Questions, Please call: 888-552-0033
www.gourmia.com
DISPOSAL
DISPOSAL OF THE DEVICE
PROTECTION OF THE ENVIRONMENT
At the end of the life of your product, it should go to a specially adapted
waste-recycling center.
ENVIRONMENT PROTECTION FIRST
1. The symbol on the product or on its packaging indicates that this
product may not be treated as household waste. Instead it should be handed
over to the applicable. Collection point for the recycling of electrical and
electronic equipment.
2. By ensuring this product is disposed of correctly, you will help prevent
potential negative consequences for the environment and human health, which
could otherwise be caused by inappropriate waste handling of this product .For
more detailed information about the recycling of this product, Please contact
your local council oce or your household waste disposal service.
Table of contents