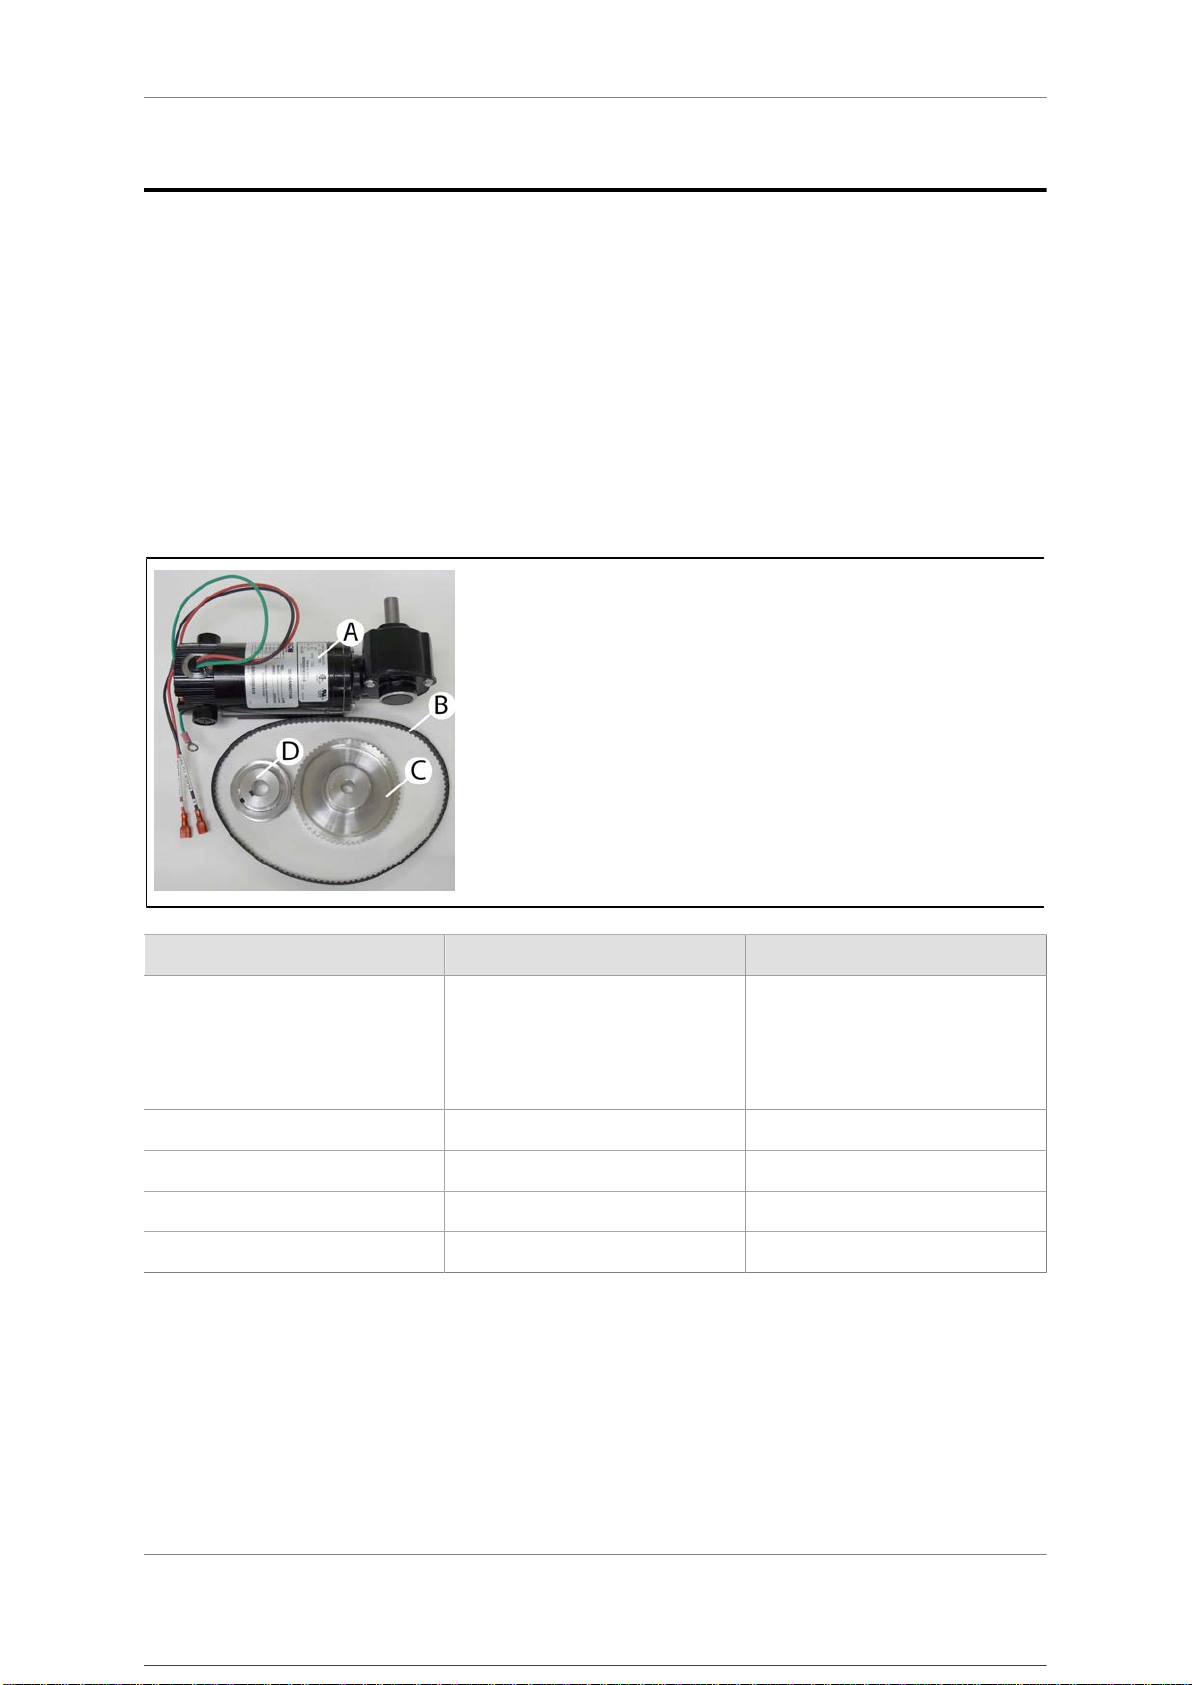
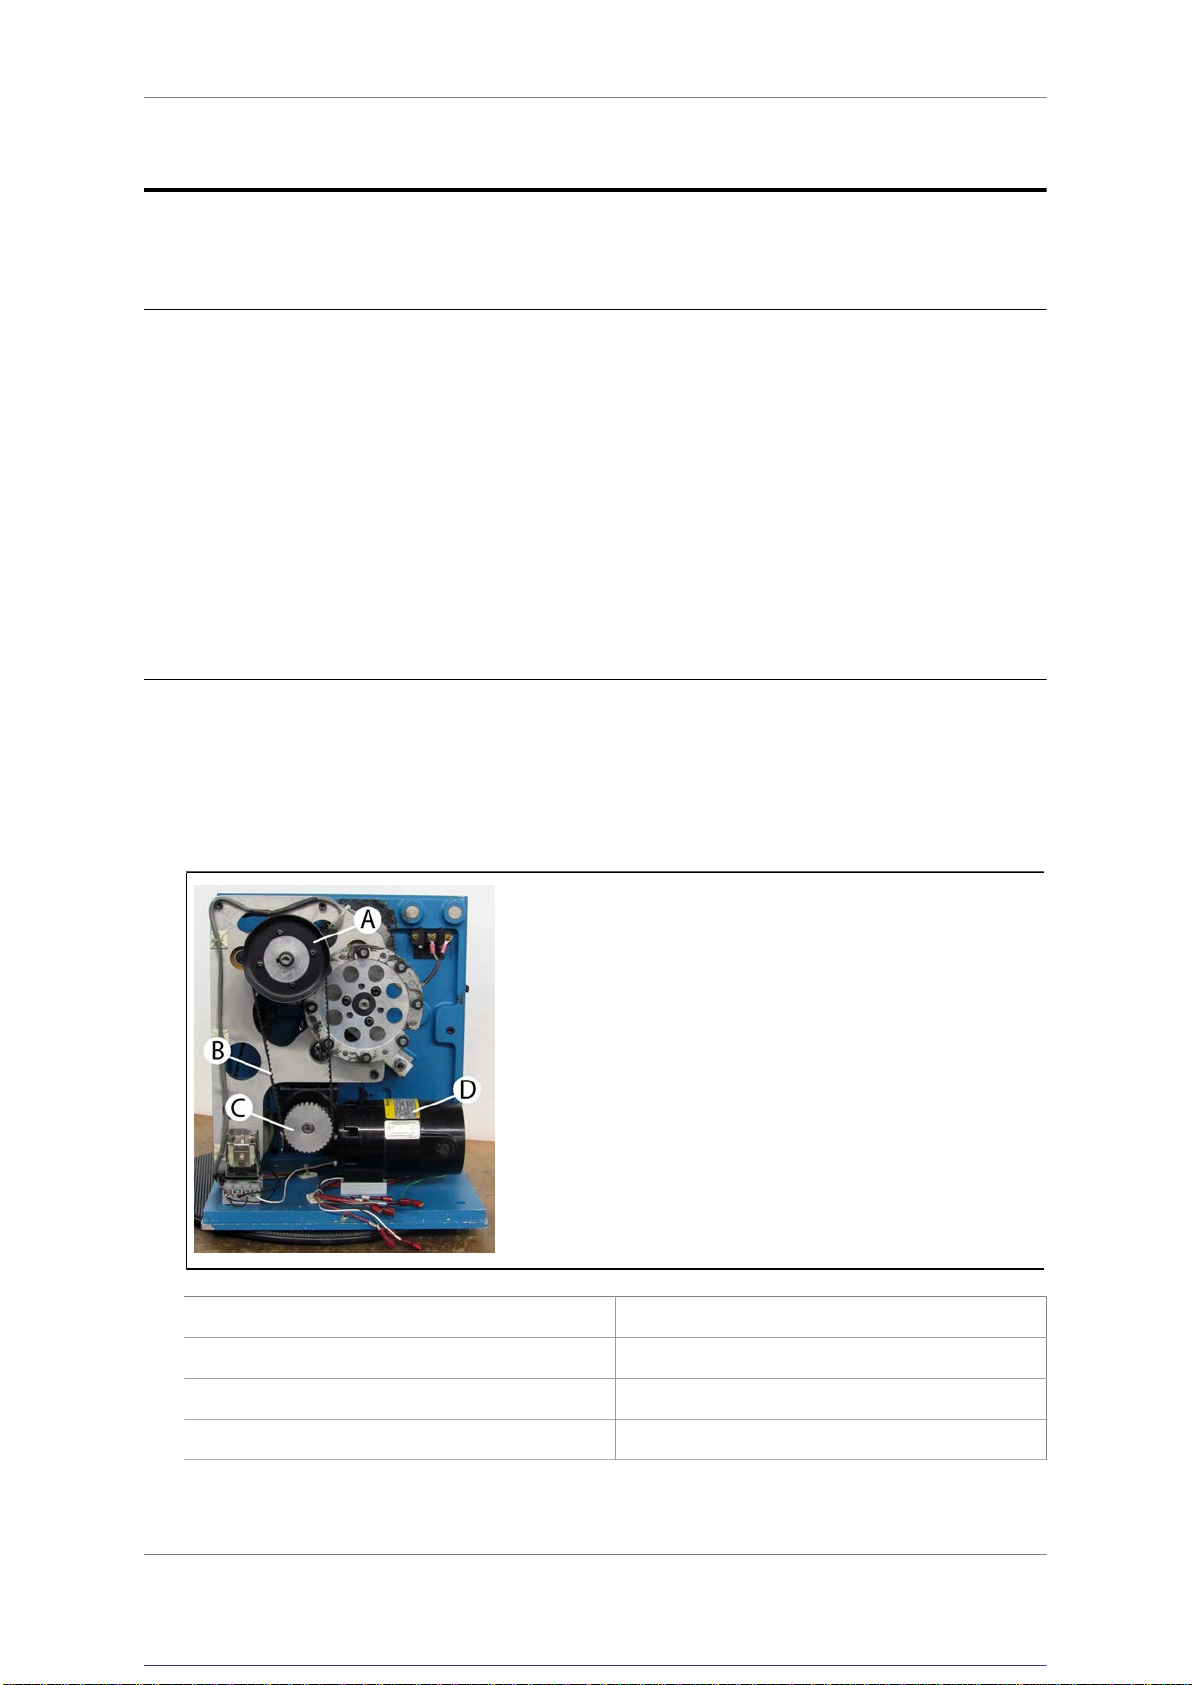
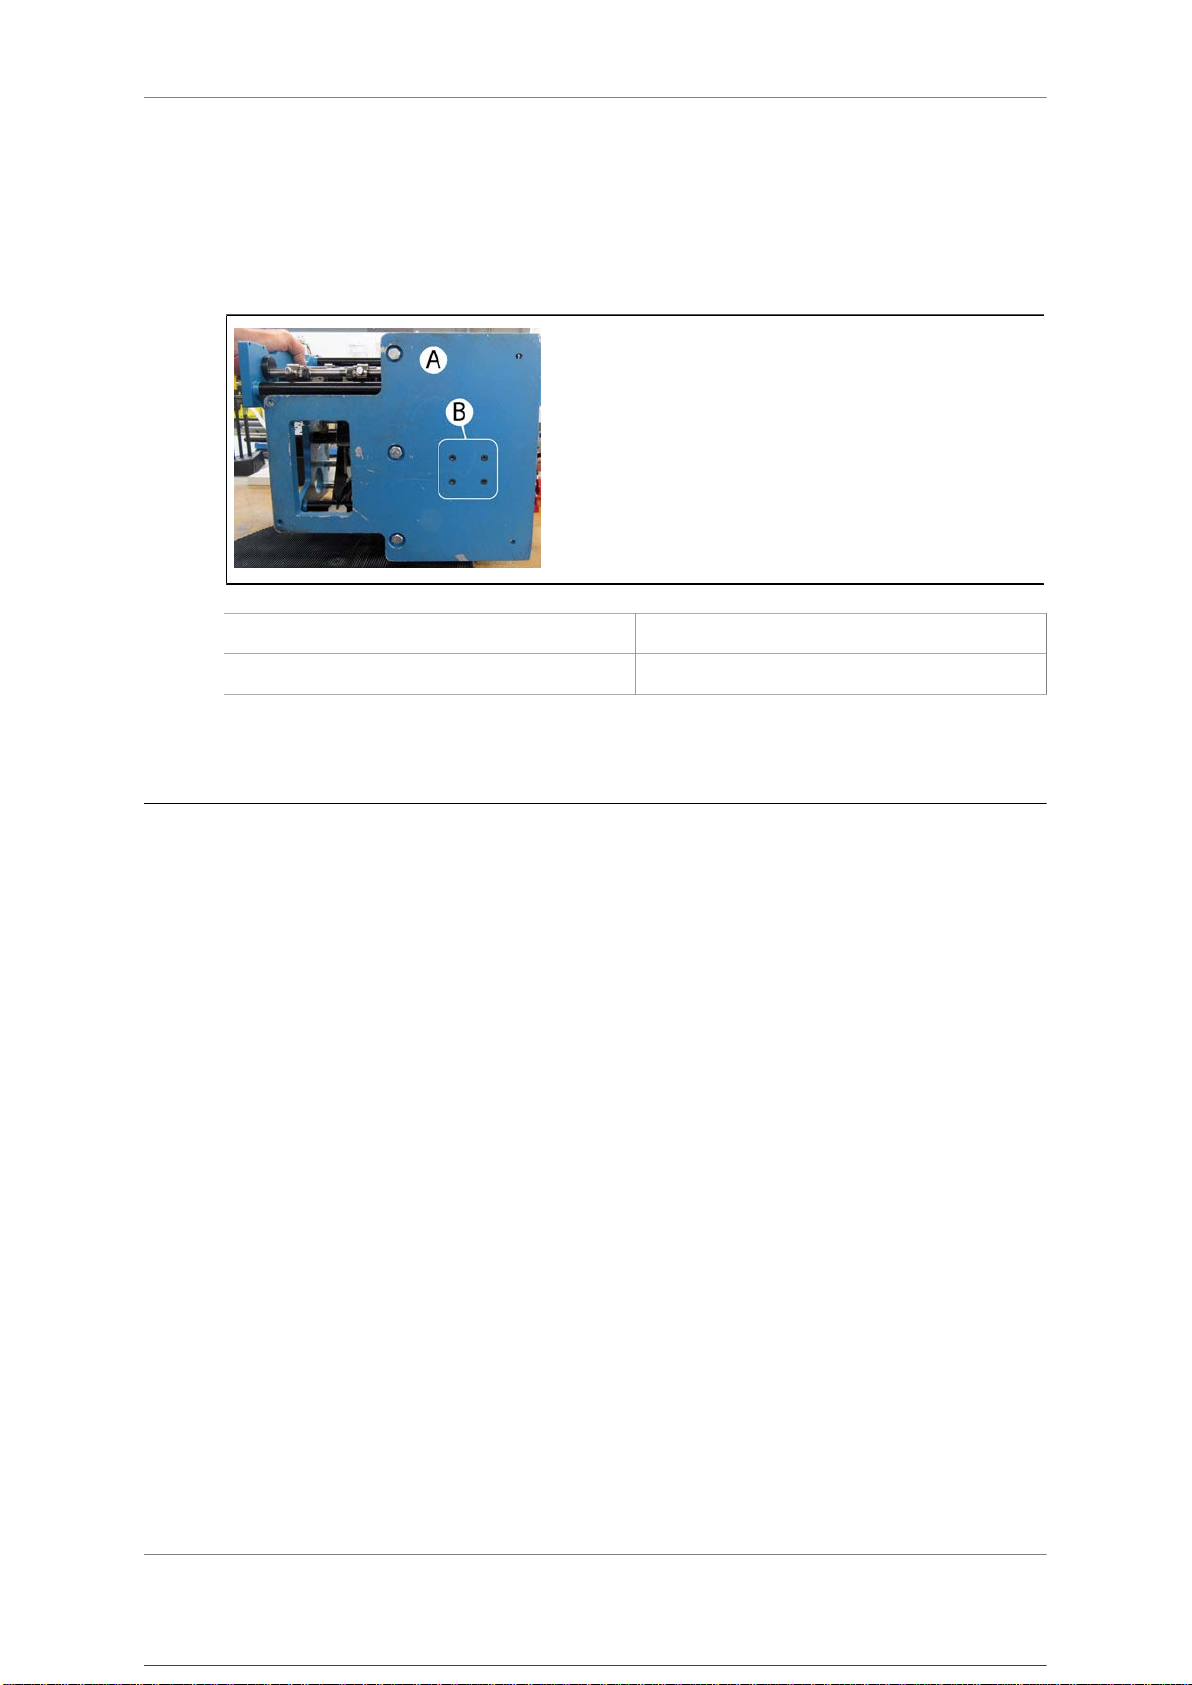
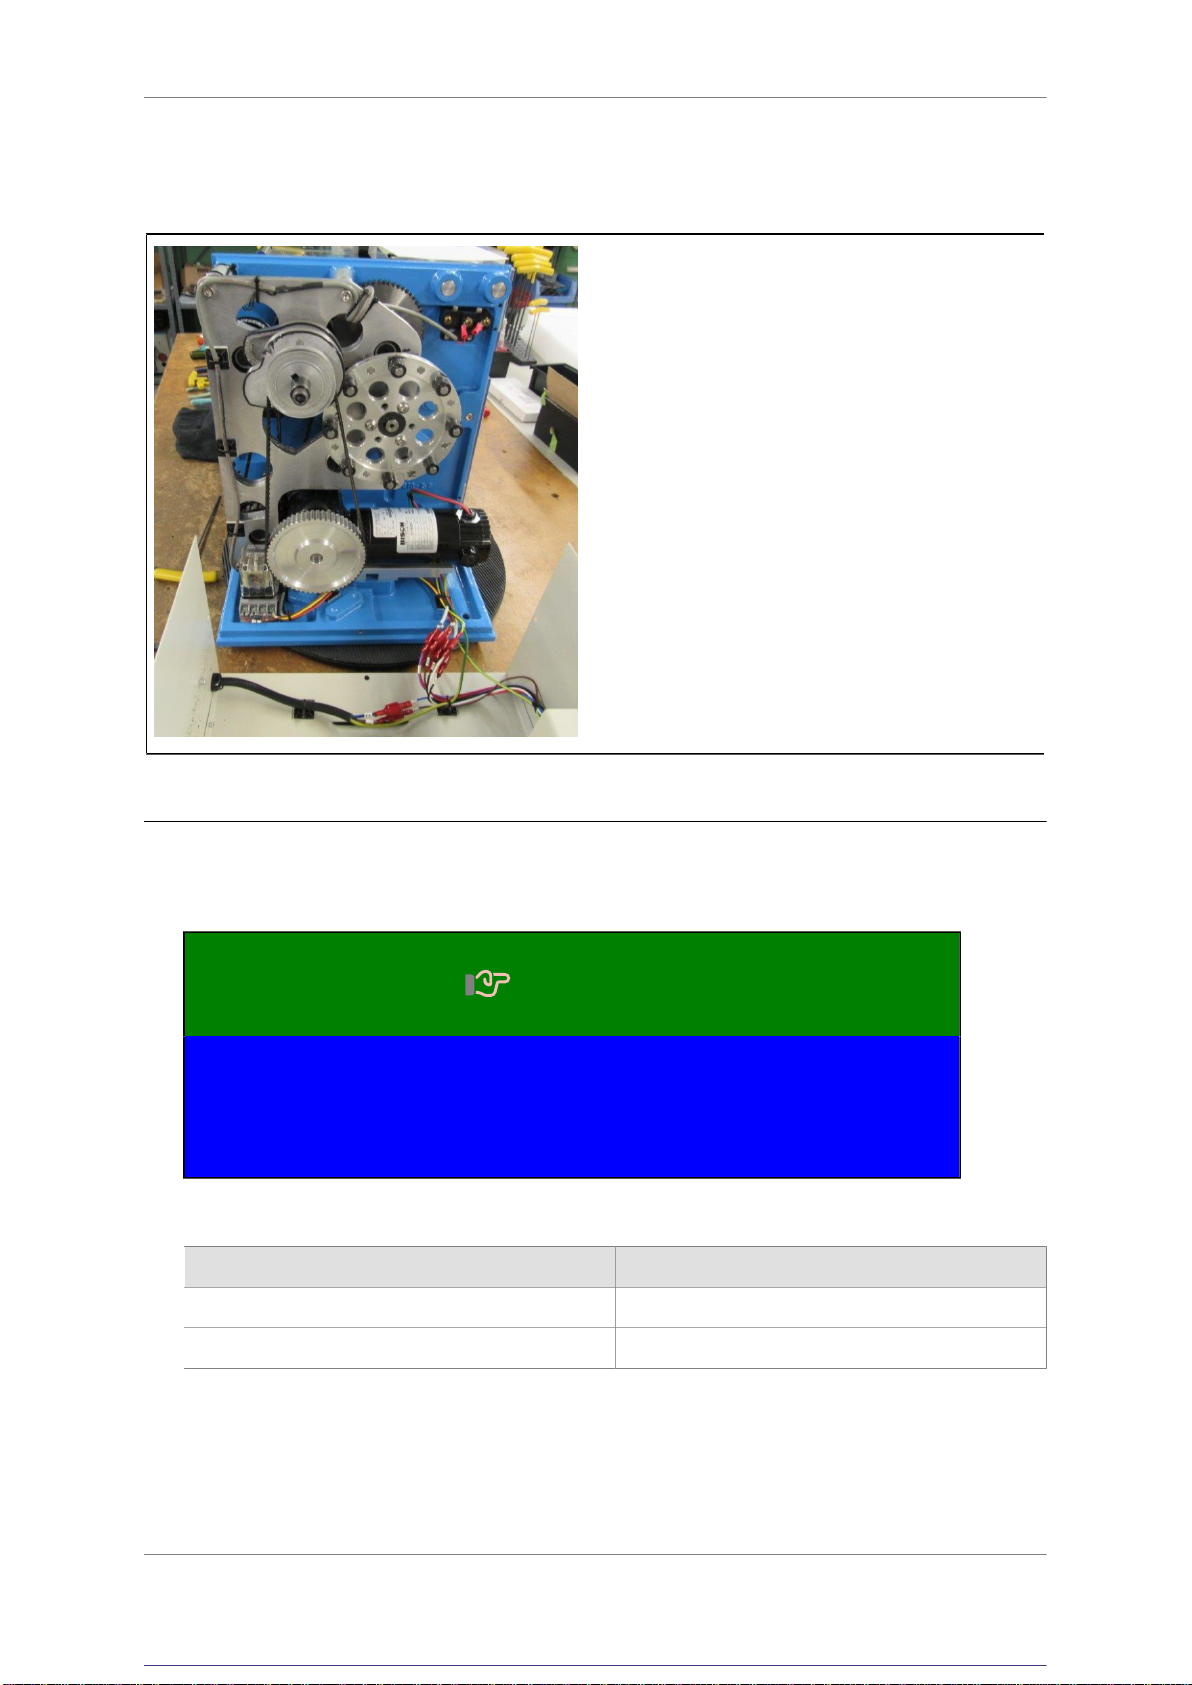
CF-8 Motor Upgrade Procedure
Chapter 1. Legal
1. Trademarks
GPD Global® is a registered trademark of GPD Global, Incorporated.
Trademarks are used throughout this manual. Rather than put a trademark symbol in every occurrence of a
trademarked name, we state that we are using the names in an editorial fashion only and to the benefit of the
trademark owner with no intention of infringement on the trademark.
2. Warranty
General warranty
Subject to the remedy limitation and procedures set forth in the Section “Warranty Procedures and Remedy
Limitations,” GPD Global warrants that the system will conform to the written description and specifications
furnished to Buyer in GPD Global’s proposal and specified in the Buyer’s purchase order, and that it will be
free from defects in materials and workmanship for a period of one (1) year. GPD Global will repair, or, at
its option, replace any part which proves defective in the sole judgment of GPD Global within one (1) year
of date of shipment/invoice. Separate manufacturers’ warranties may apply to components or subassemblies
purchased from others and incorporated into the system. THIS WARRANTY IS EXPRESSLY IN LIEU OF
ANY AND ALL OTHER WARRANTIES,EXPRESS OR IMPLIED, INCLUDING WARRANTIES OF
MERCHANTABILITY OR FITNESS FOR A PARTICULAR PURPOSE.
Limitations
GPD Global reserves the right to refuse warranty replacement, where, in the sole opinion of GPD Global the
defect is due to the use of incompatible materials or other damages from the result of improper use or neglect.
This warranty does not apply if the GPD Global product has been damaged by accident, abuse, or has been
modified without the written permission of GPD Global. Items considered replaceable or rendered unusable
under normal wear and tear are not covered under the terms of this warranty. Such items include fuses, lights,
filters, belts, etc.
Warranty procedures and remedy limitations
The sole and exclusive remedy of the buyer in the event that the system or any components of the system
do not conform to the express warranties stated in the Section “Warranties” shall be the replacement of the
component or part. If on-site labor of GPD Global personnel is required to replace the non-warranted defective
component, GPD Global reserves the right to invoice the Buyer for component cost, personnel compensation,
travel expenses and all subsistence costs. GPD Global’s liability for a software error will be limited to the
cost of correcting the software error and the replacement of any system components damaged as a result of
the software error. In no event and under no circumstances shall GPD Global be liable for any incidental or
consequential damages; its liability is limited to the cost of the defective part or parts, regardless of the legal
theory of any such claim. As to any part claimed to be defective within one (1) year of date of shipment/invoice,
Buyer will order a replacement part which will be invoiced in ordinary fashion. If the replaced part is returned
to GPD Global by Buyer and found by GPD Global in its sole judgment to be defective, GPD Global will issue
to Buyer a credit in the amount of the price of the replacement part. GPD Global’s acceptance of any parts so
shipped to it shall not be deemed an admission that such parts are defective.
3. Disclaimers
Disclaimer for GPD Global forming equipment.
Chapter 1. Legal 1