Fr
ont
JK Gra
Ba
rs
Handle
Installation
Instr
uc
tions:
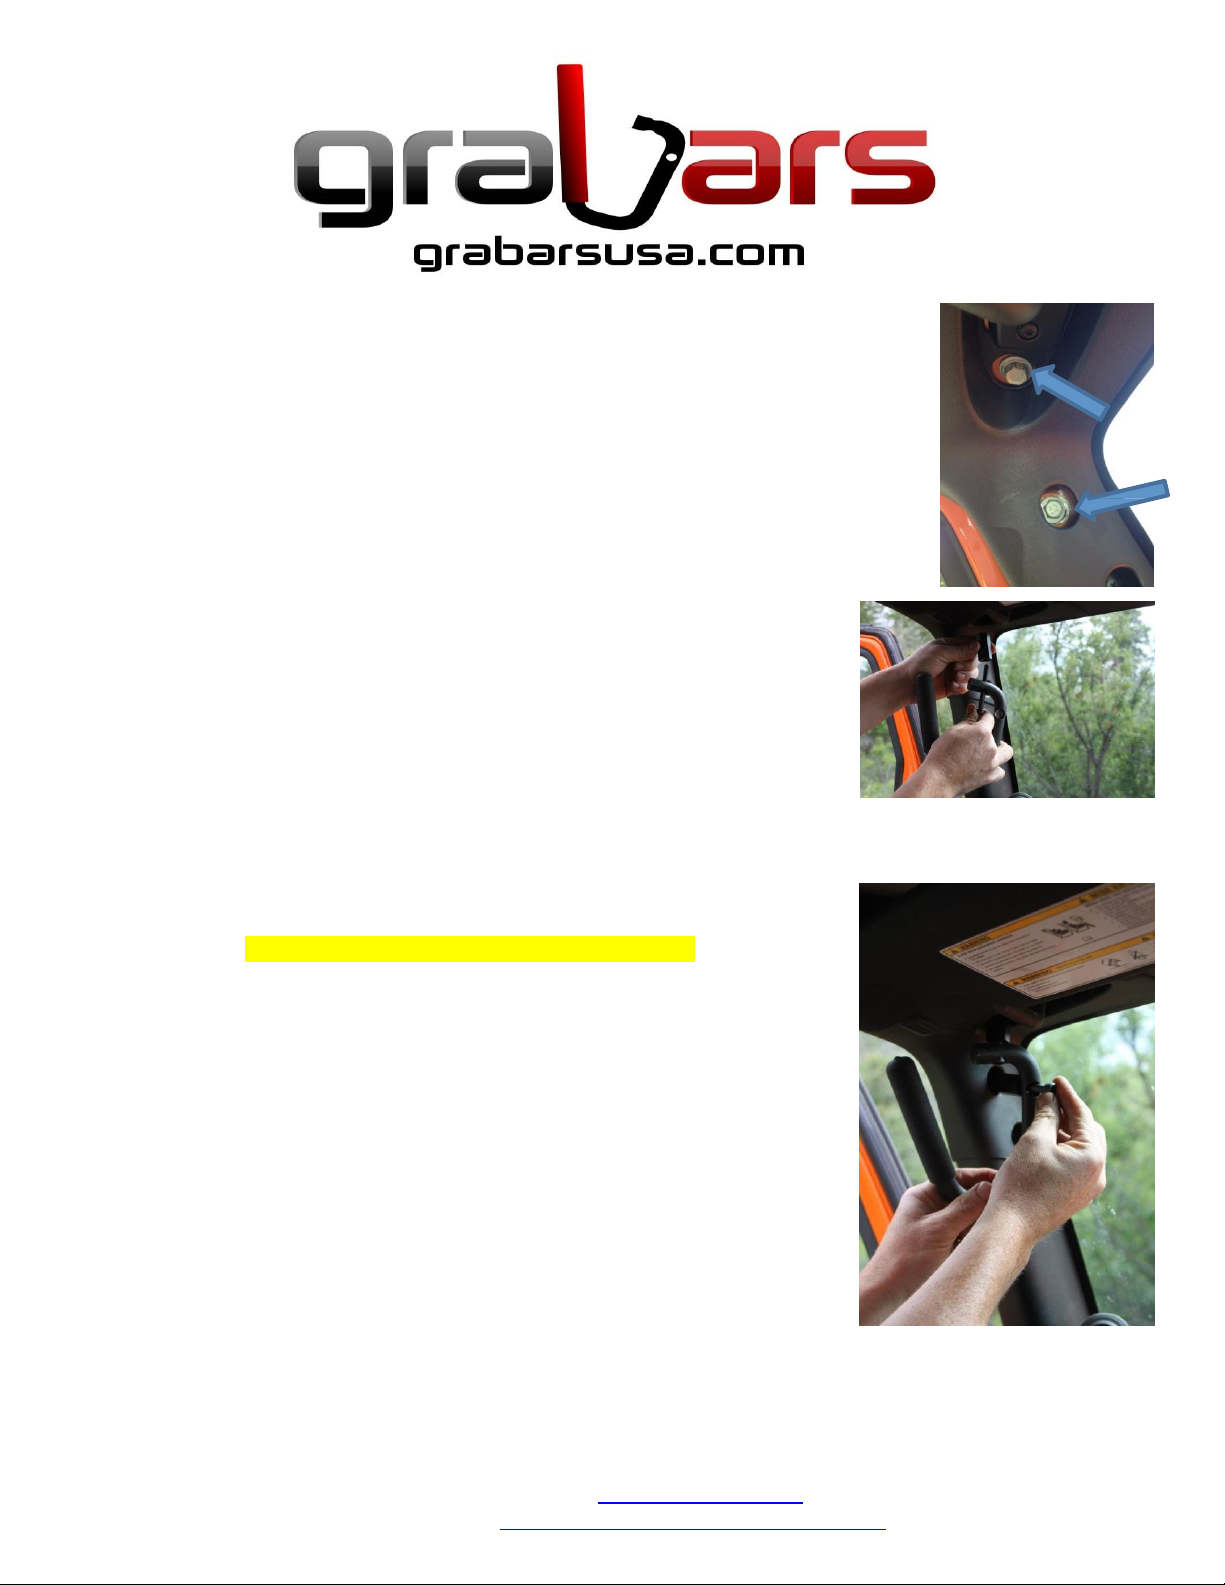
Step 1:
Remove the (2) 8mm bo
l
ts (photo on right) in the inside upper
--‐
corner of the w
i
ndsh
i
e
l
d
frame, us
i
ng a 13mm socket and ratchet
.
Use caut
i
on when remov
i
ng the side bo
l
t as
i
t can
eas
il
y fa
ll
beh
i
nd the p
l
astic cover dur
i
ng remova
l
! We back out the bo
l
t most of the way, and
then use a pa
i
r of need
l
e nose v
i
se
--‐
gr
i
ps to grab the bo
l
t, and then fin
i
sh remov
i
ng
.
Customers have suggested us
i
ng double back st
i
cky tape on the
i
ns
i
de of the socket
or stuff
i
ng a piece of paper towe
l
behind the plast
i
c cover to prevent the bolt from
dropping
.
(New bo
l
ts are prov
i
ded w
i
th your order)
Step 2:
NOTE: We recommend adding a drop of oil or WD-40 to the bolts before installing to
remove the thread locker Jeep puts in the threads from the factory.
Insta
ll
the short 8mm bo
l
t through the top hole of the handle, then through the
short spacer
.
Insert the bo
l
t w
i
th the hand
l
e and spacer
i
nto the upper ho
l
e of the
windsh
i
e
l
d frame (Do not t
i
ghten! On
l
yturn
i
t
i
nacoup
l
eof threads)
.
Then place
the long spacer onto the s
i
de hole of the w
i
ndshie
l
d frame (A P
ill
ar) and add the long
8mm bolt through the handle, and through the long spacer
.
Tighten the bo
l
t unt
il
i
t’s
a
l
most t
i
ght
.
Now tighten the upper bolt and torque to 25 ft-lbs (300
i
n
--‐
lbs) using a
6mm hex wrench
.
Then t
i
ghten the s
i
de bo
l
t to 25 ft-lbs (300
i
n
--‐
lbs) using a 6mm
hex wrench
.
We use a short 3”
l
ong hex wrench and t
i
ghten
i
t as hard as we can
.
We
have encountered a few Jeeps where the nuts were not
i
nsta
ll
ed stra
i
ght from the
factory
.
If th
i
s is the case, try putting the
l
ong s
i
de bo
l
t
i
nto the top ho
l
e without the
hand
l
e and spacer installed, and see
i
f
i
t
i
s straight up and down
.
If not you can pu
ll
on the bo
l
t and use
i
t to stra
i
ghten the nut
.
NOTE: Make sure you have the
l
eft hand
l
e for the
l
eft side, and the r
i
ght
--‐
handle for
the right s
i
de
.
Th
i
s
i
s determ
i
ned by the counter sunk ho
l
es for the s
i
de bolts
.
Repeat steps 1 & 2 for the other side.
Congratulations on installing your new Solid Steel GraBars; we thank you and your family for partnering with
Welcome Distributing! If you have any questions or need any additional help, don’t ever hesitate to contact us!
Please visit our website atwww.GraBarsUSA.com
“Like US” on Facebook at www.Facebook.com/Welcome.Distributing!


