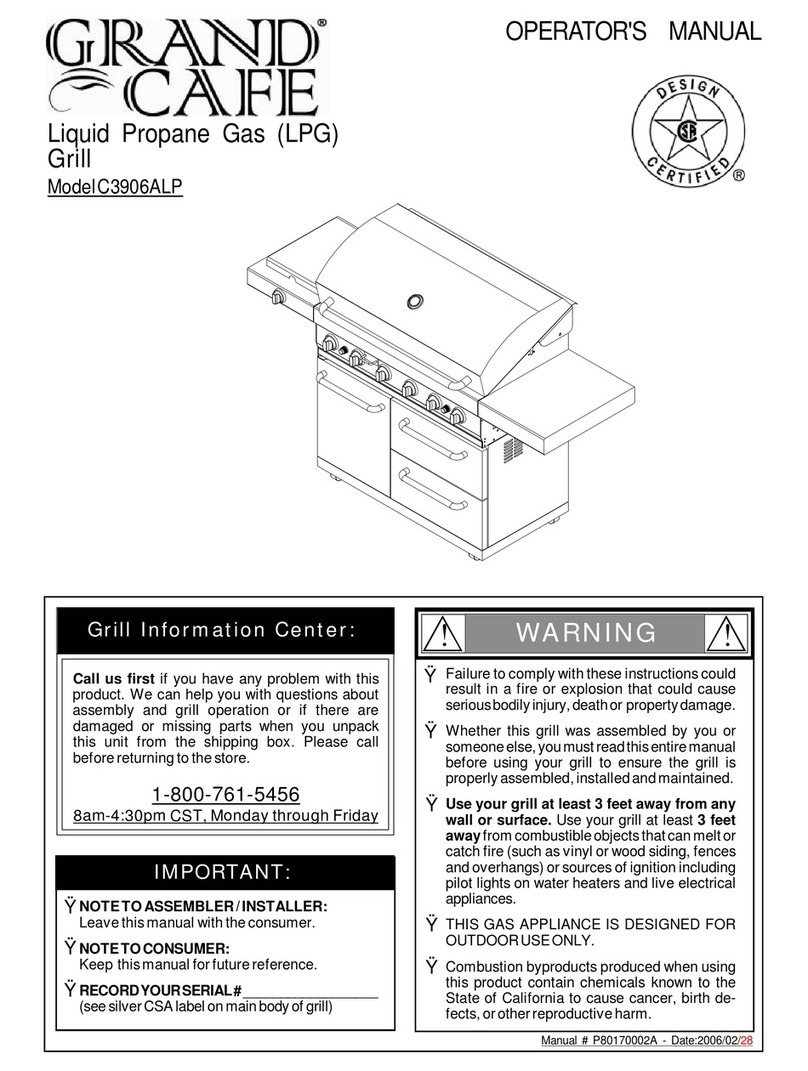
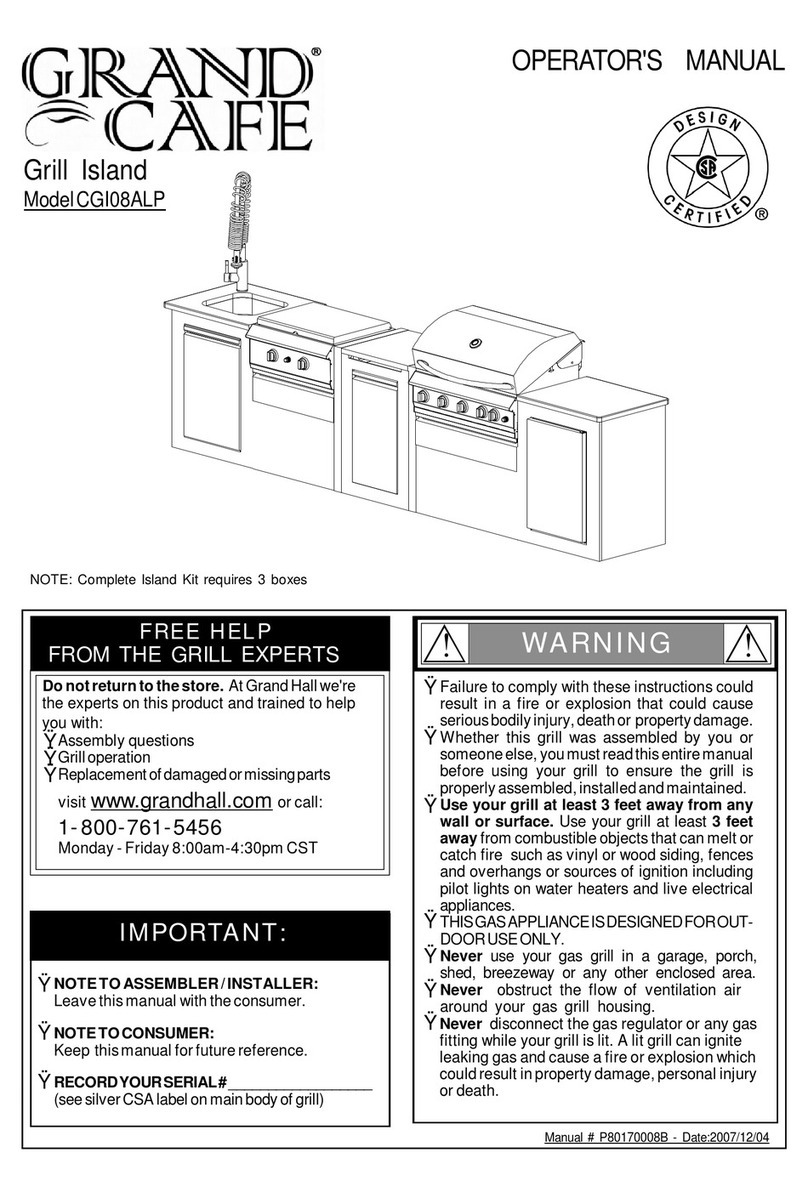
GrandCafe CGI07ALP User manual

Manual#P80170007A-Date:2008/08/08
Grill Island
ModelCGI07ALP
OPERATOR'SMANUAL
Failuretocomplywiththeseinstructionscould
resultinafireorexplosionthatcouldcause
seriousbodilyinjury,deathorpropertydamage.
Whetherthisgrill wasassembled byyouor
someoneelse,youmustreadthisentiremanual
beforeusing yourgrilltoensurethe grillis
properlyassembled,installedandmaintained.
Use yourgrill atleast3feetaway fromany
wall orsurface. Useyourgrill atleast 3feet
awayfromcombustibleobjectsthatcanmeltor
catchfire(suchasvinylorwood siding,fences
and overhangs)orsourcesofignition including
pilotlightson waterheatersand liveelectrical
appliances.
THISGASAPPLIANCEISDESIGNEDFOR
OUTDOORUSEONLY.
Combustion byproductsproduced when using
thisproductcontainchemicalsknowntothe
StateofCaliforniatocausecancer,birth
defects,orotherreproductiveharm.
Thisproductcontainschemicalsknownto
theStateofCalifornia tocausecancer,birth
defects,orotherreproductiveharm.
Ÿ
Ÿ
Ÿ
Ÿ
Ÿ
Ÿ
Ÿ
NOTETOASSEMBLER/INSTALLER:
Leavethismanualwiththeconsumer.
NOTETOCONSUMER:
Keepthismanualforfuturereference.
RECORDYOURSERIAL# __________________
(seesilverCSAlabelonmainbodyofgrill)
IMPORTANT:
Ÿ
Grill Information Center:
Callusfirstifyou haveanyproblemwith
thisproduct.Wecanhelpyouwithques-
tionsaboutassemblyandgrilloperationor
iftherearedamagedormissing parts
whenyou unpack thisunitfromthe ship-
pingbox.Pleasecallbeforecontacting
yourlocalretailer.
1-800-761-5456
8am-4:30pmCST,Mondaythrough Friday
NOTE:CompleteIsland Kit requires3boxes
Ÿ
WARNING
! !

2
DANGER
!!
1.
2
3.
4.
Ifyousmell gas:
Shutoff gas totheappliance.
Extinguishanyopenflame.
Openlid.
Ifodorcontinues,keepawayfrom
theappliance andimmediatelycall
yourgas supplieroryourfire
department.
Donotstoreoruse gasolineorother
flammableliquidsorvaporsinthe
vicinityofthisoranyotherappli-
ances.
AnLPcylindernotconnectedforuse
shall notbestoredinthevicinityof
thisoranyotherappliance.
1.
2.
WARNING
! !
•LPGgrillmodelsmustbeusedwithLiquid
PropaneGas and the regulatorassembly
supplied.NaturalGas modelsmustbe used
withNaturalGasonly.Anyattempttoconvert
thegrillfromonefueltypetoanotheris
hazardous andmustbeperformed bya
qualifiedgastechnicianonly,usingaNG
ConversionKitpurchasedfromGrand Hall.
Never use yourgas grill inagarage,porch,shed,
breezewayoranyotherenclosedarea.
Never obstructtheflowofventilation airaround
yourgas grill housing.
Never disconnectthe gas regulatororanygas
fitting whileyourgrillislit.Alitgrillcanignite
leakinggas and causeafireorexplosionwhich
couldresultinpropertydamage,personalinjury
ordeath.
Keepgas regulatorhose awayfromhotgrill
surfaces and dripping grease.Avoidunneces-
sarytwisting ofhose.Visuallyinspecthose
priortoeach use forcuts,cracks,excessive
wearorotherdamage.Ifthehose appears
damageddo notuse thegas grill.Call:
1-800-761-5456 foranauthorizedreplacement
hose.
•
•
•
•
TableofContents
PrimarySafetyWarnings...........................1-3
Pre-AssemblyInstructions..............................3
PartDiagramsandLists........................4-12
AssemblyInstructions.............................13-18
Use&CareInstructions:
•FaucetOperation.....................................19
•GasSafetyand LeakTests...........20-22
•Lighting Instructions............................23-24
•Troubleshooting.........................................24
•Rotisserie Instruction...........................25-27
•Cleaning andMaintenance................28-29
•CookingGuide...................................A1-A6
•FrequentlyAsked Questions............A7-A8
WarrantyTerms...........................BackCover
Neveruse charcoalinthisgas grill.
Failureto complywith theseinstructions
couldresult in a greasefireorexplosion
that couldcauseseriousbodilyinjury,
death orpropertydamage.
WARNING
! ! TheGreaseDrainingTrayandGrease
Receptaclemustbevisuallyinspected
beforeeachgrilluse.Removeanygrease
andwashGreaseDrainingTrayand
GreaseReceptaclewithamildsoapand
warmwatersolution. Failuretocomply
withthese instructionscouldresultin
agrease fireorexplosionthatcould
cause seriousbodilyinjury,deathor
propertydamage.
WARNING
! !
WARNING
! !
1.
WARNING
! !
DonotstorespareLPcylinder
within10feet(3m)ofthisappliance.
Donotstoreoruse gasolineor
otherflammableliquidsand
vaporswithin25 feet(8m)ofthis
appliance.
Whencookingwithoil/grease,do
notallowtheoil/grease toget
hotter350°F(177°C)
Donotleaveoil/grease unattended.
4.
2.
3.

3
Pre-AssemblyInstructionsForYourSafety
ToolsRequiredforAssembly include:
protectiveworkgloves
protectiveeyewear
Whileit ispossibleforone person tounpack thisgas
grill,obtainassistancefromanotherperson when
handling thelargepieces.
UsetheHardwareand Part Diagramstoensureall
itemsareincludedand freeofdamage.
Donotassembleoroperatethegrill ifitappears
damaged.If therearedamaged ormissingparts
whenyou unpack theshipping boxoryou have
questions during the assemblyprocess,callthe:
Toexpeditethe assemblyprocess followthese
generalguidelines:
•
•
GrillInformationCenter 1-800-761-5456
8am-4:30pmCST,MondaythroughFriday
Spidersand small insectscanspinwebsand
nestinthegrill BurnerTubes during transitand
warehousing which canleadtoagas flow
obstruction resulting inafireinand around the
BurnerTubes.Thistypeof"FLASHBACK FIRE"
cancause seriousgrill damageand createan
unsafeoperating condition fortheuser.
Toreduce thechance ofFLASHBACK
FIREyou mustcleantheBurner Tubes
as followsbefore initialuse. Alsodo this
atleastonceamonthinsummerand fall or
wheneverspidersareactiveinyourarea,and if
yourgrill has notbeenusedforanextended
period oftime.
WARNING
! !
Failuretocomplywiththeseinstructionsmay
resultinahazardoussituationwhich,ifnot
avoided,mayresultininjury.
Forsafeoperation ensuretheGas ValveAssem-
blyOrificeisinsidetheBurnerTubebeforeusing
yourgrill.See figure.IftheOrificeisnotinside
theBurnerTube,lighting theBurnermaycause
explosion and/orfireresulting inseriousbodily
injuryand/orpropertydamage.
•
METHOD 1:Bend astiff wireorwirecoat
hangerintoasmall hook as shownand run
thehook through theBurnerTubeand inside
theBurnerseveraltimes toremovedebris.
METHOD 2:Use abottlebrushwithaflexible
handleand run thebrushthrough theBurner
Tubeand insidetheBurnerseveraltimes to
removeanydebris.
METHOD 3:Use anairhose toforceair
through each BurnerTube.Theforcedair
shouldpass debrisorobstructionsthrough
theBurnerand outthePorts.
TOCLEANBURNER TUBE,INSERTHOOK
HERE
BurnerTube
9
Grill Installation Codes
Theinstallation mustconformwithlocalcodesor,inthe
absenceoflocalcodes,withthe NationalFuelGas
Code,ANSIZ223.1/NFPA54,Storage and Handling of
Liquefied PetroleumGases,ANSI/NFPA58,NaturalGas
and Propane Installation Code,CSA B149.1, Propane
Storage and Handling Code,B149.2.
Orifice BurnerTube
GasValveAssembly
PhillipsHeadScrewdriver
CAUTION !
Whenusing electricalappliances,basic
safetyprecautionsshould always beused.
!
WARNING
! !
Thisappliance,when installed,mustbe electri-
callygrounded inaccordancewithlocalcodes
or,inthe absenceoflocalcodes,withthe
National Electrical Code,ANSI/NFPA 70, orthe
Canadian Electrical Code,CSA C22.1.
Keep anyelectricalsupplycordand the fuel
supplyhoseawayfromanyheated surfaces.
•
•
Carefullylift eachBurnerupandaway fromthe
GasValveOrifice.
CheckandcleanBurner/VenturiTubesfor
insectsand insectnests.Acloggedtubecan
leadtoafirebeneaththegrill.
Refertothefigurebelowand performoneof
these 3cleaning methods:
Remove thescrewsfromtherearofeachMain
BurnerusingaPhillipsHeadScrewdriver.
1.
2.
3.
4.

4
HardwarePack PartsList forModelCGI07ALP
*TwoBatteries/AA includedintheHardwarePack.
PART# PARTDESCRIPTION QTYPURPOSEOFPART
P06024005A HardwarePack 1 Foruseinassembly(Grilland Range)
S112G04061 PhillipsHeadScrew1/4"x3/8" 8 InstallCartFramestoLeft /RightBowlPanels
S162M04201 HexHead ScrewM4X20mm 2 SecureFaucetWasherand Faucet BrackettoFaucet
S233G03194 Wing Bolt3/16"x1-3/16" 1 SecuresGasTanktoTankHolder
P05515017L Wrench 1AdjustlevelonIsland AssemblySet
Alreadypackedinthe FaucetAssemblyKitBox
AlreadyInstalledon TankHolder
Alreadypackedinthe Cooking ComponentsBox
PhillipsHeadScrew1/4"x3/8"
Qty.8
Part#S112G04061
Wing Bolt3/16"x1-3/16"
Qty.1
Part#S233G03194
Hardware alreadyinstalledon theTankHolder
HexHeadScrewM4x20mm
Qty.2
Part#S162M04201
Alreadypackedin theFaucetAssemblyKitBox
Wrench
Qty.1
Part#P05515017L
Alreadypackedin theCooking ComponentsBox

5
PartsDiagramforModelCGI07ALPGrill
1
2
3
4
5
6
9
7
8
13
15
18
25
26
24
27
28
29
30 31
33
48
56
55
42
46
53
51
49
50
40
45
44
47 41
38
36
35
34
22
17
16
14
12
11
23
70
43
48
59
62
10
37
71
58
68
60 61
39
39
73
72
32
69
64
63
65
66
74
52
75
54
76
57
78
77
67
19
21 20
79

6
PartsDiagramforModelCGI07ALPRange
6
11
14
17
1
2
8
9
7
16
10
15
24
30
31
30
29
27
13 512
18
26
28
20
19
23
4
32
33
34
35
51
49
42
53
50
38
38
48
44
43
36
37
52
54
41
45
46
47
66 3
22
21
60
61
56 57
58
62
63
65
64
8
67
59
39
40
68
70
71
69
73
74
55
75
25 72

7
PartsDiagramforModelCGI07ALPIsland
1
2
34
5
6
7
8
10
9
11
14
15
16
17
20 21
22
19
13
13
12
18

8
PartsList forModelCGI07ALPGrill
KEY DESCRIPTION KEY# QTY
1LidAssembly P00147063A 1
2TemperatureGauge P00601071A 1
3 LidHandle P00205086B 1
4ProtectivePad P05518011 I 2
5Cooking Rack/Secondary P01516004B 1
6Cooking Grid P01604013B 2
7Cooking Grid P01604031B 1
8Burner/Main P02008032A 3
9Infrared BurnerAssembly P02005010A 1
10 Thermocouple P05305019A 1
11 SavorPlate® P01708033B 3
12 BurnerBracket P02203364A 1
13 Back BurnerAssembly P02007068A 1
14 Back BurnerWind Shield P06906046B 1
15 Back BurnerElectrode P02614025A 1
16 Back BurnerOrifice P06534005A 1
17 Back BurnerExtension Tube P03717045B 1
18 Bowl P0071334BC 1
19 ThermocoupleBracket P03343008C 1
20 CartPanelBracketA P03327038C 1
21 CartPanelBracketB P03327039C 1
22 BurnerHeatShieldP06906045C 1
23 GreaseTrayHeatShield P06904020C 1
24 GasValve/ManifoldAssembly Y0060412 1
25 ElectricWireSet P02615103A 1
26 GasCollectorBoxwithElectrode P02609010B 3
27 ControlPanelExtension P02909768S 1
28 ControlPanelUpper P02909771S 1
29 ControlPanel P02909781A 1
30 ControlKnob P03429062J 3
31 ControlKnob ForBack Burner/Infrared Burner P03429072J 2
32 CartFrame,Left P01303016B 1
33 ControlKnob Seat P03415014A 5
34 Lighting Stick P05507008A 1
35 RegulatorWithHose P03601004A 1
36 GreaseTray P02717454A 1
37 BowlSupportBracket,Left P01301006B 1
38 CartPanel,Top P07801027A 1
39 CartPanel,Lower/Left&Middle P07604016B 2
40 CartPanel,Right P07620001D 1
41 CartFrame,Right P03344002D 1
42 CartPanel,Front P07621001D 1
43 CartFrameforFrontPanel P03344003D 1
44 CartPanel,Rear/Left P07702064G 1
45 CartPanel,Rear/Right P07702065G 1
46 CartFrame,Front P00907003C 1
47 CartFrame,Rear P00907004C 1
48 DrawerSlide Set P05516012C 1
49 Door P04301030A 1
50 DoorHandle P00215031A 1
51 TankTray P04009030B 1
52 Slide Set P05516013C 1
53 Slide BracketA P03311011D 2

9
PartsList forModelCGI07ALPGrill
KEY DESCRIPTION KEY# QTY
54 HoseHolder P05536001A 1
55 Drawer P01901008B 1
56 DrawerHandle P00215032A 1
57 ProtectiveCap A P05535008I 1
58 NamePlate P00407010D 1
59 LevelAdjuster P05322003A 4
60 DoorBracket,Left P03302027C 1
61 DoorBracket,Right P03302028C 1
62 HeatInsulating Spacer P06801022A 2
63 SavorPlateBracket,Front P03328015A 3
64 SavorPlateBracket,Rear P03328017A 3
65 Back BurnerThermocouple P05305022A 1
66 Back BurnerThermocoupleBracket P03328047C 1
67 GreaseDraining Plate P06902006C 2
68 ElectricIgnitor, 6-port P02502075C 1
69 ElectricIgnitorProtector P05545002A 1
70 GreaseTrayHandle P00213012B 1
71 BowlSupportBracket,Right P01302006B 1
72 CartPanel,Upper/Left P01301009B 1
73 CartPanel,Upper/Middle P01302009B 1
74 TankHolder P05358001Y 1
75 GreaseTrayHeatShield,Lower P06903050M 1
76 DoorTrimPanel P07510023A 1
77 L Bracket,Left P03302031C 1
78 L Bracket,Right P03302032C 1
79 InfraredBurnerElectrode P02614052A 1
Cover P07002064B 1
RotisserieAssembly Y0250122 1
HardwarePack P06024005A 1
Operator'sManual P80170007A 1

10
PartsList forModelCGI07ALPRange
KEY DESCRIPTION KEY# QTY
1Lid P0014605AY 1
2Griddle P05702020E 1
3CoverHook P05514133A 2
4Burner/Griddle P02008046B 1
5Side BurnerBody P01106040B 1
6GreaseTube P02721042B 1
7FrameForGriddleBurner P0071325FC 1
8GriddleBracket P03328041C 4
9LightingTube P05507139A 1
10 BowlPanel,Top P0073941DC 1
11 Side BurnerPotSupport P00815013D 1
12 Side Burner P02004037B 1
13 Side BurnerCap P02013057E 1
14 BowlPanel,Left P0072075DC 1
15 BowlPanel,Right P0072175DC 1
16 BowlPanel,Rear P0072575DC 1
17 ControlPanelBracket,Left P03328039C 1
18 ControlPanelBracket,Right P03328040C 1
19 GreaseTray P02717465A 1
20 GreaseTrayHandle P00213011B 1
21 BowlSupportBracket,Left P01301006B 1
22 BowlSupportBracket,Right P01302006B 1
23 Side BurnerElectrode P02607054A 1
24 GasCollectorBoxWithElectricWire P02610025A 1
25 CartPanelBracketC P03327040C 1
26 GasValve/ManifoldAssembly Y0060413 1
27 ControlPanel,Upper P02907971S 1
28 ControlPanel P02907981A 1
29 ControlKnob Seat P03415014A 2
30 ControlKnob P03429062J 2
31 ElectricIgnitor,2-Port P02502172C 1
32 RegulatorWithHose P03601040A 1
33 FaucetAssembly P05513006M 1
34 SinkFrame P07801028A 1
35 Sink P0071332BC 1
36 CartPanel,Left P07619001D 1
37 CartFrame,Left P03344004D 1
38 CartPanel,Middle& Lower/Right P07604016B 2
39 CartPanel,Front P07621002D 1
40 CartFrameforFrontPanel P03344005D 1
41 CartPanel,Rear/Left P07702066G 1
42 CartPanel,Rear/Right P07702067G 1
43 Door P04301030A 1
44 DoorHandle P00215031A 1
45 CartBasket P05203007G 1
46 CartBasketBottom P01001053D 1
47 SlideSet P05516013C 1
48 SlideBracketA P03311011D 2
49 BowlBracket,Right P01305018D 1
50 CartPanel,Upper/Right P07606026B 1
51 BowlBracket,Left P01306018D 1
52 CartFrame,Front P00907005C 1
53 CartFrame,Rear P00907006C 1

11
PartsList forModelCGI07ALPRange
PartsList forModelCGI07ALPIsland
KEY DESCRIPTION KEY# QTY
54 Refrigerator P05335018A 1
55 DoorFor Refrigerator P04301031A 1
56 DoorHandleForRefrigerator P00201001C 1
57 DoorBracket,Upper P03302029C 1
58 DoorBracket,Bottom P03302030C 1
59 Refrigerator Bracket,Left P03329010D 1
60 Refrigerator Bracket,Right P03329011D 1
61 LevelAdjuster P05322003A 4
62 DoorBracket,Right P03302028C 1
63 DoorBracket,Left P03302027C 1
64 CartFrame, Right P01303016B 1
65 GrateLifter P05515014E 2
66 Side BurnerFrame P01903003B 1
67 ProtectivePad P05518011 I 2
68 NamePlate P00407010D 1
69 DoorTrimPanel P07510023A 1
70 L Bracket,Left P03302031C 1
71 L Bracket,Right P03302032C 1
72 CartPanelBracketD P03327041C 1
73 ProtectiveCap A P05535008I 1
74 ProtectiveCap B P05535009I 3
75 DoorTrimPanel/Refrigerator P07510024A 1
Cover P07002065B 1
KEY DESCRIPTION KEY# QTY
1TableTop P07801029A 1
2Panel,Front P07621003D 1
3FrameforFrontPanel P03344006D 1
4Panel,Left P07605026H 1
5
Panel,Right
P07606027H
1
6Panel,Rear P07702068G 1
7Frame,Front P00907007C 1
8Frame,Rear P00907008C 1
9Door P04301030A 1
10 DoorHandle P00215031A 1
11 SlideSet P05516013C 1
12 SlideBracketB P03311013D 2
13 ProtectiveCap C P05535010 I 2
14 TankTray P04009030B 1
15 LevelAdjuster P05322003A 4
16 DoorBracket,Left P03302027C 1
17 DoorBracket,Right P03302028C 1
18 TankHolder P05358001Y 1
19 DoorTrimPanel P07510023A 1
20 L Bracket,Left P03302031C 1
21 L Bracket,Right P03302032C 1
22 HoseHolder P05528002G 1

12
Y0250122 RotisserieAssemblyPartsDiagram
Y0250122 RotisserieAssemblyPartsList
HardwareforRotisserie
Rot. Screw#10-24x3/4"
UNC
Qty.2
Part #S112G10121
Rot. Thumbscrew
3/8"x1/2"
Qty.3
Part #S196G06081
Rot.Washer
Qty.2
Part #S411G03081
Rot. Nut.#10-24
Qty.2
Part #S362G10121
KEY PART#
DESCRIPTION QTY
Rot.Bushing
Rot. Thumbscrew3/8"x1/2"
Rot.Collar
Rot. Spit
Rot. Holding Fork
Rot. MotorBracket
Rot.Motor/AC
Rot. Screw#10-24x3/4"UNC
Rot. Washer
Rot. Nut#10-24
1.
2.
3.
4.
5.
6.
7.
8.
9.
1
3
1
1
2
1
1
2
2
2
P05508092A
S196G06081
P05508091A
P05508175A
P05508090A
P05508174A
P07101042B
S112G10121
S411G03081
S362G10121
1.
2.
3.
4.
5.
6.
7.
8.
9.
10.
42
1
2
5
2
910
6
8
3
7

13
AssemblyInstructions
PhillipsHeadScrew1/4"x3/8"
Qty.4
Part#S112G04061
Install CartFrame (ForRangeModel)
PhillipsHeadScrew1/4"x3/8"
Qty.4
Part#S112G04061
Align the4holes intheCart Frameand theRange,
Right(Front/Rear) Cart Legs.Insert the4Phillips
HeadScrews1/4"x1/2"and tightensecurely.
1
Install CartFrame (ForGrill Model)
Align the4holes intheCart Frameand theGrill Left
Cart Legs(Front/Rear). Insert the4PhillipsHead
Screws1/4"x1/2"and tightensecurely.
2
AssembleIsland Set(OptionalConfigurations)
Align the3individualmodelsand slidetogether
as showntoyourpreference.
Besuretoattach theRegulatorwithHose installation
fromRangeand Island beforesecurelyplacing into
position.(Please refertoStep4).
3
Note:
All measurementsareininches
(Option2- nextpage)
Option 1
Grill
Range
Island
Use yourgrill atleast 3feetaway fromanywall
orsurface.
Donotobstructtheflowofairforcombustion
andventilation.
CAUTION
! !

14
Note:
All measurementsareininches
Option 2
4-1 Install RegulatorwithHose toHose holder.
(Island AssemblySet-ForOption 1and 2).
Withthehelpofanassistant,proceedwiththe followingsteps.
Remove the2screwsandUpperRightCartPanel.
Detach theRegulatorwithHose fromtheHose Holder
and insert theRegulatorHose end through theopening.
ReplacetheUpperRightCartPanelandtightensecurely
usingthe screwsprovided.Besurethatthe RegulatorHose
sitswithinthedesignatedslotopening.
PositiontheRangeandIslandsetatcloserange.
InserttheRegulatorwithHosethroughtheHoseInleton
the IslandsetandattachtheRegulatorwithHosetothe
Hose Holder.
Fromtheouside faceofthepanelsealtheHoseInletwith
thecap provided.
12
3
CartPanel,
Upper/Right
Range
Island
HoseHolder
Hose
Inlet
Panel,
Left
4-2 Install RegulatorwithHose toHose holder.
(Island AssemblySet-ForOption 2Only).
Remove thescrewsandHoseHolderfromtheLeftPanel.
Alignthe holesontheHoseHolderanddesignated holes
ontheRightPaneland insertthescrews.
Then proceed withthe assemblyinstructions asfor
Step4-1.
Island
Panel,
Right
HoseHolder
Hose
Inlet
Cap
Cap
Slotopening

15
5-1 Install Gas TanktoFront&SideTankTrays.
(Island AssemblySet-ForOption 1).
Slide open theTankTraydoors(asshown).
TurnyourLPGas Tank Valveclockwise totheclosedor
OFF positon.
UnscrewtheWing Boltfromrightbracketoftank holder.
PlaceLPGas tank intotank holderon theTank Tray.
Install thetank sotheTank Valvefaces therearright
cornerofcabinet.
Align anadditionalnutand screwtheWing Boltintoright
bracketoftank holdertosecurethegas tank.
Attach theRegulatorwithHose tothegas tank.
PushtheTankTraydoorsclosed.
5-2 Install Gas TanktoRear &SideTankTrays.
Island AssemblySet-ForOption 2).
FollowtheAssemblyInstructionasoutlined insteps 5-1.
ViewofRear
TankTray
SideTank
Tray
RearTank
Tray
Keeptheventilation openingsoftheTank Traycabinet
free and clearofdebris.
CAUTION
! !
FrontTankTray
Additional
Nut
Tanktray
Tank
Holder
SideTankTray

16
Install FaucetAssembly
SlideopentheCart BasketDoorand fromtheundersideoftheSink Frame
unscrewand removetheLeft Cart RearPanelas shown.(See fig.1).
Loosen4preassembledWing Bolts1/4"x1/2"halfwayand gentlypushthe
Left Cart RearPaneltoslidealong thedesignatedslottoremove.
Insert thefaucetas shown.
FromtheundersideoftheSink Frameattach the2Faucetwashersand
Bracket, theninsert the2HexHeadScrewsM4x20mm totheBracket(as
shown). Donotsecuretoo tightly.
Gripthefaucettositflaton theSink Frametop and screwtheBracket
(clockwise)fromtheundersideoftheSink FrametosecuretheFaucet
firmlyintoposition.
Thensecurelytightenthe2HexHeadScrewsM4x20mm.(See fig.2).
Insert oneend ofthewaterPipe(notsupplied)totheFaucetpipeoutlet
(diameter=5/8")and threadtheotherend through therearpanelas shown
tothewatersupplylineofyourpreference.(See page19)
Thenalsothreadtheloose end ofthepreassembledDrainpipethrough
therearpaneltoasuitabledrainagepipe.
Align theslotand slidetheLeft Cart Rearpanelclosedand retightenthe
screws.
PushtheCart BracketDoorclosed.
ForOperation instructionsrefertoUse and Care
on page19.
6
Fig1.
1
LeftCart
RearPanel
2
4slots
3
HexHeadScrewM4X20mm
Qty.2
Part#S162M04201
Fig2.
SinkFrame
top
Underside
view
HexHead
Screw
Faucetmetal
washer
Bracket
Faucetrubber
washer 5/8"
Faucetpipe
outlet
OutletforFaucet
and Sinkpiping

17
Install IgnitorBattery
UnscrewIgnitorCapfromControlPanel.
PlacesuppliedAA batteryintotheIgnitor
Slotwithpositivepolefacing you.
Position theCapand Spring overtheAA
batteryand tightenontoControlPanel.
Repeattoinstall theotherAA battery
intotheIgnitorSlot.
Besureall ControlKnobsaresetto
"OFF"and opentheGrill Lid.
Haveyourassistantstand behind tothe
rightofthegrill and look towardthefront
ofthegrill bowl. Never putyourface
insidetheGrill Head.
Press theIgnitorCap.You shouldhear
a"clicking"sound.Yourassistantshould
see abluesparkwithineach Gas
CollectorBox.Ifasparkispresentthe
ElectrodeTipsareproperlypositioned.
Ifno sparkisseen,theSparkGap
needstobeadjustedas follows:
•
•
•
Using anadjustablewrench,loosenthe
InsideNutuntil theGas CollectorBoxcan
beturnedupward.
IfthegapbetweentheSparkElec-
trodeTipand Receiverismorethan
3/16"use long nose plierstogently
squeeze theGas CollectorBoxto
narrowgap.
ReturntheGas CollectorBoxtoits
originalposition,securetheInsideNut
and trytheElectrodeCheck again.Ifno
"clicking"sound isheard:
AA Batterymaybeinstalledback-
wards.
Electricwiresmay be loose.Remove
theAABatteryand inspecttheIgnitor
Junction Boxfound behind theControl
Paneland reconnectanyloose wires.
SideBurner ElectrodeCheck
-
-
Withtheassistance ofanother person,
perform thisElectrodeCheck before
proceeding.
Thistestwillensurethatthe SparkElectrode Tips
areproperlypositionedsoyourgrilllightseasily
andproperly.
Openrangelid.Removepacking mate-
rial(cardboardand styrofoam)from
burnerand potsupport.
Pushand turnsideburnerControlKnob
toHIGH/IGN.Look forsparkbetweentip
ofelectrodeand burner.
Ifyou don'tsee asparkfromsideburnerelec-
trode,adjustgapbetweenelectrodeand
burnersurfaceto3/16 in.
8
Install Cooking Components
PlacetheSavorPlates®above the
Burners.
PlacetheCooking Gridson theledge
abovetheSavorPlates®.
PlacetheSecondaryCooking Rack into
theholes on theupperleft and rightof
theBack Burnerframewiththebottom
resting intheslotson eithersideofthe
Grill Bowl.
SecondaryCooking Rack
SavorPlates®
10
Cooking Grids
Spring
IgnitorCap IgnitorSlot
AA Battery
AA Battery IgnitorSlot
Spring
IgnitorCap
CGI07 Range
ControlPanel
CGI07 Grill
ControlPanel
SparkElectrodeTip
SparkReceiver
SparkGap GasCollectorBox
7
8
9

18
WARNING !
Failureto readandfollow theUseand Care
Instructionscouldresultinafireorexplosion
thatcouldcauseseriousbodilyinjury,deathor
propertydamage.
!
11 Install PotSupportand Griddle
PlacetheSideBurnerCapontothesideburnerbowl
insert.
Place the PotSupportonthebowlpanelTopPanel.
PlacetheGriddleon theBowlPanelTop Panel.
PotSupport
Griddle
SideBurnerCap
FinalGrill AssemblyStep
Whenyou have finishedassembling your
grill besure thatall screwsare tightened
forsafeoperation ofyourgrill.
Wrench
Qty.1
Part#P05515017L
LevelAdjusterarelocated undersideoftheIslandAssemblyasshown.
Adjustthe12preassembled LevelAdjustersusingthe wrenchprovided.
-Turnitclockwiseraisestheheightofthe Assemblyand
-Turnitcounterclockwisetolowertheheight.
IMPORTANT:ForillustrationpurposetheIslandAssemblySetisshown
onatiltedangle. FORYOURSAFTEY DONOTTILT yourIslandAssembly
atanytime.
12 AdjustIsland AssemblySet(on unevensurface position).
UndersideviewofIsland AssemblySet
LevelAdjuster
Wrench

19
Swiveland adjusttheflexiblefaucetneck as neededto
directthesprayhead.
Removethefaucetneck fromclampholderformanualcon-
trolanddirectionaluse.
USE AND CAREINSTRUCTIONS
Water supplyand drainagesystem for
Island Assembly.
ThisServing Cartisprovided withan optional
faucetand watersupplyhose.You can havethe
faucetand watersupplyhoseplumbed directly
toyourhomesinside watersupplyline sothat
youroutdoorsinkcan be used forwashing food
and dishes.However,ifyou electtousethiskit
and attachagarden hosetoyourfaucet, be
awarethatinsomeU.S.stateswatersupplied
through agarden hoseisregarded tobe unfitfor
drinking.
CaliforniaProposition65 Warning
!
ON
OFF
Forillustration purposes left cart side panelisnotin
view.
OutletforFaucet
and Sinkpiping
FaucetOperation
Withthewaterand drainpipefittedtoasuitableoutlet, be
surethe wateranddraininlet/outletconnection fittings
aretightenedsecurely.
Turnon themainwatersupplyline.
Pushtheleveron theFaucettotheleft torelease
thewater.
Two Spray setting mode:
DualFunction use
CenterSpray
Full Spray
Faucet
neck
Faucet
head
Faucet
holder
Lever
TwisttheFaucetHeadclockwise orcounter-clockwise to
adjustthespraymode.

20
USE AND CAREINSTRUCTIONS
CORRECTLPGASTANK USE
LPGasgrillmodelsaredesignedforusewitha
standard20lb.LiquidPropane Gas(LPGas)tank,
notincluded withgrill. Never connectyourgasgrillto
an LPGastankthatexceeds thiscapacity.Atankof
approximately12inchesindiameterby18-1/2inches
highisthe maximumsizeLPGastanktouse. You
mustusean "OPD"gastankwhichoffersalisted
Overfill PreventionDevice. Thissafetyfeature
preventstankfrombeingoverfilled whichcan cause
malfunctionofLPGastank,regulatorand/orgrill.
Never connectan unregulated LPgastanktoyour
gasgrill. Thegasregulatorassemblysuppliedwith
yourgasgrillisadjusted tohavean outletpressure
of11"watercolumn(W.C.)forconnectiontoanLP
gastank.Onlyusetheregulatorandhoseassembly
supplied withyourgasgrill. Replacementregulators
andhoseassembliesmustbethosespecifiedby
theManufacturer.
Have yourLPGasdealercheckthereleasevalve
aftereveryfillingtoensureitremains freeofdefects.
Always keepLPGastankinuprightposition.
DonotsubjecttheLPGastanktoexcessive heat.
Neverstorean LPGastankindoors.If youstore
yourgasgrillinthe garage always disconnectthe
LPGastankfirstandstoreit safelyoutside.
LPGastanksmustbestored outdoorsinawell-
ventilated areaandoutofthe reachofchildren.
Disconnected LPGastanks mustnotbestoredina
building,garageoranyotherenclosed area.
The regulatorandhoseassemblycan be seen after
openingthe doors(ifapplicable)andmustbe
inspectedbeforeeachuseofthe grill. Ifthereis
excessiveabrasionorwearorif thehoseiscut,it
mustbe replaced priortousingthe grillagain.
Anyattempttoconvertthe grillfromonefueltype
toanotherisextremelyhazardous andmustbe
performedbyaqualifiedgas technicianonly,using
aNG Conversion KitpurchasedfromGrandHall.
Never lightyourgasgrillwiththelidclosedor
beforecheckingtoensurethe burnertubesarefully
seated overthe gasvalve orifices.
The LPGastankmustbe constructedandmarked
inaccordance withtheSpecifications forLP-Gas
CylindersoftheU.S.DepartmentofTransportation
(D.O.T.)orthe NationalStandardofCanada,CAN/
CSA-B339,Cylinders,SpheresandTubesfor
TransportationofDangerous Goods;andCommis-
sion,asapplicable.
The LPGastankmusthaveashutoffvalve,
terminatinginanLPGassupplytankvalve outlet,
thatiscompatiblewithaType1tankconnection
device.The LPGastankmustalso haveasafety
reliefdevice thathasadirectconnectionwiththe
vaporspace ofthetank.
The tanksupplysystemmustbe arranged forvapor
withdrawal.
The LPGastankusedmusthaveacollar
toprotectthetankvalve.
•
•
•
Use yourgrill atleast3feetawayfromany
wall orsurface. Use yourgrill atleast 3feet
away fromcombustibleobjectsthatcanmelt
orcatch fire(such as vinylorwood siding,
fences and overhangs)orsources ofignition
including pilotlightson waterheatersand live
electricalappliances.
Never use yourgas grill inagarage,porch,shed,
breezewayoranyotherenclosedarea.
Never obstructtheflowofventilation airaround
yourgas grill housing.
Never allowchildrentooperateyourgrill.Do
notallowchildren orpetstoplay nearyourgrill.
Use ofalcoholordrugsmayimpairtheabilityto
assembleand operatetheappliance.
Keepfireextinguisherreadilyaccessible.Inthe
eventofaoil/grease fire,do notattemptto
extinguishwithwater. Use typeBextinguisher
orsmotherwithdirt, sand orbaking soda.
Intheeventofrain,coverthegrill and turnoff
theburnerand gas supply.
Use yourgrill on alevel,stablesurfaceinan
area clearofcombustiblematerials.
Donotleavegrill unattendedwheninuse.
Donotmovetheappliancewheninuse.
Allowthegrill tocoolbeforemoving orstoring.
Donotuse yourgrill as aheater.
Thisgrill isnotintendedtobeinstalledin
oron recreationalvehicles and/orboats.
Thegrill isnotintendedforcommercialuse.
Neveruse charcoalinthisgas grill.
WARNING !!
DonotstoreaspareLP-Gastank underornear
thisappliance.
Neverfillthetankbeyond80percentfull; and
Ifthe information in"(a)"and"(b)"isnotfollowed
exactly,afirecausingdeathorseriousinjurymay
occur.
A.
B.
C.
WARNING !!
Table of contents
Other GrandCafe Grill manuals
Popular Grill manuals by other brands

Weber
Weber Genesis II E-335 Assembly guide

Tupperware
Tupperware MicroPro Series manual

Landmann
Landmann Vista Smoky Mountain 560200 Assembly and operating instructions

Coleman
Coleman RoadTrip 9945-700 Assembly and instruction manual

Bull
Bull OUTLAW 26038 Assembly & operating instructions

Princess
Princess Digital Grill Master Pro user manual

Lotus
Lotus CW-74G Installation and operating instructions

Roller Grill
Roller Grill Savoye Instructions for use and installation

Char-Broil
Char-Broil 463243812 Product guide

Kenmore
Kenmore PG-40406SOL-1 Use & care guide

Cuisinart
Cuisinart WM-SW2 INSTRUCTION AND RECIPE BOOKLET

Weber
Weber 71150 owner's guide