GRASS VALLEY 8900NET - User manual

8900NET
NETWORK INTERFACE MODULE
Instruction Manual
SOFTWARE VERSION 4.2.0
071061205
NOVEMBER 2007

Affiliate with the N.V. KEMA in The Netherlands
CERTIFICATE
Certificate Number: 510040.001
The Quality System of:
Grass Valley, Inc.
400 Providence Mine Road
Nevada City, CA 95945
United States
15655 SW Greystone Ct.
Beaverton, OR 97006
United States
10 Presidential Way
3rd Floor, Suite 300
Woburn, MA 01801
United States
Nederland B.V.
4800 RP BREDA
The Netherlands
Weiterstadt, Germany
Brunnenweg 9
D-64331 Weiterstadt
Germany
Rennes, France
Rue du Clos Courtel
Cesson-Sevigne, Cedex
France
Technopole Brest Iroise
CS 73808
29238 Brest Cedex 3
France
17 rue du Petit Albi-BP 8244
95801 Cergy Pontoise
Cergy, France
2300 South Decker Lake Blvd.
Salt Lake City, UT 84119
United States
7140 Baymeadows Way
Suite 101
Jacksonville, FL 32256
United States
Including its implementation, meets the requirements of the standard:
ISO 9001:2000
Scope:
The design, manufacture and support of video hardware and software products and
related systems.
This Certificate is valid until: June 14, 2009
This Certificate is valid as of: August 30, 2006
Certified for the first time: June 14, 2000
H. Pierre Sallé
President
KEMA-Registered Quality
The method of operation for quality certification is defined in the KEMA General Terms
And Conditions For Quality And Environmental Management Systems Certifications.
Integral publication of this certificate is allowed.
KEM
A
-Registered Quality, Inc.
4377 County Line Road
Chalfont, PA 18914
Ph: (215)997-4519
Fax: (215)997-3809
CRT 001 073004
A
ccredited By:
ANAB

8900NET
NETWORK INTERFACE MODULE
Instruction Manual
SOFTWARE VERSION 4.2.0
071061205
NOVEMBER 2007

4 8900NET — Instruction Manual
Contacting Grass Valley
Copyright © Grass Valley. All rights reserved.
This product may be covered by one or more U.S. and foreign patents.
Grass Valley Web Site
The www.thomsongrassvalley.com web site offers the following:
Online User Documentation — Current versions of product catalogs, brochures,
data sheets, ordering guides, planning guides, manuals, and release notes
in .pdf format can be downloaded.
FAQ Database — Solutions to problems and troubleshooting efforts can be
found by searching our Frequently Asked Questions (FAQ) database.
Software Downloads — Download software updates, drivers, and patches.
International
Support Centers
France
24 x 7
+800 8080 2020 or +33 1 48 25 20 20
United States/Canada
24 x 7 +1 800 547 8949 or +1 530 478 4148
Local Support
Centers
(available
during normal
business hours)
Asia
Hong Kong, Taiwan, Korea, Macau: +852 2531 3058 Indian Subcontinent: +91 22 24933476
Southeast Asia/Malaysia: +603 7805 3884 Southeast Asia/Singapore: +65 6379 1313
China: +861 0660 159 450 Japan: +81 3 5484 6868
Australia and New Zealand: +61 1300 721 495 Central/South America: +55 11 5509 3443
Middle East: +971 4 299 64 40 Near East and Africa: +800 8080 2020 or +33 1 48 25 20 20
Europe
Belarus, Russia, Tadzikistan, Ukraine, Uzbekistan: +7 095 2580924 225 Switzerland: +41 1 487 80 02
S. Europe/Italy-Roma: +39 06 87 20 35 28 -Milan: +39 02 48 41 46 58 S. Europe/Spain: +34 91 512 03 50
Benelux/Belgium: +32 (0) 2 334 90 30 Benelux/Netherlands: +31 (0) 35 62 38 42 1 N. Europe: +45 45 96 88 70
Germany, Austria, Eastern Europe: +49 6150 104 444 UK, Ireland, Israel: +44 118 923 0499

8900NET — Instruction Manual 5
Preface
About This Manual
This manual describes the features of a specific 8900 module in the Gecko
and GeckoFlex Signal Processing System families As part of this module
family, it is subject to Safety and Regulatory Compliance described in the
Gecko 8900 Series frame and power supply documentation (see the Gecko
8900 Frames and the GeckoFlex Frames Instruction Manuals

6 8900NET — Instruction Manual
Preface

8900NET — Instruction Manual 7
Contents
Preface. . . . . . . . . . . . . . . . . . . . . . . . . . . . . . . . . . . . . . . . . . . . . . . . . . . . . . . . . . . . . . . . . . . . . 5
About This Manual . . . . . . . . . . . . . . . . . . . . . . . . . . . . . . . . . . . . . . . . . . . . . . . . . . . . . 5
8900NET Network Interface (Net Card) Module. . . . . . . . . . . . . . . . . . . . . . . . . 9
Introduction . . . . . . . . . . . . . . . . . . . . . . . . . . . . . . . . . . . . . . . . . . . . . . . . . . . . . . . . . . . 9
8900NET Features . . . . . . . . . . . . . . . . . . . . . . . . . . . . . . . . . . . . . . . . . . . . . . . . . . . . 9
Remote Control Panels . . . . . . . . . . . . . . . . . . . . . . . . . . . . . . . . . . . . . . . . . . . . . . . 10
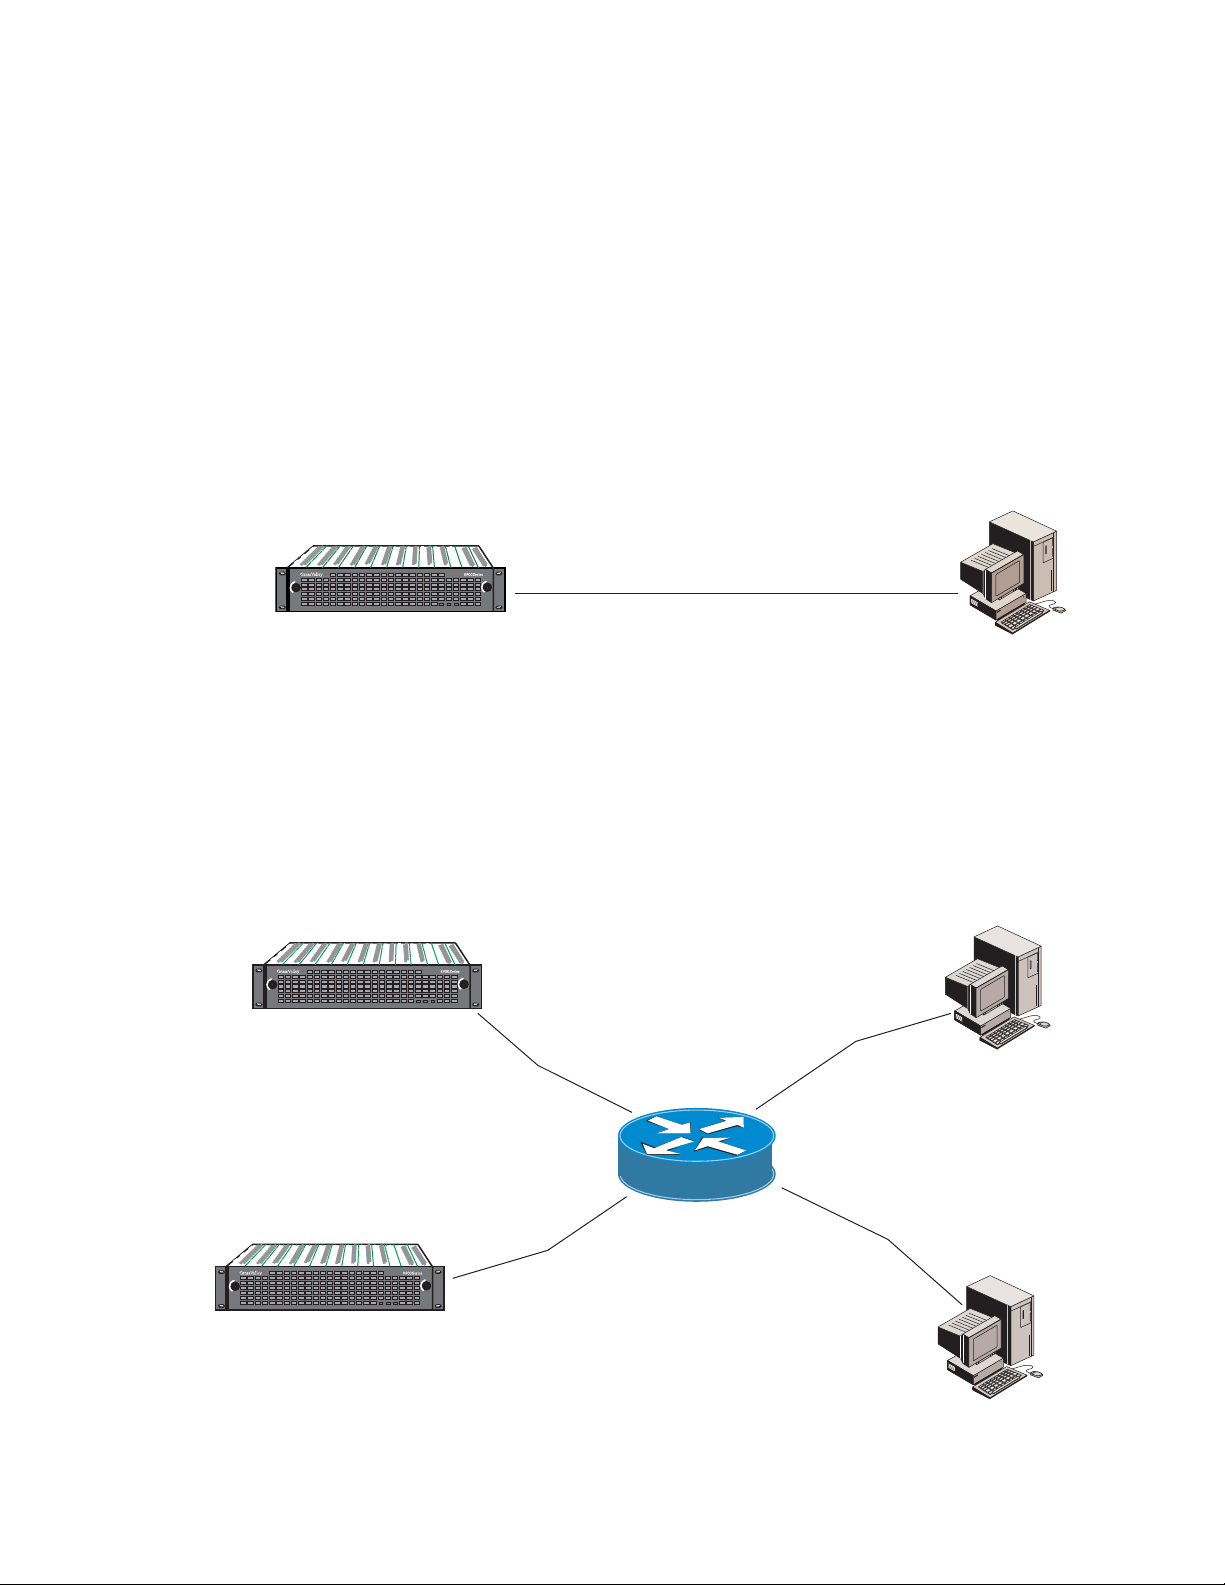
Basic Network Design. . . . . . . . . . . . . . . . . . . . . . . . . . . . . . . . . . . . . . . . . . . . . . . . 10
Installation . . . . . . . . . . . . . . . . . . . . . . . . . . . . . . . . . . . . . . . . . . . . . . . . . . . . . . . . . . . 11
8900NET Module Alarm DIP Switches . . . . . . . . . . . . . . . . . . . . . . . . . . . . . . . . . 11
Module Placement in the Gecko 8900 and GeckoFlex Frame . . . . . . . . . . . . . . . 12
Cabling . . . . . . . . . . . . . . . . . . . . . . . . . . . . . . . . . . . . . . . . . . . . . . . . . . . . . . . . . . . . 14
RS-232 Communication Port . . . . . . . . . . . . . . . . . . . . . . . . . . . . . . . . . . . . . . . . 15
Ethernet Cable . . . . . . . . . . . . . . . . . . . . . . . . . . . . . . . . . . . . . . . . . . . . . . . . . . . . 18
Power Up . . . . . . . . . . . . . . . . . . . . . . . . . . . . . . . . . . . . . . . . . . . . . . . . . . . . . . . . . . . . 20
8900NET Module Indicator LEDs . . . . . . . . . . . . . . . . . . . . . . . . . . . . . . . . . . . . . . 21
Establishing Frame Network Identity . . . . . . . . . . . . . . . . . . . . . . . . . . . . . . . . . . . . 22
NetConfig Application . . . . . . . . . . . . . . . . . . . . . . . . . . . . . . . . . . . . . . . . . . . . . . . 22
Good Networking Practices. . . . . . . . . . . . . . . . . . . . . . . . . . . . . . . . . . . . . . . . . . . 22
Setting Frame Network Identity . . . . . . . . . . . . . . . . . . . . . . . . . . . . . . . . . . . . . . . 23
Network Configuration Storage . . . . . . . . . . . . . . . . . . . . . . . . . . . . . . . . . . . . . . . 25
Web Browser Setup. . . . . . . . . . . . . . . . . . . . . . . . . . . . . . . . . . . . . . . . . . . . . . . . . . . . 25
Web Browser Notes. . . . . . . . . . . . . . . . . . . . . . . . . . . . . . . . . . . . . . . . . . . . . . . . . . 26
Addressing the Frame URL . . . . . . . . . . . . . . . . . . . . . . . . . . . . . . . . . . . . . . . . . . . 26
Default MAC (machine) Address . . . . . . . . . . . . . . . . . . . . . . . . . . . . . . . . . . . . 26
Status Monitoring and Reporting . . . . . . . . . . . . . . . . . . . . . . . . . . . . . . . . . . . . . . . . 27
External Frame Alarm. . . . . . . . . . . . . . . . . . . . . . . . . . . . . . . . . . . . . . . . . . . . . . . . 28
Module Health Bus Reporting . . . . . . . . . . . . . . . . . . . . . . . . . . . . . . . . . . . . . . . 28
LED Status Reporting . . . . . . . . . . . . . . . . . . . . . . . . . . . . . . . . . . . . . . . . . . . . . . . . 30
Web Browser Status Reporting . . . . . . . . . . . . . . . . . . . . . . . . . . . . . . . . . . . . . . . . 31
SNMP Monitoring . . . . . . . . . . . . . . . . . . . . . . . . . . . . . . . . . . . . . . . . . . . . . . . . . . . 32
Using the 8900NET GUI. . . . . . . . . . . . . . . . . . . . . . . . . . . . . . . . . . . . . . . . . . . . . . . . 34
8900 Frame GUI Interface. . . . . . . . . . . . . . . . . . . . . . . . . . . . . . . . . . . . . . . . . . . . . 34
Frame Status Page . . . . . . . . . . . . . . . . . . . . . . . . . . . . . . . . . . . . . . . . . . . . . . . . . 34
Older 8900 Module Support. . . . . . . . . . . . . . . . . . . . . . . . . . . . . . . . . . . . . . . . . 37
Frame Configuration Web Page . . . . . . . . . . . . . . . . . . . . . . . . . . . . . . . . . . . . . 39
Frame Connections Web Page . . . . . . . . . . . . . . . . . . . . . . . . . . . . . . . . . . . . . . . 41
Frame Alarm Reporting Web Page . . . . . . . . . . . . . . . . . . . . . . . . . . . . . . . . . . . 42
LED Reporting Web Page . . . . . . . . . . . . . . . . . . . . . . . . . . . . . . . . . . . . . . . . . . . 48
SNMP Reporting Web Page . . . . . . . . . . . . . . . . . . . . . . . . . . . . . . . . . . . . . . . . . 50
Power Supply/Demand Web Page. . . . . . . . . . . . . . . . . . . . . . . . . . . . . . . . . . . 52
Frame Power Supply Web Pages. . . . . . . . . . . . . . . . . . . . . . . . . . . . . . . . . . . . . 55
8900NET Module Interface . . . . . . . . . . . . . . . . . . . . . . . . . . . . . . . . . . . . . . . . . . . 56
8900NET Module Status Web Page. . . . . . . . . . . . . . . . . . . . . . . . . . . . . . . . . . . 56

8 8900NET — Instruction Manual
Contents
8900NET Module Configuration Web Page . . . . . . . . . . . . . . . . . . . . . . . . . . . 57
8900NET Network Web Page . . . . . . . . . . . . . . . . . . . . . . . . . . . . . . . . . . . . . . . 61
Media Module Slot Configuration . . . . . . . . . . . . . . . . . . . . . . . . . . . . . . . . . . . 62
Upgrading 8900NET Software . . . . . . . . . . . . . . . . . . . . . . . . . . . . . . . . . . . . . . . . 64
Acquiring Module Software Updates . . . . . . . . . . . . . . . . . . . . . . . . . . . . . . . . 64
Service . . . . . . . . . . . . . . . . . . . . . . . . . . . . . . . . . . . . . . . . . . . . . . . . . . . . . . . . . . . . . . 65
Troubleshooting GUI Operation . . . . . . . . . . . . . . . . . . . . . . . . . . . . . . . . . . . . . . . . 66
LogPrint Procedure From Gecko/GeckoFlex Frame. . . . . . . . . . . . . . . . . . . . . . 73
Functional Description . . . . . . . . . . . . . . . . . . . . . . . . . . . . . . . . . . . . . . . . . . . . . . . . 78
Temperature Sensing . . . . . . . . . . . . . . . . . . . . . . . . . . . . . . . . . . . . . . . . . . . . . . . . 78
ROM and RAM . . . . . . . . . . . . . . . . . . . . . . . . . . . . . . . . . . . . . . . . . . . . . . . . . . . . . 79
Ethernet Port . . . . . . . . . . . . . . . . . . . . . . . . . . . . . . . . . . . . . . . . . . . . . . . . . . . . . . . 79
RS-232 Serial Port . . . . . . . . . . . . . . . . . . . . . . . . . . . . . . . . . . . . . . . . . . . . . . . . . . . 79
Module Health Bus. . . . . . . . . . . . . . . . . . . . . . . . . . . . . . . . . . . . . . . . . . . . . . . . . . 79
Frame Bus . . . . . . . . . . . . . . . . . . . . . . . . . . . . . . . . . . . . . . . . . . . . . . . . . . . . . . . . . 79
Module Present Detection . . . . . . . . . . . . . . . . . . . . . . . . . . . . . . . . . . . . . . . . . . . . 79
Fan Speed Control and Monitor . . . . . . . . . . . . . . . . . . . . . . . . . . . . . . . . . . . . . . . 80
On-board Regulator . . . . . . . . . . . . . . . . . . . . . . . . . . . . . . . . . . . . . . . . . . . . . . . . . 80
Specifications. . . . . . . . . . . . . . . . . . . . . . . . . . . . . . . . . . . . . . . . . . . . . . . . . . . . . . . . . 81
Appendix . . . . . . . . . . . . . . . . . . . . . . . . . . . . . . . . . . . . . . . . . . . . . . . . . . . . . . . . . . . . . . . . . 83
Compatibility Matrix . . . . . . . . . . . . . . . . . . . . . . . . . . . . . . . . . . . . . . . . . . . . . . . . . . 83
Control and Monitoring Support . . . . . . . . . . . . . . . . . . . . . . . . . . . . . . . . . . . . . . 86
Control and Monitoring Notes . . . . . . . . . . . . . . . . . . . . . . . . . . . . . . . . . . . . . . . . 86
8900–FLOAD–CBL Assembly. . . . . . . . . . . . . . . . . . . . . . . . . . . . . . . . . . . . . . . . . 86
8900NET Software Update From FTP Server. . . . . . . . . . . . . . . . . . . . . . . . . . . . . . 87
FTP Method Overview. . . . . . . . . . . . . . . . . . . . . . . . . . . . . . . . . . . . . . . . . . . . . . . 87
FTP Software Update Procedure . . . . . . . . . . . . . . . . . . . . . . . . . . . . . . . . . . . . . . 88
Password Protection for Software Upgrades . . . . . . . . . . . . . . . . . . . . . . . . . . 96
Upgrading Software . . . . . . . . . . . . . . . . . . . . . . . . . . . . . . . . . . . . . . . . . . . . . . . 97
Unsupported Software Updates. . . . . . . . . . . . . . . . . . . . . . . . . . . . . . . . . . . . . . 102
Index. . . . . . . . . . . . . . . . . . . . . . . . . . . . . . . . . . . . . . . . . . . . . . . . . . . . . . . . . . . . . . . . . . . . . 103

8900NET—Instruction Manual 9
8900NET Network Interface
(Net Card) Module
Introduction
The 8900NET Network Interface module (Net Card) provides control and
monitor access to the Gecko 8900 and GeckoFlex frames and the
audio/video media modules in the frames through a web browser graph-
ical user interface (GUI), the Newton Control Panel, and SNMP manage-
ment applications.
Note Refer to the 8900 Gecko Frames or GeckoFlex Frames Instruction Manuals
for more specific frame information.
8900NET Features
The 8900NET module features:
• 10 Base-T Ethernet interface,
• Fan front cover power and control,
• Support for the following:
• Software update downloading
• Newton Modular Control system control panels
• Frame Alarm connector on rear of module
• Asset Tag identification
• HTML protocol
• Simple Network Management Protocol (SNMP) monitoring
• NetConfig Networking Configuration application

10 8900NET—Instruction Manual
Introduction
Remote Control Panels
The 8900NET module with version 3.2.0 or later software allows the frame
to be remotely controlled by the Newton Control Panel via the Ethernet
port. Refer to the Newton Control Panel documentation for details.
Basic Network Design
The 8900NET module can be employed in either a point-to-point or local
area network (LAN) control/monitoring configuration. Figure 1 illustrates
a point-to-point configuration.
Figure 1. Point-to-point Configuration
Figure 2 illustrates a typical LAN configuration.
Figure 2. Basic Network Configuration
0612-08r1
PC running:
Windows2000/XP OS,
Unix, orMacintosh OS
Ethernet
Web browser:
Internet Explorer,
version6.0 orlater
orany compatible
web browser
Ethernet cable, Category 5 Crossover
8900 frame with
Network Interface Module
PS1 PS 2
LOCK
LOCK
FAULT
0612-07r1
LAN Ethernet Hub
8900 frame with
Network Interface Module
PS1 PS 2
LOCK
LOCK
FAULT
8900 frame with
Network Interface Module
PS1 PS 2
LOCK
LOCK
FAULT
Ethernet cable: Category 5 PC running:
Windows2000/XP OS,
Unix, orMacintosh OS
Ethernet
Web browser:
Internet Explorer,
version6.0 orlater
orany compatible
web browser

8900NET—Instruction Manual 11
Installation
Installation
This section describes placing the module in Gecko 8900 and GeckoFlex
frames and cabling the communications ports for all frame types. Proce-
dures for DIP switch settings, installation, and cabling of the module are
described in this section.
An 8900NET module will come installed in Gecko 8900TF/TFN and
GeckoFlex 8900FF/FFN frames. Note that there are two DIP switches
described below that will affect reporting to the 8900NET module, the
external RS-232 Frame Alarm, and the SNMP reporting system.
Note The GeckoFlex frame requires an 8900NET module running 4.0.0 or later
software.
8900NET Module Alarm DIP Switches
There are two eight-position DIP switches (S1 and S2) on the 8900NET
module for enabling or disabling the overall status reporting of the frame
and modules. Figure 3 illustrates the DIP switches set with the factory
defaults and Table 1 on page 12 gives the function of each DIP switch set-
ting. You may enable or disable reporting functions from this point.
Note Some web page and frame alarm and SNMP reporting functions must be
enabled on the DIP switches to be functional.
Figure 3. Alarm Reporting DIP Switches (Defaults Shown)
The current status of the DIP switch settings is always reported on the
8900NET Status (page 56), Frame Alarm Reporting (page 42), LED
Reporting (page 49), and SNMP Reporting (page 48) frame web pages. You
may check DIP switch status on these web pages instead of pulling out the
module.
Refer to Figure 12 on page 20 for the location of S1 and S2 on the 8900NET
module and Table 2 on page 21 for the possible settings. A settings table is
also silk-screened on the bottom of the module. Disabling (or filtering) of
fault reports can sometimes be useful in isolating problems in the frame.
12345678
12345678
S2S1
PowerSupply #1
PowerSupply #2
Temperature (not used)
Fan
Module
Frame Bus
FanSpeed
NM Control
Status
8900NET
IP Address
Frame Control
Remote
Override
LED
0612_28r2

12 8900NET—Instruction Manual
Installation
Note Disabled faults are still detected by the network GUI but LEDs will be inactive.
Refer to Status Monitoring and Reporting on page 27, for an overview of
overall status reporting from the Gecko and GeckoFlex frames, 8900NET,
power supplies, and media modules in the frame.
Module Placement in the Gecko 8900 and GeckoFlex Frame
There are ten cell locations in the frame to accommodate media modules.
These are the left ten locations. Refer to Figure 4 (Gecko 8900 frame shown
with no cover).
The two cells on the right are allocated for the power supplies. For addi-
tional information concerning the Power Supply modules, refer to the 8900
Frames Instruction Manual and the GeckoFlex Frames Instruction Manual.
Note Gecko and GeckoFlex frames do not use the same power supply. Refer to
Power Supply/Demand Web Page on page 52.
The third cell from the right is allocated for the 8900NET Network Interface
or Frame Monitor module (GeckoFlex 8900FF and Gecko 8900TF-V/A). For
additional information concerning the Frame Monitor module, refer to the
8900 Frames Instruction Manual or the GeckoFlex Frames Instruction Manual.
Table 1. 8900NET Module DIP Switches
S1
Segment Left Position (Enabled) Right Position (Disabled)
1 PS1 Fault Reporting Enabled PS1 Fault Reporting Disabled
2 PS2 Fault Reporting Enabled PS2 Fault Reporting Disabled
3 (Not used) Over Temp reporting is always enabled locally and through SNMP
4 Fan Fault Reporting Enabled Fan Fault Reporting Disabled
5 Module Fault Reporting Enabled Module Fault Reporting Disabled
6 Frame Bus Error Reporting Enabled Frame Bus Error Reporting Disabled
7 Fan Speed Controlled by Temperature Fan Speed Fixed at Maximum
8Network Module Control Enabled (remote control via GUI is
enabled)
Network Module GUI is placed in read only mode
S2
Segment Left Position (open) Right Position (closed)
1 Status Enabled (enabled alarms are reported over SNMP) SNMP Reporting is disabled except for Over Temp alarm
2 IP Address (not currently supported)
3 Frame Control Enabled (remote control via GUI is enabled) GUI for the frame and all modules within is placed in read only mode
4 – 8 (Currently Not Used)

8900NET—Instruction Manual 13
Installation
Figure 4. Gecko 8900 Series Frame
Note The 8900NET module can be plugged in and removed from an 8900 frame
with power on. When power is applied to the module, LED indicators reflect
the initialization process (see Power Up on page 20).
To install the 8900NET module in the frame:
1. Insert the module, connector end first (see Figure 5), with the
component side of the module facing to the right side of the frame.
Instead of an ejector tab, the 8900NET module has a connector tab with
a circular finger-hole for pulling the module.
2. Verify that the module connector seats properly and securely against
the backplane.
Figure 5. Module/Frame Orientation
Frame Monitor
or 8900NET Network
Interface Module (only)
Any 8900 Module Power
Supplies
(only)
0612_04r1
0612 -16
S1
8
76
5
432
1
8
7
6
543
2
1
Configuration DIP switches
Component side

14 8900NET—Instruction Manual
Installation
Cabling
This section describes physical connections, the connectors and cables,
used for network communications. Setup procedures for each type of con-
nection are described in Using the 8900NET GUI on page 34.
An example of control and monitoring connectors on the frame rear are
illustrated in Figure 6 for the Gecko 8900 frame and Figure 7 for the
GeckoFlex frame.
Note There are variations for the AC rears in the Gecko 8900 and GeckoFlex Series.
Refer to the manual for you specific frame if the information is not covered
here.
Figure 6. 8900NET Input/Output Connectors on 8900TFN -V/-A Frame
Figure 7. 8900NET Input/Output Connectors on GeckoFlex Frames
J1 J2
RS232
ETHERNET
Frame Alarm
(Video Frame – J102 pins 8 and 9)
(Audio Frame – J7 pins 8 and 9)
Network configurationstorage
Frame ID
(Frame MAC address storage)
0612_31r1
J1 J2
RS232
ETHERNET J103
J102
Frame Alarm -
J102 pins 8 and 9
0612_32

8900NET—Instruction Manual 15
Installation
RS-232 Communication Port
The RS-232 port on the rear of 8900 frames is used for two purposes: an
output for an external Frame Alarm and to set initial frame communication
parameters. Both of these uses are described below.
Note Earlier version 8900 frames used a BNC connector labeled SMPTE ALARM to
access the frame alarm connection. For information concerning the SMPTE
Alarm bus cable, refer to the 8900 Frames Instruction Manual.
Frame Alarm
The Frame Alarm can be accessed through pins 8 and 9 of the RS-232 con-
nector. The Frame Alarm outputs a continuous or pulsing voltage level to
indicate alarm status. The type of voltage output is selected on the Frame
Alarm Reporting web page. This voltage output is connected to an external
device that responds to a voltage level for displaying Frame component
(PS1, PS2, Fans) and status and Module Health bus status. Details for con-
necting an external customer-supplied alarm are given in the 8900 Frames
Instruction Manual and the GeckoFlex Frames Instruction Manual.
The Frame Alarm responds to conditions enabled on the 8900NET
Network Interface module with DIP switches S1 and S2 as given in Table 2
on page 21 and settings made on the Frame Alarm Reporting web page
(Frame Alarm Reporting Web Page on page 42).
Setup of Frame Communication Parameters
The nine-pin RS-232 connector is also used to connect the frame to a PC to
initially set the frame’s network communication parameters. After network
communication is established, subsequent changes to these parameters can
be made using the network GUI.
CAUTION The RS-232 cable should be removed after completing the initial frame setup.
Leaving a long serial cable connected to the frame without a connection at the
other end may freeze the 8900NET module startup routine.
Note The cable used for this connection is a DB-9F to DB-9M, straight-through
cable available from Grass Valley as part of cable kit model 8900CAB
(10 ft./3 m length).
The communication parameters for the RS-232 connection are:
• Baud rate: 9600
• Data bits: 8
• Parity: none
• Stop bits: 1
• Flow control: none

16 8900NET—Instruction Manual
Installation
The male end connects to the RS-232 connector on the 8900 frame (see
Figure 8) and the female end connects to either Com1 or Com2 on the PC,
depending upon the configuration of the computer’s I/O ports.
Figure 8. RS-232 to Initialization PC Cable and Pinout
DB-9
Female
DB-9
Male
PinPin
1
2
3
4
5
6
7
8
9
1
2
3
4
5
6
7
8
9
Com1 or
Com2 port
RS-232
PC running HyperTerminal Emulation
8900 Frame
0612 -09r2
Comm. Parameters: 9600 baud, 8 bits, parity-none, 1 stop, flow-none
DB-9
Male
Pinout
Pin5
Pin1
Pin9
DB-9
Female
Pinout
Pin1
Pin5 Pin9
Only pins
2,3, & 5
are required

8900NET—Instruction Manual 17
Installation
If the PC uses a 25-pin RS-232 connector, use a cable adapter as shown in
Figure 9.
Note The 25-pin adaptor is available from Grass Valley as part of cable kit model
8900CAB.
Figure 9. DB-9 Cable and DB-25 Cable Adaptor Pinout
1
2
3
4
5
6
7
8
9
1
2
3
4
5
6
7
8
9
8
3
2
20
7
6
4
5
22
0612 -11
25-pin25-pin9-pin9-pin9-pin
1
2 Tx
3 Rx
4
5
6
7
8
9
20
22
1
Tx 2
Rx 3
4
5
6
7
8
9
9-pin
DB-25
Female
DB-9
Male
DB-9
Female
DB-9
Male
Pinout
Pin5
Pin1
Pin9
DB-25
Female
Pinout
Pin1
Pin13
Pin14

18 8900NET—Instruction Manual
Installation
Ethernet Cable
The 8900NET module enables the frame’s RJ-45 Ethernet connector.
Through this port the Gecko frame can connect to:
• A single PC with a network card (point-to-point), or
• A local area network (LAN) through a network hub.
Point-to-Point Connection
Figure 10 illustrates the crossover cable connection and pinout for a
point-to-point connection to the controlling PC.
Note This Category 5, UTP Crossover Cable is available from Grass Valley as part
of cable kit model 8900CAB (10 ft./3 m length).
Figure 10. Point-to-Point RJ-45 Connection and Cable Pinout
RJ-45
connector
RJ-45
connector
PinPinPinPin
1
2
3
4
5
6
7
8
1
2
3
4
5
6
7
8
3
6
1
5
4
2
8
7
1
2
3
4
5
6
7
8
To PC network card
RJ-45 connector
Pin1
PC with network card and net browsersoftware
Category 5, UTP CrossoverCable
0612 -10r1
8900 Frame
Ethernet

8900NET—Instruction Manual 19
Installation
Local Area Network (LAN) Connection
Figure 11 illustrates the cable connection for a LAN connection to a
network hub.
Note Because of varying length requirements and ready availability from network
equipment suppliers, this cable is not supplied by Grass Valley.
Figure 11. LAN RJ-45 Connection and Cable
8900 Frame
RJ-45
connector
RJ-45
connector
PinPinPinPin
1
2
3
4
5
6
7
8
1
2
3
4
5
6
7
8
1
2
3
4
5
6
7
8
1
2
3
4
5
6
7
8
To network hub
RJ-45 connector
Ethernet
Pin1
Network Ethernet Hub (typical)
0612 -15r1
Category 5, UTP Cable
8 7
10 BaseT
6 5 4 3 2 1
hp

20 8900NET—Instruction Manual
Power Up
Power Up
The various front LED indicators and configuration switches on the
8900NET module are illustrated in Figure 12. Upon power-up, all LEDs
should light for the duration of the initialization process. The frame is
powered up when either of the AC mains connections are made on the rear
of the frame (Figure 6 on page 14 for Gecko frame and Figure 7 on page 14
for GeckoFlex frame).
After initialization the Power LED will be on and the red Network Module
LED (labeled NM) should be off. All other LEDs report detected fault con-
ditions within the frame and the installed modules. If the NM LED does not
go off, the board needs servicing.
Note When a media module is first plugged into an 8900 frame, the 8900NET
module may report a momentary fault. This will clear once the media module
has booted up.
Figure 12. LEDs and Configuration Switches on the 8900NET Module
LEDs on the 8900NET module primarily indicate status items from the
frame and the modules in the frame. Some functions specific to the
8900NET module are also reported (PWR, ETHER, COMM). LED reporting
for each specific LED on the front of the 8900NET module can be disabled
if desired on the LED Reporting web page (LED Reporting Web Page on
page 48).
Table 2 on page 21 describes all the module’s LEDs and the conditions indi-
cated.
FAN (red)
MOD - Module Health Bus (red)
PS1 - PowerSupply 1 (red)
PS2 - PowerSupply 2 (red)
TEMP - Temperature (red)
S1
8
7
6
5
4
3
2
1
87
6
5
4
3
2
1
PWR - Power(green)
Red = Fault
Green= OK
Yellow = Active
LED ColorKey
NM - Network Interface Module (red)
FB - Frame Bus (red)
COMM - Communication(yellow)
ETHER - Ethernet communiction
(yellow)
REM OVR - Remote Override
(yellow)
FAULT - Frame Fault (red)
INHIB - Module Health Inhibited
(yellow)
ConfigurationDIP switch S1
0612 -06r1
ConfigurationDIP switch S2
Other manuals for 8900NET -
1
Table of contents
Other GRASS VALLEY Network Hardware manuals
Popular Network Hardware manuals by other brands

IndigoVision
IndigoVision 3000 Series Hardware guide

D-Link
D-Link DNR-326 Quick installation guide

ADC
ADC HiGain HRE-420 user manual

SecureCom Video
SecureCom Video V-4408D installation guide

EnerSys
EnerSys Alpha Cordex 48-650W Technical guide

Patton electronics
Patton electronics DigiLink-V 2530 user manual