INSTALLATION INSTR CTIONSIMPORTANT INFORMATION
1. This heater must be installed in accordance with the Building Regulations. These may be
obtained from HMSO or viewed and downloaded from www.communities.gov.uk
following the link for Building Regulations.
2. If in any doubt consult a qualified electrician.
3. This heater is designed for wall mounting and must be used horizontally, this heater should
not be used vertically and should not be used as a free standing portable appliance.
4. If the heater is to be installed in a location where it may be touched, or could cause
injury, we recommend fitting a protective guard which is designed specifically for this
purpose ( art no: TUBG).
5. This heater must be installed so that switches and other controls cannot be touched by a
person in the bath or shower.
6. The mounting position should allow the free movement of air around the heater.
Obstructing the air flow could result in overheating.
7. Switch off the mains before commencing installation and remove the appropriate circuit
fuse.
8. Suitable for indoor use only.
9. This product is suitable for installation on surfaces with normal flammability (indicated by
the “F” in a triangle) e.g. wood, plasterboard, masonry. It is not suitable for use on highly
flammable surfaces (e.g. polystyrene, textiles).
10. Before making fixing hole(s), check that there are no obstructions hidden beneath the
mounting surface such as pipes or cables.
11. The chosen location of your new heater should allow for the product to be securely
mounted (e.g. to a solid wall) and safely connected to the mains supply.
12. Do not site the heater directly beneath a mains outlet socket.
13. If the location of your new heater requires the provision of a new electrical supply, the
supply must conform with the requirements of the Building Regulations.
14. This product is designed for use with a permanent connection to fixed wiring, this should
be either a suitable ring circuit (protected with a 5 or 6 Amp MCB or fuse) or a fused spur
(with a 3 Amp fuse) via a fused connection unit. The supply must incorporate a switch or
other means of disconnection.
15. Make connections to the electrical supply in accordance with the following code:
Live-Brown or Red
Neutral-Blue or Black
Earth-Green and Yellow
16. If the supply cord is damaged, it must be replaced by a qualified persons in order to
avoid a hazard.
17. If you have made a fixed connection to the mains, you are advised at every stage of your
installation to double check any electrical connections you have made. After you have
completed your installation there are electrical tests that should be carried out, these tests
are specified in the Wiring Regulations (BS7671) referred to in the Building Regulations. If in
doubt consult a qualified electrician.
18. This product is not intended to be used by children and persons with sensory, physical
and/or mental impairments that would prevent them from using it safely.
WARNING - To avoid overheating, do not cover the heater. This product becomes hot!
!
Single Heater:
1. Choose the location for your new heater giving consideration to all of the points above.
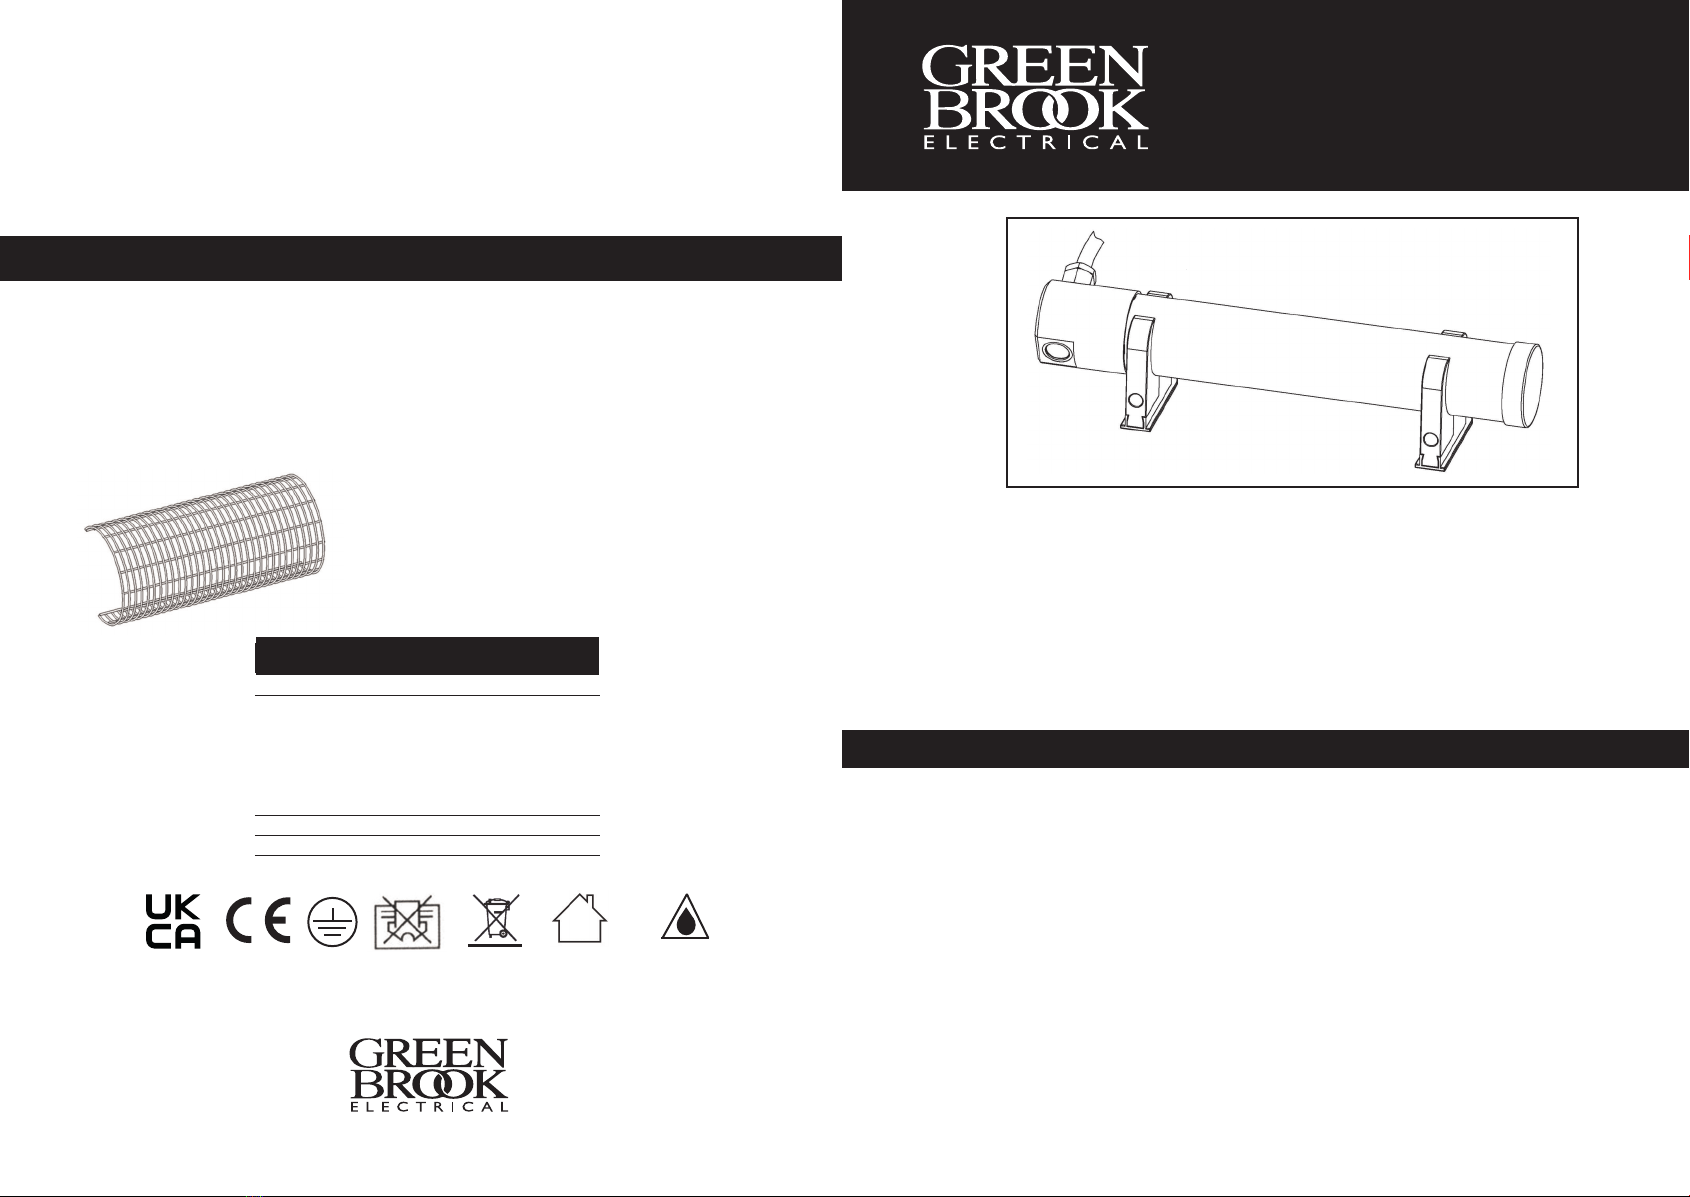
2. Fit the plastic clips onto the fitting and slide towards each end of the heater. See below
for assembly diagram.
3. Hold the heater against the mounting surface and mark the position of the fixing holes.
4. Remove the plastic clips.
5. Use a spirit level to check holes are level.
6. Make fixing holes using a No.8/5mm drill bit.
7. Insert the plastic plugs and secure the bottom part of the clip using screws supplied.
If the screws supplied are not appropriate for your installation, choose suitable
alternatives.
8. Rest the heater onto the plastic clips and secure in place.
9. Make connections to the mains supply according to the colour code opposite or plug
in.
10. Restore the power supply and switch on.
Multiple Heaters:
1. Follow the directions for fitting of a single heater for each of the locations where a
heater is required. Do not fit one heater directly above another.
2. Loosen the screw in the end of the heater and remove the end cap. Take care
removing the end cap not to pull the wires out of the terminals. Ease the cable back
through the gland/nut as you pull the end cap away.
3. Cut out required blank cable entry and fit a cable gland. The gland should be inserted
with the short thread entering the cap and the large nut remaining on the outside.
4. Tighten securely but take care not to overtighten.
5. Check the length of cable required between the two heaters and cut to length giving
sufficient spare to enter the first heater.
6. Loosen the new cable gland/nut and thread the cable through.
7. Strip back the cable end with approximately 25mm of coloured insulation showing and
approximately 5mm of bare conductors.
8. Make the connections to the heater making sure that both supply and through
connections are secure and that there are no strands of wire protruding from the
terminal block.
9. Secure the spare cable clamp in position using the screws provided.
10. Secure the plastic end cap back in position threading both cables back through the
gland/nuts.
175mm minimum
50mm minimum
50mm minimum
NOTE: You may experience a smoke vapour when heater is irst switched ‘On’, this is
caused by a protective coating, this will clear a ter two minutes.
Tubular Heater In Apr 21.qxp_Layout 1 26/04/2021 13:29 Page 2