manuals.online logo
Brands
  1. Home
  2. •
  3. Brands
  4. •
  5. Green Power
  6. •
  7. Garbage Disposal
  8. •
  9. Green Power GPCC1524 User manual

Green Power GPCC1524 User manual

Owner's Manual
Operation Instructions
1. LED indicator and seven-segment digital display
Connect the charger to the battery. Turn on the mains. The charger enters the charging mode (the battery type indicator shows the default battery
type). The status indicator - % Percent, Battery Voltage, Charging Current and the seven-segment digital display will show the charging status.
Maintenance Instructions
1.
Do not expose charger to oil, dirt, mud or direct heavy water spray when cleaning vehicle.
2.
The enclosure of the charges has been tested successfully to IEC 60529, meeting IP66 or IP67 (see silk screen of the device).
3.
If the detachable input power supply cord set is damaged, replace with a cord that is a safety approved detachable cord, 3 conductor, 1.5
mm² minimum, and rated appropriate for use in the country of destination and, on the other end, an output grounding type IEC 60320 C14 plug.
Product Specifications
% Percent: Battery capacity % indicator. i.e. 10, 20, 30…… 100 (%)
Battery Voltage (V): Battery voltage indicator. i.e. 24.0(V)
Charging Current (A): Charging current indicator. i.e.15 (A)
Model GPCC1524
DC Output
Voltage-Range(V) 0-34V
Current-Range(V) 0-15A
Output Power(W) 510W
Power Error(%) 1%
Applicable to Battery AGM, WET, GEL, Lithium
Reverse Polarity Electronic protection-auto-reset
Short Circuit Electronic protection-auto-reset
AC Input
Voltage-Range(V) 100-240V
Frequency(Hz) 50-60Hz
Current-max(A) 5A
Full Load AC Power Factor >0.98
Dimensions 22.6*15.2*8.1cm
Weight 2.5KG
Operating Temperature -40℃~+65℃
Storage Temperature -40℃~+70℃
3.
Status indicator and seven-segment digital display:
4. The instruction for cable connection:
1 Connect the battery. 2 Interlock Cable (When charger is charging, the interlock
cables will form an open circuit with no voltage. When charger is not charging, the
interlock cable will form a short circuit with no voltage).
3Connect AC input wires.
4 Connect CANBUS or LED light wire (Optional function)
Warning: Assure the battery connection cable is
well connected with the charger before it is connected to the battery. Otherwise, the
battery short circuit may occur and cause personal injury or damage to the battery.
Seven-segment digital display
fault code Fault Cause Solution
E01 The battery is not well connected
or battery reversely connected or
battery damaged.
1)
Check battery connection iscorrect.
2)
Check charger connection iscorrect.
3)
Check each battery isgood..
E02 Abnormal AC Power Input (Voltage).
1)
CheckAC input cord isconnected between charger and AC outlet.
2)
Make sureAC plugis tightly inserted into AC outlet.
E03 Charger High Temperature
Protection.
1)
Charger shuts down and enters protection mode due to charger/environmental
temperature istoohigh.Please placethechargerina well-ventilatedenvironment.
2)
Disconnect the charger and wait for 15-20minsbefore reconnecting for charging.
E04 Battery High
Temperature Protection. 1) Charger will reduce current even stop charging to prevent the battery from
overheating when battery temperature exceeds the preset value.
2) When the battery temperature drops, the charger will restart automatically.
E05
1)
Discharging activities during charging cycle.
2)
Battery low voltage detected during charging
cycle.
3)
Output current is too high
(E05 will reappear even after unit reset).
1)
Make sure no discharging activity duringchargingoperation.
2)
Reset charger (disconnectAC power andreconnect fora2nd charge cycle).
3)
If E05 reappear within 10 minutes, please return charger tofactory forrepairing.
E06 Battery Voltage is too high. Check and assure that the correct output battery voltage is connected.
E07 Address declaration failure Return to the factory for repairing.
E08 Internal error in product. Return to the factory for repairing.
E10 Relay Fault Return to the factory for repairing.
E11 Battery error (battery damaged or
battery system error) Replace battery
Fault Indicator
2
。INTERLOCK
1
。
4
。
3
。
DC OUTPUT CANBUS/LED AC INPUT
@
Powering
everyday
everywhere!
%Q
vQ
A
Press 5 s: Change charging profile
10 s: Start EQ mode (Wet Battery)
Battery capacity % indicator
Battery voltage indicator
To change the charging profile, press & hold the Select button
for 5 seconds, then press the Select button to choose the
desired profile. Once selected, press & hold the Select key for
5seconds, and the charging profile selection will be completed.
To start EQ mode, press & hold theSelect button for 10
seconds, and display will show EQmode. The next charging
cycle will gointo EQ mode. If you want to quit the EQ mode,
hold the Select button for 10 seconds. When display shows
OFF, the charger will quit the EQ mode.
Note: Each operation interval is 5 seconds. If the operation
interval exceeds 5 seconds, it will automatically return to the
default setting.
2. Common Mode(Default) & BMS Mode
Select button Charging current indicator
a. The charger enters BMS mode when being connected to lithium-ion battery through Can Bus;
b. For safety reason, the charger will flash "bnS" if being reconnected to Lead-acid battery under a BMS mode;
c. Press & hold the Select button for 3 seconds in BMS mode to release the curve number, that is, switch back to normal mode.Press & hold
the Select button for 1 seconds to choose the desired profile.
GPCC1724
0-34V
0-17A
578W
GPCC3012
0-17V
0-30A
510W
使用说明书
一、警告信息
请在使用本产品前详细阅读使用说明书,理解这些安全指导
,
并保存好此说明书以方便取阅。
警告:只可以使用稳压电源系统中可选择的稳压供电程序来选取适当的电池类型。其它的使用可能会造成人身伤害或稳压电源的损
坏。在稳压供电的过程中,铅酸电池可能产生爆炸性的氢气体,请远离火花.火焰。或易燃易爆的物体。在稳压供电过程中,保持
通风良好,在有对流的环境下工作。不可充冰冻电池。阅读所有电池厂商的注意事项,比如:稳压供电速度及可单独稳压供电或不
可单独稳压供电的电池单元。
危险:冒电击的危险,连接稳压电源输入线的插座必需是按当地安规条例安装有地线的插座,接地良好的插座减少电击的危险。不
能接转接器或更改过的插头。不要用手接触稳压电源输出端非绝缘部分和电池端非绝缘部分。当稳压电源正在稳压供电时,需要断
开AC 线,才可以终止电池连接。不可打开或拆散稳压电源。假如AC 线损坏或是稳压电源被重击、跌落地下,以及其它的任何情况下损
坏,都不可使用稳压电源。有关修理工作,请让有相关资格证的人员进行。有精神缺陷或缺乏使用经验和安全知识者勿用此机器,
除非在专人监督和指导下安全使用。不可让小孩使用稳压电源。
二、操作说明
1.
LED 指示灯和数码显示
将稳压电源与电池连接好,接通市电,稳压电源进入稳压供电模式(电池类型指示灯显示默认电池类型);状态指示灯: % Percent,
Battery Voltage, Charging Current 及数码显示会循环显示稳压供电状态。
四、保养建议
五、 产品规格参数
型号 GPCC1524
DC 输出 电压范围 0-34V
电流范围 0-15A
最大功率 510W
功率误差% 1%
适用电池 AGM, WET, GEL, Lithium
极性接反 自动保护
短路 自动保护
AC 输入 电压范围 100-240V
频率 50-60Hz
最大电流 5A
满载时功率因数 >0.98
尺寸 22.6*15.2*8.1cm
重量 2.5KG
工作温度 -40℃~+65℃
存放温度 -40℃~+70℃
% 容量%指示灯:显示当前供电%,数码显示具体百分比值:10 20 30…… 100 (%)
V 电池电压指示灯:显示当前供电的电池电压,数码显示具体电压值: 24.0(V)
A 稳压供电电流指示灯:显示当前电池的稳压供电电流,数码显示具体电流值: 15 (A)
4.接线示意图
1 连接电池正负极
2 稳压供电锁车线 (在稳压供电时,稳压供电锁车线
为开路, 无电压;不稳压供电时,稳压供电锁车线为短
路,无电压)
3 连接AC 市电
4 连接 CANBUS 或者连接 LED 灯线(产品可选功能)
警告: 在将电池连接线连接到电池的过程中, 请确保
电池不被短路,否则可能会造成人身伤害及电池损坏
的危险。
1
。
4
。
3
。
2
。锁车线
DC输出 CANBUS/LED AC输入
数码显示
三、故障显示
错误代码
故障原因
排除办法:
E01
输出没接电池或接反,短路,
坏节。
1)检查电池组是否连接正确。
2)检查稳压电源是否连接正确。
3)检查电池组中的单个电池是否损坏。
E02
市电不正常(电压。)
1)检查 AC 电源线是否连接在稳压电源和 AC 插座之间。
2)确保 AC 插头紧插在 AC 插座上无松动。
E03
稳压电源高温保护。
1)稳压电源内部或环境温度过高,稳压电源将关闭并进入高温保
护模 式。请把稳压电源放在通风良好的环境工作。
2)断开稳压电源,等 15-20 分钟后再重新连接稳压电源。
E04
电池高温保护。
1)当电池温度超过预设值后,稳压电源会关闭输出,防止电池继续过热。
2)当电池温度下降后,稳压电源会自动重启。
E05
1)充电过程中放电。
2)充电过程中,电池电压太低。
3)输出电流太高(在重启机
器
后,E05 仍出现)。
1)在充电过程中,确定没有放电。
2)重启稳压电源(断开AC 电源,重启稳压电源进行充电)。
3)如果重启稳压电源 10 分钟内再次出现E05,退回维修。
E06
电池电压过高。
检查并确保连接正确的输出电池电压。
E07
地址声明故障
退回返修。
E08
内部错误。
退回返修。
E10
继电器故障
退回返修。
E11
电池错误(坏节或电池系统错误)
更换电池。
1. 洗车时,请勿将稳压电源暴露在有油、污垢、淤泥的场所或用高压水枪直射稳压电源。
2. 稳压电源通过IEC 60529 测试,且符合IP66 或者 IP67 等级 (详见机身丝印)
3. 如果可拆卸的输入线损坏,请使用符合安规认证及工业适用等级最小 1.5 平方毫米的 3 芯电源线,线的一端,带地线并
符合国家 标准的插头,另一端,接地类型 IEC60320C14 的插头。
@
Powering
everyday
everywhere!
%Q
vQ
A
Press 5 s: Change charging profile
10 s: Start EQ mode (Wet Battery)
容量%指示灯
电池电压指示灯
2.普通模式和BMS模式(默认为普通模式)
a 稳压电源通过 CAN总线与锂电连接,稳压电源进入BMS模式。
b 为了安全起见,如果在 BMS模式下重新接上铅酸电池,稳压电源会闪烁“bnS”,提示没有通讯,不能供电。
c 在BMS模式下按住 Select 键 3 秒松开,显示曲线号,即切换回普通模式,按 Select 键 1 秒松开切换电池曲线。
3.供电状态指示灯及数码显示:
按住Select 键 5 秒松开,数码显示当前供电曲线代码;轻按
1 秒松开,切换供电曲线代码,如选定供电曲线代码,按住
Select 键5 秒,供电曲线代码快闪,松开按键,电池设置完
成。如需更改请重复以上操作。
按住Select 键 10 秒,数码显示快闪EQ 字符松开按键,此时
代表稳压电源进入EQ 模式;如要退出EQ 模式,同样按住
Select 键10 秒,数码显示快闪OFF 字符,松开按键,稳压电
源将退出EQ 模式。
注:每次操作间隔时间为 5 秒,如操作间隔时间超过 5 秒,
会自动回默认设置状态。
选择按钮 稳压供电电流指示灯
GPCC1724
0-34V
0-17A
578W
GPCC3012
0-17V
0-30A
510W
Battery category and program code contrast table/电池曲线对应表:
Numbering Battery brand Battery Mode
b11 Generic Common type of Flooded
b02 Trojan Trojan T-105
b06 Trojan Trojan 30XHS
b01 Trojan Trojan T1275 (两串)
b14 Hoppecke 12TB-115 AGM
b30 US Battery US 12VXC2
b45 G&Yu EB100
b46 Fullriver DC85-12
b47 Fullriver DC115-12_(Float-Mode)
b48 Discover
b77 US Battery US 27DC XC2
b78 Super B SB12V160E-ZC
b79 Trojan 24TMX
b80 Trojan 27TMH
b81 Fullriver DC115-12_(3-Stage-Mode)
101 Leoch(理士) DT1275(LG)
122 Leoch(理士) 6-EV-100
125 FENGRI 6-DM-80
126 Leoch(理士) 6-EV-75
134 Hoppecke 12TB90 AGM
142 BSLBATT B-LFP24-120
144 Fullriver DC55-12
145 NBA 4GL12N
146 Discover EV12A-A
147 Discover EV12A-B
148 VISION EV24-85A-AM
158 超威 6-EVF-100
159 山东圣阳 6-EV-100
163 SAMSUNG INR18650
167 US Battery US 31DC XC2
174 QUIMO QM 80~130
181 嘉得力锂电池 TB24100F-T110C
184 理士 DJM12120
185 XUPAI(旭派) 6-EVF-75
186 LUMINOR LDC12-80
187 LUMINOR LDC12-100
188 Zenith ZL120185
191 US Battery 24DC XC2
194 LUMINOR 24XMP
210 RoyPow S2480-8S1P
REV E
EV31A-A
b03 Discover Discover AGM (80-150Ah)
b04Discover Discover AGM (250Ah)
b10 Trojan Trojan T145
b12 Discover EVGC6A-A
b13 Trojan Trojan T605
b20 US Battery US 2200XC2
b22 Hoppecke 6TB-220 AGM
b19 US Battery US 2000XC2
b32 US Battery US 125XC2
b33 US Battery US 145XC2
b28 Generic Common type of AGM
b42 天能 3-EVF-200
b50 超威 6-EVF-200A
b86Generic Generic 200~300Ah
95 EXIDE GC3-105
127Trojan 6V-AGM

This manual suits for next models

2

Other Green Power Garbage Disposal manuals

Green Power LEGRAND ZLGP16 User manual

Green Power

Green Power LEGRAND ZLGP16 User manual

Green Power TDH 00500 User manual

Green Power

Green Power TDH 00500 User manual

Green Power TDM 00500 User manual

Green Power

Green Power TDM 00500 User manual

Popular Garbage Disposal manuals by other brands

GE GFC530F - DirectWire 1/2 HP Continuous Feed... specification

GE

GE GFC530F - DirectWire 1/2 HP Continuous Feed... specification

Newstripe AeroVent 1 Operation guide

Newstripe

Newstripe AeroVent 1 Operation guide

Caple WDU050 instruction manual

Caple

Caple WDU050 instruction manual

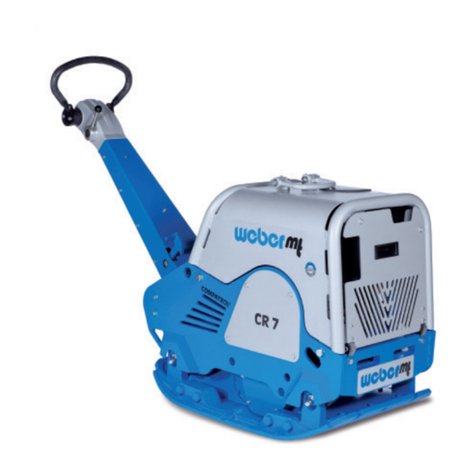
Weber mt CR 9 CCD 2.0 Operating and maintenance manual

Weber mt

Weber mt CR 9 CCD 2.0 Operating and maintenance manual

GE Disposall GFC720V Dimensional information

GE

GE Disposall GFC720V Dimensional information

Gladiator GACP15XXMG0 Use & care guide

Gladiator

Gladiator GACP15XXMG0 Use & care guide

InSinkErator Badger 5XP Specifications

InSinkErator

InSinkErator Badger 5XP Specifications

NatureMill NEO quick guide

NatureMill

NatureMill NEO quick guide

Emerson InSinkErator EVOLUTION PRO 750 manual

Emerson

Emerson InSinkErator EVOLUTION PRO 750 manual

HJH office CLEAN VI manual

HJH office

HJH office CLEAN VI manual

Thetford SMARTTOTE2 LX owner's manual

Thetford

Thetford SMARTTOTE2 LX owner's manual

Electrolux WDU4100 Instruction book

Electrolux

Electrolux WDU4100 Instruction book

MQ Multiquip MVC82VH Operation and parts manual

MQ Multiquip

MQ Multiquip MVC82VH Operation and parts manual

Teral DSP-125H manual

Teral

Teral DSP-125H manual

KitchenAid TC707S1 Use & care guide

KitchenAid

KitchenAid TC707S1 Use & care guide

InSinkErator EVOLUTION COVER CONTROL user manual

InSinkErator

InSinkErator EVOLUTION COVER CONTROL user manual

KitchenAid Imperial KCDI250 Use and care guide

KitchenAid

KitchenAid Imperial KCDI250 Use and care guide

InSinkErator Evolution Septic Assist owner's manual

InSinkErator

InSinkErator Evolution Septic Assist owner's manual

manuals.online logo
manuals.online logoBrands
  • About & Mission
  • Contact us
  • Privacy Policy
  • Terms and Conditions

Copyright 2025 Manuals.Online. All Rights Reserved.