GREEN TOILET Lux Reference manual

MANUAL FOR
INSTALLATION
AND USE

CONGRATULATIONS FOR YOUR NEW,
ECOLOGICAL DRY TOILET!
Green Toilet Lux is an composting toilet that is easy and pleasant to use and service. It is
durable and will serve you for many years to come.
1
PACKAGE CONTENT
porcelain pedestal
(non-separating / urine separating)
with a seat and a lid
Green Toilet composting
container and a spare
container (330 / 120 liters)
ventilation pipes 3 pcs x 100 cm,
joints 2 pcs, metal fixtures 3 pcs,
screws
flexible pipes 50 cm, 2 pcs ventilation pipe hat
(or a wind fan as an option)
canister and liquid hose
150 cm (with urine separating
pedestal 2 pcs of each)
electrical duct fan
(can be replaced with a wind
fan)
waste pipe Ø 200 mm, length
100 cm (also longer/shorter
ones available by order)
bag of dry material

EXAMPLE OF BASIC INSTALLATION OF GREEN
TOILET LUX
2
Green Toilet Lux is installed on two levels:
The porcelain pedestal is placed to the
bathroom and the Green Toilet composting
unit below the floor level to a cellar or outside
to the basement. It is important to ensure
that the waste pipe goes straight vertically
down from the pedestal.
The ventilation is led from the composting
unit outside to the roof level. The electrical
duct fan can be installed anywhere in the
ventilation line. The fan is protected against
dripping water, so it can be placed outdoors
(classification IPX2). However, the fan will last
longer if it is installed into a dry space.The
ventilation pipe can also be led out through a
wall and curves are allowed. If you are using
the electrical duct fan, only a ventilation pipe
hat is needed on the top to prevent the rain to
flow in (included in the package).
If there is no electricity available, then a wind
fan is highly recommended, and the ventila-
tion pipe should go up as straight as possible
without making any curves.
The seap liquid, ie. the excess liquid that
comes out of the composting unit, can be led
to a canister or to a GeoTrap Dry Toilet Filter.
Contact us if you have any questions about the installation of Green
Toilet Lux. You can also send us pictures of the installation site. We are
happy to advise on the right implementation.
tel. +358 50 442 4775 / info@greentoilet.fi

3
ASSEMBLY OF THE NON-SEPARATING
PORCELAIN PEDESTAL
Measure carefully the place for the porcelain pedestal in the bathroom and where the hole
for the waste pipe will be. Check possible floor structures before cuing the hole.
When you have measured the right place, make a hole of 210 mm to the floor. Lead the
waste pipe through the hole so that about 5.5 cm is above the floor level. If the hole for the
pipe is loose, add insulation material.
In the end of this manual you will find instructions for fixing the seat to the porcelain.
Place the pedestal above the waste
pipe so that the porcelain shaft goes
into the black pipe tightly. Lift the
black pipe upwards, if necessary. No
additional or silicone gasket is
needed.
There are fixures for the porcelain
pedestal for fixing it to the floor
included in the package. Those can be
used if the floor is made out of wood.
Alternatively, you can fix the pedestal
to the floor with silicone mass.
Place the black waste pipe to the right
height and aach it with screws either
from upper or the lower side of the
floor. The waste pipe should go some
5-10 cm into the composting unit.
The shaft should come 2-8
cm into the composting unit.
180 mm ± 3
50 mm
5 mm
175 mm ± 3

4
The black waste pipe (diam 20 mm) is assembled as described above. For the separating
pedestal, you will also need make an extra hole of about 30 mm for the liquid hose (Ø 25
mm) on the front side.
The liquid hose is aached to the urine bowl and led down to a canister or to a dry toilet
filter (not included in the package).
There are more detailed instructions for assembly of the urine-separating pedestal
included inside the pedestal package.
ASSEMBLY OF THE URINE SEPARATING PEDESTAL
When you have measured the right place for the pedestal, make a hole of 210 mm to the
floor. Lead the waste pipe through the hole so that about 17 cm is above the floor level.
395 mm
580 mm
480 mm
Waste
pipe

5
ASSEMBLY OF THE GREEN TOILET
COMPOSTING UNIT
First, cover the double base of the
Green Toilet with some organic, dry
material: peat moss, saw dust,
agricultural chopped waste etc.
The layer should be about 10-15 cm to
give a good start for the composting
process. Place the double base into the
container which will come into use first.
Place the composting unit with the open
lid below the waste pipe as described
earlier.
Connect the black liquid hose to the outlet
in the lower front of the Green Toilet and
the other end to the canister (or a filter).
Make a suitable outlet through the wall or
the roof for the ventilation pipe. The
flexible part of the ventilation kit should be
the first part connected to the container.
Thus, it can be easily removed when
servicing the containers.
Preferably, install the duct fan to a dry
place. It should be always on to ensure
the right air flow at all circumstances. The
fan has three power levels to
accommodate dierent use cases. In
many cases the lowest speed level (1) is
enough in domestic use.

6
The liquid hose should lead at least a bit
downwards so that the excess liquid can
flow out of the composting unit.
Sometimes the Green Toilet container has
to be placed on a small platform to get the
liquid flow downwards.
Aach the end of the hose to a canister or
to a filter. If possible, a secure hole for the
canister can be made.
USE AND MAINTENANCE OF GREEN TOILET LUX
The use of Green Toilet Lux is simple: you can use it just like the water toilet, but without
flushing. All toilet waste, together with the toilet paper goes down into the same
composting container. Please note, that any hygiene products that contain plastic should
be put into a separate waste bin. They will not compost and should therefore go with the
other household waste.
Depending on the level of use, it is good to check the liquid canister 1-4 times a month. The
seap liquid can be used directly as fertilizer to non-eatable plants, bushes and trees. When
using the seap liquid, make sure that it cannot get to any water body: well, bond, ditch, sea
or lake.
The porcelain seat can be washed with
water and biodegradable detergent. You
can pour water from a watering can and
use normal toilet brush. You can also use
bidet with Green Toilet Lux for personal
hygiene. Please note, that if you use the
bidet a lot, it is good to add more dry
material to the compost.
Dry material can be added either after
every use, 1-2 dl (one cup) or as separately,
once or twice a week eg. one bucket (10 l).

When the first composting container gets full, it is time to change the container. However,
before you change to a new container, it is good to level and stir the active compost in use.
Many times, this will postpone the need for the change as the composting process is
usually at its best when there is a lot of biomass in the container. So do not hurry too early –
let the compost work for you!
When you do the change, first take the liquid hose out of the container, and lift the end up
so no liquid is spilled. Lift the lid of the Green Toilet container so that you can pull that out
by using the wheels. Then, put the closed lid onto the full container and wheel it out to a
suitable place to decompose. The best place would be a warm, sunny side of the yard to
maximize the power of sunlight.
Fill the double boom of the empty container with a layer of dry material. Place the
container under the waste shaft and close with the lid. The use of Green Toilet Lux can
continue again!
When you make the next change of the container, the compost mass in the first Green
Toilet is probably ready to be used in the garden. The compost is usually very nutritious, so
it is a good idea to mix it with soil or sand before applying to plants. Or – you can use it just
small amounts and spread widely in the garden. When the biomass is fully composted,
after about 8-14 months, there is no fear of pathogens, it can be used anywhere to fertilize
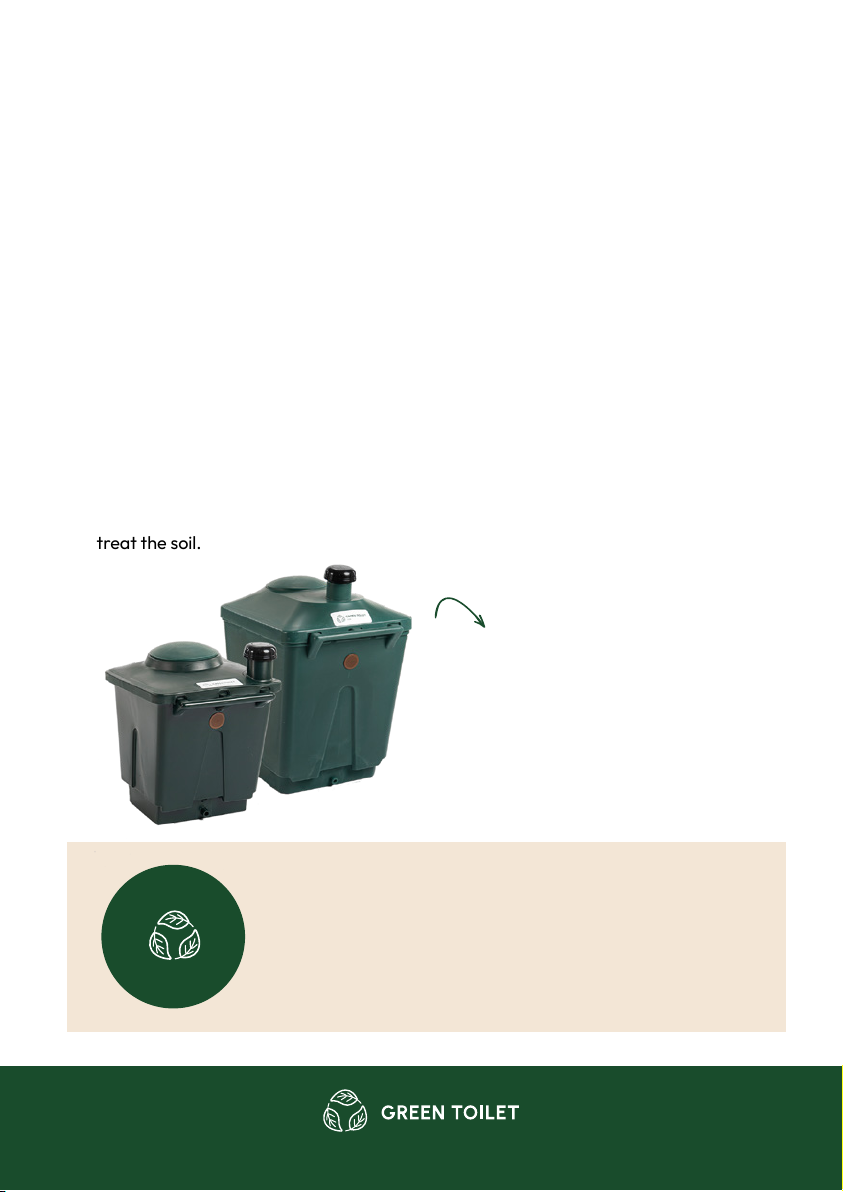
and treat the soil.
Warranty for the containers and the porcelain
pedestal: 10 years, other parts 2 years from the
purchase date.
The warranty applies to a domestic use, not public or commercial use.
The capacity of Green Toilet Lux
system can easily be grown by
acquiring more spare containers.
1
0
Y
E
A
R
W
A
R
R
A
N
T
Y
Meripalo Ltd. Naantali, Finland Tel. +358 50 442 4775 info@greentoilet.fi www.greentoilet.fi
Other GREEN TOILET Toilet manuals
Popular Toilet manuals by other brands

URIMAT
URIMAT ceramic C2 NRV 12401 Installation instruction

Dometic
Dometic SeaLand 4300 Series owner's manual

Toto
Toto MS855CD Series installation manual

Xylem
Xylem Jabsco Lite Flush Step-by-step guide

Toto
Toto CS735 Series installation manual

American Standard
American Standard H2Optimum 288AA installation instructions