SAFETY INFORMATIONSAFETY INFORMATION
Dress Code
1. No open-toed shoes or high heels allowed. To provide secure footing, choose shoes with
softer soles and stable platforms. Wearing appropriate footwear will help protect feet
from falling components.
2. No loose clothing allowed. This includes but is not limited to ties, scarves and loose-
sleeved shirts.
3. Remove all jewelry that could be caught in moving machinery. This includes rings and
loose bracelets. Remove necklaces and the like, if not securely restrained.
4. Restrain all hair, including beards, that has potential for entanglement with moving
machinery.
NEVER supply power to the machine if it is without any of its guards or hopper.
NEVER put hands or arms near the machine during operation.
HIGHLY recommended to be operated in conjunction with a GreenBroz Rise Conveyor.
CAUTION
BURN HAZARD
The motors and other moving parts or guards may heat up during
operation. Give the machine time to cool before cleaning or servicing.
CAUTION
HAZARDOUS VOLTAGE
Use precautions when plugging and unplugging the machine and
components from any power sources.
CAUTION
OSCILLATING MECHANICAL PARTS
Moving machine parts have the potential to cause severe injury or death.
All machine components must be fully secured before operation and are
essential for protecting users. Never place hands or other body parts near
the machine during operation
CAUTION
ROTATING MECHANICAL PARTS
Rotating machine parts have the potential to cause severe injury or death.
All components must be fully secured before operation and are essential
for protecting operators. Never place hands or head near the machine
during operation.
844.DRY.TRIM info@greenbroz.com greenbroz.com 3
Safety Information ......................................................................................................3
Introduction ................................................................................................................4
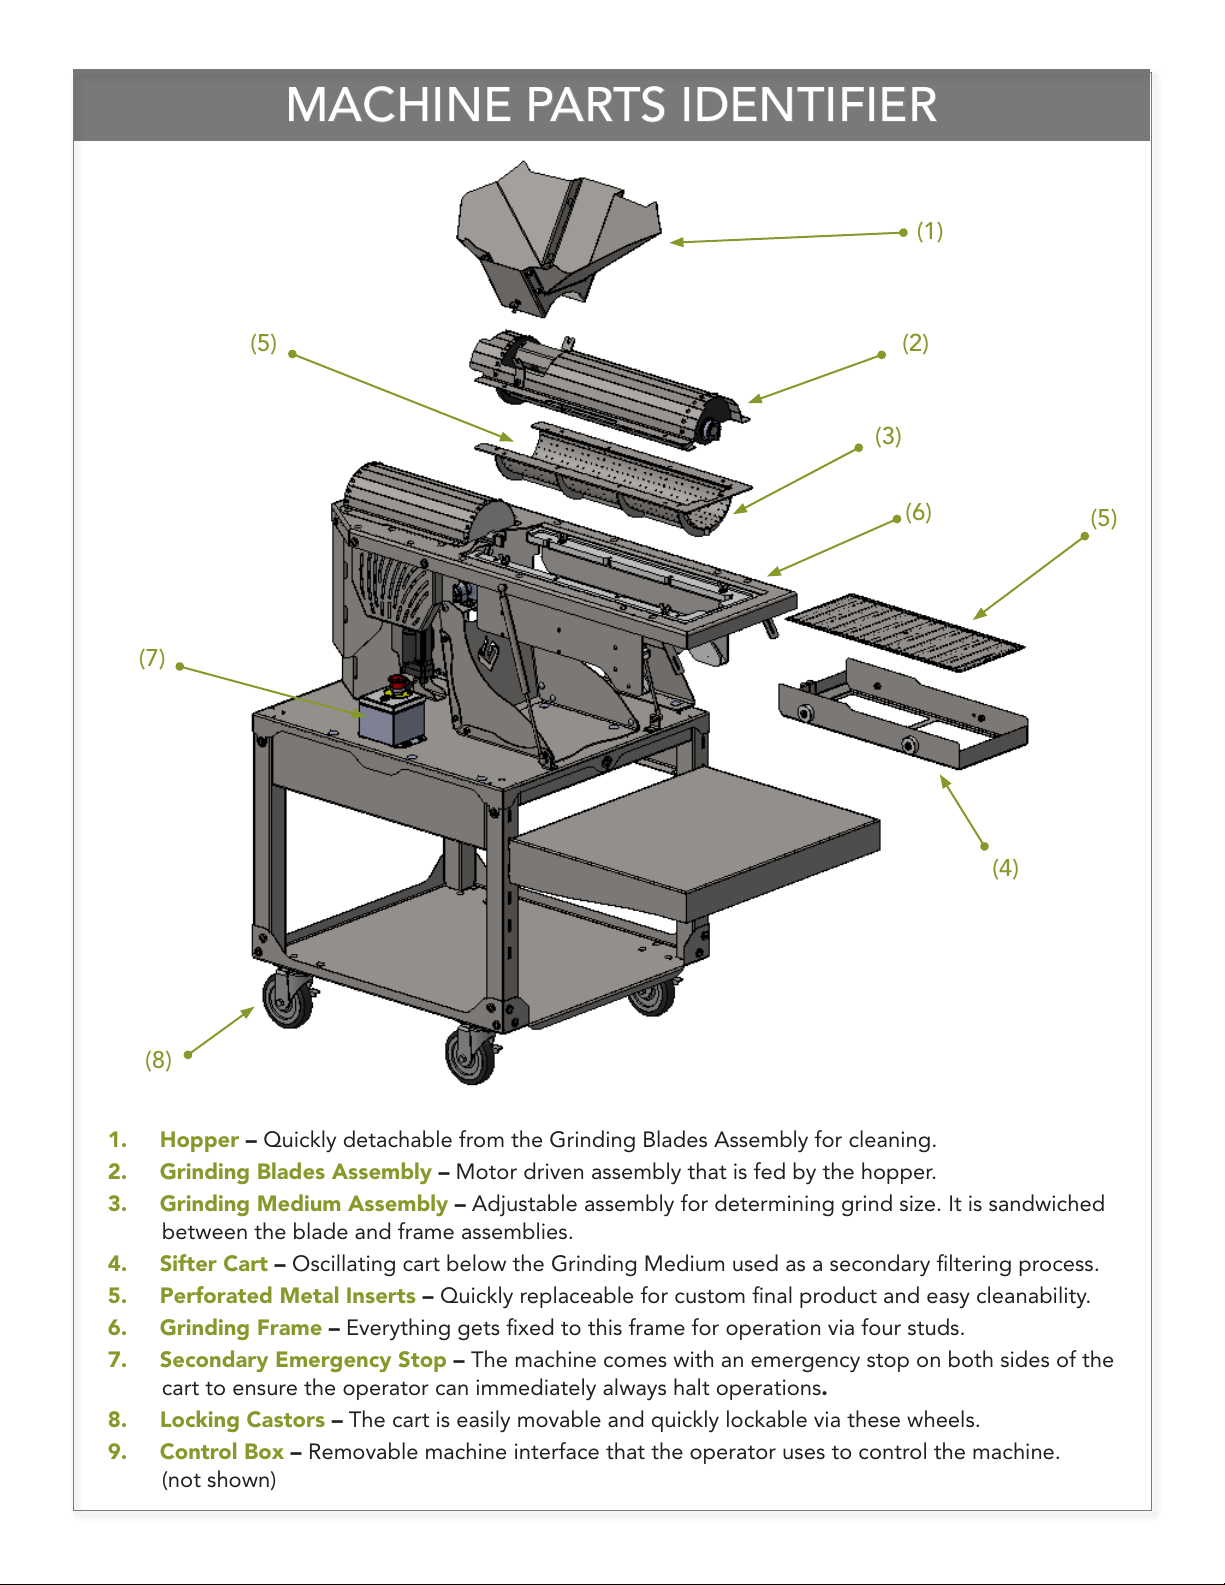
Machine Parts Identifier ..............................................................................................5
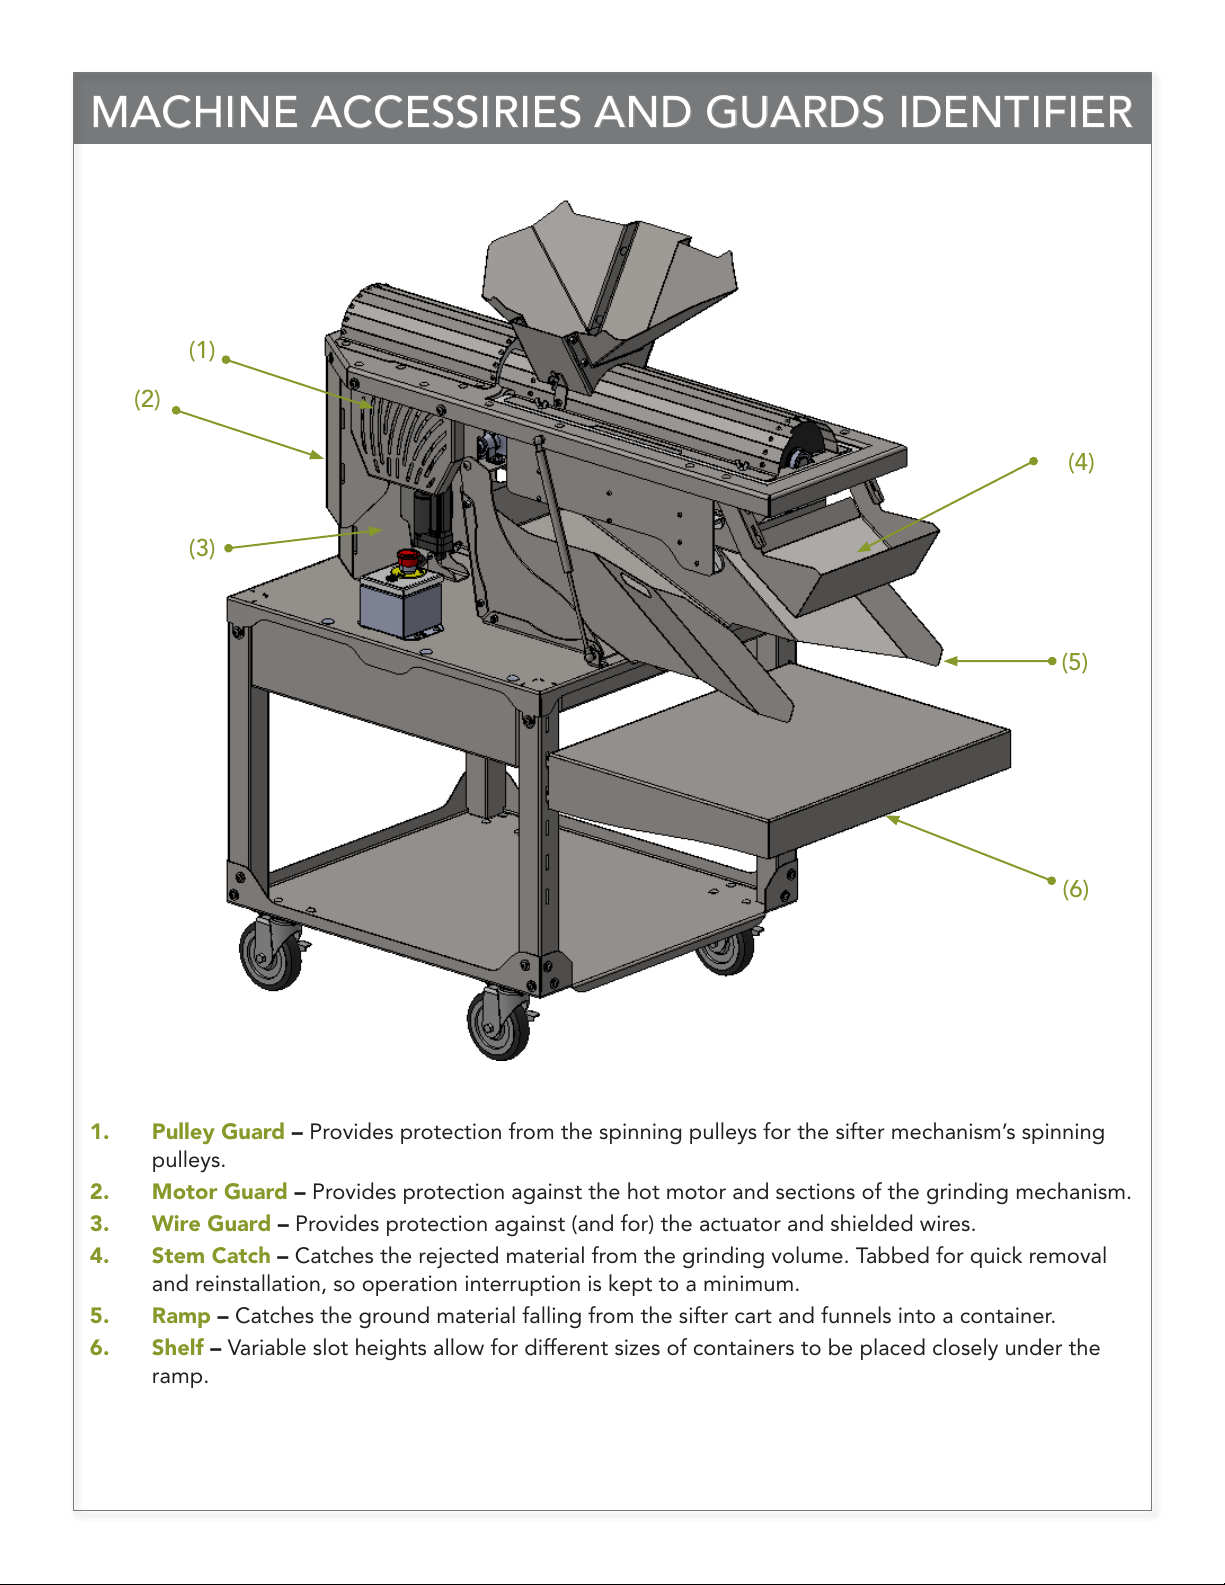
Machine Accessories and Guards Identifier..................................................................6
Technical Specifications................................................................................................7
Unpacking and Installation ..........................................................................................7
Unpacking.........................................................................................................................7
Control Box Installation....................................................................................................8
Sifting Cart and Screen Installation..................................................................................9
Grinding Medium & Blades Installation & Details .........................................................12
Hopper Installation & Details..........................................................................................13
Removable Accessories Installation & Details................................................................14
Locking Castors Adjustment..........................................................................................16
Machine Operation & Details.....................................................................................17
Shut Down......................................................................................................................19
Cleaning and Sanitation.............................................................................................20
Removable Machine Accessories ..................................................................................21
Machines Cart and Frame ..............................................................................................21
Grinding Blades Assembly .............................................................................................23
Grinding Medium Assembly............................................................................................24
Sifter Cart Assembly .......................................................................................................24
Troubleshooting.........................................................................................................25
Maintenance..............................................................................................................28
Checking Bearings and Bearing Housings.....................................................................28
Pulley Belt Replacement ................................................................................................31
Modular Systems.......................................................................................................32
Warranty Registration...............................................................................................33