ROTISSERIE KIT WITH MOTOR
INSTRUCTION
When using electric appliances always observe safety regulations to reduce the risk of fire, electric shock
and personal injury.
Always check that the power supply corresponds to the voltage on the rating label on the underside of the
appliance.
1. This appliance is not intended for use by persons (including children) with reduced physical, sensory
or mental capabilities, or lack of experience and knowledge, unless they have been given supervision
or instruction concerning use of the appliance by a person responsible for their safety.
2. Children should be supervised to ensure that they do not play with the appliance.
3. Always unplug the appliance from mains supply when not in use. If the supply cord (100505) is
damaged, it must be replaced by a special cord or assembly available from the manufacturer or its
service agent.
4. Do not use accessory attachments which are not recommended by the manufacturer, as they may
cause injury.
5. Do not place the spit motor on or near a hot surface, such as gas or electric burners, or in a heated
oven. To avoid damaging the spit motor. If using a barbecue with a side burner, do not use the side
burner if the spit motor is fitted to the same side as the burner. It is recommended to fit the spit motor
on the opposite end to the side burner. Note in some cases the projection of the spit may preclude
using the side burner on some appliances, if mounting this way.
6. Do not use the appliance for anything other than the intended use.
7. CAUTION: To reduce the risk of electric shock, keep extension cord connection dry and off the
ground.
8. Do not immerse the motor in water. Do not immerse any part of the motor or supply cord in water.
Do not use wet with wet hands or in damp environments.
9. Always use gloves when using rotisserie. Do not touch hot surfaces.
10. To turn motor on/off, always use the switch then turn off at main power supply.
NB: This appliance is for outdoor use on barbecues as shown.
READ AND SAVE THESE INSTRUCTIONS
Carefully read this manual before using the GRILLMAN rotisserie. Make sure that you know how to
operate the appliance. Maintain the appliance in accordance with the instructions to ensure that
it functions properly. If the appliance is to be used by a third party, this instruction manual must
be supplied. No liability can be accepted for any damage caused by non-compliance with these
instructions or any other improper use or mishandling.
BALANCING OF FOOD ON THE SPIT PRIOR TO COOKING
It is very important to ensure your food is evenly balanced on the spit rods prior to cooking. Unbalanced food can lead to
burning or over cooking on one side. Meats such as poultry, fish or soft meats can break away from the rod if not evenly
balanced along the rod. Loose food can also jam between the grill and the rod, causing the motor to stall. This additional
pressure on your spit motor can reduce the life span of the motor. Food which is centred and balanced will cook evenly and
present better.
HOW TO CHECK THE BALANCE
Roasts are the easiest foods to balance, due to their shape and texture.
It is best to test the balance of your food on the spit prior to cooking. Place the rod through the centre of the food. To test
the balance, rest one end of the spit rod on a table, or edge of hot plate. Hold the other end with the palm of one hand.
Attempt to turn the food on the rod, by turning the rod in your hand. If the food falls to one side, then re-centre the food.
For foods that are difficult to balance a spit counter balance (not included) can be used.
It is recommended when cooking poultry and leg roasts, to tie any loose parts close to the main body. Legs and wings of
poultry can break away from the body as the meat softens, causing burning. To prevent wings and legs from burning, use
cooking foil to cover.
COOKING
Most food can be cooked with indirect heat (food placed between two outside burners), with the hood of the barbecue down.
This will prevent any flare up and smoking caused by dripping fats. If a charred finish is desired, direct heat is required. It is
recommended to do in the final stages of cooking (approx 10-15 minutes), with the hood up.
A very useful tool to determine cooking time is a meat thermometer (not included). Probe the meat in the centre with the
meat thermometer, avoid any solid bone. Cooking times are usually the same as in a domestic oven.
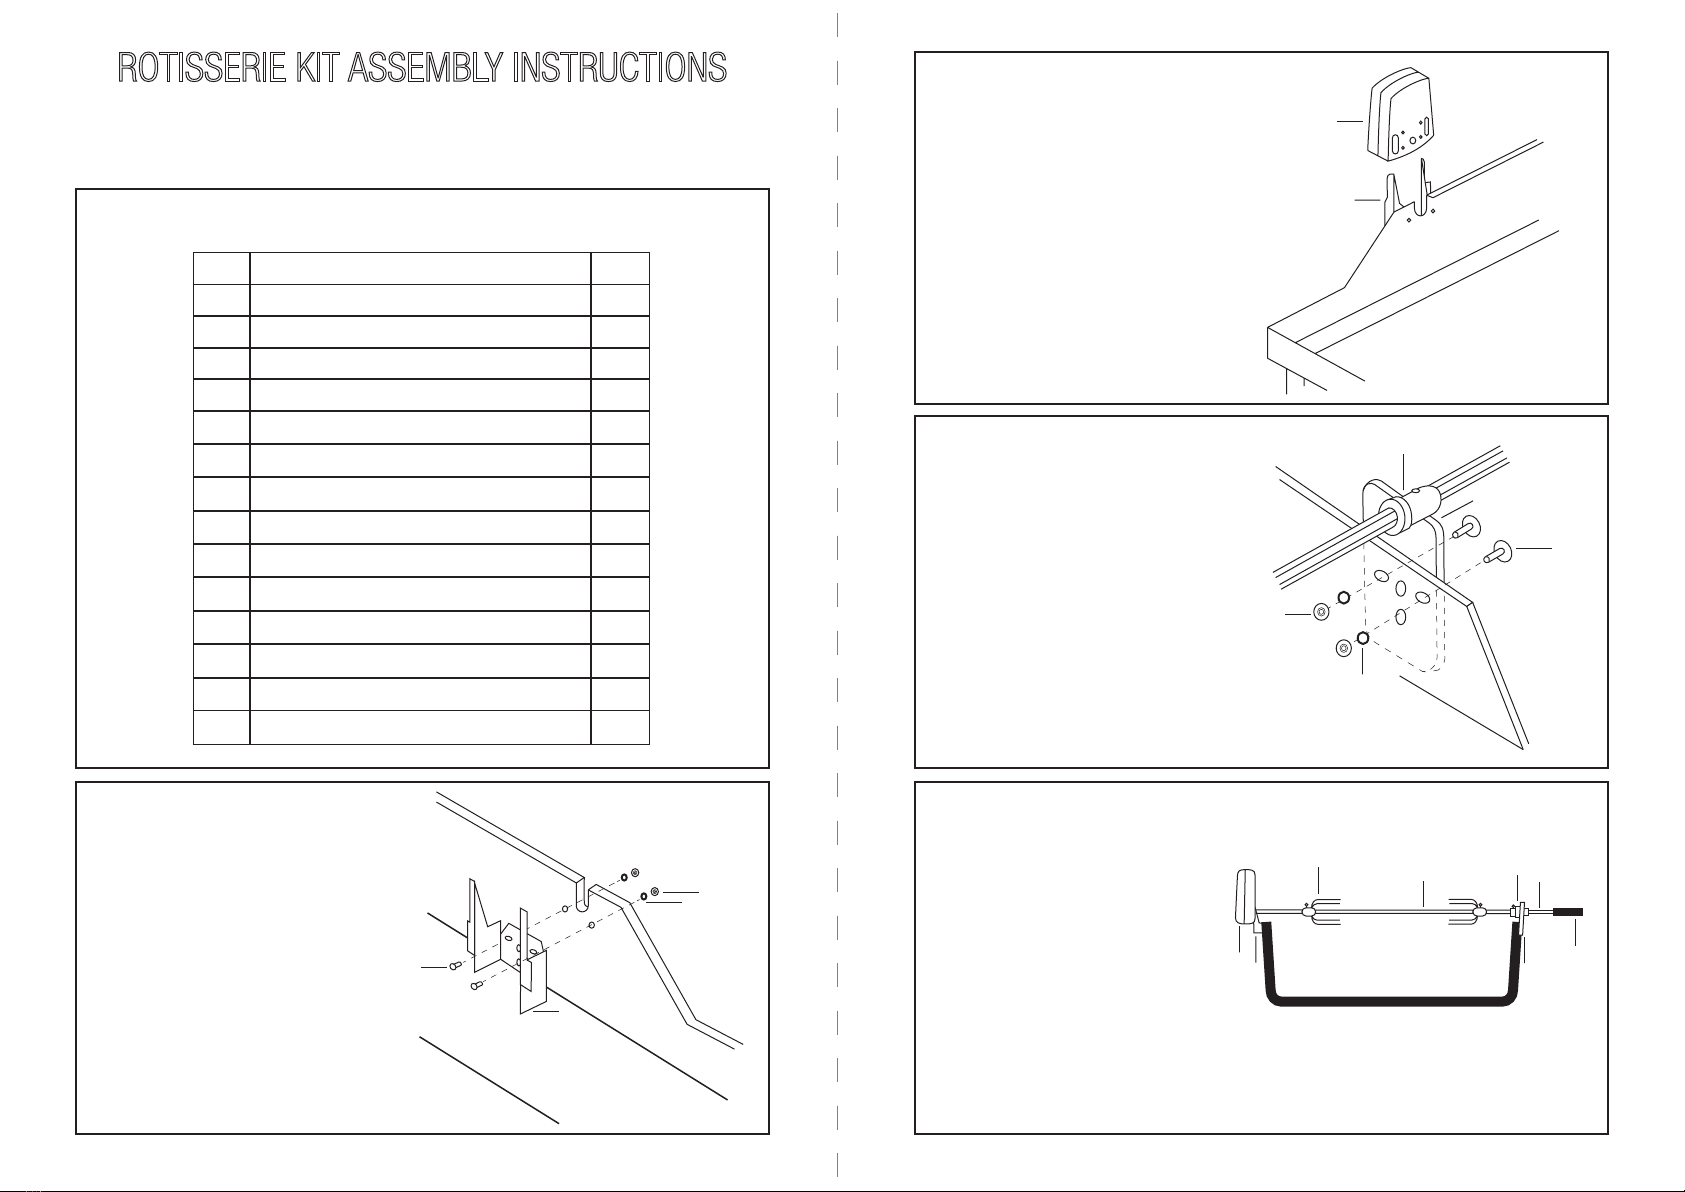
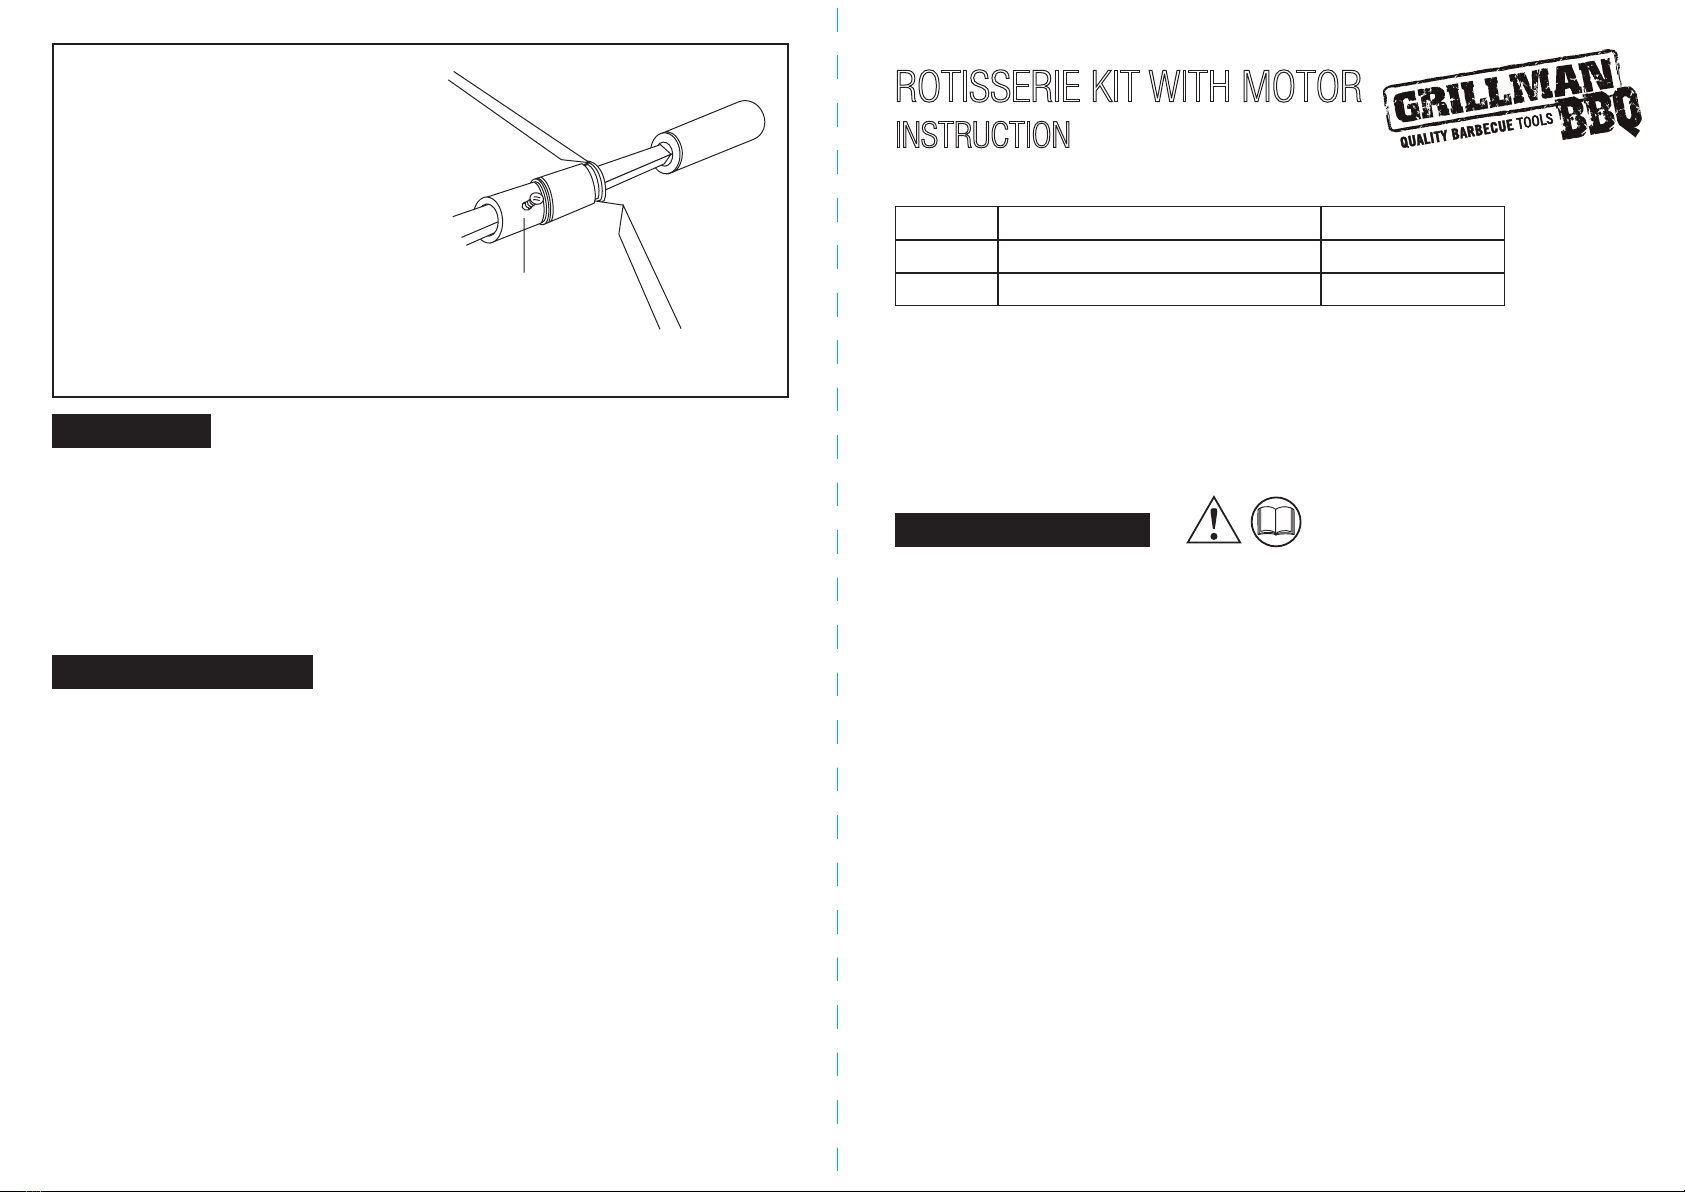
STEP 6 – Fit pointed end of spit rod
combination into motor. Slide the bush (10)
onto the opposite end and position so that
the bush sits in the rod support bracket
(9). Tighten bush thumbscrew. Screw the
handle (7) to the threaded end of the spit
rod combination. The spit rod can be easily
removed from the brackets by lifting the rod
by the handle and sliding out of the motor.
Bush with
Thumbscrew (10)
Lip edge of BBQ
The spit rod can be easily removed from the brackets by lifting the rod by
the handle and sliding out of the motor.
ITEM CODE DESCRIPTION POWER SOURCE
100505 Rotisserie Kit 240V Electric Motor 220-240Volt AC only
100506 Rotisserie Kit Battery Powered Motor 2 x 1.5V D Batteries
These instructions are related to the following products:
IMPORTANT SAFEGUARDS
Regular maintenance of your appliance will keep it safe and in proper working order.
1. Clean your spit rods and prongs before and after use, with warm soapy water, dry thoroughly.
2. Do not submerge your spit motor in water.
3. Always store your spit motor in a dry place.
NB: Remove batteries from motor when storing (applies to 100506 Model)
4. Always check that your spit motor is in good working condition before use.
NB: Check the power supply cord and plug regularly for damage (applies to 100505 Model)
MAINTENANCE
OPERATING INSTRUCTIONS