GSA instructions Issued Oct 2022
page 10
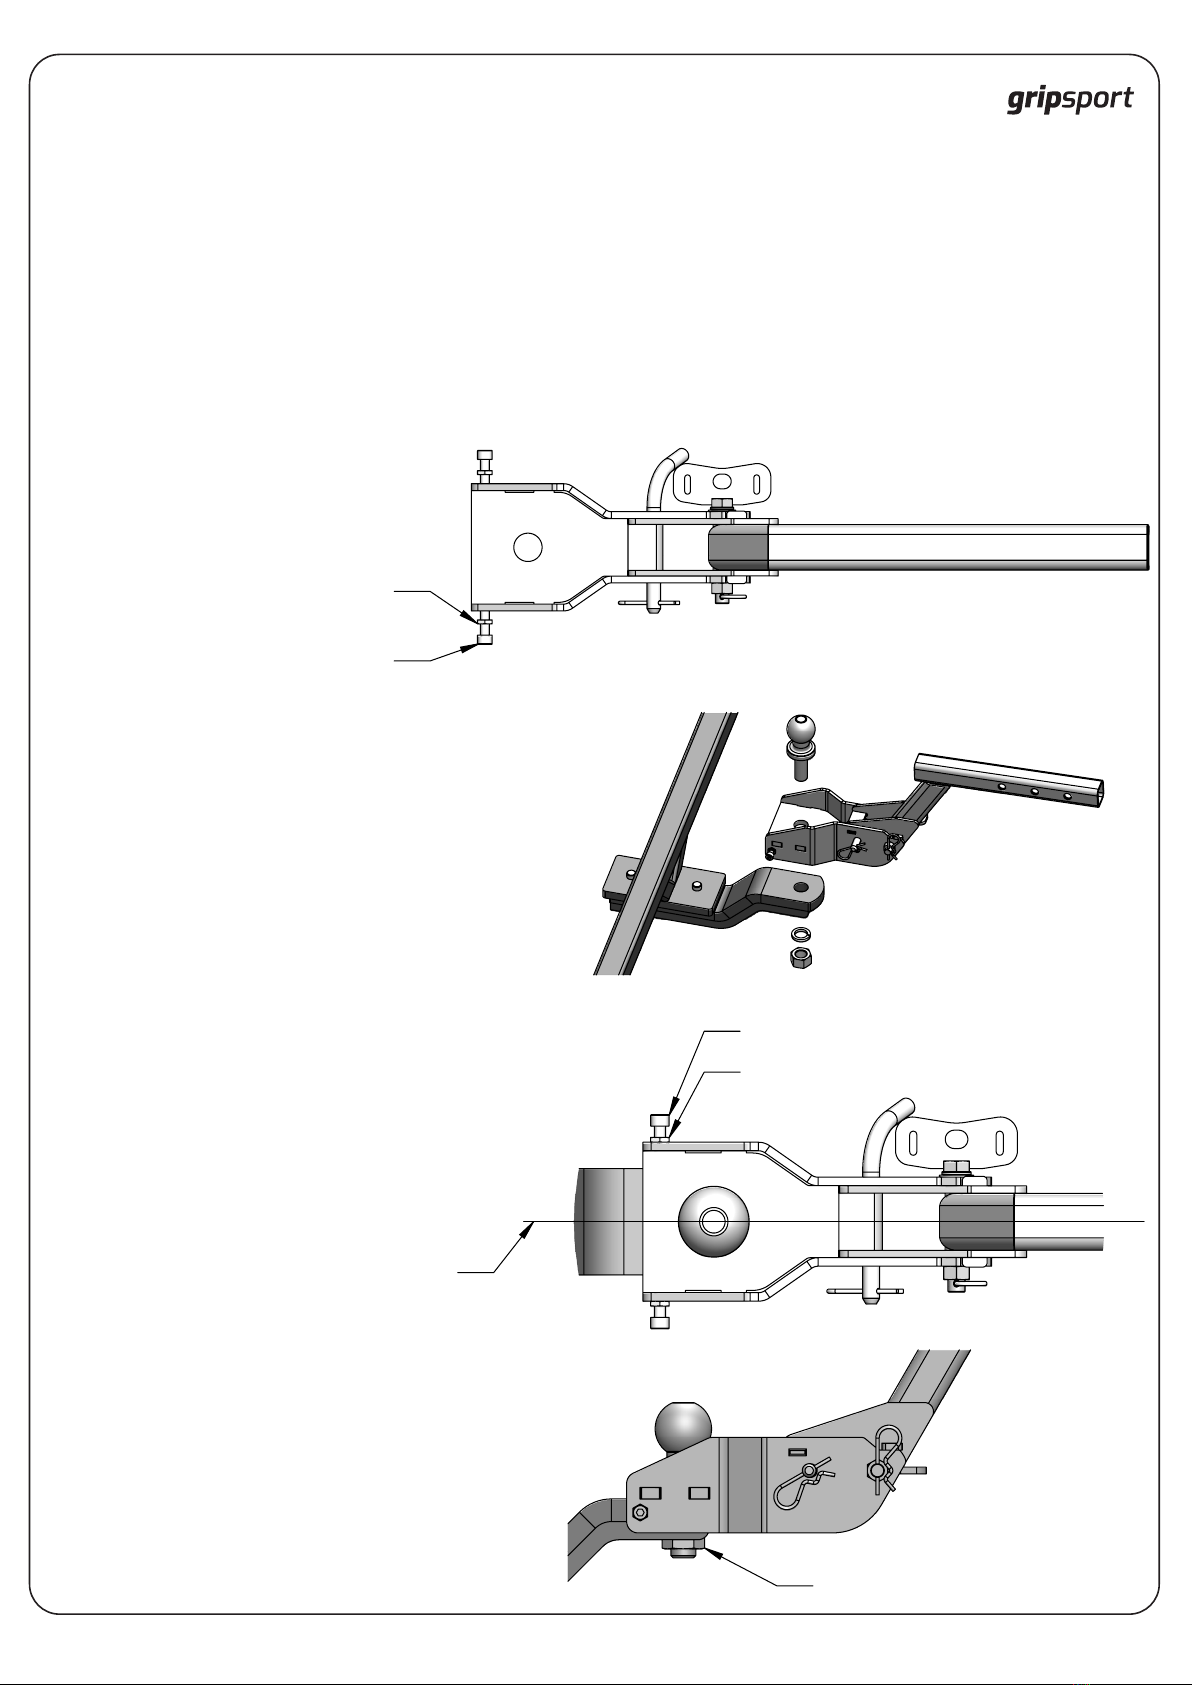
10. Tongue Mount - Tilting 1&2 Bike version
The Tongue Mount Tow Bar Adapter tilting function works in
the same way as the Square Hitch model shown previously.
Fitting the Tongue Mounted TBA to your vehicle tongue can be done as shown below.
NOTE:
- Tongue mounted carriers are rated for light off-road use.
- Tongue mounted carriers are NOT rated for heavy off-road use!
- This includes use of a Tongue Insert used in a Square Hitch Receiver.
- For heavy off-road use, please use a Square Hitch model GSA Tow Bar Adapter.
- You may need to upgrade your vehicle tow bar from a Tongue to a Square Hitch Receiver.
Sidebolt:
Start at unscrewed position
Locknut:
Start loose along Sidebolt
(c)Locknut against sidewall
(b)Sidebolt tight against tongue
(a) Align to tongue
Tighten Nut
Fitting the Tongue Mounted TBA to your vehicle tongue can be done as shown below.
Step 1. Prepare
Ensure Locknuts and Sidebolts
are wound out as shown.
Step 2. Assemble
Assemble Tongue Mount, Tow Ball, Spring
Washer and Nut onto vehicle Tongue.
Tighten Nut to just firm at this stage.
Step 3. Position
(a) Align Tongue Mount to point directly
back from vehicle
(b) Tighten Sidebolts tight to the tongue
(c) Tighten Locknuts firm to the sidewalls
Step 4. Final Fix & Tighten
Tighten Tow Ball Nut very tight as per
supplier/product recommendations.
Double check all fixings and position.