5
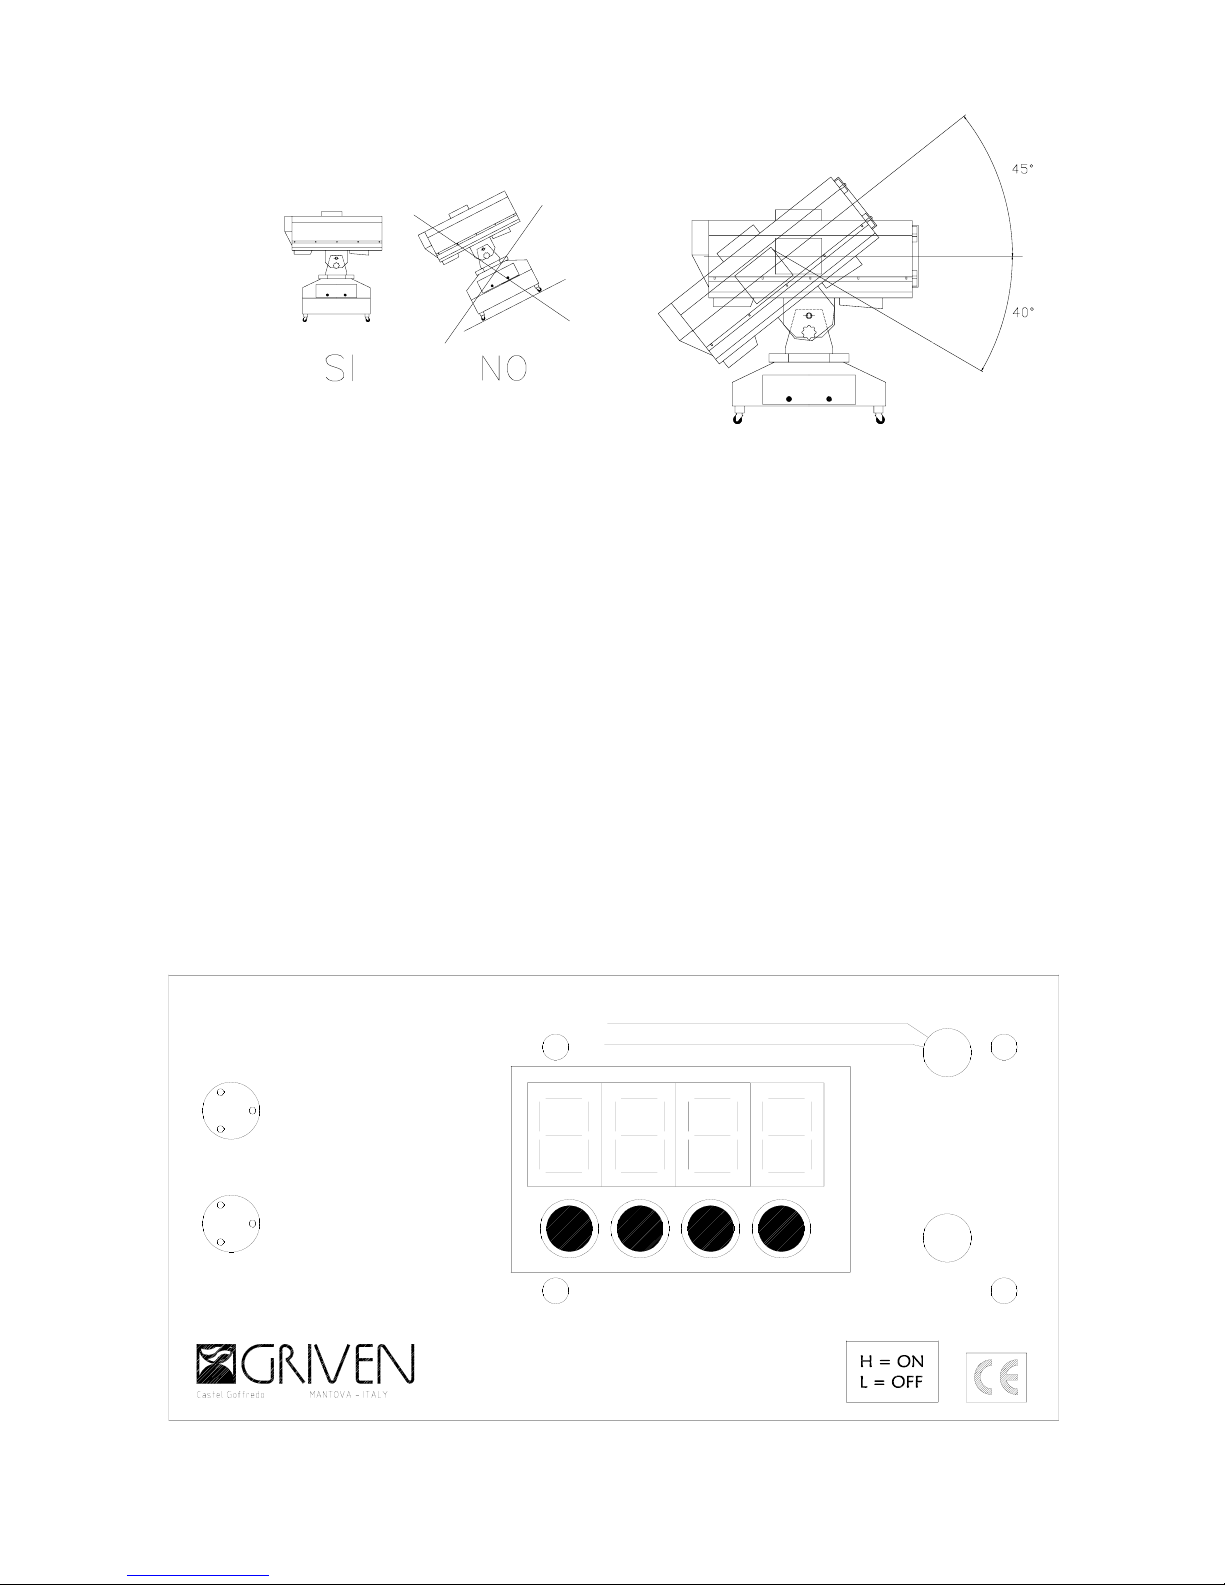
4.3 Lettura del display ed uso dei comandi
Pulsante MENU: Premendo in successione il pulsante MENU, il display mostra in sequenza le
seguenti funzioni:
- Settaggio dell’indirizzo;
- Settaggio del modo manuale;
Pulsanti UP e DOWN: Premendo i pulsanti UP/DOWN, è possibile cambiare i valori della funzio-
ne mostrata sul display;
Pulsante ENTER: Premere il pulsante ENTER per alcuni secondi (finché il display e la luce verde
del led lampeggiano) per memorizzare la funzione mostrata sul display.
Tenendo premuto il tasto Enter per 5 secondi si visualizza il contaore della vita Proiettore.
4.4 Settaggio dell’indirizzo
Settaggio dell’indirizzo: Accendendo il proiettore il display mostra l’indirizzo del proiettore, per
modificare l’indirizzo, procedere attenendosi alla seguente descrizione:
premere una volta il pulsante MENU per passare al settaggio dell’indirizzo
e tramite i pulsanti UP e DOWN selezionare il valore desiderato (compre-
so tra 1 e 512) come mostra la figura a lato; premere ENTER per confer-
mare.
4.5 Funzionamento in manuale
Questa funzione si attiva impostando la funzione Man sul valore H senza collegare il segnale
DMX. Accendendo il proiettore il display mostra l’indirizzo del proiettore; premere tre volte il pul-
sante MENU per selezionare il modo manuale e tramite i pulsanti UP e
DOWN selezionare il valore “H” come mostra la figura a lato; premere
ENTER per confermare.
Ora il proiettore esegue le escursioni di PAN e ROTAZIONE COPPA. Per modificare la velocità
del movimento PAN, premere una volta il pulsante MENU: il display
mostra “S” seguito da un numero compreso da 0 e 10 che rappresenta la
velocità selezionata in quel momento, modificarla tramite i pulsanti UP e
DOWN e confermare premendo il pulsante ENTER.
Premendo il pulsante MENU, è possibile impostare l’angolo di escursione del PAN, il display
mostra il carattere “P” seguito da un numero compreso tra 0 e 255 che rap-
presenta l’angolo di escursione del proiettore; modificare il valore tramite i
pulsanti UP e DOWN e confermare premendo il pulsante ENTER.
Premendo il pulsante MENU, è possibile impostare la velocità e la direzione di rotazione della
coppa, il display mostra il carattere “r” seguito da un numero compreso tra
0 e 255 che rappresenta la velocità e la direzione di rotazione della coppa;
modificare il valore tramite i pulsanti UP e DOWN e confermare premendo
il pulsante ENTER.
Premendo il pulsante MENU, è possibile settare il funzionamento del black-out, il display mostra
il carattere “b” seguito da un numero compreso tra 0 e 255; Modificare il
valore tramite i pulsanti UP e DOWN e confermare premendo il pulsante
ENTER. I valori da 1 a32 impostano il black-out chiuso, i valori da 33
a224 l’effetto strobo, mentre i valori da 225 a 255 impostano il black-out aperto.